Feb 18 2008

Sunset Pine

Published by zindorf at 10:05 am under Tutorials

sunset-pine-7.jpg

In celebration of having today off work for President’s Day and starting my blog this week, I created a tutorial for this card.

Supplies:

Stamps: SU Lovely as a Tree, SU Short & Sweet
Paper: White Glossy, Whisper White, Apricot Appeal, Really Rust, Old Olive
Ink: Really Rust, Chocolate Chip, Palette Noir Black, Distress Ink Peeled Paint, SU Reinkers Barley Banana, Summer Sun, Pumpkin Pie, Really Rust, Close to Cocoa, Chocolate Chip
Accessories: Old Olive & Black markers, White Gel Pen, Tim Holtz tool, Sponges, Ribbon, Brads, 1 1/4 circle punch, Heat tool

sunset-pine-8.jpg

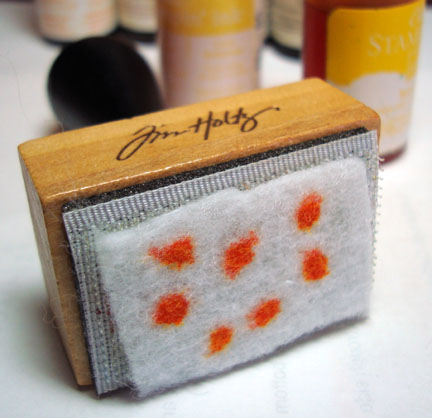
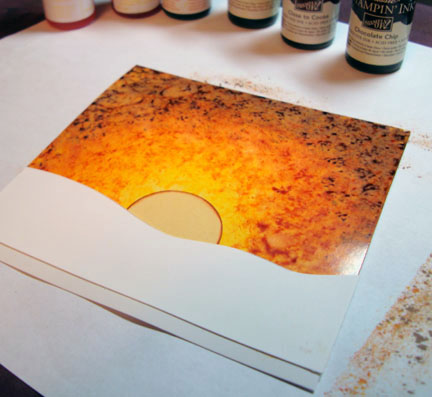
Loaded the Tim Holtz tool, starting with the lightest reinker color, Barely Banana, I applied it to glossy white card stock using a bouncing motion.  Continued to add reinkers in the same manner moving out a bit with each color in the following order, Barely Banana, Summer Sun, Pumpkin Pie, Really Rust, Close to Cocoa, Chocolate Chip.  

sunset-pine-1.jpg

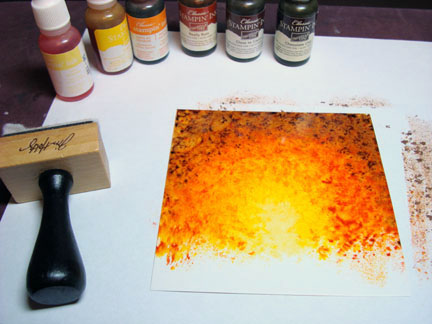
Heat set the colors using my Stampin’ Up Heat tool.  Note:  if you don’t heat set it, the color will stay wet a long time on the glossy card stock.

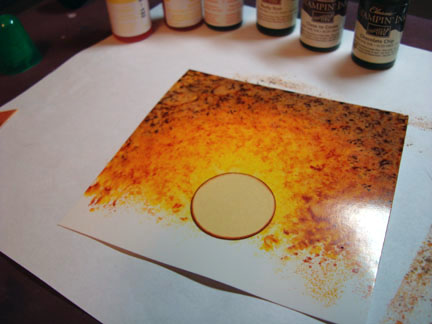
I cut a circle with a Stampin Up 1 1/4″ circle punch out of Apricot Appeal card stock and rolled edge on Really Rust ink pad, adhered to background.

sunset-pine-2.jpg

Cut a curvy edge on pieces of card stock, 2 pieces of Whisper White, 1 piece of Apricot Appeal and 1 piece of Really Rust card stocks to layer as the ground.  Adhered all but 1 piece of Whisper White.

sunset-pine-3.jpg

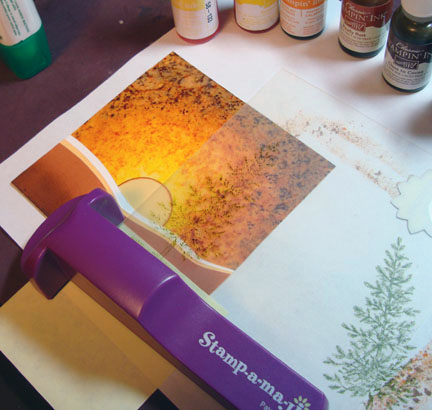
Using Stamp-a-ma-jig for placement, I stamped the Pine tree twice, once in Peeled Paint and again in Black moving the image just a hair when stamping the black to create a shadow.  Note:  you need to give lots of pressure on the tree stamp, due to stamping on multiple layers of card stock.  My image had gaps in it where the ground met the background.  I used an Old Olive & Black marker to draw in the gaps.

sunset-pine-4.jpg

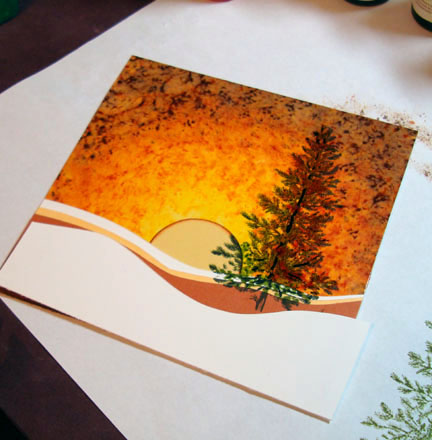
Adhered last Whisper White ground piece.

sunset-pine-5.jpg

Sponged White Card stock with Really Rust and Chocolate Chip inks.  Put white highlights with a white gel pen in the tree to simulate snow.

sunset-pine-6.jpg

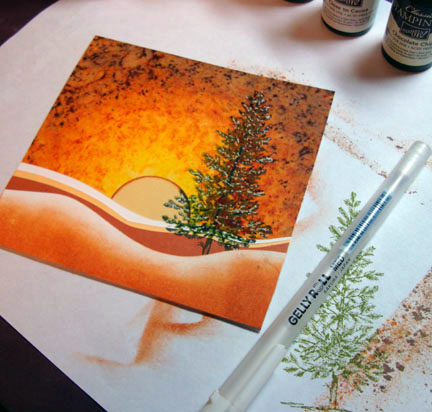
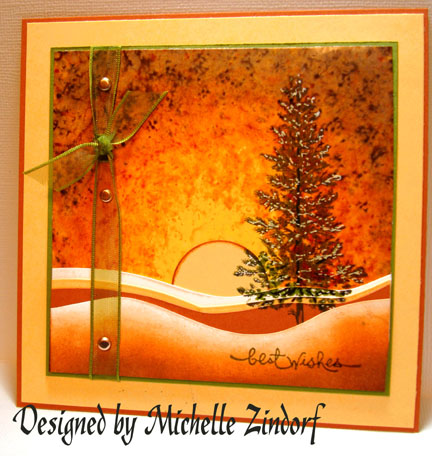
Finished by layering, adding ribbon, brads and stamping sentiment in Old Olive Ink, using Stamp-a-ma-jig for placement.

There you have it, Sunset Pine

sunset-pine-7.jpg

I hope you enjoyed this tutorial as much as I did making it!  Stamping keeps me sane.  It’s cheaper than therapy, lol.

If you would like to see more tutorials, please leave a comment and let me know.

28 responses so far

28 Responses to “Sunset Pine”

  1. julie aka jazz4 says:

    Oh I’m excited you are starting a blog. Such talent you have and you can be sure I will be checking in. Good luck and enjoy your new venture!

  2. craftygirl04 says:

    Michelle, this card has inspired me to play some more with my alcohol inks. Just checked out your pastel paintings. They are wonderful. You are truly talented.

  3. Gidget-Trish says:

    The tutorial is fantastic. Yes I definitely want more of them. Next time could you please show what sponges you use for general sponging? Thanks. The card is incredibly beautiful! I soooo enjoyed seeing how it was made! Thanks again.

  4. Lisa says:

    So happy to see you joined the blog world. I’m adding your blog to my list.
    Lisa

  5. Michelle!!! This card is amazing and I love the tutorial!!! You did leave off one important detail though….DO NOT try this at home unless you are ZINDORF!!!!!!!! I doubt I could ever get these kind of results!! I LOVE your new blog!!

  6. rainy says:

    *picking jaw up*
    Visiting your blog is hazardous to my health!! Every time I do my jaw drops down and hits the floor so fast and hard!!! Michelle this is incredible. And I love the tutorial!!

  7. Elizabeth says:

    Stop the press!! All my dreams have come true! Zindorf started a blog! Happy Days, Happy Days! Thrilled you are sharing your fabulous style and techniques with us.

    Dorky admirer, Elizabeth

  8. Judy Gabriel says:

    I have been looking at your gallery for some time and wondering how you do some of the things you do with a brayer. So I am very pleased that you have started a blog and would love to see more tutorials. Your art is beautiful and some of the best I’ve seen on the internet. Thank you so much for sharing your talent. Judy Gabriel

  9. kerri says:

    Oh wow I am so glad you have started blogging. Your work is amazing such an inspiring lady.
    Thanks for blogging

  10. Jayne Mercer says:

    I’d love to see more tutorials – thanks for sharing your stunning work.

  11. Tina says:

    Beautiful artwork – thanks for the clear and well written tutorial, and for sharing your amazing talent with us all. I’ll be a regular visitor here, that’s for sure :)

  12. Vanessa Webb says:

    Thank you so much for sharing your inspiring and original creations with us. I can see your blog will be a mecca for stampers seeking something fresh and innovative ……. love your purple Stamp-a-majig too, I thought they only come in black lol.

  13. Claire Daly says:

    Yeah – you are one of my very fave stampers and now you have a blog! You have made my day. Your work is just amazing. Thankyou for taking the time to inspire us.

  14. Debra Hogg says:

    Oh yes please!! I’m in heaven with your blog – more tutorial!~!

  15. Sandy aka smor says:

    Michelle, this card is gorgeous and the step by step, descriptive tutorial fantastic. It is so kind of you to share your talent. I visit your gallery often and drool. You can bet I will be visiting your blog a lot. Thank you for sharing with us, and good luck with your blogging venture. —Sandy

  16. Bev Mantle says:

    Wow…thanks for sharing..would love to see more tutorials,so glad you are blogging.

  17. Claudia Zimmerman says:

    This is a great, well-written tutorial and the pictures are very clear as well. Add me to the list of your fans who would LOVE more tutorials. I am so drawn to your unique work; thank you so much for sharing your talent!

  18. Gre says:

    Thank you for the tutorial, its great:-)
    groetjes Gre

  19. stampinsueco says:

    I’ve admired your cards on SCS and would love to see more tutorials on how you accomplish such beautiful cards. Your cards are such an inspiration to try something different. Thanks, Sue

  20. rebekah says:

    Thanks so much for sharing this one! I always visit your gallery on SCS and I am so glad I stopped by your blog. I have always wondered how you make such beautiful backgrounds… I am hoping with your blog tutorials I will be able to get something that is at least a fraction as beautiful as yours!

  21. Laurie says:

    I love your tutorials. Keep them coming. You make them sound so easy to do, that I am not afraid to give them a try. I loved when you did the brayered sky tutorial for the Weekly Inkling. I have actually done that a couple times now. Thank you so much for sharing.

  22. Dorothy Wilburn says:

    Hi Michelle,
    Please do more tutorials!! Your pics and directions are great! I LOVE your cards — even though mine aren’t as pretty as yours. I’ve been a fan of your SCS cards for a long time. You’re an inspiration!

  23. Judy says:

    Somebody shut my mouth! I’m drooling! Your designs are incredible! Please do more tutorials! Most of us can only aspire to create such beauty. Breathtaking!

  24. Linda Cronkite says:

    You do beautiful work. Thank you so much for sharing your talents.

  25. Diane says:

    What beautiful cards……thanks for a terrific tutorial. I think I can now try this. I’d love to see more.

  26. Brenda McB says:

    WOWZA!! This is my first day visiting your blog, and I must say your artwork is absolutely GEORGEOUS! I will be visiting your blog often. Love your tutorials, please keep them coming. Thanks for sharing.

  27. Lisa says:

    Gorgeous work, as always! Thank you, thank you, thank you for the tutorials!

  28. Gina says:

    I am starting at the beginning of your works! I enjoy them SO much, I may not ever need therapy if I can master the art of stamping, lol! You rock!