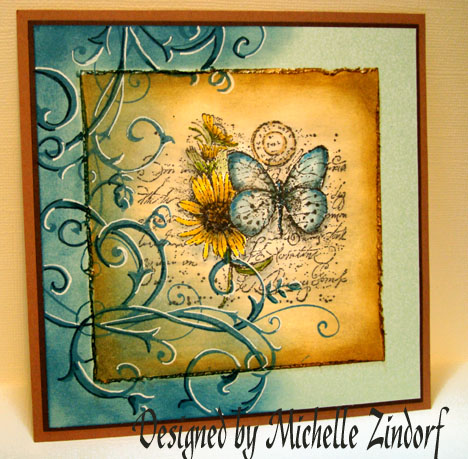
Flourishes are all the craze now. You can get flourish stamps by just about every stamp company out there. I love flourishes! They can add so much to a piece.
I get comments on my cards saying “I can’t believe you cut those flourishes out”. Well I didn’t and today I will show you how to make those flourishes look 3D.
Supplies: SU Soft Sky card stock, Tim Holtz Distress Ink Faded Jeans, White Gel Pen, SU Not Quite Navy Marker, Sponge.
Stamp Flouish with Faded Jeans Ink on Soft Sky card stock.
I like to make my flourishes come out of the shadows. Sponge Faded Jeans in a circular motions, starting from the far left of the Cardstock and working in. You will want it to be a little darker at the edge of the cardstock.
Now to figure out where you want your light source to come from. The pen on the card stock shows the direction of where I want mine to come from.
Keeping your light source in mind, use your gel pen and highlight the flourish by tracing the right side (light source side) of the flourishes. This does not have to be exact.
Now to the dark side (starting to sound like Star Wars, lol).
Your shadow is coming from the left side (dark side), in the direction the marker is pointing.
Traced the left side of the flourishes with a Stampin’ Up Night of Navy Marker.
There you have it, 3D looking flourishes. This is the same technique I used on my Flourished Collage card.
I hope you enjoyed this tutorial and come away inspired to make your flourishes pop!
Your comments, questions and suggestions are always appreciated.


25 responses to “Flourished Collage Card with Flourishes Tutorial”