Feb 27 2008
Emboss Resist, Resist, Resist Scene Tutorial
I love making scenes with the emboss resist technique and I created this tutorial to show you the process. If your up for a challenge, give it a whorl! I would love to see your creations using this tutorial, please leave me a link to them in the comments section!
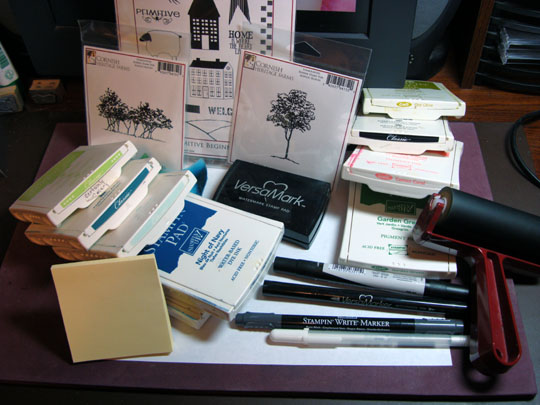
Supplies:
| Stamps: Cornish Heritage Farms - Primitive Beginnings, Row of Trees, Ash Tree, Stampin Up Stitched Exotics |
| Paper: Whisper White, Soft Sky, Not Quite Navy |
| Ink: Stampin Up Certainly Celery, Garden Green, Cameo Corel, Old Olive, Basic Black, Soft Sky, Blue Bayou, Not Quite Navy, Night of Navy, White Craft |
| Accessories: White Gel Pen, Versamark Marker and Pad, Black marker, Sponge, Post it Notes, Brayer, Clear Embossing Powder |
Note: When working a scene with the emboss resist technique you work from foreground to the background (front of scene to back of scene). This is so your images in front resist the ink of the images you want to look like are behind them.
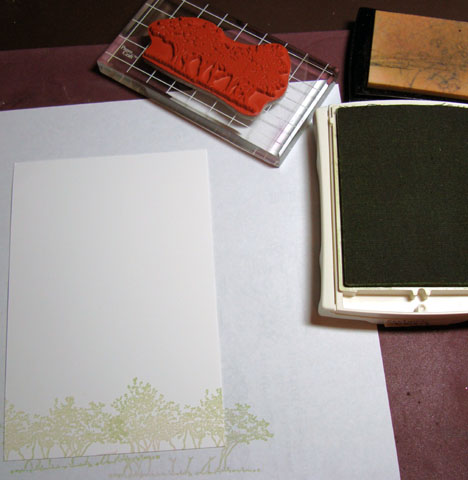
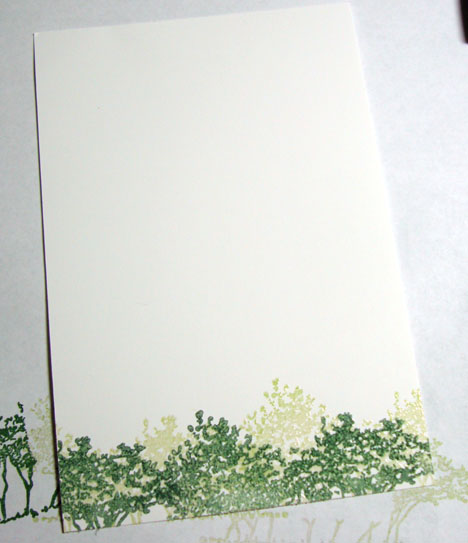
I started out with Whisper White card stock and loaded my stamp with Versamark and then Certainly Celery and stamped it, heat embossed it with clear embossing powder.
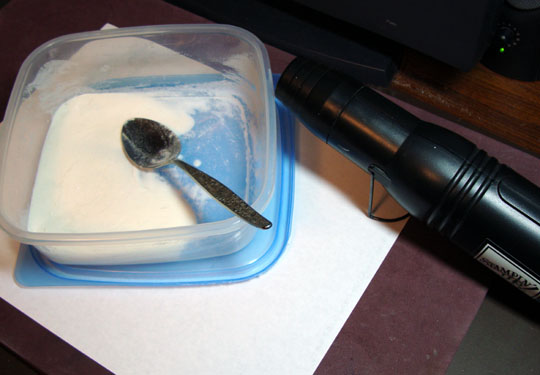
I store my clear embossing powder in a plastic sandwich size container so I don’t have to mess with putting the embossing powder back into a tiny canister or cleaning an embossing powder tray.
Stamped the same stamp again only this time loading with Versamark and then Garden Green then stamping it, heat embossed it with clear embossing powder.
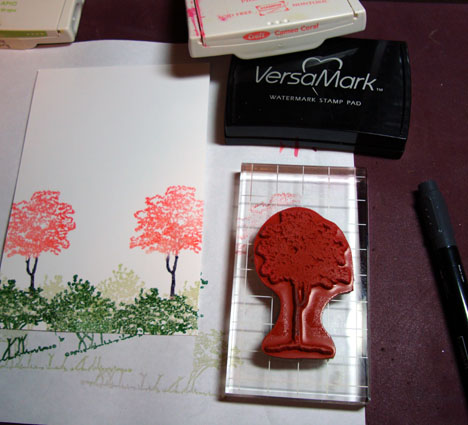
Loaded tree stamp with versamark and Cameo Coral ink, then went over the trunk with a black marker, stamped, heat embossed them with clear embossing powder.
Loaded house stamp with Versamark and then black ink, stamped, heat embossed it with clear embossing powder.
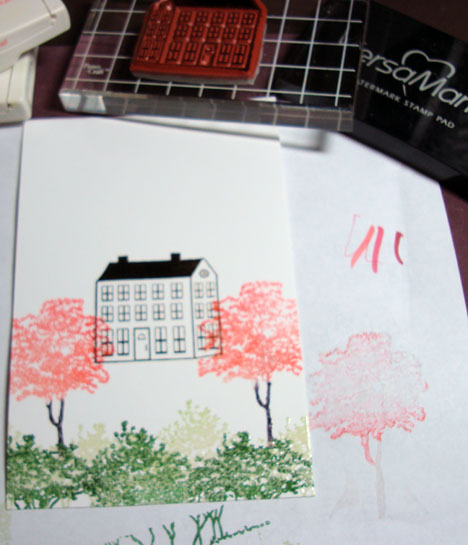
Used a Versamark marker and went over the entire house with it and heat embossed it with clear embossing powder.
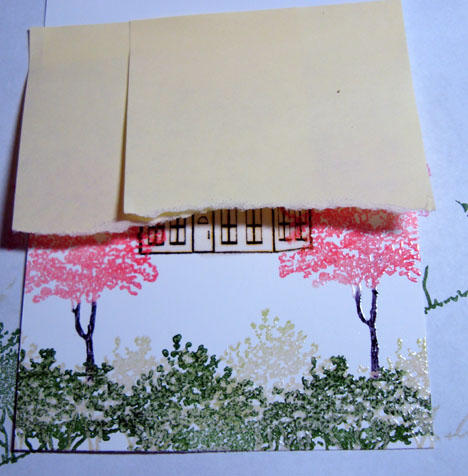
Tore the edge of two post it notes and positioned them to cover the sky area. You will put the torn edge where you want your horizon line to be.
Brayer Old Olive ink on. Don’t be shy, use a lot of ink and work it into the nooks and crannies of the embossed trees and bushes.
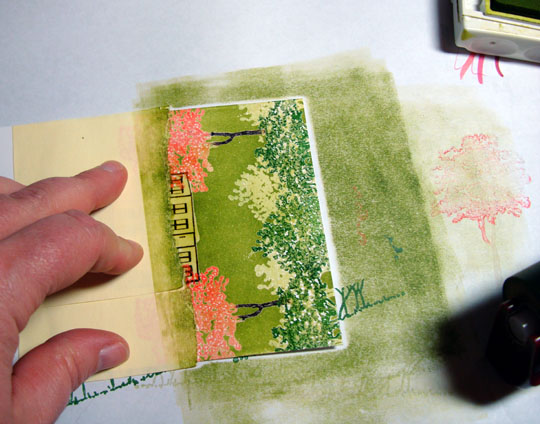
Remove Post it Notes and wipe the Old Olive ink off of the house with a paper towel.
Next brayer on Soft Sky ink. Brayer across the card stock, not up and down. Start at the very top of the card stock, with most of the brayer off of the cardstock and work the brayer back and forth moving down the card stock. Use a lot of ink and work it into the paper. I like to leave some white card stock showing above the horizon line so I don’t brayer all the way down to the horizon line. The more ink you put on the paper the better it blends and you won’t have those brayer lines.
Brayer on Blue Bayou ink in the same manner as the Soft Sky ink in the last step, only don’t brayer all the way down over your Soft Sky ink, leave some of it showing, we are creating a graduation in color.
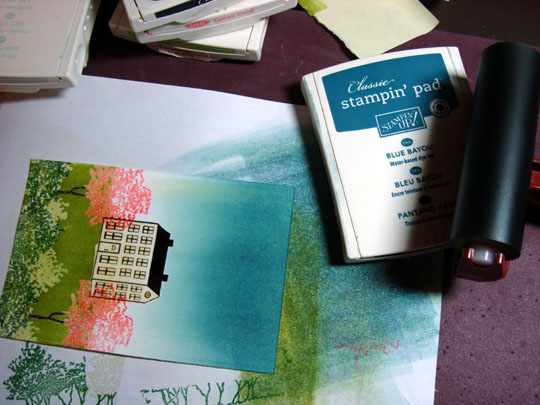
Do the same process as the last two steps only using Not Quite Navy ink. Don’t brayer all the way over your Blue Bayou ink. Remember, lots of ink and work it in.
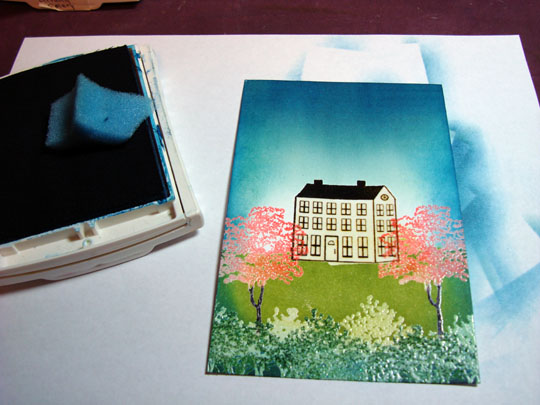
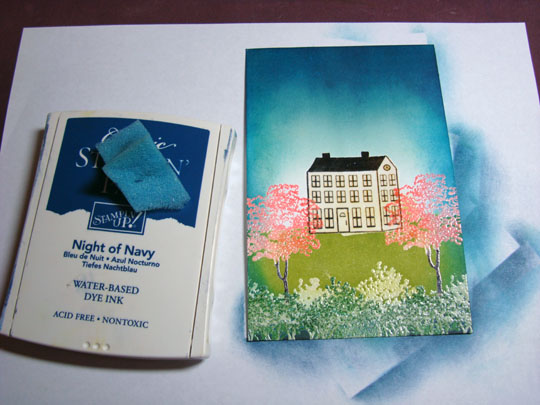
Sponge on Night of Navy ink around the edges of the card stock and work it into the bottom card stock in the bushes area and at the top of the card stock in the sky.
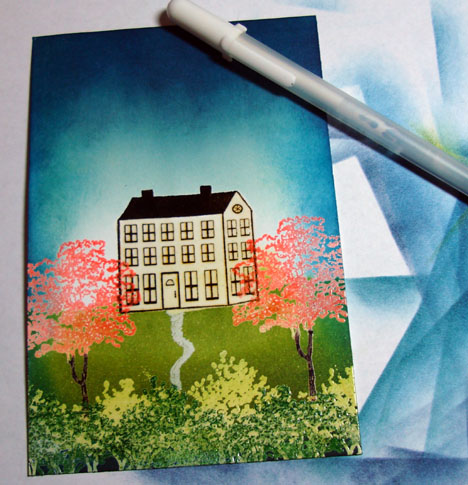
Use a White Gel pen to put in the walk way in front of the house.
Assemble card and stamp Stitched Exotics using Stampa-ma-jig and White Craft Ink.
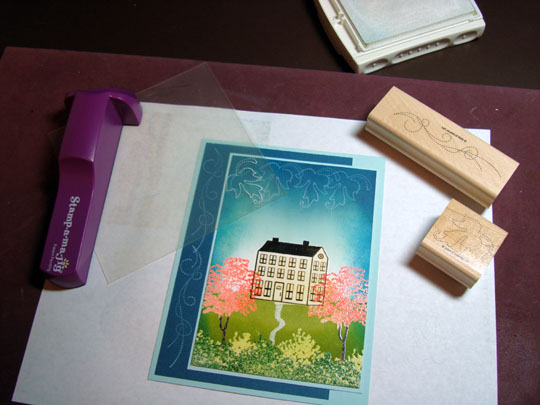
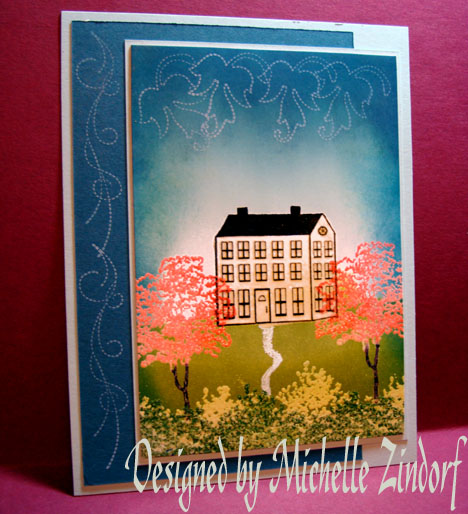
Finished creation!
If you enjoyed this tutorial, give me a shout out in the comments section.
Hope your world is completely filled with color today!

Your cards are amazing. Thank you for this great tutorial. I have added to my favorites!
Your work is stunning. How sweet of you to share this tutorial with us. You are so talented with the brayer and I appreciate that you share your “secrets.”
Michelle,
Thank you for sharing this technique with us. Your art is amazing. Is your brayer a hard rubber or the softer foam version? I rarely use a brayer because I get those pesky lines. But your creation is so beautiful I am going to dig out my brayer and ink it up.
Linda
Linda asked “Is your brayer a hard rubber or the softer foam version?” I use a Speedball Rubber Brayer.
Michelle, I was about to ask the same question as Linda and then noticed your reply. I have a Speedball 4″ brayer as well. Mine is a soft rubber one. I know from when I ordered mine a while ago having to make a choice between hard and soft rollers.
Do you fid any problem with stamping and embossing over an already embossed area.
Sorry about all the questions I post, unfortunately I’m an inveterate learner and want to know everything.
As always may thanks for showing us your fantastic work.
Chris asked “Do you fid any problem with stamping and embossing over an already embossed area?”
We live and learn!
Sometimes there is a problem with putting dark embossed images over light ones. Take for instance the house on this card. I probably should have just stamped the image with black ink with no versamark. Let it dry and wipe the black ink off of the trees and then use a versamark marker to color over the entire image and heat emboss with clear ep. I think the house would have looked more in the distance.
Michelle, this is a wonderful tutorial. You make it sound as if it’s not so difficult! The card you created is gorgeous, as usual!!
Truly you are an artist!!
Absolutely gorgeous…. I love your work Michelle… very inspiring!! TFS the tutorial… I have to try this for fall.
You make the most beautiful scenes with trees! Love the coral ink you used to make the trees full of spring blooms. The stiched stamps along the border give this a very homey feel. Thanks for all of the wonderful tips like stamping the scene front to back and working lots of ink with the brayer to better blend the background. This is lovely and springy (is that a word?). I gotta get these tree stamps! TFS!!!!!!
You are truly the Brayer Queen! May your reign be long and fruitful!!

And… you’ve already answered the questions I had. How much better can it get? Ohh, you could come to my house and we could do a one on one class! lol
Feel like visiting CO?
This was a great tutorial. I really appreciate you taking the effort to show how you did it. I would love to have artwork like this.
Beautiful work Michelle and so sweet of you to take the tiem to make it into a tutorial, too! Thanks.
What an awesome tutorial! Your tips and step-by-step pics break it down perfectly for a novice. I’m almost ready to ink up my brayer for the first time. Poor thing was purchased a year ago and is still a virgin. LOL!
Thank you for sharing your ZINDORFULOUS talent! Elizabeth
Stunning work and AWESOME tutorial!!! As I have said before - you are creatively wicked with that brayer!!!! great work
Great tutorial, I love your work and have so many issues working with a brayer, I end up with lines all over the place and it is a hard one. Any tips? Aside from working hard? What cardstock is best?
Wonderful tutorial and the finished piece is drop-dead gorgeous!
I have a question if you don’t mind: how do you clean your brayer? Or do you?
Thanks for sharing!
Deb asked “How do you clean your brayer?”
Deb, I spray Stampin’ Mist on my Stampin’ Scrub and clean it by rolling on the Stampin’ Scrub.
I just wanted to send you a word of encouragement and support. Yes, we all are, your admirerers, appreciate your wonderful tutorials, all your tips and details.
Your kindness and talant shines in all of your art work.
Please, please, continue to share and do what you do.
All the best, Olga