
I’m still working on my Sympathy card stash. So here is a tutorial on one of them.
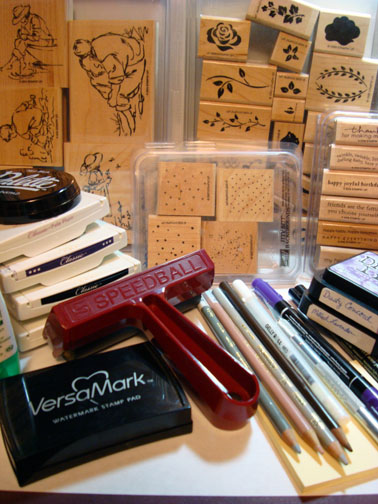
Supplies:
| Stamps: Stampin Up Summer by the Sea, Hand Painted Petites, Small Sayings and Itty Bitty Backgrounds |
| Paper: Stampin’ Up Whisper White & Elegant Eggplant |
| Ink: Stampin’ Up Pale Plum, Elegant Eggplan, Going Gray & Basic Black, Distress Inks Milled Lavender & Dusty Concord, Palette Noir Black |
| Accessories: Prismacolor Pencils Beige Sienna, 30% Warm Gray & 50% Cool Gray Pencils, Stampin’ Up Elegant Eggplant Marker, Black marker, Exacto Knife & Glass Mat, Photocorner Punch, Brayer, Brads, Clear Embossing Powder and Heat gun, Post It notes, White Gel pen, Sponge, Versamark Pad |
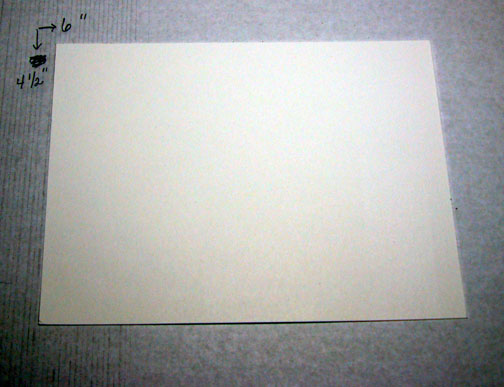
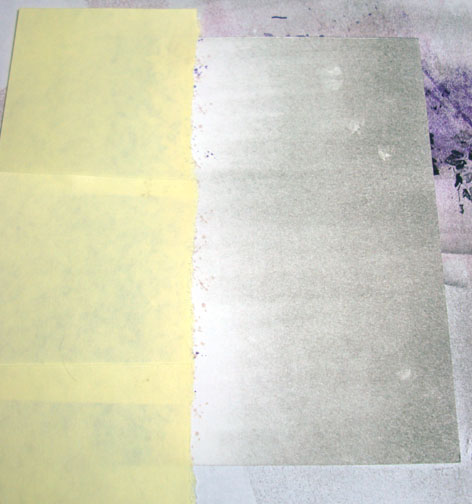
Starting with a piece of Whisper White card stock and masking the sky area with Post it Notes (nope, I don’t have stock in this company, lol).
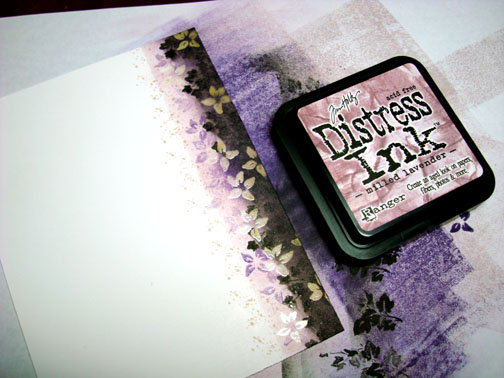
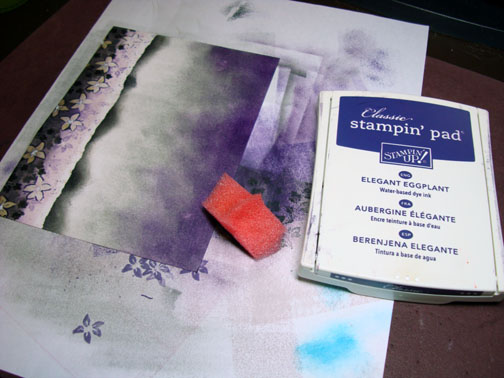
Brayered Milled Lavender ink on card stock.
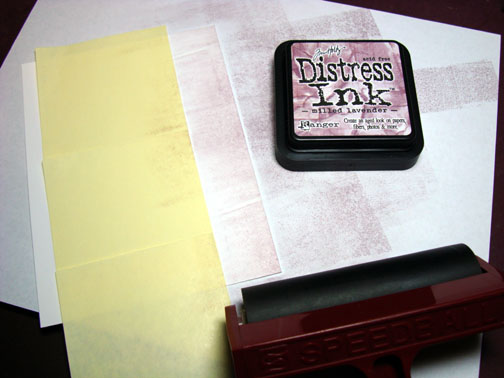
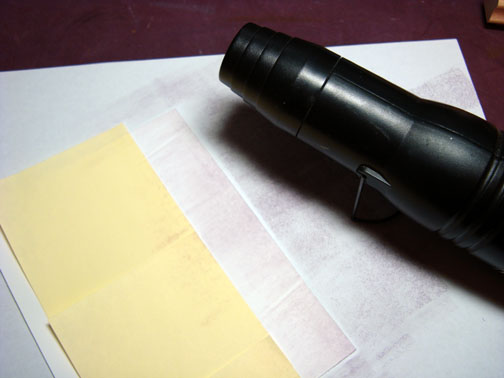
I heated the ink to dry and set it on the card stock before the next step.
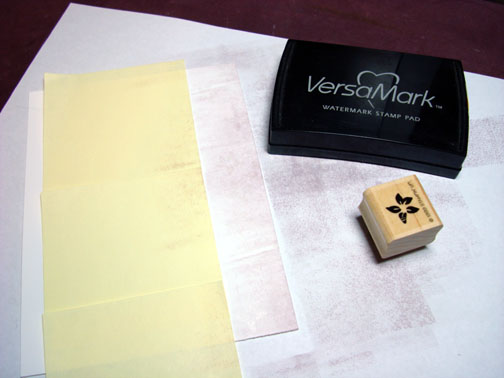
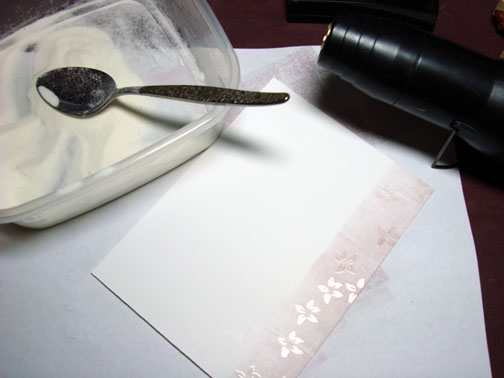
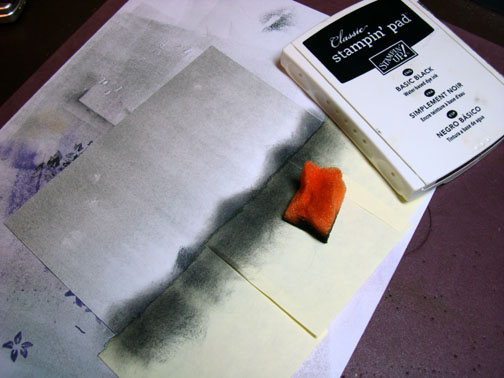
Stamped flowers randomly over Milled lavender with Versamark, removed Post it Notes and then heat embossed the flowers with clear embossing powder and a heat gun. Note: If I had not dried the brayered Milled Lavender ink the embossing powder would have stuck to it too.
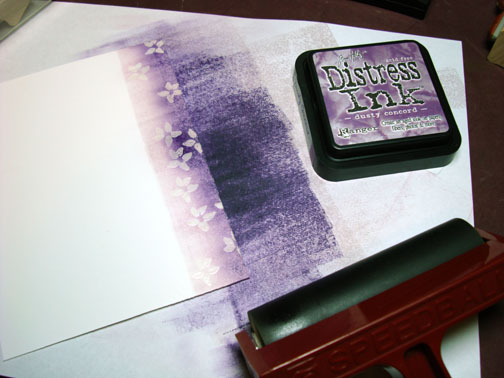
Brayered Pale Plum ink over embossed images.

Brayered Dusty Concord ink at the bottom of the card stock being sure to not cover all of the Pale Plum ink to create a graduation in color.
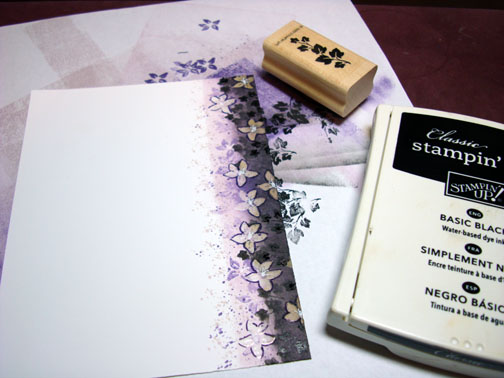
Stamped leaves with Basic Black ink and then wiped the ink off of the embossed images with a sponge in a circular motion to create shadow with the leaves. I did not smear all of the leaf images.

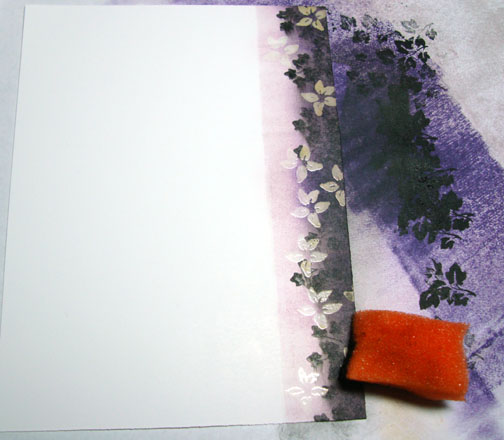
Stamped some more flowers on the milled lavender section with Dusty Concord ink.
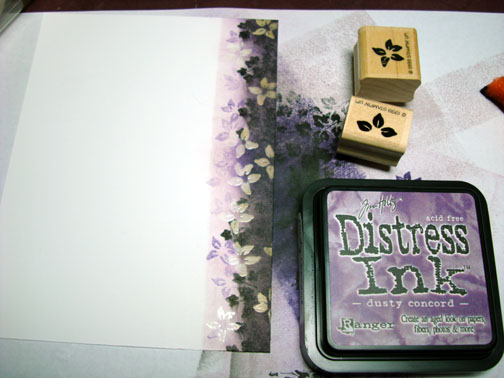
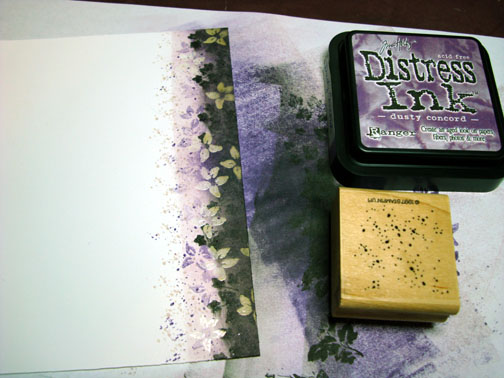
Stamped the Itty Bitty Background stamp with both Milled Lavender and Dusty Concord.
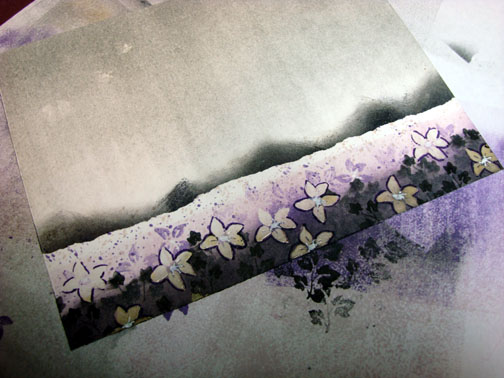
Outlined embossed flowers with an Elegant Eggplant marker to make them more visible.
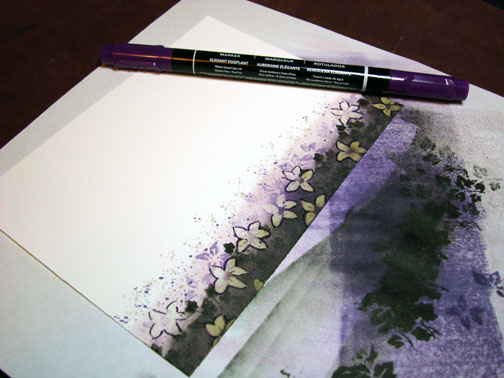
Highlighted the centers of the flowers with a White Gel Pen.
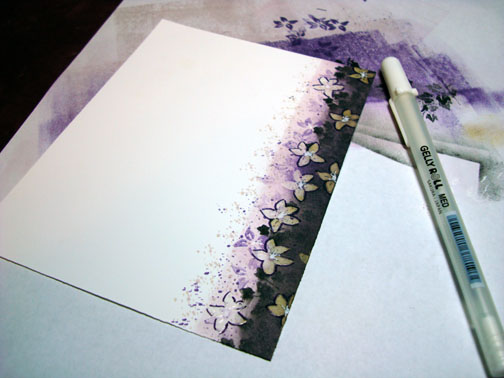
Stamped more leaves with Basic Black ink in between embossed flower images.
Time to work on the sky.
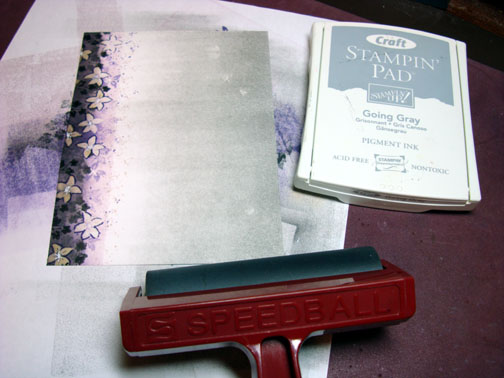
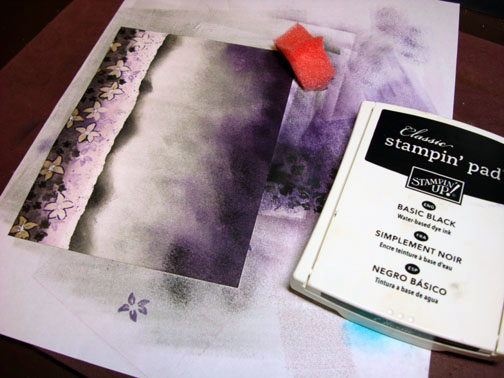
Turned the card stock around and brayered on Going Gray ink in the sky area leaving about 1 inch of white space between sky and ground.
Time to put in the horizon line.
Masked ground area and about 1/4 inch of the white area above the ground with Post it Notes that are torn through the sticky part of the note.
Sponged basic black ink right at the Post it note torn edge to create hills at the horizon line.
Removed Post it Note masks. Wow, now that made an impact. I love using really dark colors against light ones. It makes things pop, don’t you think?
Sponged on Going Gray ink to start to create some interest in the sky.

Sponge on Milled Lavender ink in the sky area, not covering all of the Going Gray ink.
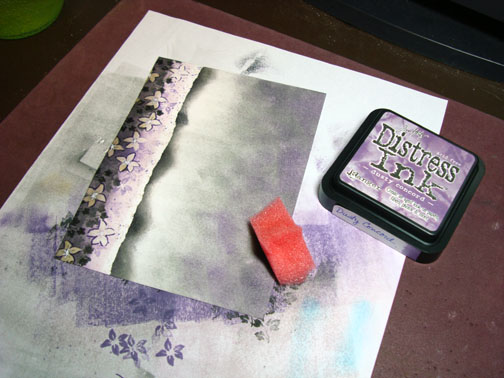
Sponge Elegant Eggplant ink but did not cover all of the Milled Lavender ink. We are creating a nice graduation in the sky.
Sponged Basic Black ink right at the top of the card stock.
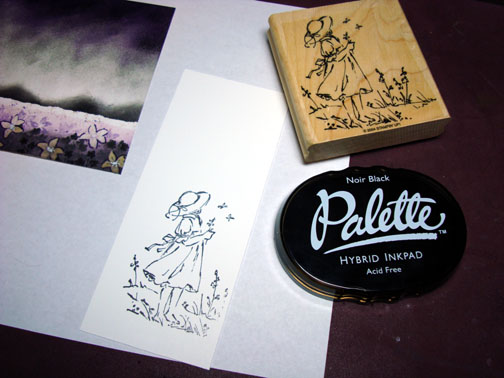
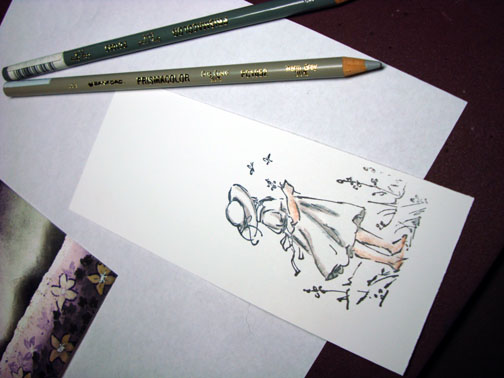
Stamped girl image with Palette Noir Black ink on a separate piece of Whisper White card stock.
Colored the underside of her arm and back side of her legs with a Beige Sienna Prismacolor Pencil.
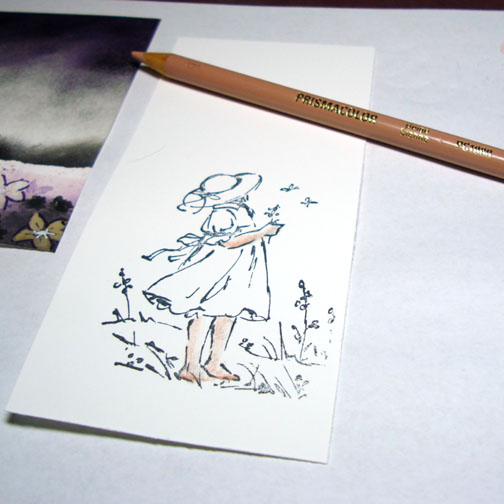
Colored the folds of her dress with a 30% Warm Gray pencil and then outlined the fold marks with a 50% Cool Gray pencil. Basically, I used a light shade of gray and then a darker one.
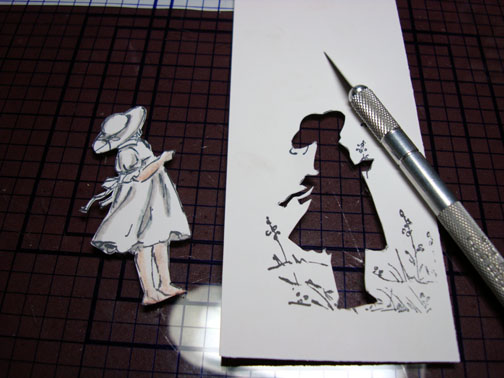
Brought out my Glass Mat and Exacto Knife and cut the girl image out. If you use a glass mat and a very sharp Exacto knife you can cut images out very easily. Like cutting butter. I hold the knife in one place and move the paper to cut it, especially curved areas.
I didn’t show it, but I cut out the white area between her legs too.
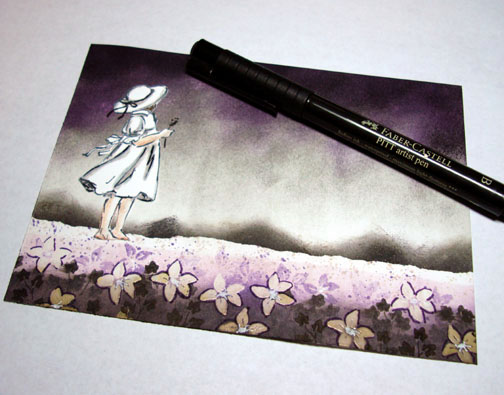
Adhered the girl to the scene with Tombo Mono Multi glue (love this glue). Also drew in the little flower in her hand and darkened the folds of her dress and ribbon on her hat with a Faber-Castell Black marker. Any fine point marker would work.
Using my Stamp-a-ma-jig for placement, I stamped my sentiment using Elegant Eggplant ink.
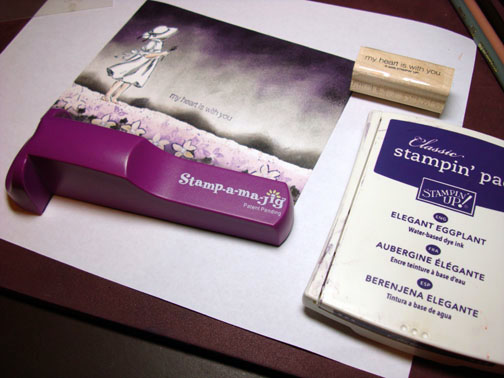
Assembled card and added some photo corner punches and brads and I have a finished card.

I hope you enjoyed following along with this tutorial and feel inspired to try it yourself.
Keep Stamping!
29 responses to “My Heart is With You – Tutorial”