
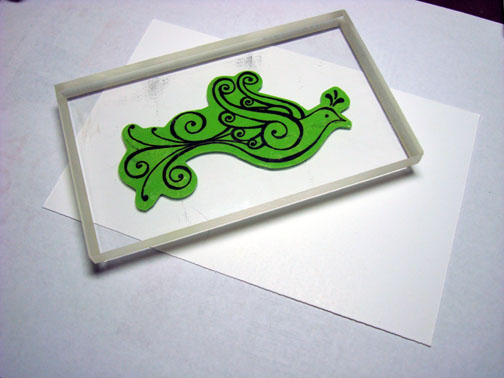
I came home from work last night to find a wonderful package filled with new stamps sets waiting for me at the door. Thought I would try one out. This set is from See D’s at www.InqueBoutique.com named “Nightingale.” I love those flourishes!
These are my first sets from See D’s and they are probably named that due to the fact they are unmounted and have the picture of the stamp on the back side so when you put it on your clear mount so you can see the image and exactly were you are going to stamp it on your paper. Nice huh?
Let’s get started with the tutorial.
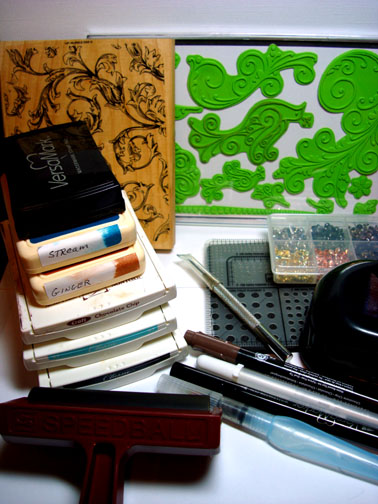
Supplies:
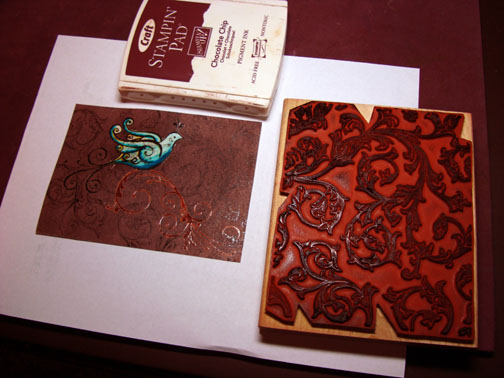
| Stamps: See D’s Nightingale, Stampin’ Up Antique Background |
| Paper: Whisper White, Cool Carribean, Chocolate Chip, Basic Black |
| Ink: Stampin’ Up Basic Black, Cool Carribean, Chocolate Chip, Adirondack Ginger and Stream |
| Accessories: Versamark Pad and Marker, Photo Corner Punch, Copper Brads, Piercing Tools, Brayer, Clear Embossing Powder, Heat Gun, White Gel Pen, Chocolate Chip Marker, Aqua Painter, Paper Towel |
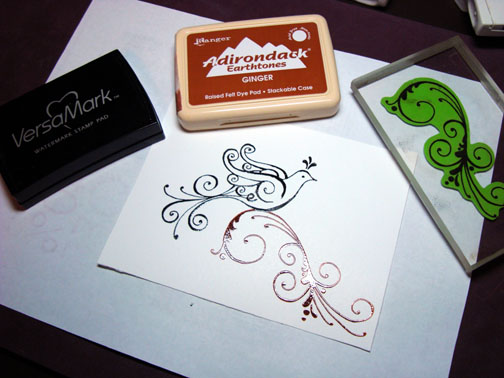
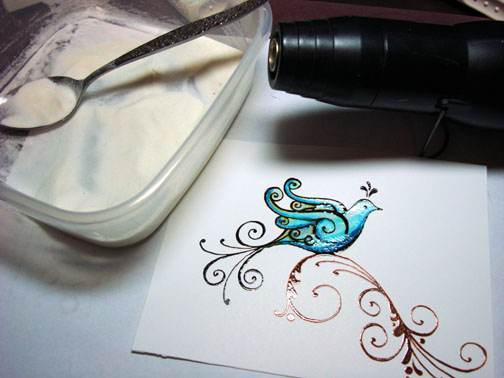
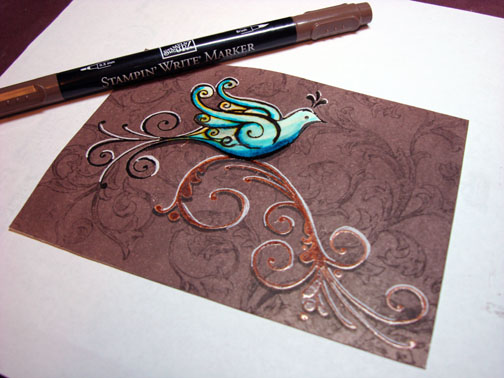
I started out with Whisper White card stock. Loaded the stamp with Versamark and then Black ink and stamped the bird.
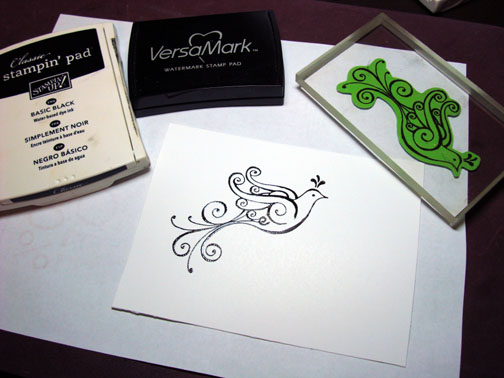
Heat embossed the bird with clear embossing powder and heat gun.
Stamped the flourish by loading the stamp first with Versamark and then loading it with Ginger ink.
Heat embossed the flourish with clear embossing powder and heat gun.

Watercolored the bird using Cool Carribean ink and an Aqua brush. With my ink pad closed I squeezed it so the pad would press against the lid and create a pudding of ink. I used the puddle to paint with.
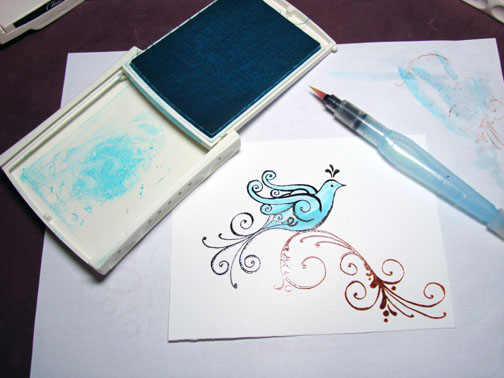
Shadowed the belly and wings with Aqua Brush and Stream ink.
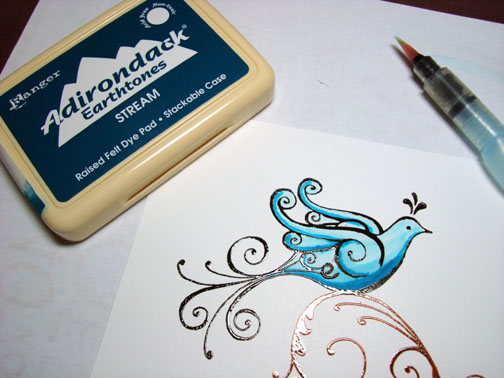
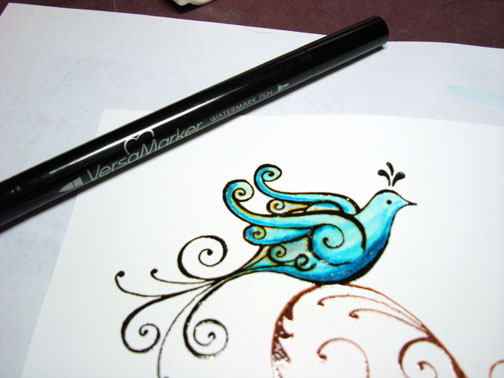
Colored over the entire bird with Versamark marker and heat embossed using clear embossing powder and a heat gun. Notice the black embossing did smear some when I used the Versamark marker. That is the yellow/brownish color you see.
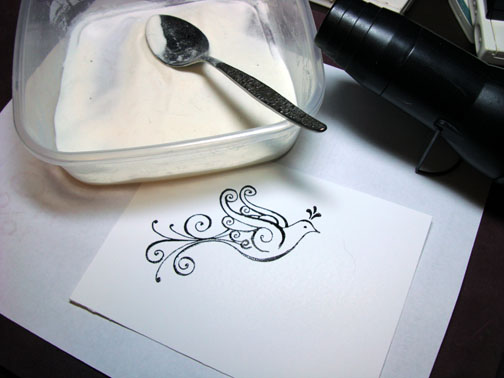
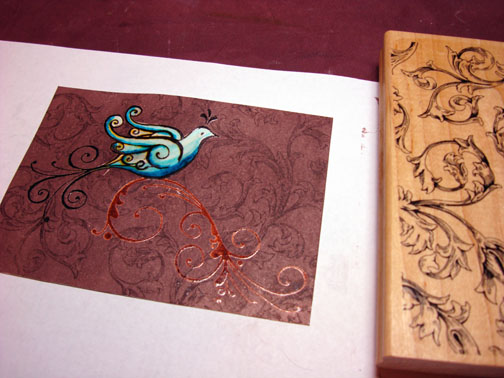
Now for the scary part. Heavily Brayered Chocolate chip ink over entire piece of card stock. The embossed images will resist the brayered ink.
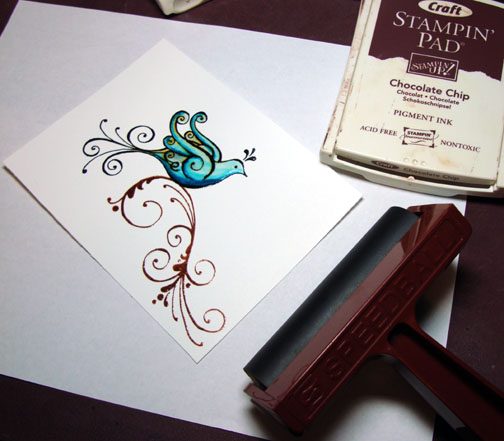
Let the ink dry for a few moments and then wipe the ink off of the embossed images with a paper towel.
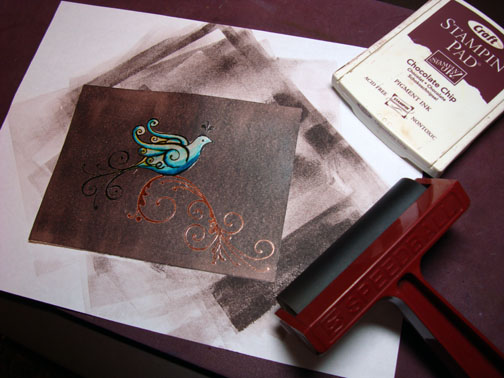
Stamped Antique Background stamp over the entire piece of card stock with Chocolate Chip ink. Note I lay my background stamp wood side down and press my ink pad on top of it to ink it. I then lay the card stock face down on the background stamp and put a piece of scrap paper over it and lightly rub over it to transfer image.
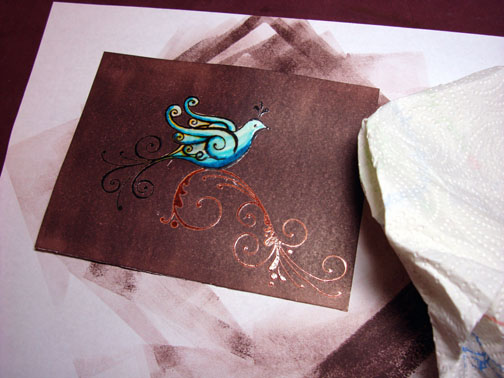
Wait a few moments to let the ink dry and then use a paper towel to wipe the ink off of the embossed images.
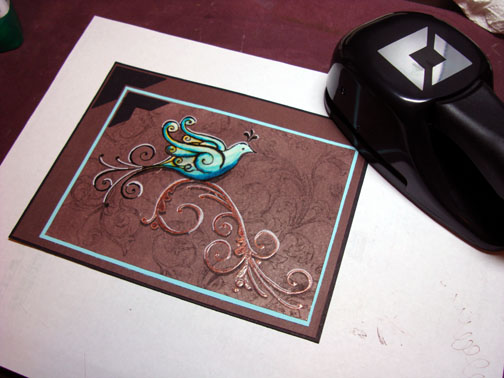
Put a shadow on the undersides of the flourish using a Chocolate Chip Marker. (Note: this would look more dramatic if I would have used a black marker).
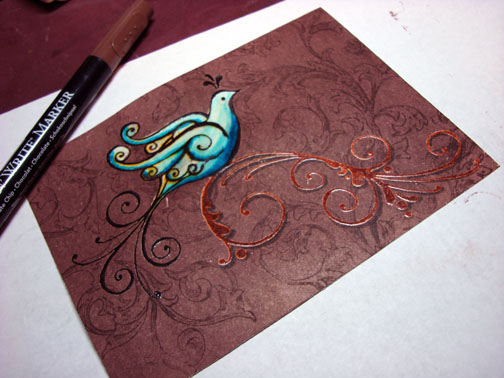
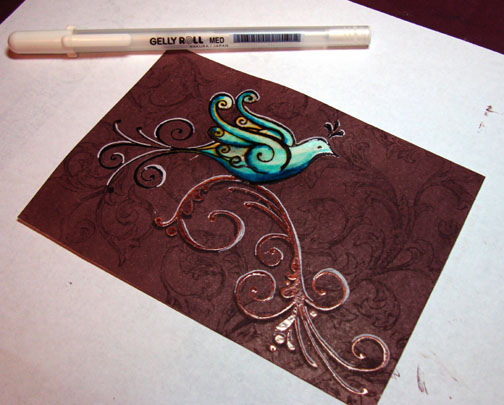
Used a white gel pen to put in highlights on the top sides of the flourish, bird’s tail and the top of the bird. This step really adds dimension.
Put a shadow under the birds belly with a Chocolate Chip marker.
Started assembling the card layers and used a photo corner punch with black card stock for photo corners.
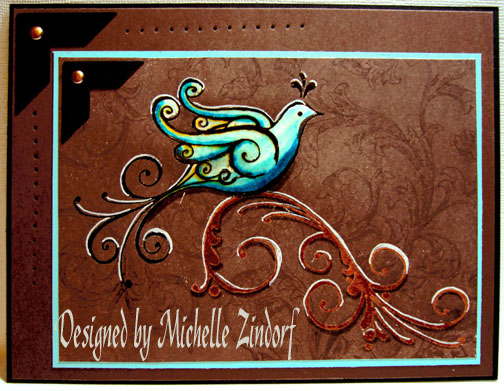
Added copper brads to the photo corners and used my piercing tools along top and left sides of card front.

Here we have another finished creation.
Thanks for coming along on my trial run of these new stamps.
Hope your day is filled with the soothing sounds of birds singing. It is Spring after all!
25 responses to “Emboss Resist Nightingale – Tutorial”