Mar 28 2008

Warm Wishes Wanted - Tutorial

Published by zindorf at 3:49 am under Tutorials

dsc03003.jpg

 Ahhhhhh warmth!  My projects have been a little cold of late.  It’s time for some warmth and a little dabbled light.

Let’s get going. . . . . . .
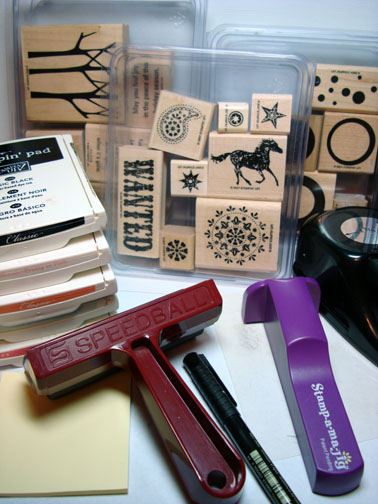
Supplies:

Stamps: Stampin’ Up Trees Three, Wanted, Hugs & Wishes, Simply Circles
Paper: Stampin’ Up Whisper White, Basic Black and Groovy Guava
Ink: Stampin’ Up Groovy Guava, Soft Sky, Basic Black, Pretty In Pink and Regal Rose
Accessories: Brayer, Black Marker, Stamp-a-ma-jig, 1 3/8 circle punch and post it notes

dsc03004.JPG

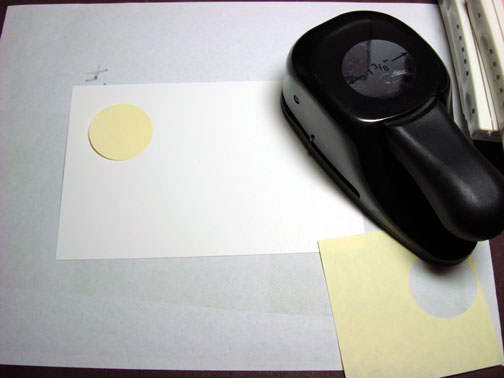
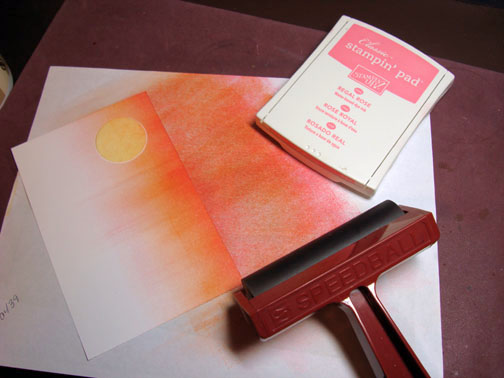
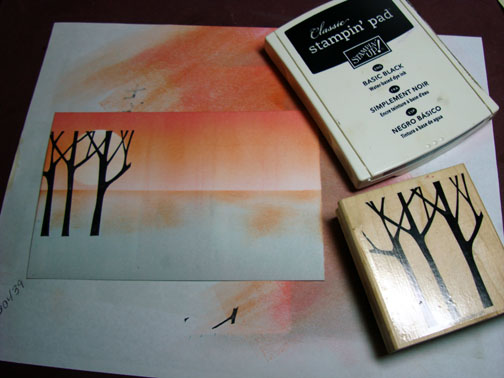
Started out by punching a 1 3/8″ circle from the sticky part of a Post It Note and put it on my Whisper White card stock to use as a mask for the sun.

dsc02984.JPG

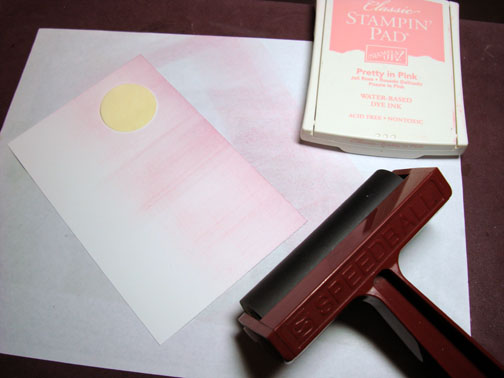
Brayered on Pretty in Pink ink over top 2/3rds of the card stock.

dsc02985.JPG

Brayered on Groovy Guava ink, but did not cover the Pretty in Pink ink all the way.  Working towards a graduation in color here.

dsc02986.JPG

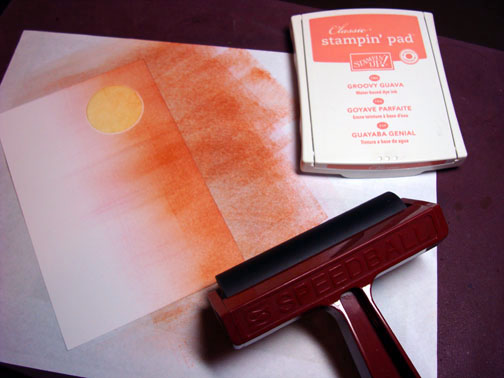
Brayered on Regal Rose ink at the top of the card stock, but did not cover the Groovy Guava ink completely.  We now have a nice graduation in color.

dsc02987.JPG

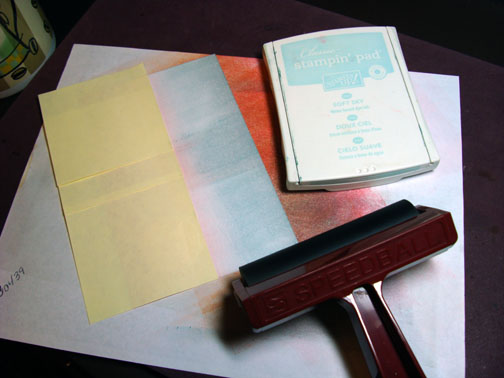
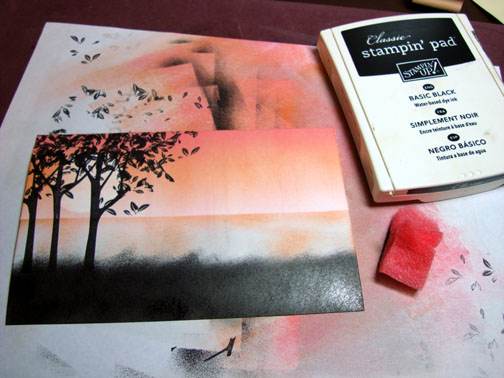
Covered the sky area with Post it notes to mask it.  Be sure the post it notes are straight.  You don’t want your horizon to go up hill, lol.

dsc02988.JPG

Brayer on Soft Sky ink at the bottom of the card stock.

dsc02989.JPG

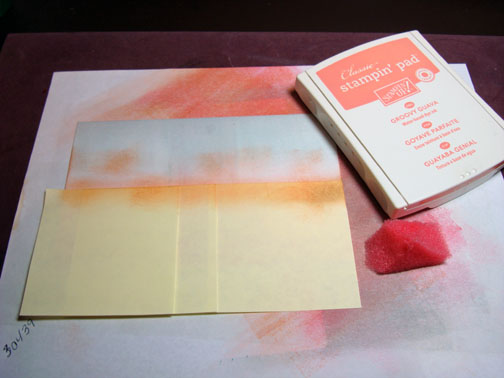
Sponge on Groovy Gauva ink right at the edge of the post it notes.  I use a rubbing motion for this so I don’t get speckles.

I also swiped a little Groovy Gauva ink across the Soft Sky ink, very lightly with my sponge.

dsc02990.JPG

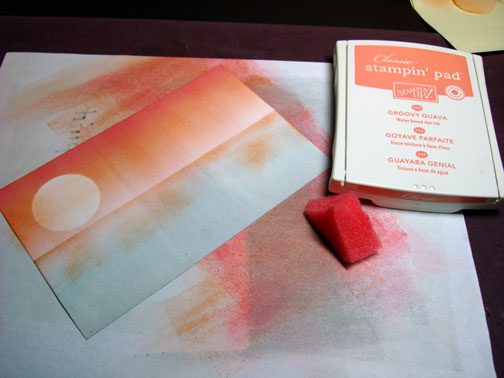
Removed all of the masks and swiped some Groovy Guava ink over the Sun to tone it down a little.

dsc02991.JPG

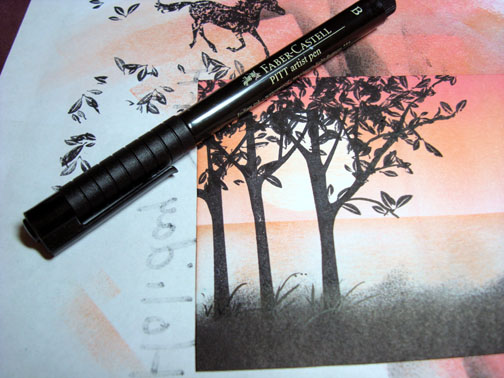
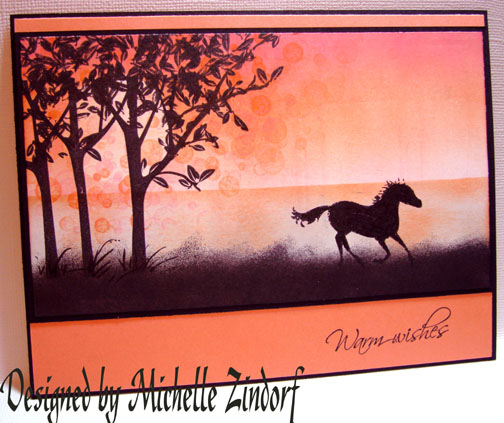
Stamped Trees with Basic Black ink.  Sorry, this Stampin’ Up Trees Three set is retired, but I love it and will never give it up until someone comes out with something comparable.

dsc02992.JPG

Stamped leaves on trees with Basic Black ink.

dsc02993.JPG

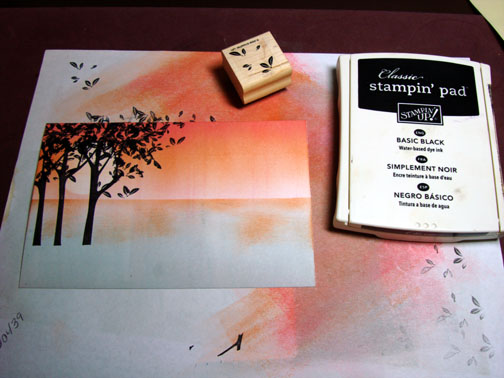
Sponged Basic Black ink on for ground.  I did use a pouncing motion with the sponge for the very top of the ground to simulate grasses in the light.

dsc02994.JPG

Stamped horse with Basic Black ink.

dsc02995.JPG

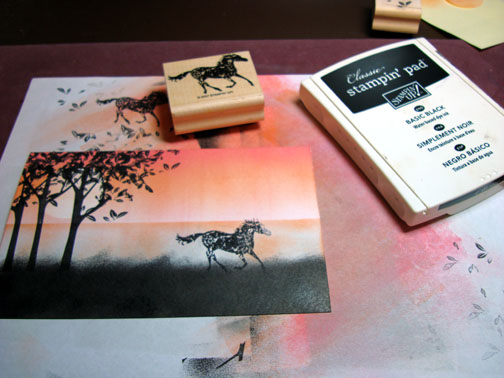
Colored Horse in with a black marker.

dsc02996.JPG

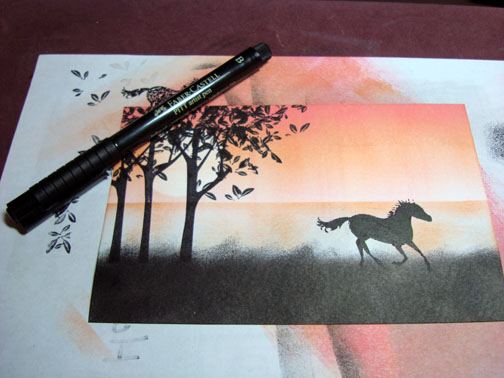
I had some stray leaves stamped, so I drew in a couple of branches with a black marker so the leaves would make more sense in the scene.

I also drew in a couple of grasses at the base of the trees with the black marker.

dsc02998.JPG

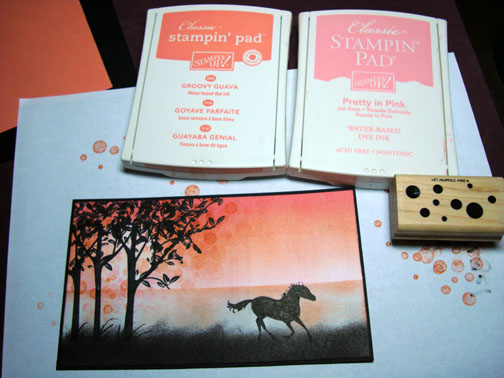
Here I took a chance and stamped some small circles with Groovy Gauva and Pretty in Pink inks on and around the trees to simulate dabbled light.  I kinda like it.  It gives a little more life to the scene.

dsc02999.JPG

Stamped sentiment with Basic Black ink, using my Stamp-a-ma-jig for placement on the Groovy Guava layer.

dsc03000.JPG

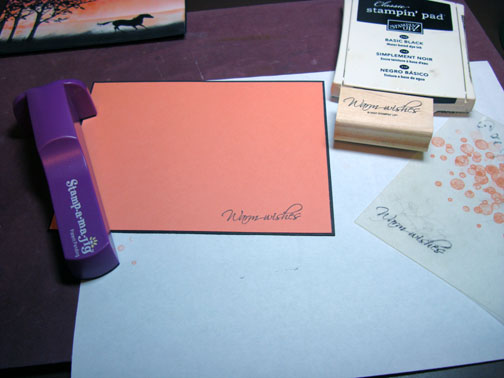
Assembled card and here it is finished!

dsc03003.jpg

Hoped you enjoyed this tutorial and give it a try.

May your day be filled with warmth and sunshine.

Until tomorrow. . . . . . . . . . .. .

24 Responses to “Warm Wishes Wanted - Tutorial”

  1. Debra Hoggon 28 Mar 2008 at 5:40 am

    Stunning as usually

  2. Terrion 28 Mar 2008 at 5:55 am

    Michelle, This is just lovely. How DO you come up with these? Do you ever sleep? ;-) TFS this lovely tutorial!

  3. bronihon 28 Mar 2008 at 6:23 am

    Warm and wonderful, Michelle! Just beautiful!

  4. Susan Joyceon 28 Mar 2008 at 6:40 am

    Very creative design!

  5. Beckyon 28 Mar 2008 at 7:40 am

    just beautiful as always, I just love to see your work every morning when I get up, it does inspire me so. Then I go and work on my own. :) Havent gotten my inks in yet for me to try these tech.
    Have a great day

  6. Conniecrafteron 28 Mar 2008 at 8:24 am

    very pretty, like the softness of the black at the bottom, gives it the feel of settling fog as the sun is rising!

  7. Cindy H.on 28 Mar 2008 at 9:54 am

    Beautiful, just beautiful!!! You do make it *look* so easy with your fabulous tutorials. I don’t have SU! cardstock so I’m wondering is the cardstock you use matte or glossy? The reason, I ask is that many moons ago when I first learned to use the brayer they taught you to use glossy. I have never been a fan of glossy - *but* if that’s what you use to get these gorgeous creations I will make myself learn to like it :)

  8. Wanda Hon 28 Mar 2008 at 11:00 am

    Wow!! This is my first time at your blog and it’s fabulous!!! I’ve subscribed and I’ll be back to read more when I have more time. Beautiful cards!!!!!!!!!!!

  9. zindorfon 28 Mar 2008 at 11:31 am

    Cindy asked “I’m wondering is the cardstock you use matte or glossy?”
    Cindy, the card stock I use is matte. :) I’m not a fan of glossy either.

  10. diane mcveyon 28 Mar 2008 at 11:41 am

    WOW, what a gorgeous card! And thanks for the tutorial, some of those methods were new to me! You are an amazing artist! :D

  11. Paton 28 Mar 2008 at 12:41 pm

    Your card is lovely. The dappled-light effect is very pretty.

  12. B.Renneron 28 Mar 2008 at 1:24 pm

    I’ve just been introduced to your creative genius and would like to subscribe to your daily postings.

    LOVE your work !!

    Thanks for sharing and inspiring

  13. Larie Mon 28 Mar 2008 at 2:21 pm

    As a horse lover this card is amazing, if I can make one that looks close to this beautiful card I would frame it just so I could look at it. Thank you for another beautiful card.

  14. Gidget-Trishon 28 Mar 2008 at 5:48 pm

    Wow!!!! Love the colours in this one behind the black silouettes. Gorgeous!

  15. Gidget-Trishon 28 Mar 2008 at 5:50 pm

    Typo!……….silhouettes.

  16. Sonyaon 29 Mar 2008 at 8:39 am

    Michelle,

    Im in in awe every time I see a new piece of art from you….I tried one of your techniques yesterday…I need way more practice..lol.

    I need to take a picture of it yet and hope to add it to my bog tonight. I tied the transparency technique with the butterfly at the top. Yours is much better.

    Thank you for all the wonderful techniques you show me every day. I always open your email first.

    Sonya

  17. CathyRoseon 29 Mar 2008 at 3:41 pm

    Oh, another gorgeous card and wonderful tutorial! I love the “Trees Three” stamps too. Because of you, I became totally obsessed until I found a set for sale! Lol, now I am ready to try! Thanks again for all the great tutorials!

  18. Tonnieceon 30 Mar 2008 at 12:28 am

    I ordered way too soon I see. This is wonderful. I love it.
    As my brother would say “Another ball out of the park”.

  19. Jenniferon 30 Mar 2008 at 11:07 am

    Thank you for your beautiful work. I love to see it. It feels like I am walking through an art gallery on a Sunday and being transported to these beautiful places that you create.

  20. Laurieon 30 Mar 2008 at 8:33 pm

    Warmth is good! I like warmth! Once again a stunning piece of art for some lucky recipient! Love it. I have to go look that three tree stamp up in the catalog, but something tells me it might be retired. I’ve seen you use it before and it makes a beautiful image, but I don’t think I would have even noticed it in the catalog. It wasn’t until I saw what you did with it. Wow is all I can say. Wow.

  21. Sandyon 31 Mar 2008 at 10:08 pm

    This card is beautiful. The colors just draw you in.

  22. Doneldaon 01 Apr 2008 at 11:02 pm

    I love that you “took a chance” and added those circles….I LOVE that!! it is the best part of the card…I think!! Thanks for sharing! I wish I had bought these trees before they retired but they wern’t really my “style”. But now that I see what you do with them…sheesh! Wish I’d met you before :-) Oh well, maybe I’ll pick them up some day….

  23. Sandyon 15 Jun 2008 at 1:43 am

    Michelle, what size did this card end up being? Thank you!

  24. zindorfon 15 Jun 2008 at 4:30 am

    Sandy asked “what size did this card end up being?”

    5″ x 6.5″

Trackback URI | Comments RSS

Leave a Reply