Monthly Archives: March 2008

Spring Bird Tutorial

finished-card.JPG 

This card is for the todays Sketch Challenge SC166 found here:  https://www.splitcoaststampers.com/forums/showthread.php?t=330124

Supplies:

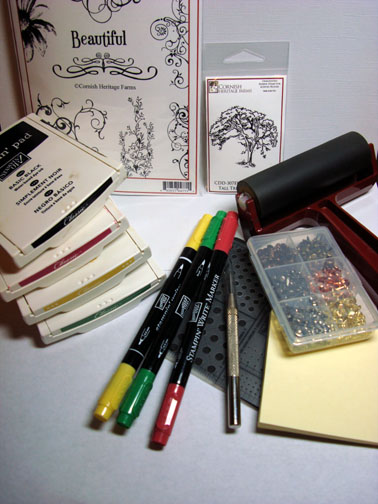
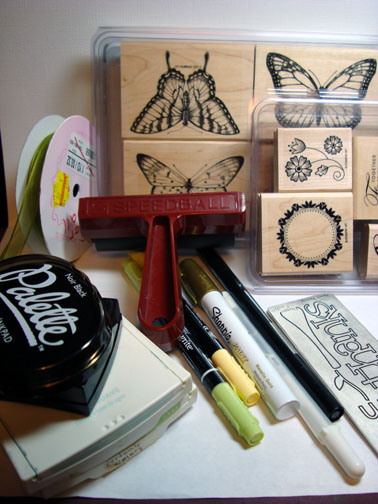
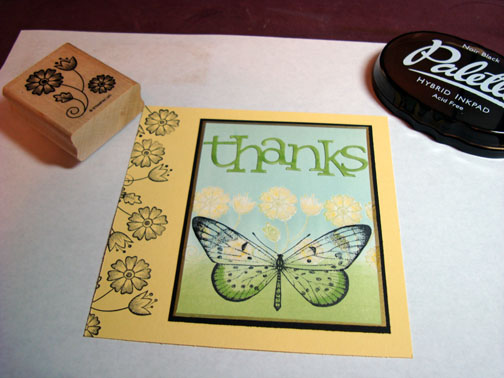
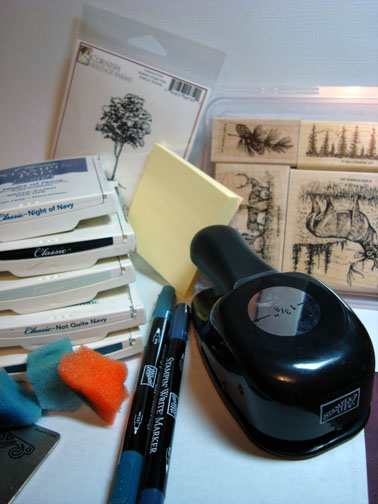
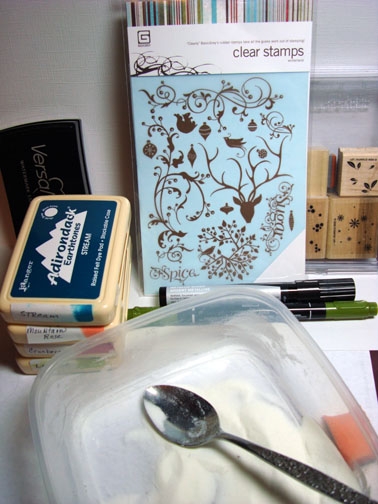
Stamps: Basic Grey, Stampin Up Trees Three (flowers)
Paper: Whisper White, Cool Caribbean, Taken with Teal
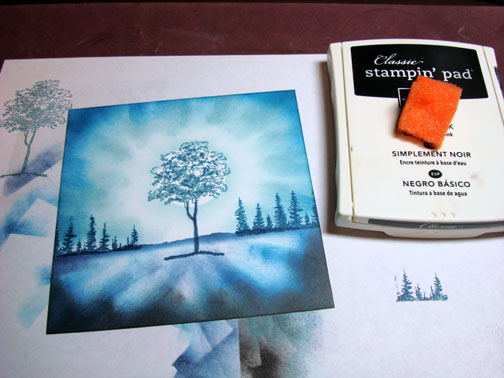
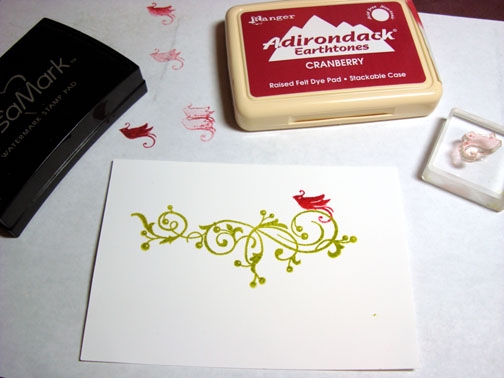
Ink: Ranger inks Lettuce, Stream, Mountain Rose, Cranberry
Accessories: Flower Punches, Brads, Sponge, Heat Gun, Clear Embossing Powder, Versamark Pad, Always Artichoke marker, Cuttlebug embossing folder, Sharpie Silver Paint Pen

dsc02450.JPG

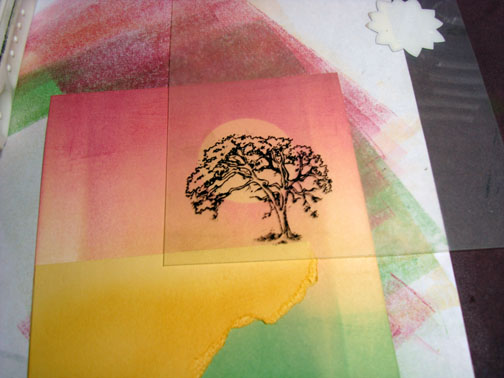
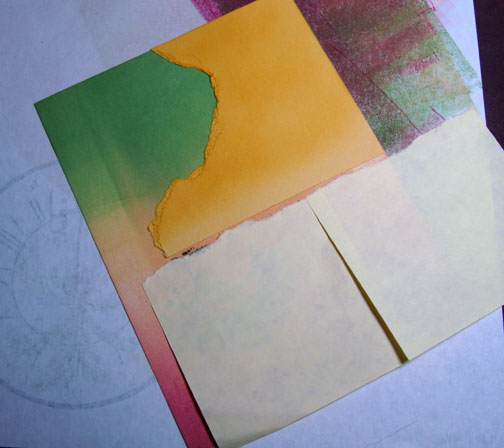
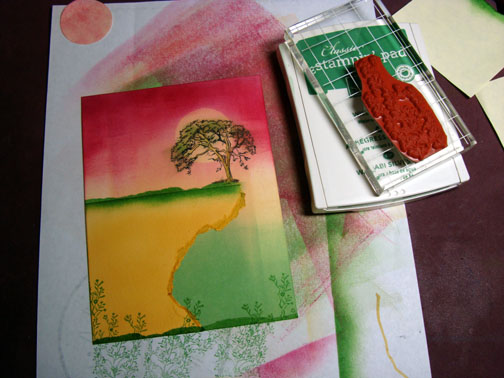
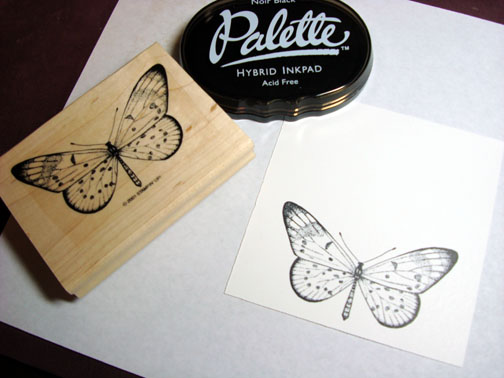
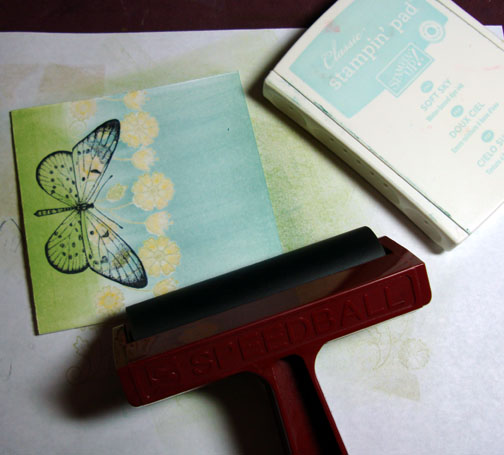
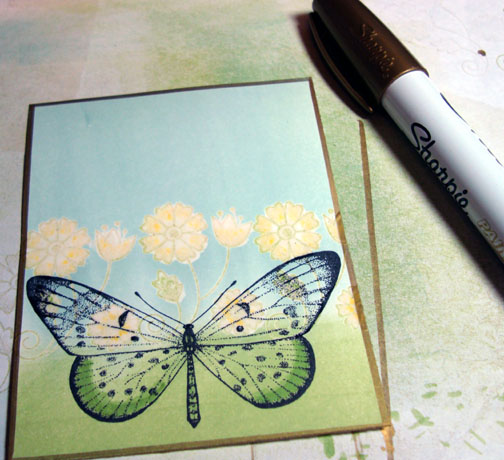
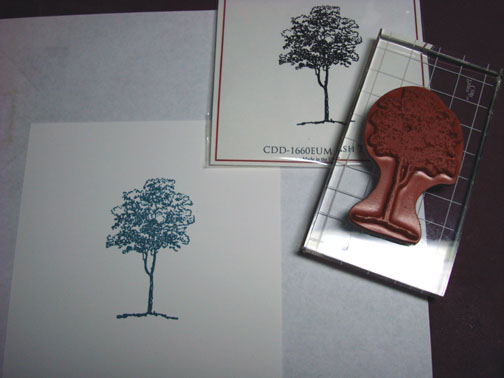
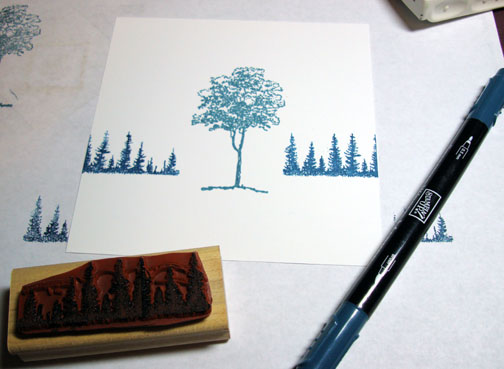
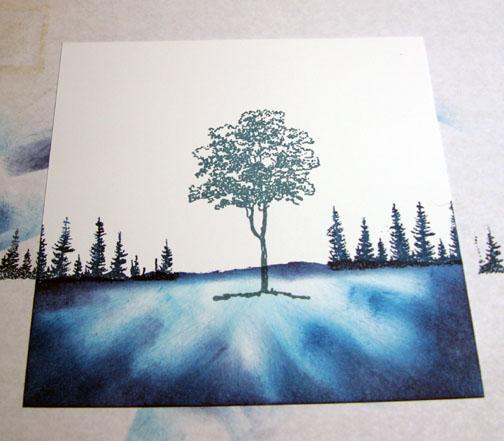
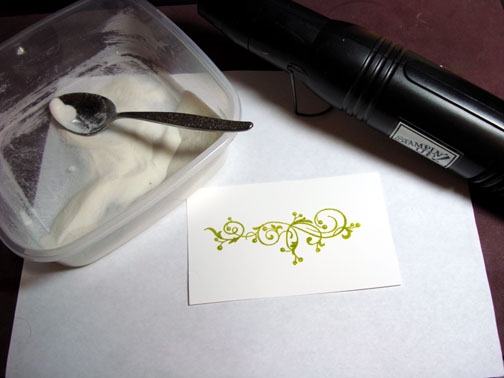
 Stamp vine by loading stamp with Versamark and then Lettuce ink and stamping on Whisper White card stock.

47b8dd24b3127cceb6f32beab3d900000026108azm2tjuzatn.jpg

Heat emboss image using clear embossing powder.  Note:  I keep my embossing powder in a sandwich sized plastic container so I don’t have to try to put the embossing powder back into the tiny container it came in.

dsc02434.JPG

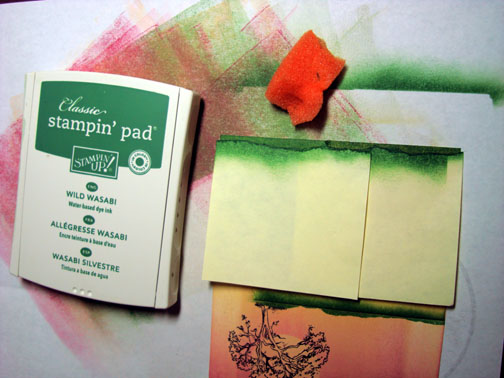
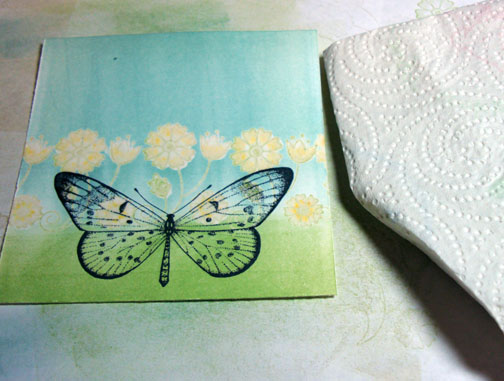
Stamp bird by first loading stamp with Versamark and then Cranberry ink.   Heat emboss it using clear embossing powder.

dsc02435.JPG

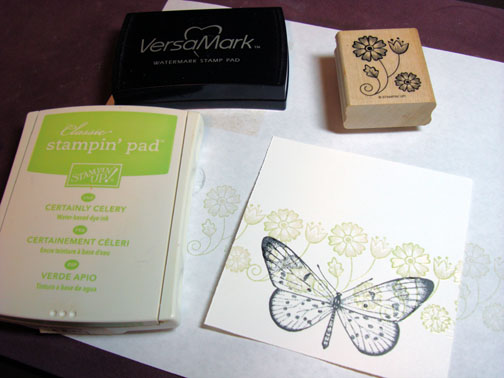
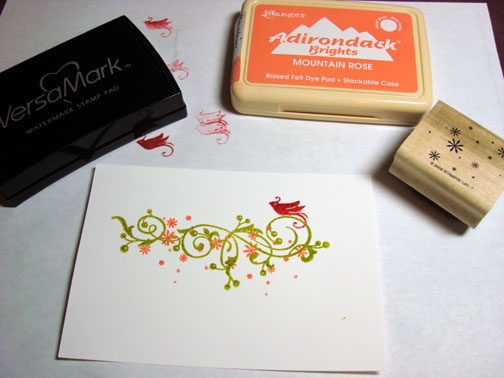
Stamp flowers from Stampin’ Up Trees Three set by first loading stamp with Versamark and then Mountain Rose ink.  Heat emboss using clear embossing powder.

dsc02436.JPG

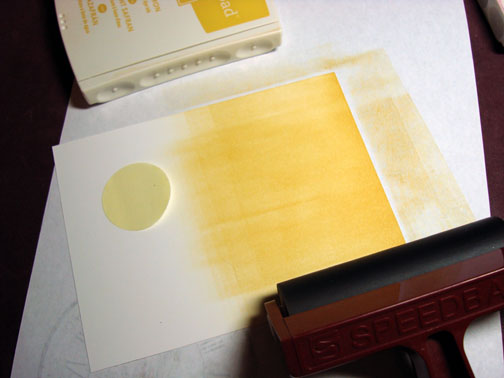
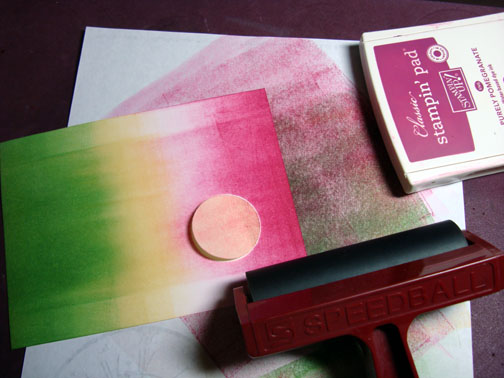
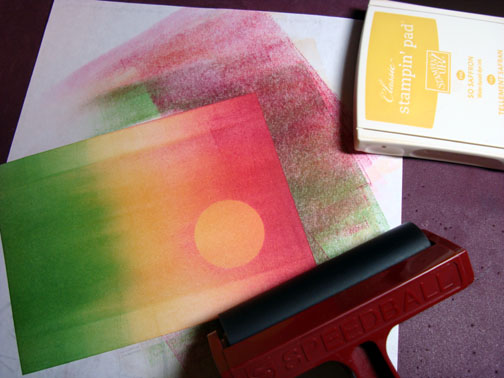
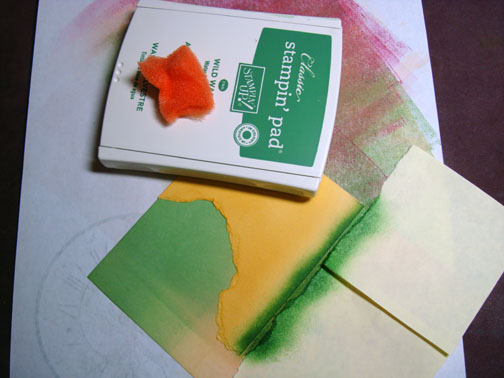
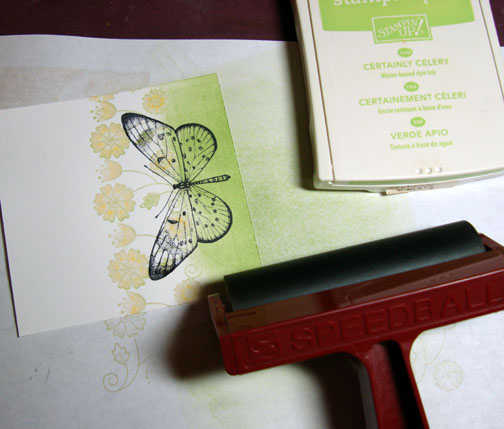
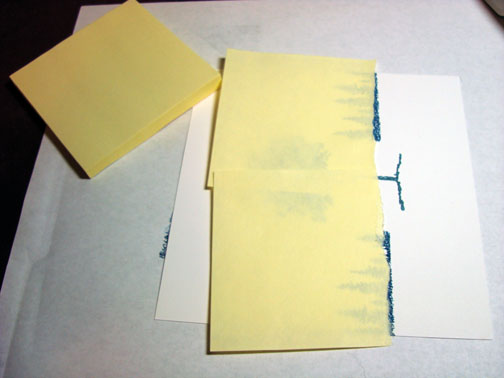
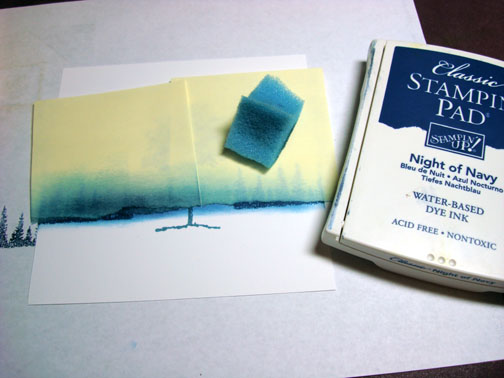
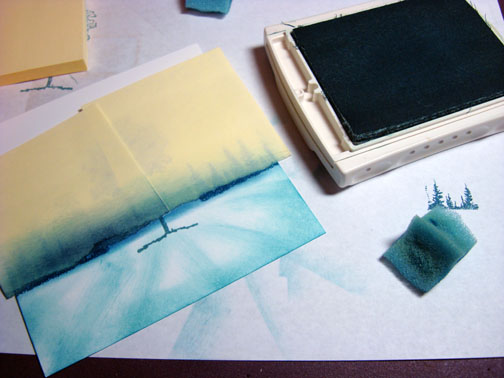
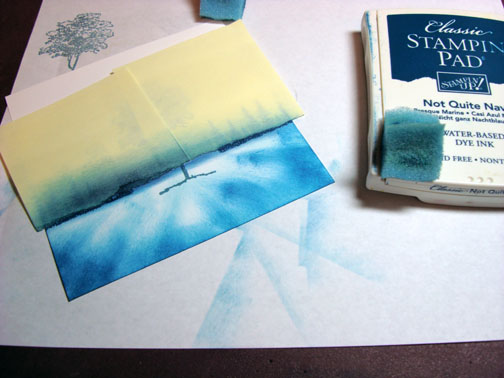
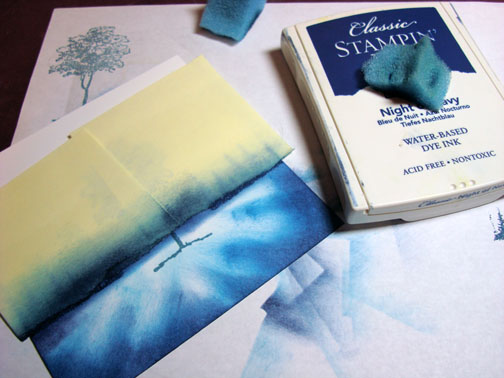
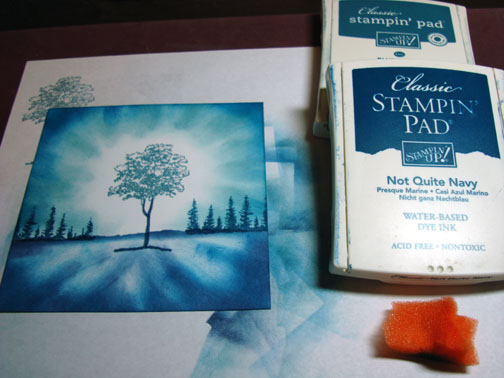
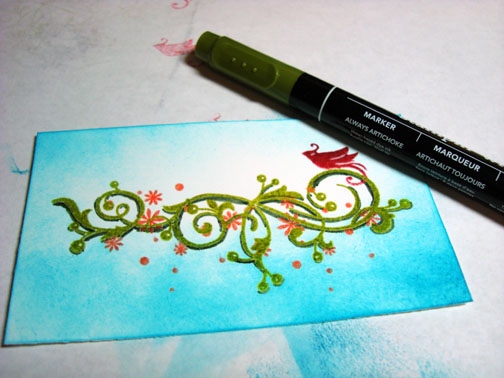
Crop image and sponge on Stream ink using a circular motion with the sponge.  It is ok to go over the embossed images with the sponge.  The ink will not stick to the embossed images.

dsc02437.JPG

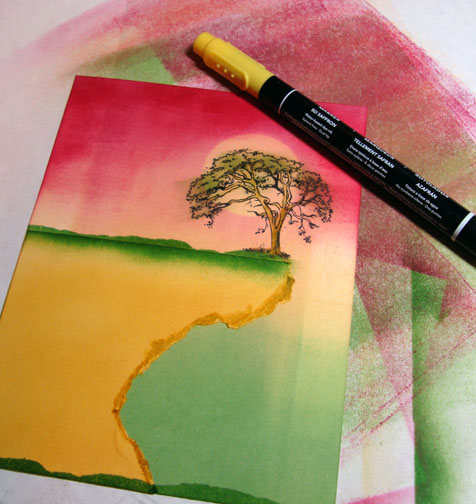
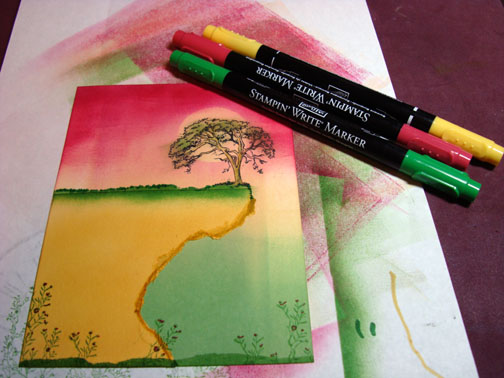
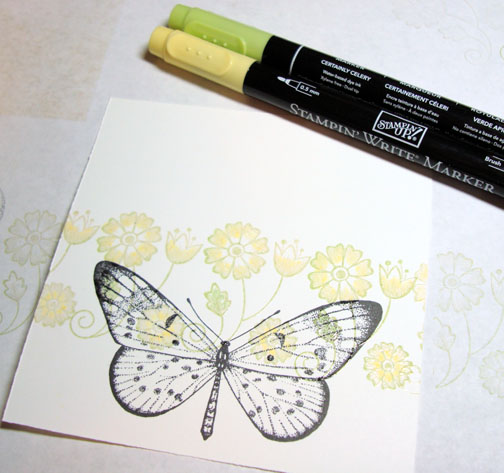
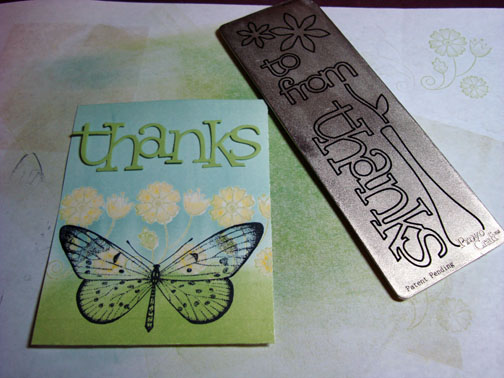
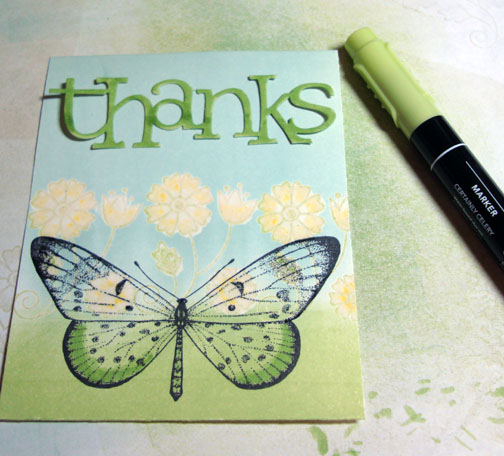
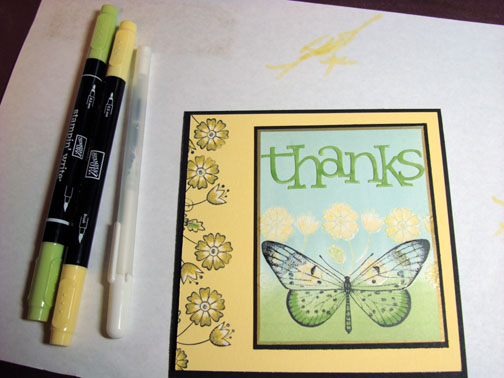
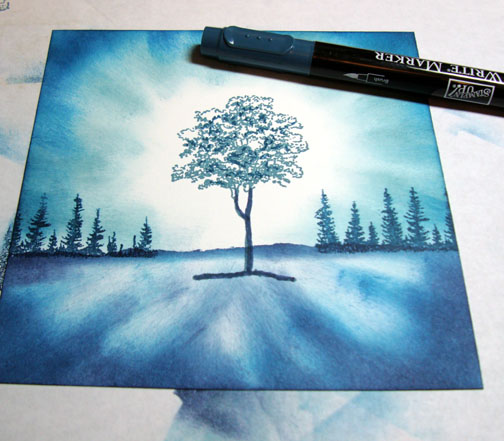
Give dimension to the vines by highlighting the under sides of the vine with an Always Artichoke marker.

dsc02438.JPG

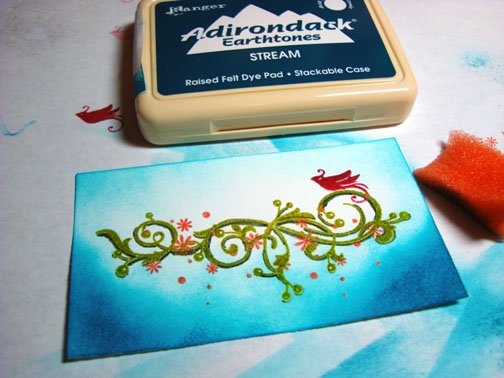
Sponged additional Stream ink on bottom corners of card stock.

dsc02439.JPG

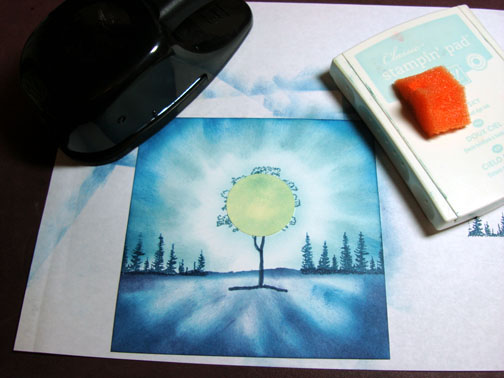
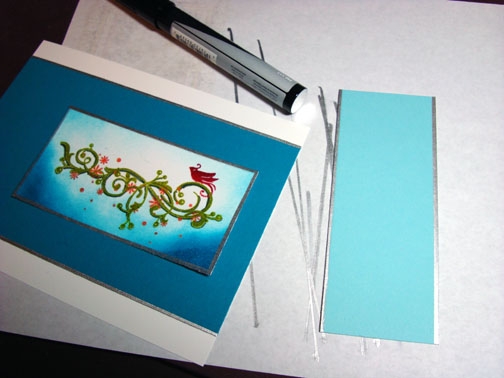
Used a Sharpie Silver Paint Pen and run it around the edges of my main image card stock and the layering card stock pieces.  This is very easy to do and gives a look of additional layers without the weight and bulkiness.   

dsc02440.JPG

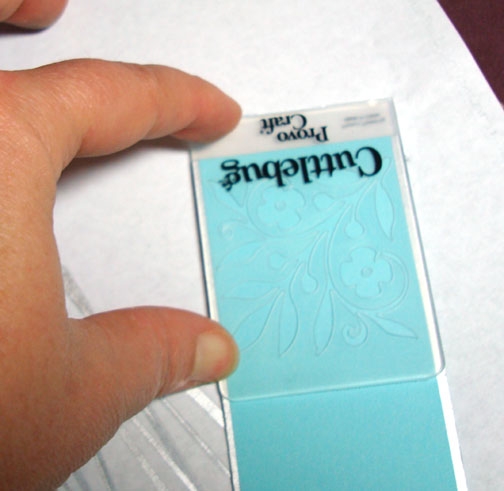
Used a small Cuttlebug embossing folder to emboss top and bottom of Cool Caribbean card stock layer.

dsc02441.JPG

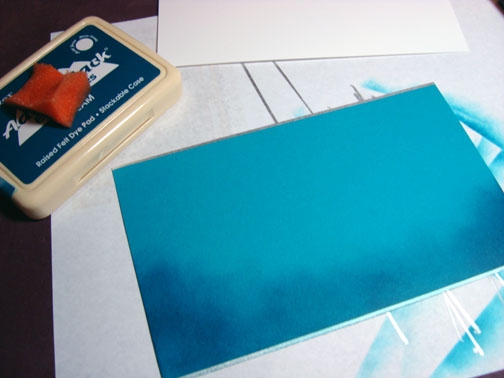
Sponged Stream ink on bottom of Taken with Teal card stock layer.

dsc02443.JPG

Used the Sharpie Silver paint pen again to go around the the very outside of the assembled card.

dsc02444.JPG

Added some flower punches and brads. 
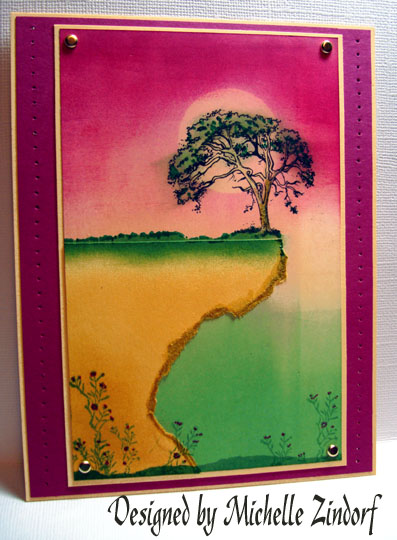
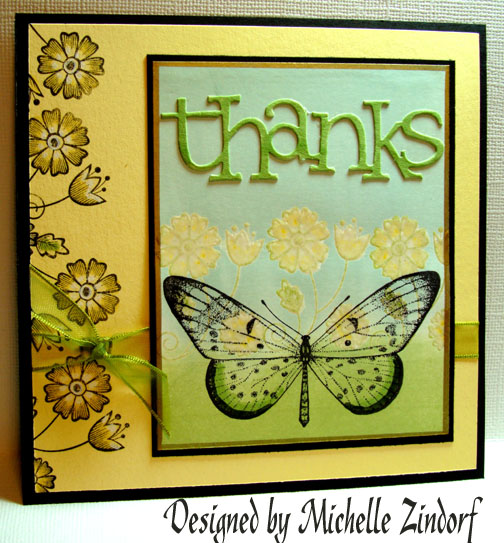
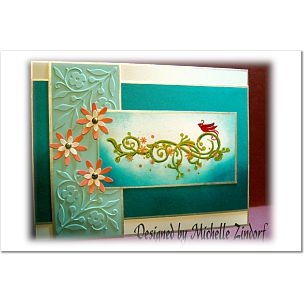
 Finished card!

finished-card.JPG

Hope you have enjoyed this tutorial.  If you did, check out my other tutorials on this blog.

If you don’t participate in the Splitcoast Stampers Challenges, you don’t know what you are missing.  They really have kept me stamping and growing in my creativity.

Have a super wonderful day!

Lone Tree Tutorial

dsc02428.jpg

On Split Coast Stampers today there is a very interesting color challenge.   The challenge is to use Purely Pomegranate, So Saffron & Wild Wasabi.  Whew!  What a challenge for me.  I really don’t like bright colors and these colors just leap off the paper.  You can find the color challenge here:  https://www.splitcoaststampers.com/forums/showthread.php?t=329824

I decided to go ahead and do a tutorial for this one.  Let’s get started!

Supplies:

Stamps: Cornish Hertiage Farms Tall Tree & Beautiful set by The Rummage Bin
Paper: Stampin Up Whisper White, So Saffron, Purely Pomegranate
Ink: So Saffron, Purely Pomegranate, Wild Wasabi, Basic Black
Accessories: Stampin Up Markers So Saffron, Baroque Burgundy, Garden Green, Piercing Tools, Brayer, Sponges, Brads, Post-It-Notes, Stamp-a-ma-jig

dsc02427.JPG

Punched a circle from the sticky part of a Post-It-Note to use as a mask for the moon, positioned it on Whisper White card stock.

dsc02406.JPG

Brayered So Saffron Ink on bottom 2/3 of card stock.

dsc02407.JPG

Brayered Wild Wasabi on bottom 1/3 of card stock.

dsc02408.JPG

Brayered Purely Pomegranate on top 1/3 of card stock.

dsc02409.JPG

Decided to tone sky down and give it a little light by removing moon mask and Brayering So Saffron over the sky area.

dsc02410.JPG

Tore a cliff shape from So Saffron cardstock and sponged on So Saffron to create a shadow.

dsc02412.JPG

Adhered Cliff to card stock.

dsc02413.JPG

Used my Stamp-a-ma-jig for placement of tree and stamped it with Basic Black ink.

dsc02414.JPG

Torn the very top of two Post It Notes and used them as mask so I could create some grass on the cliff.

dsc02416.JPG

Sponged on Wild Wasabi ink right at the edge of post it notes to create grass.

dsc02417.JPG

Using same post it notes I turned them around and used them again to put in some ground at the very bottom of the card stock.  Sponge on Wild Wasabi at the edge of post it notes.

dsc02418.JPG

Sponge Purely Pomegranate in the sky to darken it.

dsc02419.JPG

Darkened front of cliff with a So Saffron marker.  Sponged Wild Wasabi ink on tree leaves.  Colored in tree trunck with So Saffron marker.

dsc02421.JPG

Stamped weeds at the bottom with Wild Wasabi ink.

dsc02422.JPG

Cropped image, used a Garden Green marker to highlight the leaves in the tree and the top of the grasses on the cliff, colored the flowers of the weeds with a Baroque Burgundy marker.  Darkened the cliff front with the So Saffron marker to try to get it darker yet.

dsc02424.JPG

Assembled card front and used my Stampin Up Piercing tools to pierce sides of card.

dsc02426.JPG

There you have it!  The finished card.

dsc02428.jpg

Hope you enjoyed the tutorial and it inspires you to try using any color combination to create landscapes.

Have a colorful day!

Emboss Resist Thank You

dsc02398.jpg

Needed a thank you card today.  So here is a new tutorial.  🙂

Supplies:

Stamps: Stampin Up Together Forever, Wonderful Wings
Paper: Stampin Up Whisper White, Barely Banana, Basic Black
Ink: Stampin Up Certainly Celery & Soft Sky, Palette Noir Black
Accessories: Versamark Pad & Marker, Stampin Up Markers, Certainly Celery & Barely Banana, White Gel Pen, Sharpie Metallic Gold Marker, Clear Embossing Powder, Cuttlebug Die Cut, Ribbon

dsc02404.JPG

Stamped Butterfly with Black ink on Whisper White card stock.

dsc02385.JPG

Loaded flower stamp first with Versamark and then Certainly Celery ink then stamp them.  Heat embossed them with clear embossing powder.

dsc02386.JPG

Colored Flowers and leaves with Barely Banana and Certainly Celery markers.  Colored over the flowers and leaves with Versamark marker and heat embossed them with clear embossing powder.

dsc02387.JPG

Brayered Certainly Celery ink at bottom of card stock.

dsc02389.JPG

Brayered Soft sky ink over top two thirds of card stock.

dsc02390.JPG

Wiped ink off of embossed images with paper towel.

dsc02391.JPG

Cut sentiment with Cuttlebug die cut out of Certainly Celery card stock.  Cropped image.

dsc02392.JPG

Decided I wanted the sentiment to be darker so I went over it with a Certainly Celery marker.  Also, added certainly celery marker to the bottom of the butterfly wings.

dsc02393.JPG

I like to use Metallic Sharpie markers to out line a layer to give the appearance of another layer without the weight.  Much cheaper than buying metallic cardstock too.

dsc02394.JPG

Stamped Flowers at side of Barely Banana layer of card stock with black ink.

dsc02395.JPG

Colored flowers with Certainly Celery, Barely Banana and a white gel pen.

dsc02397.JPG

Completed card

dsc02398.jpg

I hope you liked this little tutorial.  If so, give a shout out in the comment section. 

Also, thank you for visiting my blog.  Hope your day is filled with Butterflies and flowers!

Inspired Treasure me Blue – Tutorial

dsc02374-copy.jpg

This card was inspired by a beautiful photograph by Werol that can be seen here:  https://www.deviantart.com/print/475044/

It is also inspired by this weeks Split Coast Stampers Inspiration Challenge IC117 found here: https://www.splitcoaststampers.com/forums/showthread.php?t=328890

Let’s get started with today’s tutorial.  🙂

Supplies: 

Stamps: Cornish Heritage Farms-Ash Tree, Stampin Up Noble Deer (pines)
Paper: Stampin Up Whisper White, Soft Sky and Black
Ink: Stampin Up Soft Sky, Blue Bayou, Not Quite Navy, Night of Navy, Basic Black
Accessories: Stampin Up markers in Not Quite Navy and Night of Navy, Cuttlebug Die Cut, 1 3/8″ Circle Punch, Post It Notes, Sponges

dsc02375.JPG

Stamp tree on Stampin’ Up Whisper White card stock using Blue Bayou ink.

dsc02351.JPG

Stamped background pines using a Not Quite Navy Marker to color in just the trees on the stamp.  Huffed on it to moisten then stamped.

dsc02353.JPG

Used Post-It-Notes to mask sky area.  I torn the Post it Notes on the stick edge of the note, making sure to leave some of the stick part on the Note to adhere to the card stock.

dsc02354.JPG

Sponged Night of Navy ink right at edge of Post It Note mask to create a horizon line. 

dsc02355.JPG

Sponged on Soft Sky ink, working from the edge of the paper and swiping the ink on toward the tree base.

dsc02356.JPG

Did the last step again only using Not Quite Navy ink and not covering all of the Soft Sky ink already applied.

dsc02357.JPG

Same step again, only with Night of Navy ink and not covering all of the Not Quite Navy ink applied in the last step.  We are getting a graduation of color here. 🙂

dsc02358.JPG

Removed Post It Notes.

dsc02359.JPG

Went over the tree trunk with a Not Quite Navy Marker to make it stand out more.

Now for the sky:  Sponged on Soft Sky ink in a swiping motion from the edge of the paper toward the tree, leaving white card stock showing around the tree.

dsc02360.JPG

Sponge on Blue Bayou and then Not Quite Navy in the same swiping motion as in the last step creating a graduation in color, by not covering entirely the lighter colors before it.

dsc02361.JPG

Used a Night of Navy marker to make a few of the leaves in the tree darker to create dimension.

dsc02362.JPG

Punched a circle out of the sticky part of a Post It Note to use as a mask to create a sun.

Sponged Soft sky ink with a swiping motion from the mask out toward the edge of the card stock.  Leaving white card stock showing to create a glow.

dsc023632.jpg

Removed Post it Note mask and sponged some black ink at very bottom of the card stock in a swiping motion.

dsc02366.JPG

Added a couple of layers of card stock and Cuttlebug die cut corners and here is the finished card.

dsc02374-copy.jpg

I hope you enjoyed today’s tutorial.  I realize my tutorials are long, but I like to show each step individually, as much as possible. 

Hope your day is filled with as much light as this tree!