Apr 21 2008
Blue Faded Flower - Tutorial
I was just itching to do some emboss resist this morning and this piece definitely is embossed. Follow along if you want to see how it was created.
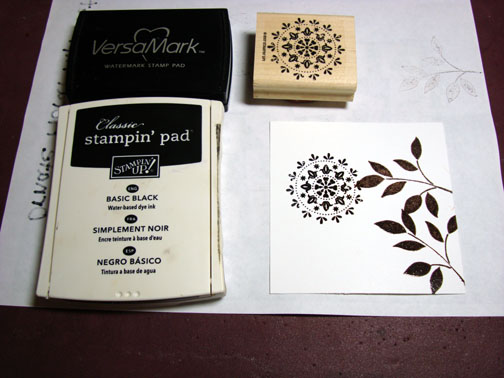
Supplies:
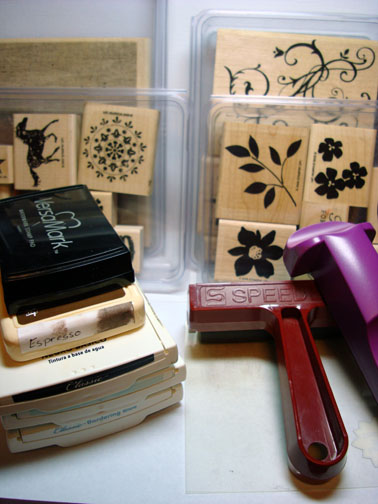
| Stamps: Stampin’ Up Best Blossoms, Baroque Motifs, Wanted, Linen |
| Paper: Stampin’ Up Whisper White & Chocolate Chip |
| Ink: Stampin’ Up Basic Black, Soft Sky & Bordering Blue, Adirondack Espresso |
| Accessories: Versamark Pad, Clear Embossing Powder, Heat Gun, Brayer, Stamp-a-ma-jig, Sponge |
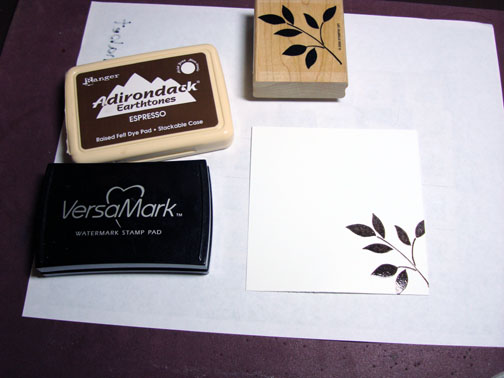
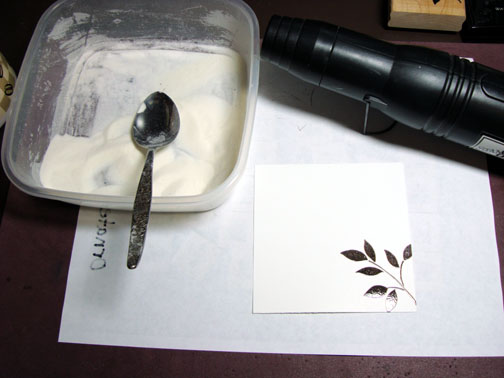
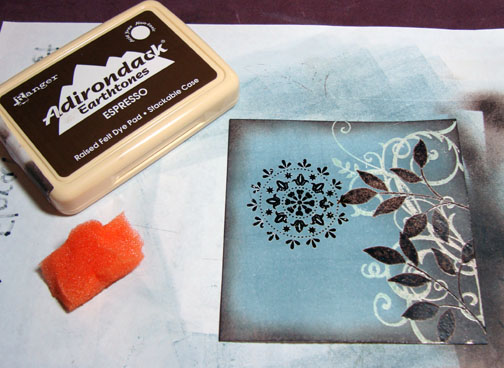
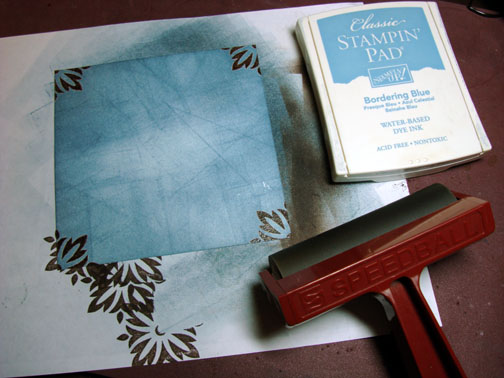
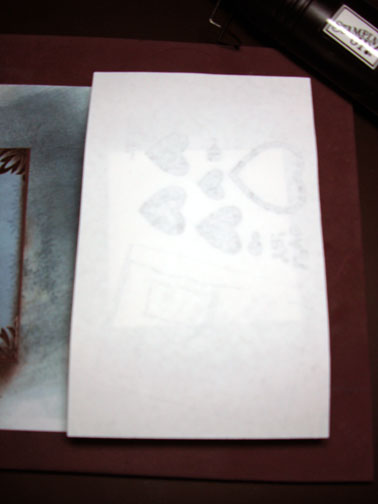
Stamped leaves on Whisper White card stock by first loading stamp with Versamark and then loading it with Espresso ink. I then heat embossed it with clear Embossing powder and a heat gun.
Note: I’m asked a lot why I just don’t use Versamark alone with colored embossing powders? Well I would rather not have to buy a bunch of different colors of embossing powder and this method allows me to emboss in any color of ink I have.
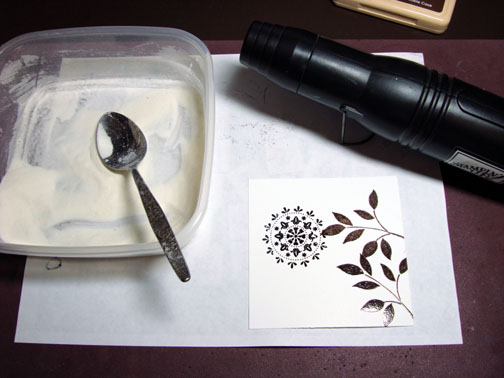
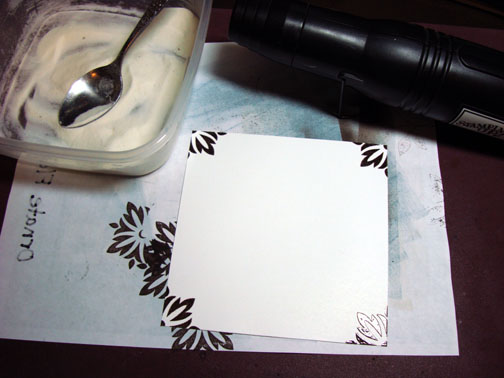
I also keep my clear embossing powder stored in a sandwich size plastic container instead of trying to use an embossing tray and then put it back in the tiny canister it came in. My aim is not very good, lol.
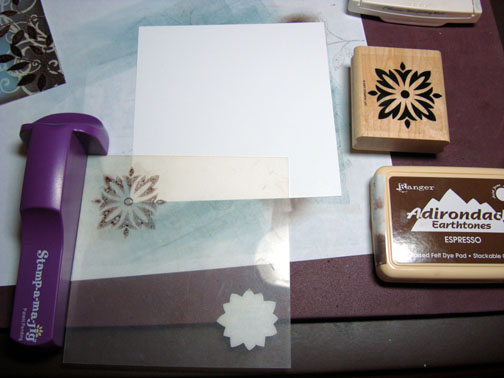
Stamped Wanted motif by first loading the stamp with Versamark and then Basic Black ink. Heat embossing image with clear embossing powder and a heat gun.
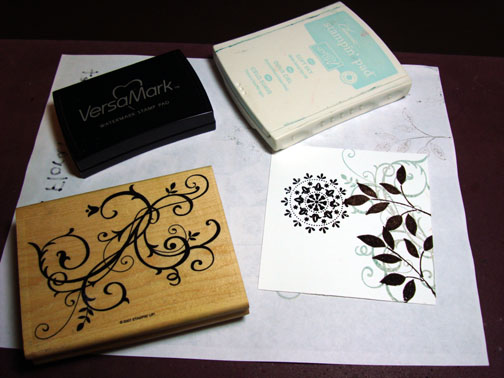
Stamped Baroque Motif by loading stamp first with Versamark and then Soft Sky ink. Stamped image over embossed leaves and heat embossed with clear embossing powder and a heat gun.
Note: when doing multiply layers of embossed images, work from the foreground to the background.
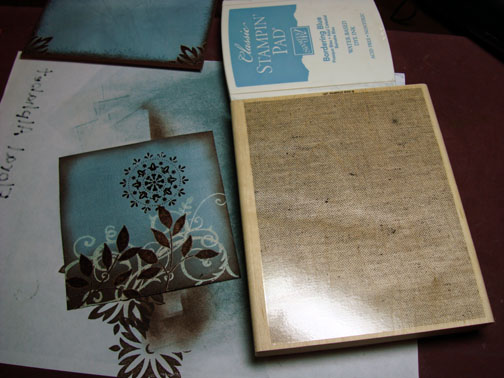
Heavily Brayer Bordering Blue ink over entire piece of card stock.
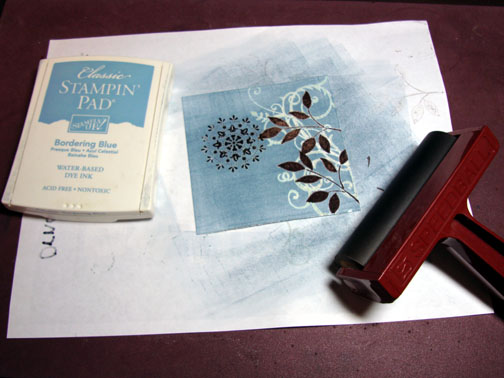
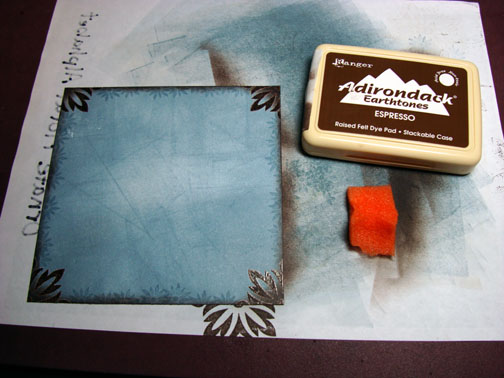
Sponge, using a circular motion, Espresso ink around edges of card stock and over leaf image area to create a shadow.
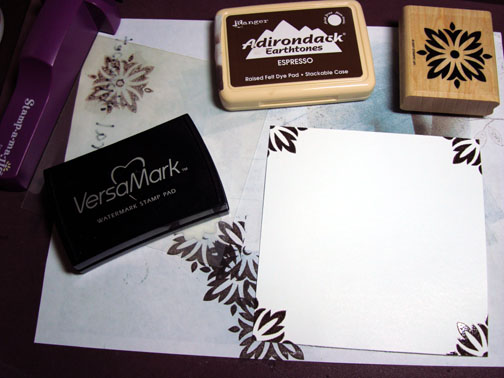
On a larger piece of Whisper White card stock, using my Stamp-a-ma-jig for placement, I stamped the background corner images by first loading my stamp with Versamark and then Espresso ink. Heat embossed images with clear embossing powder and a heat gun.
Heavily brayered Bordering Blue ink over entire background piece.
Stamped small flower around edge of card stock with Bordering Blue ink.
Sponged Espresso ink around edge of card stock.
Stamped linen stamp on my main image panel by loading my Linen background stamp with Bordering blue ink. To do this I put my stamp rubber side up on the table. Rub my ink pad on the rubber, place my card stock face down on the rubber and put a piece of scrap paper over it and rub it with my hand to get the image.
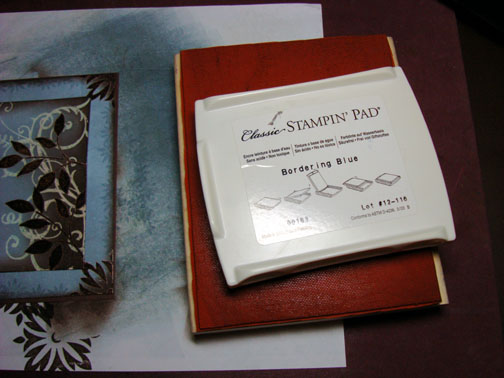
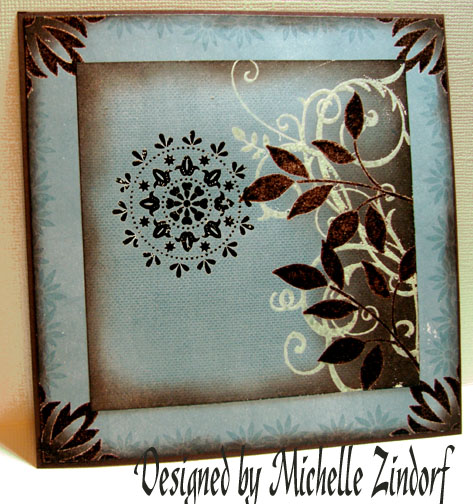
Here we have another card assembled and completed!
Give it a try!
Well I hope your day is filled with blue skies.
Until tomorrow. . . . . . .

thanks… for another great card.
Your cards are always so beautiful and you make it look so easy!
Thanks so much for sharing how you achieve these sensational cards…wonderful creations! Wishing you blue skies on this Monday morning as well!
So glad you’re back! Hope you had a great vacation but your daily tutorials were missed.
hi…I just wanted to say what an amazing card…again. I love to check in on your blog, every card just blows me away. you are so talented. Wow !!! Keep it up. hugs lis-m
Stunning and beautiful again. You never cease to amaze me.
Glad you’re back and wowing us again with more great art. Thanks for sharing the detailed instructions and all your little tips and tricks. You’re my inspiration!
I love the colors on this card Michele! Just beautiful!
This is wonderful! I love blue and chocolate and the leaves over the swirls!
Hey Michelle,
This card looks like a lot of fun to make. Im so glad you’re back! I’ve missed checking your blog everyday but have consoled myself by checking your SCS gallery (which has been such an inspiration thank you). I have a question in response to using the versamark and then the classic ink pad to emboss. When you put the stamp loaded with versamark on to the colored pad, does it effect the ink at all the next time you use it for non embossed images?
Thanks for all the time and effort you put into your blog and tutorials.
Nina
Nina asked “in response to using the versamark and then the classic ink pad to emboss. When you put the stamp loaded with versamark on to the colored pad, does it effect the ink at all the next time you use it for non embossed images?”
Nina, I have not seen any difference in my ink pads using this method
Michelle: I look at the pictures in your tutorial…I have the ink, the stamps, the sponge, the brayer….I follow instructions….does it look like yours. No. Must be you have the gift and I don’t. But you do give me inspiration. I have end of brayer marks when I brayer (like an edge line). Oh well, if at first you don’t succeed…
Judy said “I have end of brayer marks when I brayer (like an edge line).”
Judy, try this, I start my brayering at the very top of the cardstock, meaning most of the roller is off of the card stock and on my scrap paper and with each roll of the brayer I move a bit more down the cardstock. I ink the roller about 4 times for each color. I also, brayer, brayer and brayer some more to work the ink into the cardstock in between inkings. The more ink you get on the card stock the better they will blend together and not have lines.
Michelle, Thanks for that instruction about the brayer. I have had the same problem as Judy. Now that you have given a solution, I’m going to give this brayer thing another chance.
Hello Michelle, I have been following your blog for some time now. I have learn so much. I found the courage to try this technique today and I like the results, not sure how to upload to show you though. I am also having so difficulty with blending with the brayer thank you so much for the advice given to Judy. I’ll give it a try. I do have a problem brayer over the embossed areas it seems to leave a white halo effect around the image I can’t seem to get enough the ink to cover completely, I am having to do touch ups with a sponge for now.
Thank you so much for sharing you talent with us
kmills2@ec.rr.com
Karen said “I do have a problem brayer over the embossed areas it seems to leave a white halo effect around the image I can’t seem to get enough the ink to cover completely.”
Karen, When I brayer over a complete panel, like the main image one here, I have to keep turning the card stock and brayering in different directions and loading my brayer a lot with ink to get good coverage around the embossed images.
Keep at it, you will find your own methods.
Beautiful card and colors — love the details of your tutorials, Michelle!
Hi Michelle. Wonderful work again. I would love to know how your mind works to come up with these ideas. I have all of the stamps that you used here, but I can’t ever imagine coming up with this image. How do you work your process? Do you decide color first? Or do you look through what images you might want to use and decide on image first? Not that this will ever help me, but I am just curious how one stares at an empty desktop and ends up with thing of beauty after thing of beauty!! Also, do you find different embossing powders give you different results? Do you mix them in the container or do you just stick with one brand and always get that. What type/types give you best results? Thanks.
So glad to have you back! This card is just so lovely! I also appreciate you taking the time to answer all our questions!
Hi! Michelle
so happy to see your work every morning, you make my day every day. Never saw so talented lady like you. Thank you for sharing all this with us.
What an amazing piece of art! This has so much texture, it just jumps off the page! It looks just like brown velvet on a piece of pale blue linen. I would love to know where your inspiration for this card came from as well. I would guess a beautiful piece of fabric.
thanks for all the instructions as well - I’m kind of technique-shy in that I find they take a lot of time but don’t always pay off with great results. You’ve inspired me to try this technique again, however.
Alison
Boy, do you get up early!
I so appreciate your tutorials, and that you answer our questions. I had also wondered if doing the Versamark on a Classic pad would affect the Classic pad at all (not wanting to have to get extra pads!), and you have answered that question already.
I love all the techniques you use, especially all the brayering. You turn ordinary rubber stamping into an art form. Now to find some time to try it all!
Thanks for all that you do to inspire us.
WOW!!!! Such Beautiful stamping, every little bit adds so much to the finished product, LOVE it!
Laurie & Alison asked “I would love to know where your inspiration for this card came from?”
Ladies, I keep a computer file of thumbnail sized images that I have viewed on the internet. Mostly of art or photos that inspires me. I usually draw my inspiration from multiple pieces thumbnails. I’ll take a color combo from one, a layout from another. This way I am not copying any one piece of art completely. I’ll switch up the layout by moving images around, but keep the same sense of feeling that I liked about the piece in the first place. Clear as mud?
I’ll also draw inspiration from a stamp I want to use. I guess it varies as to were my inspiration comes from.
Michelle
Laurie asked “do you find different embossing powders give you different results? Do you mix them in the container or do you just stick with one brand and always get that.
Laurie, I don’t stick to any one brand. I do buy very fine clear embossing powder. When my container gets low I just buy another and dump it in.
This is truly amazing and it looks like a piece of framed art! I just recently subscribed to your blog and I sure am glad I did. Your work is so fabulous!
Pinky
Girl you are good :). You have a great day
Michelle this is fabulous.. again.. of course!! Another reason to always use the clear embossing powder is that if you use two or more different colors of ep over top of each other (like your brown and soft sky colors are here), the embossing powders end up “blending” together and the images get all messed up even if you do each color of your embossing one at a time… If it is all clear ep then there is no running or melting together of colors since the color is in the ink not the powder. This is the voice of experience here! lol Anyway, LOVE your card.
OMG This is beyond stamping! You are awesome!
Karen
Wow; this is soooooo gorgeous. I just love brown & blue & this just takes my breath away. You are truly talented!!!