May 08 2008
Grunged Up Fisherman - Tutorial
Before I started my blog, I would start each day by doing one of the challenges on Split Coast Stampers. The challenges really helped me grow as a stamper and come out of my secure little box.
I decided to do my favorite SCS challenge, the sketch challenge. Here is a link to the challenge: http://www.splitcoaststampers.com/forums/showthread.php?t=346067
Supplies:
| Stamps: Stampin’ Up On The Fly |
| Paper: Stampin’ Up Whisper White, Soft Sky, Not Quite Navy |
| Ink: Stampin’ Up Not Quite Navy, Old Olive, Night of Navy & Soft Sky, Palette Noir Black |
| Accessories:Brayer, Clear Embossing Powder & Heat Gun, Prismacolor Markers, White Gel Pen, Not Quite Navy Marker, Stamp-a-ma-jig, Sponges, Piercing Tools, Distressing Tool |
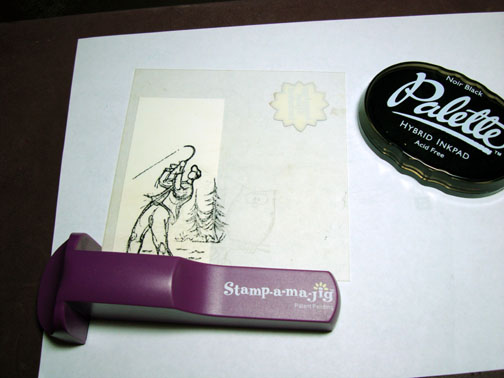
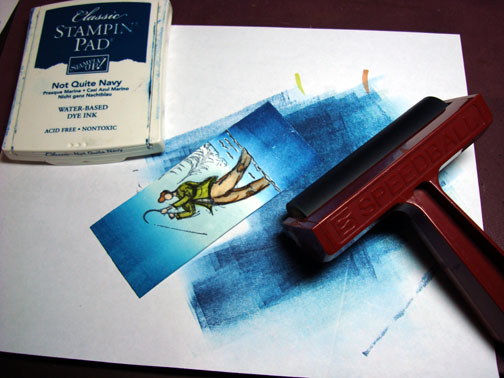
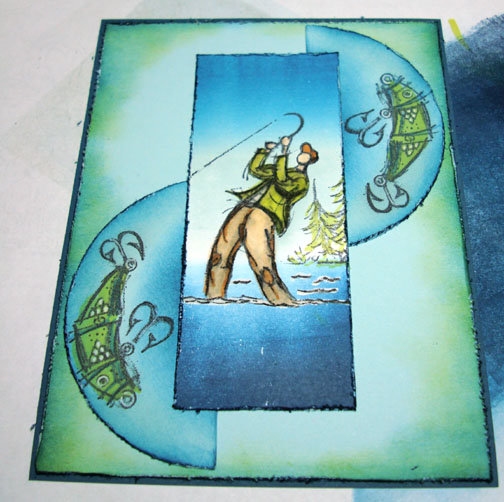
Stamped fisherman with Black ink, using a Stamp-a-ma-jig for placement. Note: I used Classic Black dye ink to stamp on the plastic sheet of the Stamp-a-ma-jig, not the Palette Hybrid ink. The Palette Hybrid ink is very hard to get off of the plastic, if you can get it off at all.
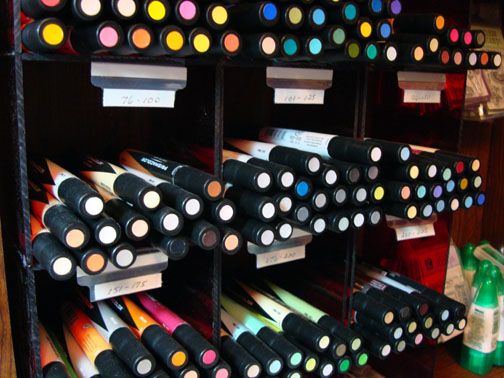
Decided to use my Prismacolor markers to color with today. I store them on their sides and I have them cataloged in my binder since I am a visual person. This way I can instantly see what color I would like to use and how it will look when it is dry.
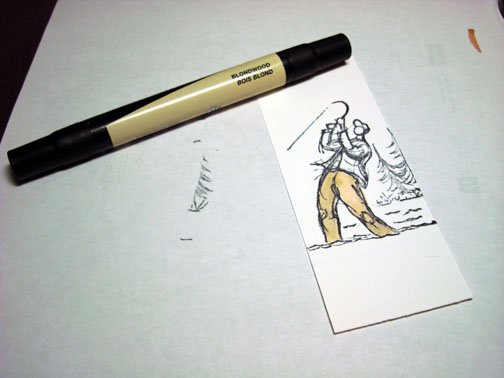
Colored his pants with Blondwood.
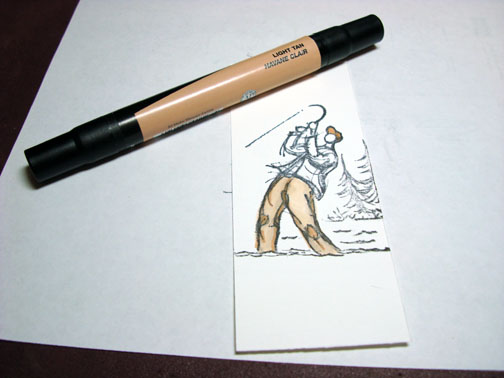
Colored the creases & knees of his pants with Light tan.
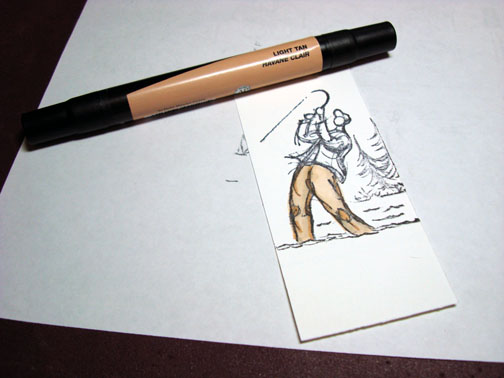
Also colored his hat with Light Tan.
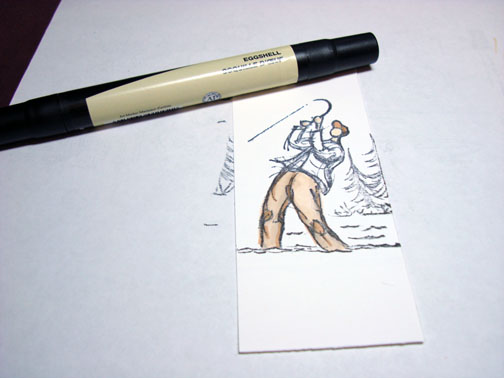
Colored his face and hands with Eggshell.
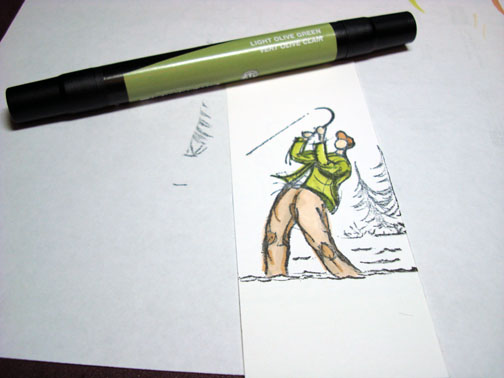
Colored his jacket with Limepeel.
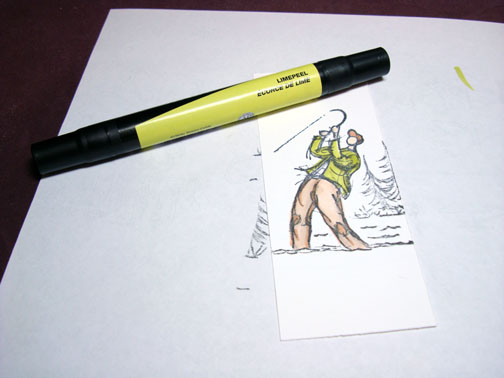
Colored the creases of his jacket with Light Olive Green.
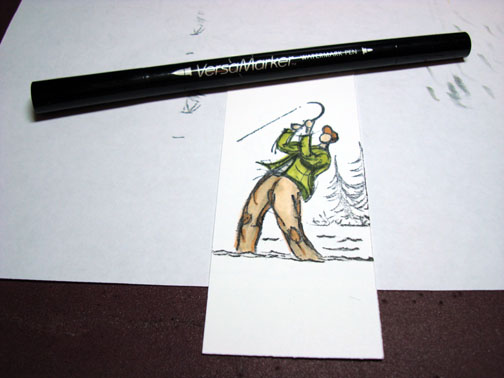
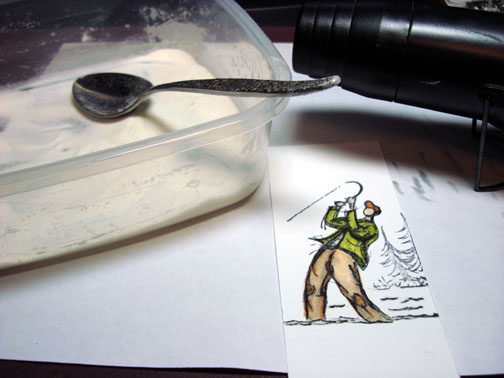
Colored over the fisher man with a Versamark marker and then heat embossed him with clear embossing powder and a heat gun.
Brayered Soft Sky ink on the sky area of the card stock.
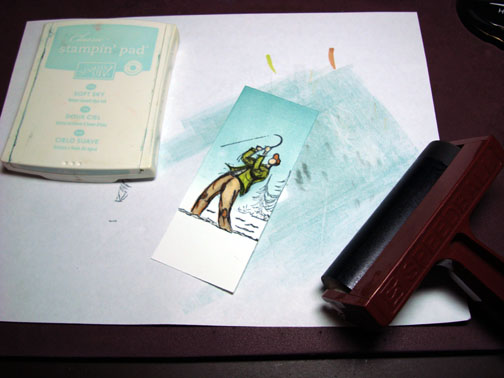
Brayered Not Quite Navy at the top of the card stock not completely covering the Soft Sky ink.
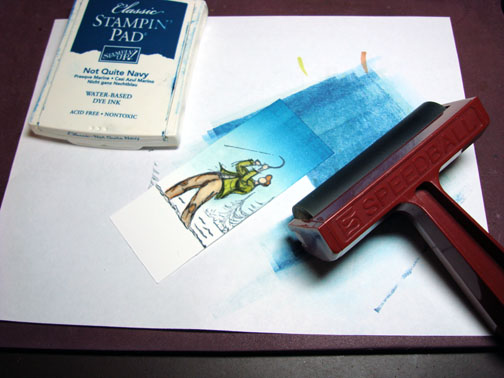
Brayered Not Quite Navy ink on the water area of the card stock.
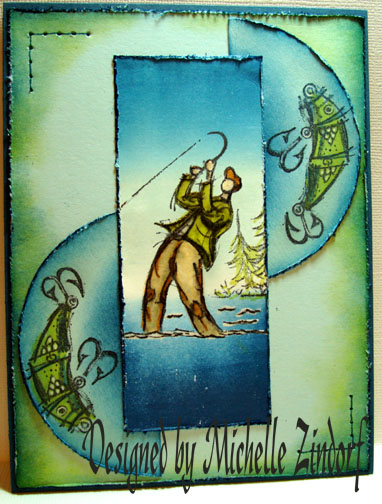
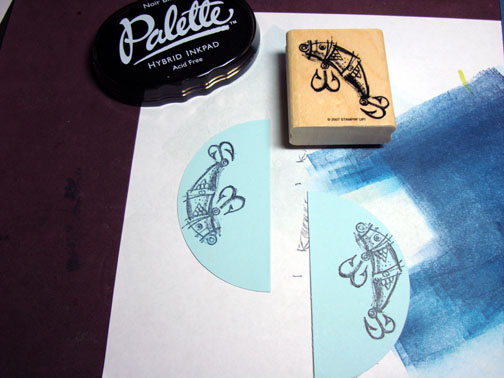
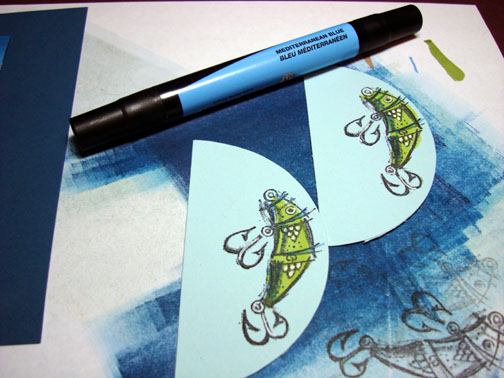
Used my curvy cutter to cut a circle from Soft Sky card stock. Cut the circle in half. Stamped the lures with Black ink on each half.
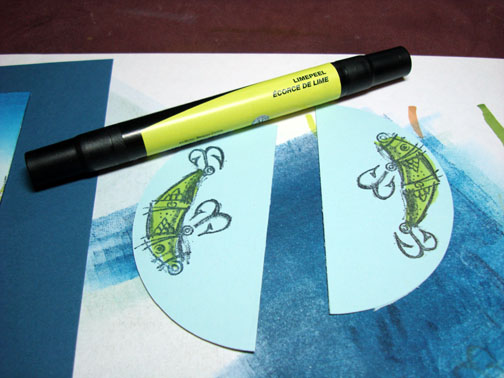
Colored Lures with Limepeel marker.
Added White Gel Pen highlights on his gills and on the hooks.
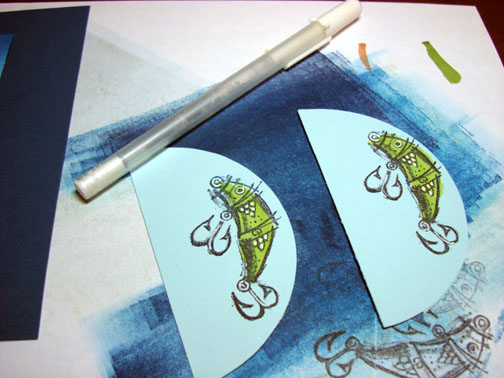
Added some stripes of Mediterranean Blue on the lures.
Sponged on Soft Sky ink on the curved part of each half circle. Ooops, missed taking a picture of this but I also, sponged on Not Quite Navy ink on the outer most part of the circles and under the lures.
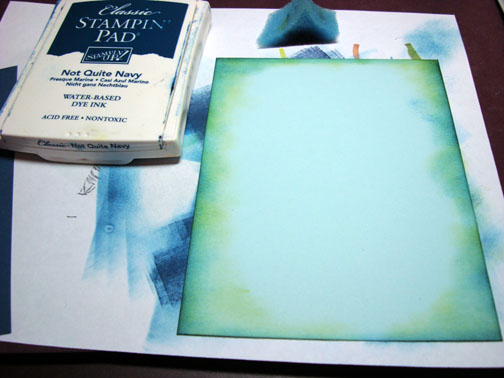
Sponged on Old Olive around the edges the Soft Sky card stock panel.
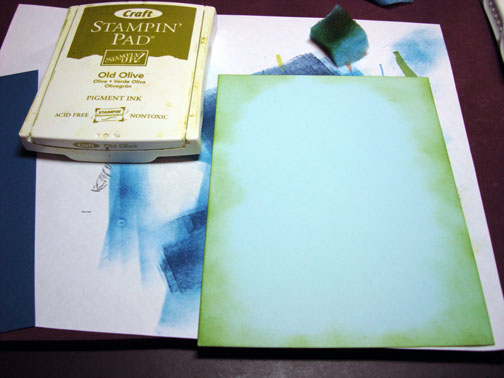
Added some Not Quite Navy sponging around the edge of the panel too.
Used a distressing tool and distressed the half circles, main image panel and Soft Sky panel edges. Drug each distressed edge across a Night of Navy ink pad to make the white edges dark.
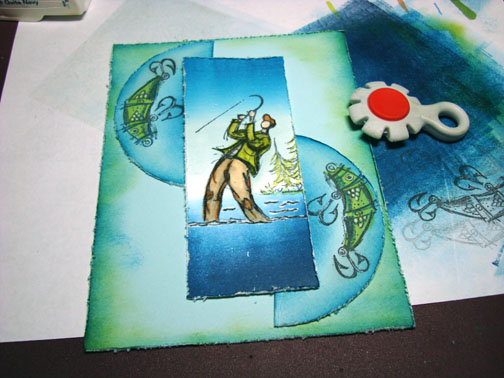
Assembled card front.
Used my piercing tools to pierce holes in the upper left and bottom right corners of the card front.
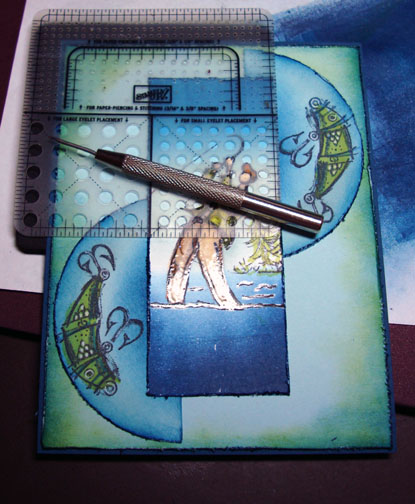
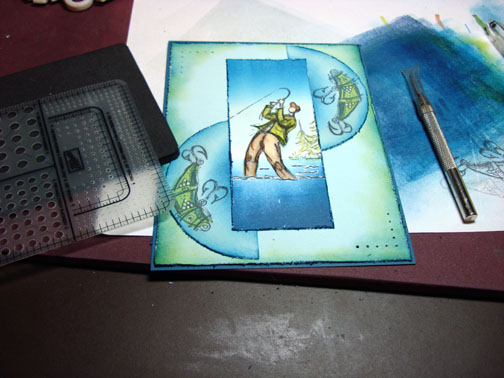
Used a Not Quite Navy Marker and created faux stitching by running the marker from one hole to another.
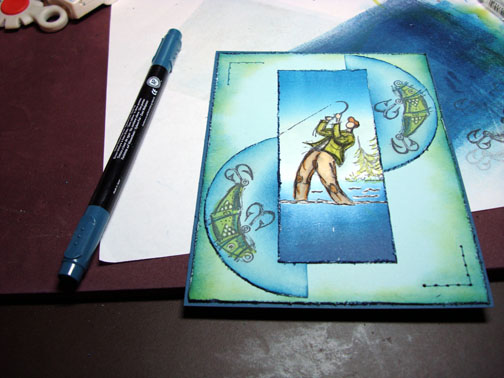
Here is the completed 5″ x 6.5″ card.
Hope your day is filled with creative challenges that will bring growth to your crafting!
Until next post. . . . . .
Michelle

Beautiful! Your cards are so great, this is definitely a masculine card, but as I think of it, most of yours could be for a male or a female. Thanks again for all that you do to share with us!!
I absolutely love it. I saw this yesterday on SplitCoast and hoped you’d do a tutorial. Your coloring is wonderful. The distressed edges really add to this too. This is awesome!
I realize it’s got to take SO much longer for you to post the tutorials, but it’s SO appreciated! Thanx for the regular source of inspiration!
Taking the time here to thank you for doing your tutorials. When I use the techniques and tips you’ve shared, I feel I’ve created art that I would have never believed I could do. Thank you too for showing a photo of what piercing tools look like. I’ve always wondered and have made do with a large yarn needle but the effect was not as crisp. Where can I get these?
Phyllis asked “Thank you too for showing a photo of what piercing tools look like. I’ve always wondered and have made do with a large yarn needle but the effect was not as crisp. Where can I get these?”
Phyllis, my set is from Stampin’ Up.
Hello Michelle, I have been using the techinques and tips you have shared as well. Your card today is lovely. The colors are beautiful. Thank you for sharing with us. Blessings!
Yet another beautiful card Michelle, thank you again. Could I please ask what a curvy cutter is and where could I get one?
I love the movement you were able to create with this sketch and these images - really do get the feeling that he is yanking that fish out of the water! Awesome!
Carol asked “Could I please ask what a curvy cutter is and where could I get one?”
Carol, a Curvy Cutter is a cutting device that attaches to a template and when you move the cutter it cuts the template shape. They have different templates for the cutter, such as circle, oval, retangles etc. I purchased mine at Wal-mart.
Fintastic! (Oh, wait…wrong set, lol!) I just KNEW that somebody would eventually vindicate this set, and it only makes sense that it’s you, Michelle! His lack of a face has always held me back from getting this set, but you make it gorgeous! Thanks so much for all the effort you put out for us. It’s definitely appreciated!
Betsy
Gorgeous Michelle! I love how this is soft but masculine at the same time! Great colors and these images work great with this sketch!
only you can take a stamp I would think is awful and make it awsome. You rock.
Great card, as are all your cards…I was wondering if there is a difference between the prismacolor markers and the SU markers? Meaning, do they color the same or different, does one set have more of a color spectrum than the other, does one color (blend) better than the other, etc. ? ‘Cause your card today looks more bold to me than I think it would if you’d used the SU markers instead. Also, thanks for all your hard work and desire to share. Dana
Dana asked “I was wondering if there is a difference between the prismacolor markers and the SU markers? Meaning, do they color the same or different, does one set have more of a color spectrum than the other, does one color (blend) better than the other, etc. ?”
Dana, The Prismacolor markers are alcohol based. You really just have to try them to see the difference. There are a lot of varying opinions regarding the subject.
Take a look at the photo above of all my Prismacolor markers. There is definately a larger color range in the Prismacolor.
Love the card!!! Just nice to see the beautiful things you do!
Thanks
I never thought of that stamp but you certainly have me thinking of purchasing it. Your tutorials are great and I appreciate that you answer the comment questions people have. You are a very talented and helpful teacher. Thanks so much.
Retired Heather
I don’t have prismacolor markers and thought I would try this with prismacolor pencils. So, does it matter which brand of black ink I use? Do you clean your brayer after each use? and with what? Or do you just roll it on paper to get the ink out before you use your next color?
Another great tutoial Michelle!! I love how you store your Prima markers
I’m going to look for something like that for me. And the binder showing you
the colors is great. You wouldn’t happen to have saved that spredsheet
would you? If you did I would love for you to share it with me. So I can do
mine that way… Maybe I’ll use them more if I can see them.
Thanks so much again- yet another classy card! The colours are wonderful. I’ve had the Prisma markers for a while, and haven’t done much with them, might have to drag them out now. What a great idea for the binder! Especially where you have drawn each colour in so you can see what it *really* looks like.
I always read the comments in your blog too, because you are so generous to answer our questions. There’s always something I learn from you!
I love everything that you do on this blog. Your’s is the first place I go whenever I log on. I would love to see a card done with this set from Gina K. Do you ever use Tombow Markers and do watercolouring??? I want to try your brayering techniques but I haven’t been able to because I just moved and all my stuff is still packed. But I come here every day and dream of cracking out my brayer and inks again.
absolutely brilliant - your use of the brayer is inspiring! thanks for sharing your talent with all of us.
WOW this is beautiful. I just love all your details.
Just love what you have done with this challenge, awesome coloring!
Got your link from Yvonne Campbell who raves about your cards on her site. Now I can see why.
I absolutely love your tutorial on the fishing card. It is so hard to make a male card. Will have to keep this one in mind for my DH but would love to buy the stamp set which you dont seem to be able to get here in Australia. Oh well, will have to us my imagination. Love the pen organisation - I am a visual person too (I had to make a sample out of my cardstock so I knew what colours I had) Well done!!!!!!!!!!!
This has such great colours and movement! TFS