May 14 2008

Butterfly Season - Tutorial

Published by zindorf at 4:20 am under Tutorials

dsc03866.jpg

This was created using the sketch challenge from Split Coast Stampers SC176.  These sketch challenges really get my mind racing.  Here is the link if you would like to play along too:

http://www.splitcoaststampers.com/forums/showthread.php?t=347754
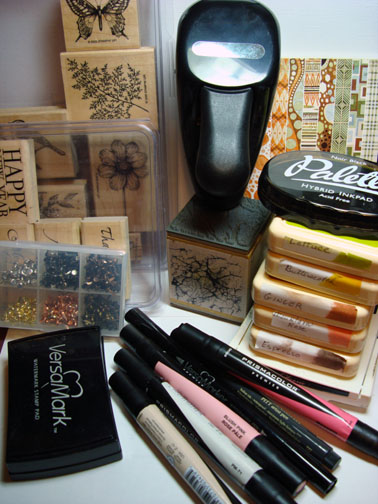
Supplies:

Stamps: Stampin’ Up Touch of Nature & Holidays & Wishes, Stampendous Marble Texture Cube
Paper: Stampin’ Up Whisper White, River Rock & Going Gray, Basic Grey DP Archaic
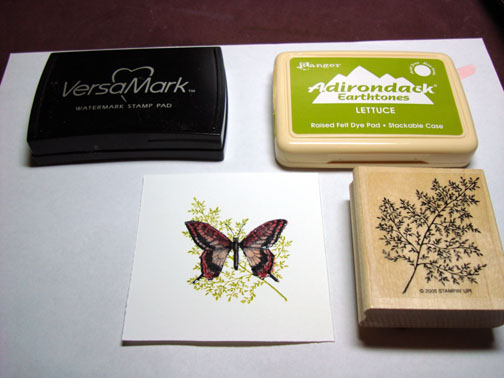
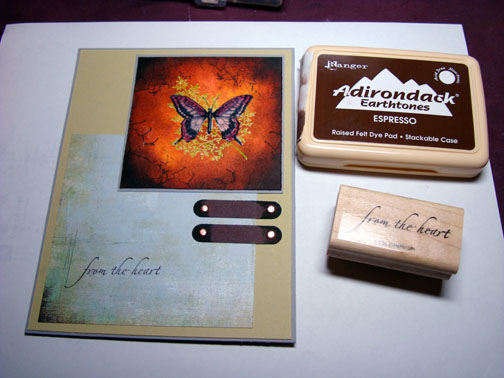
Ink: Stampin’ Up Black, Adirondack Lettuce, Butterscotch, Ginger, Mountain Rose & Espresso, Palette Noir Black
Accessories: Versamark Marker & Pad, Clear embossing powder & heat gun, Prismacolor markers Magenta, Blush Pink, Buff & Deco Peach, Sponges, Brads, Window Punch

dsc03869.JPG

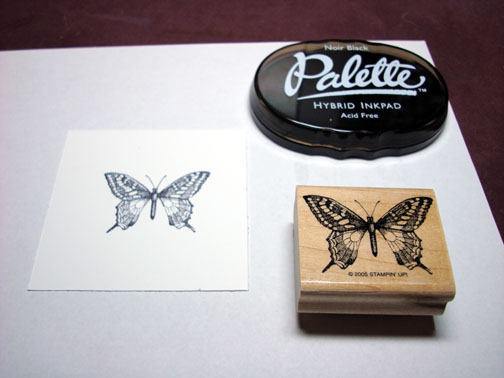
Stamped Butterfly with Palette Noir Black ink on Whisper White card stock.

dsc03842.JPG

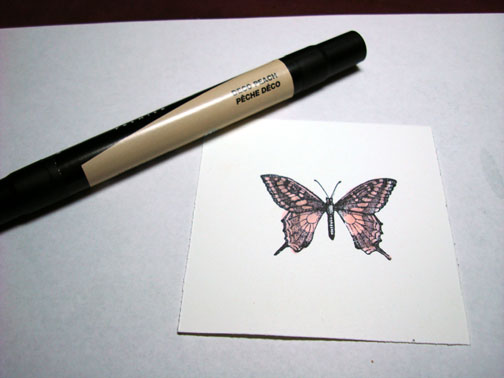
Colored the butterfly wings in with a Prismacolor Deco Peach marker.

dsc03843.JPG

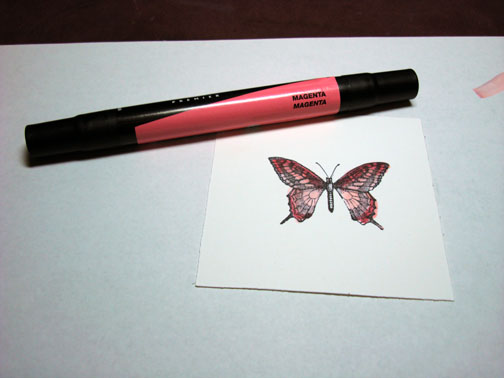
Colored the tops and bottom of the wings with a Prismacolor Blush Pink marker.

dsc03844.JPG

Colored the very tops and bottom of the wings with a Prismacolor Magenta marker.

dsc03845.JPG

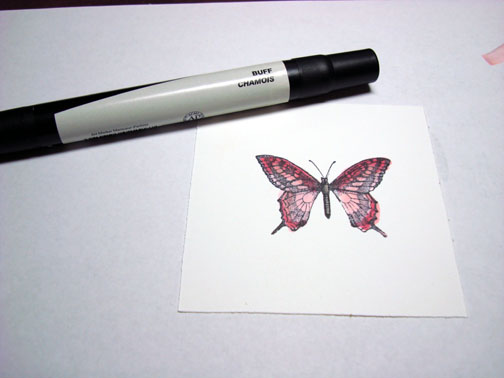
Colored the butterfly’s body in with a Prismacolor Buff marker.

dsc03846.JPG

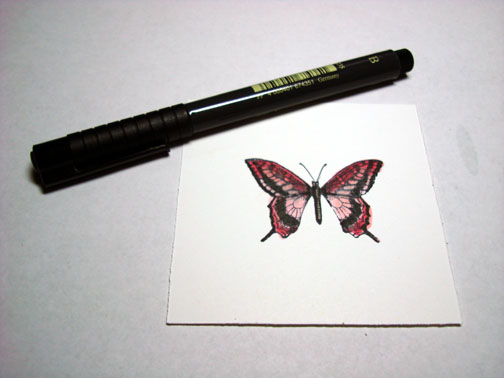
The black in the butterfly’s wings was look dual so I darkened them with a black marker.

dsc03847.JPG

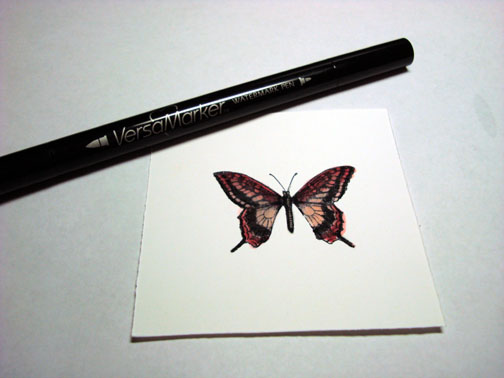
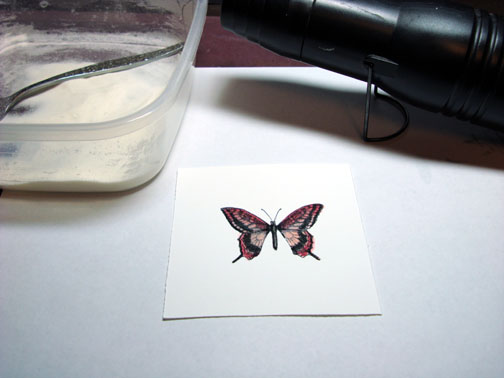
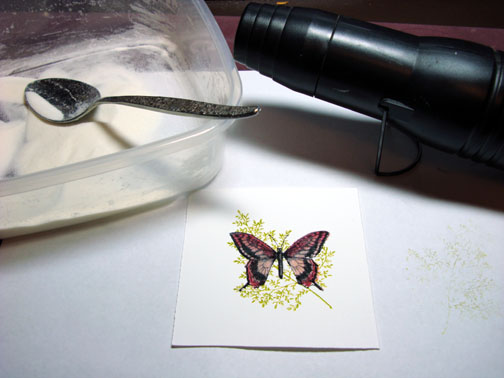
Being careful to stay in the lines, colored over the butterfly with a Versamark marker and heat embossed it using clear embossing powder and a heat gun.

dsc03848.JPG

dsc03849.JPG

Over stamped the Butterfly with the leaf stamp by first loading the stamp with Versamark and then Lettuce ink before stamping.

dsc03850.JPG

Heat embossed leaf with clear embossing powder and a heat gun.

dsc03851.JPG

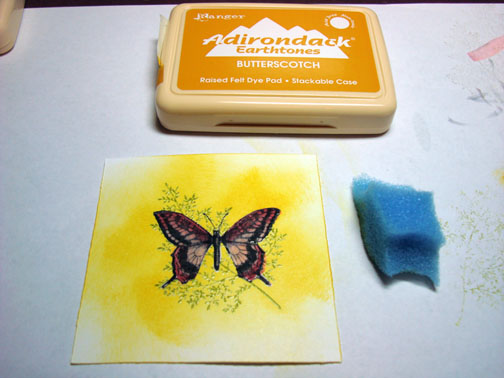
Sponge Butterscotch ink on the card stock using a circular motion.

dsc03852.JPG

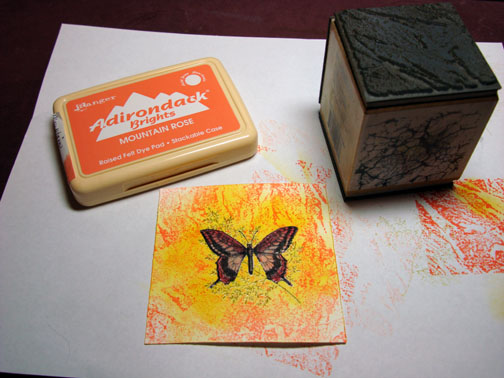
Stamped Side “A” of the marble texture cube with Mountain Rose ink.  I missed taking a picture of it, but I sponged some of the Mountain Rose ink on the card stock after the cube stamp ink had dried some.  (Sorry, but it is very early in the morning when I create these tutorial, lol)

dsc03854.JPG

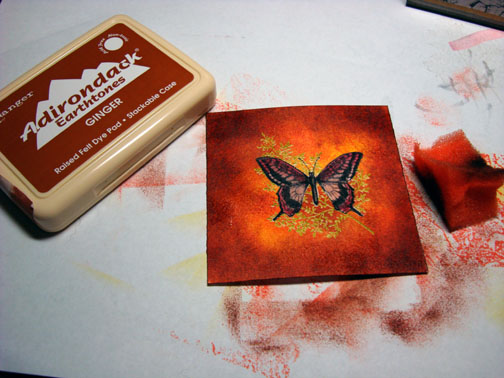
Sponged some Ginger ink around the outer edges using a pouncing motion.

dsc03855.JPG

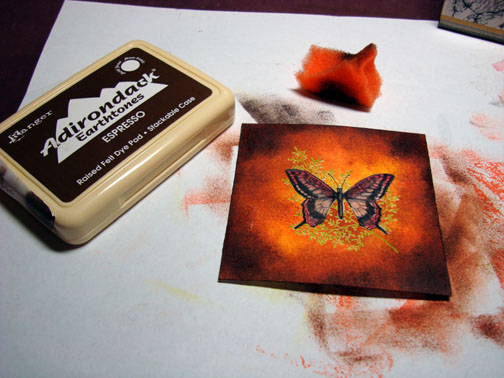
Getting darker yet by sponging some Espresso ink around the outside edges, not covering the Ginger ink completely.

dsc03856.JPG

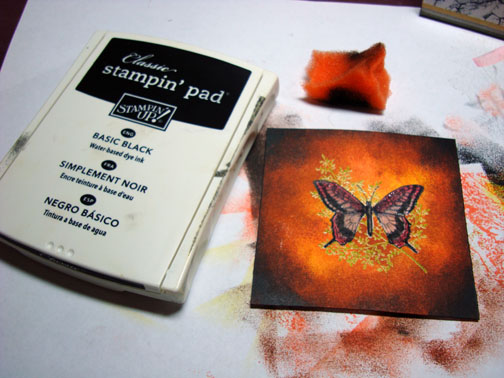
Getting even more darker, sponged black ink at the corners.

dsc03858.JPG

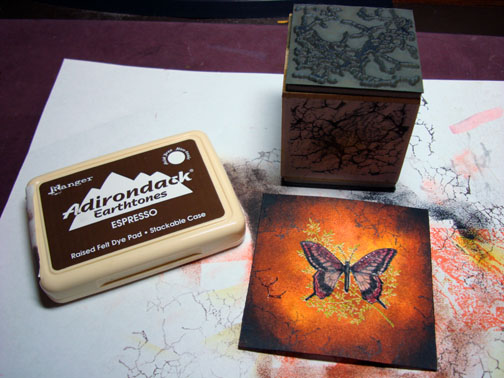
Stamped side “C” of the marble texture cube around edges with Espresso ink.

dsc03859.JPG

After ink has dried for a few moments I took an old rag and wiped the ink from the embossed images.

dsc03860.JPG

Punched 2 window punches from Chocolate Chip card stock and drug the ends of them across a black ink pad.

dsc03861.JPG

dsc03862.JPG

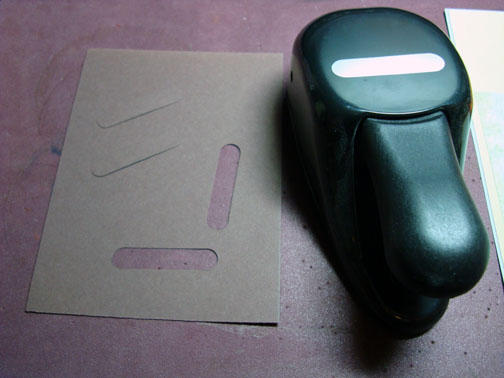
Oops!  Sorry you had to look at my grungy stamping pad in the last picture,  lol.  Really keeping it real this morning!

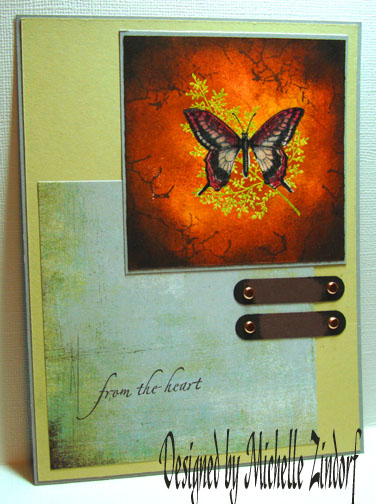
Assembled card front and stamped the sentiment in Espresso ink.

dsc03863.JPG

Here is the finished creation measuring 5″ x 6.5″. 

dsc03866.jpg

Hope you enjoyed this tutorial and will give it a try!

Hope your day is filled with beautiful sun shine and Spring weather!

Until my next post. . . . .

Michelle

44 Responses to “Butterfly Season - Tutorial”

  1. Cathy Steward, jay maineon 14 May 2008 at 6:25 am

    this card is beautiful, i enjoy your cards so much, i hope you know how much we all look forward to checking you out every morning. you start my day everyday.THANK YOU SO MUCH. your the best

  2. Druon 14 May 2008 at 7:13 am

    What a great technique - thanks so much for sharing with us. Dru

  3. Brenda (happybee)on 14 May 2008 at 7:17 am

    This is really beautiful. Another keeper one for me. Thanks !

  4. Evelynn----Ks.stamperon 14 May 2008 at 7:19 am

    Love this butterfly, he looks lilke he is going to fly away. Your colors are just beautiful, honestly Michelle you have more talent in your little finger, than I do in my entire body. Thanks for all your tutorials.
    Ks.stamper

  5. Tonnieceon 14 May 2008 at 7:22 am

    Stunning, just stunning.

    Thaks Michelle

  6. sue ciuccion 14 May 2008 at 7:41 am

    Michelle, you do such beautiful work! Every time I look through the day’s gallery, it’s soooo easy to pick out your masterpieces. They’re always the most beautiful ones. We all wish we had your creativity and talent! Would you consider doing a tutorial on sponging? I’ve tried it a number of times, but canNOT get it to look good! I know it’s so basic that you think nobody could need this, but I can’t be the only one out there!
    Thanks,
    Sue

  7. zindorfon 14 May 2008 at 7:46 am

    Sue asked “Would you consider doing a tutorial on sponging? I’ve tried it a number of times, but canNOT get it to look good! I know it’s so basic that you think nobody could need this, but I can’t be the only one out there!”

    Sue, I’ve been asked this many times before. I would gladley do it but I’m having a difficult time trying to figure out how to get it to translate to pictures. Rest assured, it is on my list of things to work on. :)

  8. Ann C.on 14 May 2008 at 7:47 am

    Beautiful card as always Michelle! I look for your blog every morning. And I appreciate seeing your “real” process - grungy & all! What a beautiful butterfly.

  9. Karen Lindsayon 14 May 2008 at 8:07 am

    All your creations are just gorgeous, but this one really catches my eye. It’s “Oh, so pretty!”

    Karen

  10. KATon 14 May 2008 at 8:34 am

    Michelle - this is a beauty…. Just love the way the butterfly is resting on the plant and looks like it is realy to pop off the paper at any minute!!!

  11. Julia (artystamper)on 14 May 2008 at 8:55 am

    Beautiful butterfly- love all the dark shadings - it really makes the butterfly soar!

  12. Debieon 14 May 2008 at 9:05 am

    Your butterflies are beautiful! Gorgeous card Michelle.

  13. 2stampis2bon 14 May 2008 at 9:19 am

    Your artwork is so beautiful!

  14. Sharon in NEon 14 May 2008 at 9:48 am

    Visiting your blog is such a special treat for me.

  15. Besseyon 14 May 2008 at 11:25 am

    Gorgeous card as always! Will have to get a mirror image stamp for sure.
    Thanks for the tutorials, right after I look at your card, I want to get the stamps and ink out. lol I do get them out, only they don’t look like yours, although I enjoy it so. To me it’s relaxing. Thanks!

  16. Debra Hogon 14 May 2008 at 12:28 pm

    Beautiful as always!! I don’t have that cube but am ordering it for sure, but was wondering what side you used. Your usually say side A or B. Thanks for always sharing your wonderful talents.

  17. christineon 14 May 2008 at 3:30 pm

    WOW

  18. Lynne P.-D.on 14 May 2008 at 3:31 pm

    I love your butterfly. The colors are so warm and rich. So life like. Your talent is so awe inspiring.

  19. Kathyon 14 May 2008 at 3:45 pm

    Beautiful….love the color combination! Thank you Michelle for being a bright spot in the day and bringing joy through your art and your generosity in sharing your talents! Hope you know how much you are appreciated :)

  20. Linda Marieon 14 May 2008 at 4:10 pm

    BRILLIANT! I really appreciate your time in giving us a step by step tutorial of your artwork.

  21. Carolon 14 May 2008 at 6:15 pm

    I think all of your cards are outstanding works of art! Just when I think I’ve found my favorite, you post another new one that blows me away! LOL I’m learning how to sponge and shade from reading these tutorials, and it’s opened up a whole new world of stamping for me. TYSM for sharing your amazing talents and making it so much easier for us to create beautiful cards with these easy-to-understand tutorials!

  22. Monicaon 14 May 2008 at 7:23 pm

    Your cards are so “breathtaking”. I love your work–wished you lived in NJ, I’d be knocking on your door for lessons!! I love your brayer cards, but your sponging is a master piece too. You have such a wonderful eye for colors. They all just seem to “pop” right off the paper. Thank-You so much for sharing all of this with us..

  23. lacyquilteron 14 May 2008 at 10:47 pm

    This is fabulous. Your image just glows.

  24. Melissa (SCS: stampin_melissa)on 14 May 2008 at 10:56 pm

    Michelle, my jaw literally dropped when I saw your card. This is truly spectacular!

  25. Beckyon 14 May 2008 at 11:14 pm

    just beautiful, coming here is like Christmas morning, opening up a present. :) thanks for sharing.
    Becky

  26. Jamie Wilcoxon 15 May 2008 at 12:34 am

    Oh Michelle, this is so pretty!! The colors are so vibrant. I’m always amazed that you can take a couple of stamps which seem unrelated and make them come out as a work of art. I’m beginning to understand through your work to just let go and try some things which may be out of the box — it’s just terrific to look forward to your tutorials and thank you so much for your generous spirit of sharing the way you do!

  27. Heather Fullertonon 15 May 2008 at 4:07 am

    I love your work. Butterflys are the best. I notice you use prima markers. Do you think they are more worthwhile than copics? I have the pencils and I love them and I have a couple of copics and I am not sure I am enjoying them. Just checking with the Queen of Answers. Thanks for sharing your talent.
    Retired Heather

  28. Heather Fullertonon 15 May 2008 at 4:08 am

    I love your work. Butterflys are the best. I notice you use prima markers. Do you think they are more worthwhile than copics? I have the pencils and I love them and I have a couple of copics and I am not sure I am enjoying them. Just checking with the Queen of Answers.
    Retired Heather

  29. zindorfon 15 May 2008 at 4:11 am

    Heather asked “I notice you use prismacolor markers. Do you think they are more worthwhile than copics?”
    Hi Heather,
    I’m definitely not the expert on markers and never have used Copic. I did the research on the whole Copic verses Prismacolor markers and found there was not enough difference in the products for me to pay the price for the Copics. I only use them for card making so the Copics at $5 a piece is a bit steep for me. I purchased one of every color of the Prismacolor markers from Ebay and paid $249.00. So far I am very happy with them.
    You might want to check out the Prismacolor website. They have videos showing artist using the different products. There is a nice video of an artist using the Prismacolor markers so you will be able to see how nicely they lay down on the paper.
    Well there is my two cents on markers, lol.

  30. cheryl Hortonon 15 May 2008 at 4:43 am

    Oh thank you so much! I have been up all night with a sick child, imagine my sigh of amazement and joy when your blog with this project shows up on my screen. Absolutely beautiful! Thanks for turning a very exhausting morning into something bright.

  31. Janet Siskon 15 May 2008 at 5:09 am

    I am so glad that I found your blog. Your work inspires me to try techniques that I maybe wouldn’t have, thinking that they were too difficult. This butterfly is awesome. Thanks for being willing to share your artistry with the rest of us in cyberland!!!

  32. Beth Normanon 15 May 2008 at 6:08 am

    My heavens, this card is breathtaking. I can’t stop looking at it.

  33. Terrion 15 May 2008 at 7:01 am

    Michelle, This is gorgeous as usual! How do you come up with these!? I do have a question. After you colored and embossed the butterfly and stamped over it with the leaf stamp and embossed it, did you wipe off the butterfly first before embossing the leaf, or did it resist the ink and embossing powder as well? Thanks for these wonderful tutorials!

  34. Sandyon 15 May 2008 at 7:03 am

    Your butterfly card is the ultimate. It is beautifuly using just the butterfly and the leaf. Then it turns into a masterpiece. For Copics at a better price than $5 go to Carpe Diem. They have them for $3.95. The catalog shows $5.95 for list and their price for $4.46 but when you put your order in the cart and view the cart, the price will come up at $3.95. This price is suppose to be good through the end of the year. I love them. But, I never purchased the Prismas.

  35. zindorfon 15 May 2008 at 7:11 am

    Terri asked “After you colored and embossed the butterfly and stamped over it with the leaf stamp and embossed it, did you wipe off the butterfly first before embossing the leaf, or did it resist the ink and embossing powder as well?”
    Terri, I didn’t wipe it off. Some of the embossing powder will stick to it, but that’s ok since it is clear. :)

  36. Beckyon 15 May 2008 at 7:40 am

    Another beautiful card. I’m thinking I need to purchase the marble cube stamp.

  37. Laurieon 15 May 2008 at 8:44 am

    Michelle, this card is stunning. There is something about the depth of color on the butterfly and the softness of the background color. Amazing!

  38. Conniecrafteron 15 May 2008 at 8:45 am

    Beautiful, love the background to your lovely butterfly, love how it seems to glow!

  39. Danielleon 15 May 2008 at 9:03 am

    Wow, that butterfly glows! Michelle it’s just gorgeous! I can’t wait to try this! Thank you for sharing your gorgeous card and technique!

  40. Debra Hoggon 15 May 2008 at 9:59 am

    I just look over your tutorial and seen it [the one and only picture eh] thanks so much for including it. And truly I’m no good in the mornings and your creative juices are flowing and you find the time to include us in them with your tutorials so when I drink my tea I get my morining buzz. Again a big hug and thanks for all your hard work. You are definitely ‘a queen’ in my books, in more ways then one.

  41. Beckyon 15 May 2008 at 10:07 am

    This butterfly is astoundingly dreamy. I love love love all the effects you have made to this card. You are truly amazing and soooo talented. Everyday I wake up and can’t wait to check my email to see what you have made. Thanks for sharing it with us. It sure makes my day brighter. You are one talented lady. Thanks again…… Happy Stamping to all !!!

  42. GlendaCon 18 May 2008 at 12:00 am

    Just thought it was about time I left a comment of thanks. It always seems superfluous when there are so many other grateful comments, but I guess for everyone left, there could be a hundred of us grateful for your wonderful tutorials and ideas that haven’t left you a message.

    My attempts at following the tutorials always end up completely different to your work, but I am grateful to learn the techniques and copy the ideas, and maybe one day I’ll make something similar (or maybe not :-)

    Always looking forward to the next one,
    Glenda

  43. Janine Bon 19 May 2008 at 2:28 pm

    Michelle, I had a go at this one http://www.splitcoaststampers.com/gallery/photo/918922?cat=500&ppuser=132530. Thank you for your careful notes it made my attempt even though I didn’t have the same stuff so much easier.

    Having done this one I then tried one of my own using some of your techniques
    http://www.splitcoaststampers.com/gallery/photo/918935?cat=500&ppuser=132530. I still have a lot to learn

  44. Lisa Robbon 28 May 2008 at 6:27 am

    WOW! Thanks for your fantastic tutorials Michelle. I had so much fun having a go at this technique. My try at this can be found here - http://digitalfox.blogspot.com/2008/05/im-back.html. I didnt have the same inks as you but i ended up using all Stampin’ Up! Colours.

Trackback URI | Comments RSS

Leave a Reply