May 19 2008

Bloomin Cart - Tutorial

Published by zindorf at 7:36 am under Tutorials

dsc04019.jpg

I’m still feeling under the weather here.  Thought a bright cheerful card might make me feel a little better.  This Blooming With Love set from Stampin’ Up had not seen ink yet so I decided to use it for today’s tutorial.

Supplies:

dsc04023.JPG

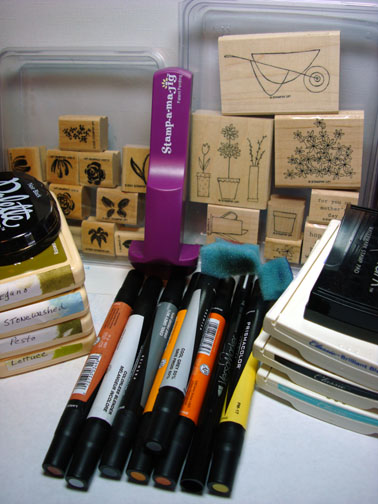
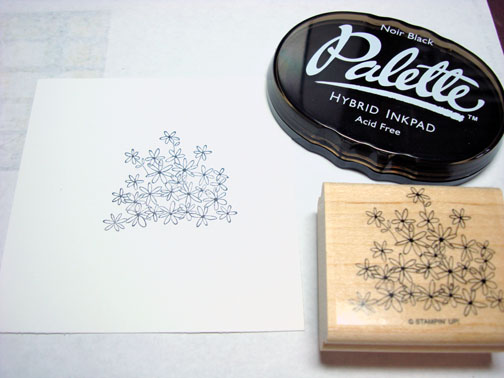
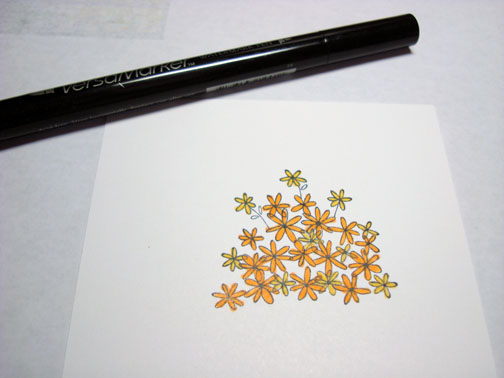
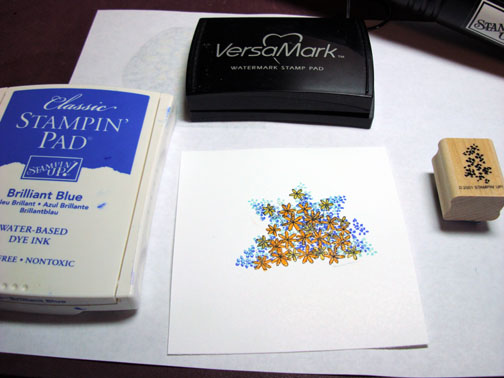
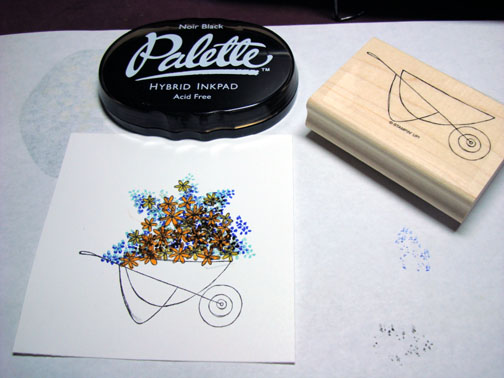
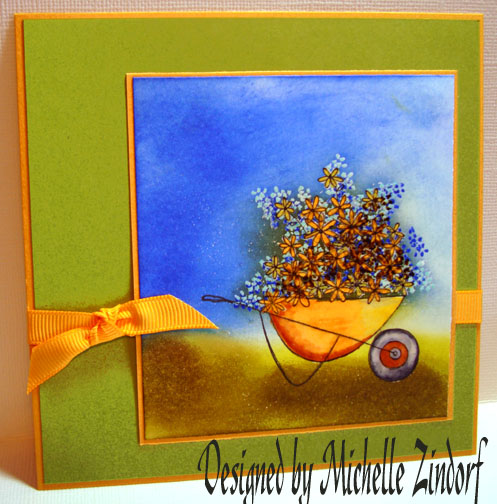
Stamped Flowers with Palette Noir Black ink on Whisper White card stock.

dsc03991.JPG

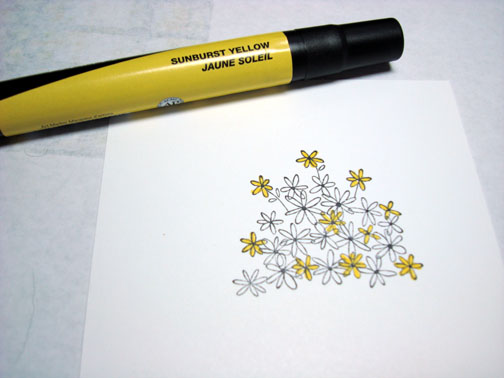
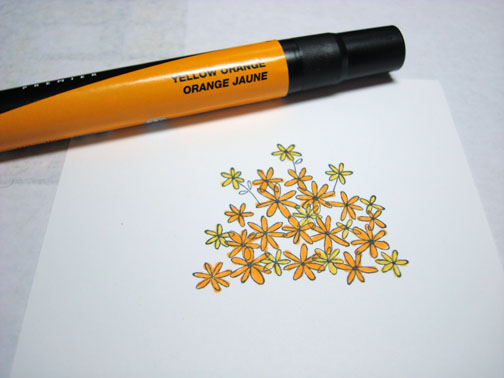
Colored some of the flowers with a Prismacolor Sunburst Yellow Marker and some with a Prismacolor Yellow Orange marker.

dsc03992.JPG

dsc03993.JPG

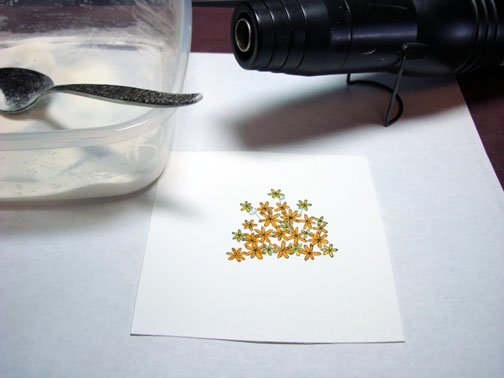
Colored over the flowers with a Versamark Marker and heat embossed them using clear embossing powder and a heat gun.

dsc03994.JPG

dsc03995.JPG

Stamped the stamp from Watercolor Minis set randomly over the flowers by first loading the stamp with Versamark and then with Cool Caribbean ink.  Heat embossed them using clear embossing powder and a heat gun.

dsc03996.JPG

dsc03997.JPG

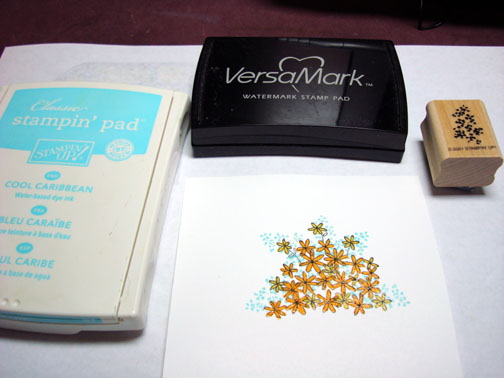
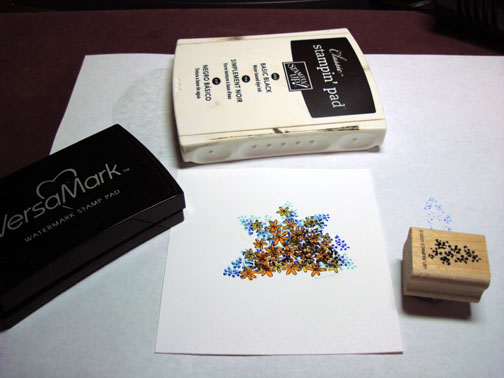
Repeated last step, but used Brilliant Blue ink and Versamark, heat embossed using clear embossing powder and a heat gun.

dsc03998.JPG

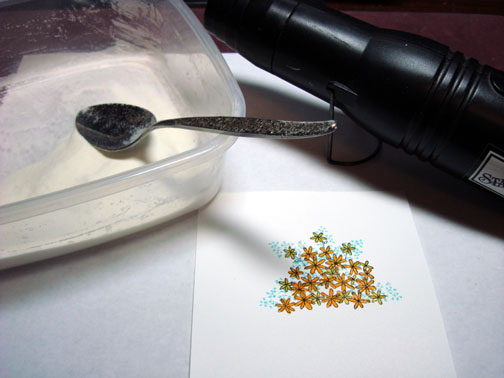
Same steps again, but used Versamark and black ink and only stamped a couple of times in the middle of the flowers.  Heat embossed with clear embossing powder and a heat gun.

dsc03999.JPG

dsc04000.JPG

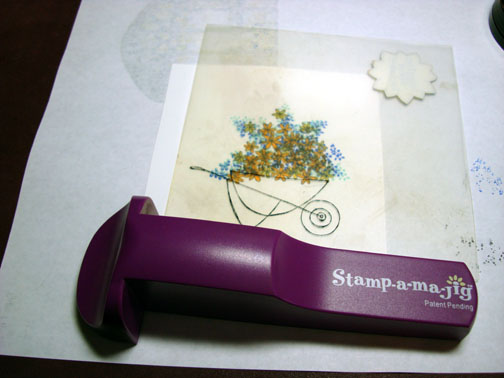
Using my Stamp-a-ma-Jig for placement, I stamp the cart with Noir Black ink.

dsc04001.JPG

dsc04002.JPG

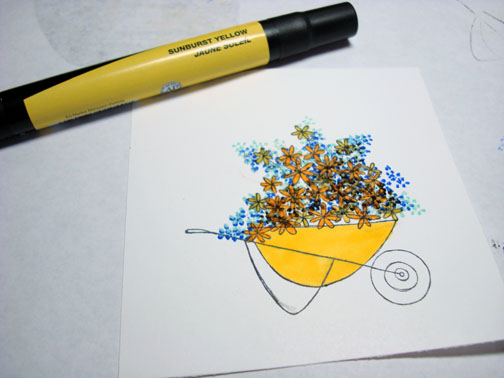
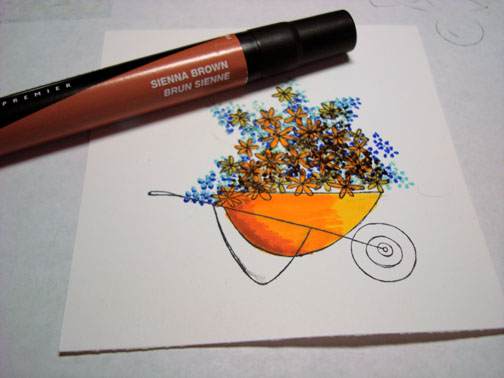
Colored the cart with a Prismacolor Sunburst Yellow marker.

dsc04003.JPG

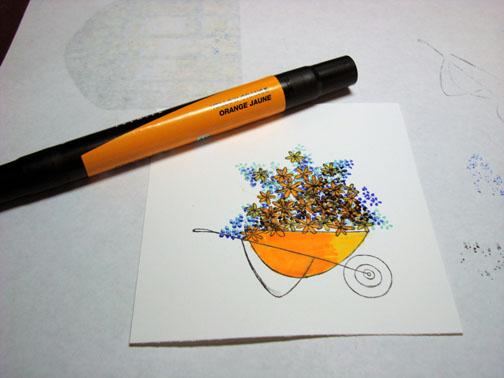
Went over part of the cart with a Prismacolor Yellow Orange Marker.

dsc04004.JPG

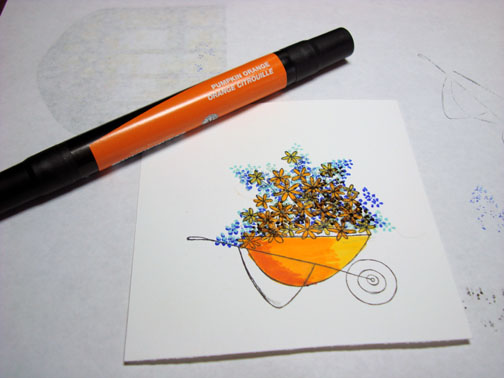
Added some Prismacolor Pumpkin Orange Marker at the left side of cart.

dsc04005.JPG

Lastly added Prismacolor Brun Sienne along left side and bottom of cart.

dsc04006.JPG

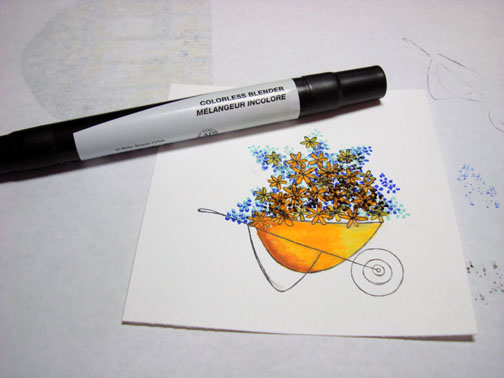
Went over the cart with a Prismacolor Colorless Blender to blend the colors.

dsc04007.JPG

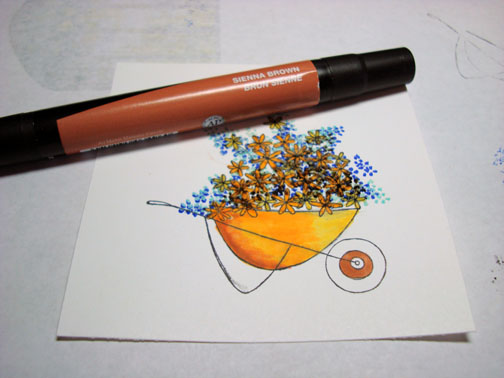
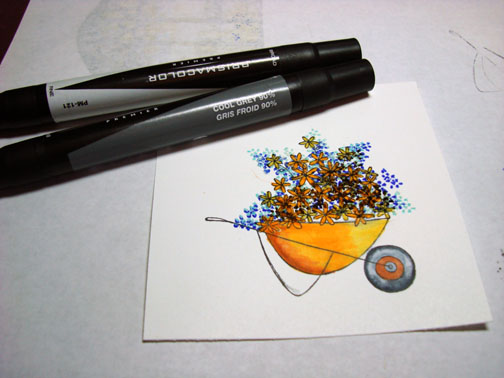
Colored the Wheel with Brun Sienna. 

dsc04008.JPG

Added Cool Grey 50% to wheel.

dsc04009.JPG

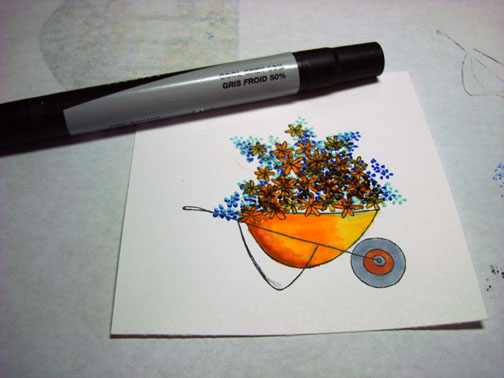
Added Cool Grey 90% around the outer edge of the wheel and used the blender marker to blend the two grey colors a bit.

dsc04010.JPG

Note:  I missed taking photos of this but I colored the cart with a Versamark marker and heat embossed it using clear embossing powder and a heat gun.

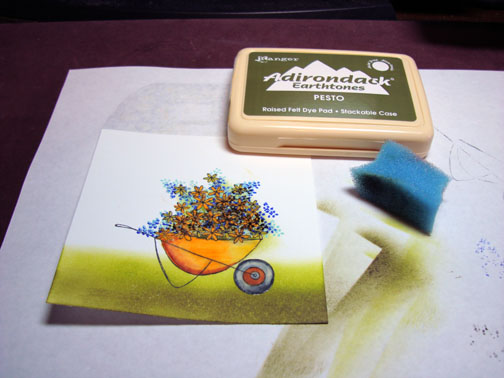
Sponged Lettuce ink at the bottom of the card stock.

dsc04011.JPG

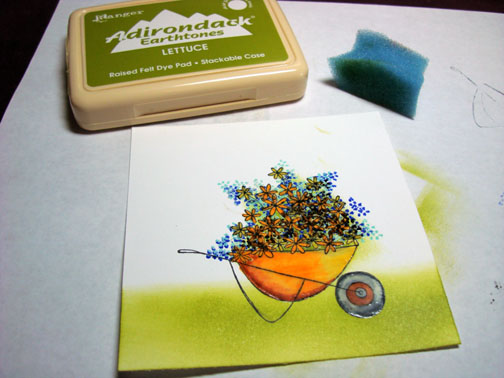
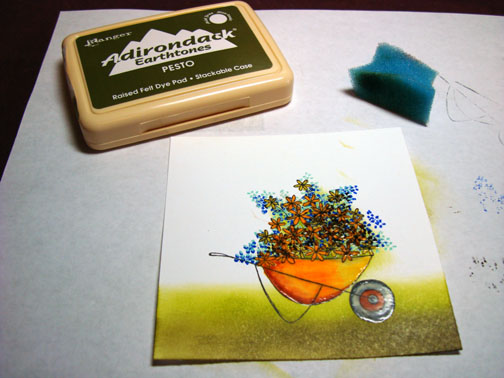
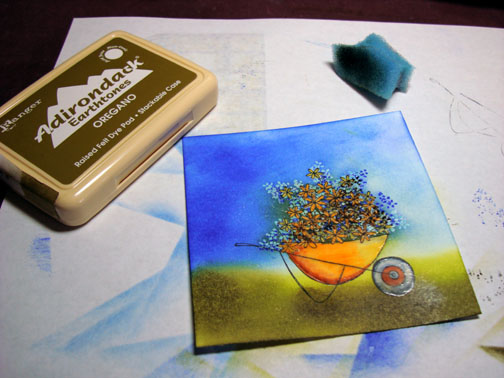
Sponged Oregano ink at the bottom of the card stock, not covering the Lettuce ink entirely.

dsc04012.JPG

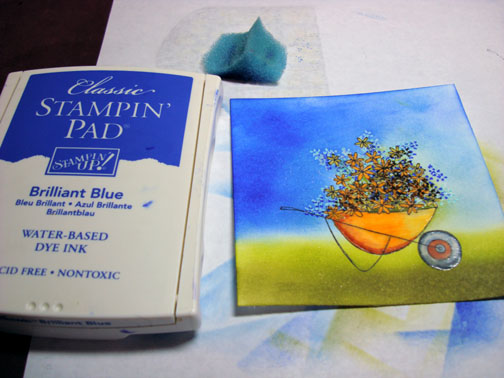
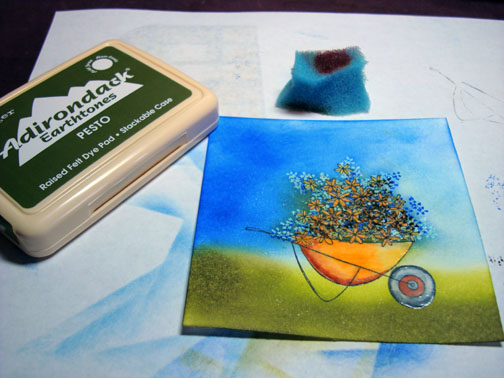
Sponge Stonewashed ink in the sky area.

dsc04014.JPG

Sponged Brilliant Blue ink on the left 2/3rds of the sky area.

dsc04015.JPG

Sponged Oregano ink under the cart as a shadow.

dsc04017.JPG

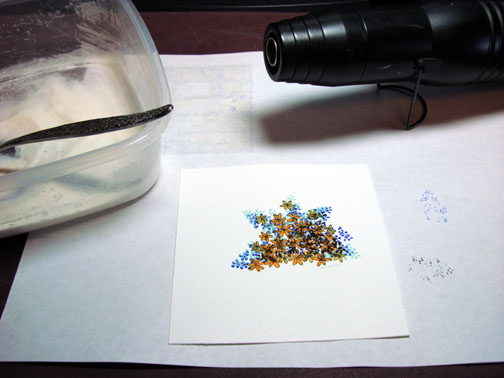
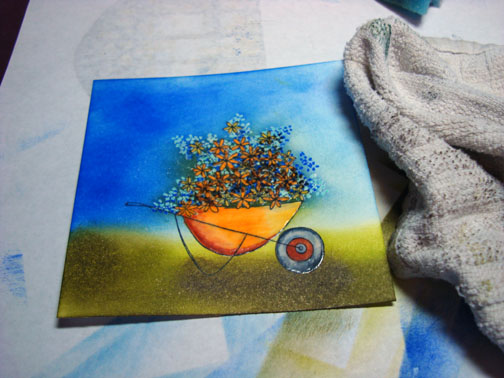
Wiped ink from embossed images.

dsc04018.JPG

Assembled card measures 5.25″ x 5.25″.

dsc04019.jpg

28 Responses to “Bloomin Cart - Tutorial”

  1. Shellyon 19 May 2008 at 8:07 am

    Sorry you are still under the weather Michelle. This is gorgeous, thanks for the step by step photos!

  2. Michelle Ron 19 May 2008 at 8:18 am

    I hope you’re feeling better soon. Your card is awesome….so happy and cheerful. Beautiful work!

  3. Evelynn----Ks.stamperon 19 May 2008 at 8:37 am

    Great job for not feeling well. Love the bright colors, and that stamp set is a keeper. As always Thanks for the wonderful tutorials and keep them coming.
    Evelynn

  4. Laurie Helgasonon 19 May 2008 at 9:17 am

    The orange flowers pop and gives dimension to the flowers. Another beauty.

  5. StampinCathyon 19 May 2008 at 10:53 am

    Love your card! It’s so bright and cheery. Very easy to follow tutorial too.

  6. Lynne P.-D.on 19 May 2008 at 11:22 am

    A super card. Love the bright colors and the cheerfulnes. Hope you are feeling better soon. Love the tutorial too.

  7. Judy Raderon 19 May 2008 at 1:12 pm

    This card looks as beatiful as you garden. Thank you for the tutorial, as usual it is so inspirational.

  8. Debieon 19 May 2008 at 1:16 pm

    Absolutely gorgeous. You have a knack for making ordinary stamps look extraordinary!

  9. Eileen Mon 19 May 2008 at 1:19 pm

    Wow, you made me feel better with this wonderful work of art! I hope it made you feel better, too!
    I loved your garden photos yesterday, too. Things are a bit slower here in MN, but it does let me know things will be changing soon!

  10. Sandy Youngon 19 May 2008 at 2:43 pm

    Too cute ! That was my first reaction to another great card of yours. As always, your color blending is gorgeous. You make a simple little stamp set come alive and make us all aware of the possibilities of a set we might pass by. I also appreciate your putting the finished card size at the end.
    108″ in Phoenix today ! Got any great inspiration for the hot desert look?!?! Hope you feel better.

  11. Giovanaon 19 May 2008 at 3:02 pm

    Hi Michelle,
    I am so sorry to hear you are still feeling under the weather. I hope you feel better soon!!!
    Your card and instructions are awesome (as always).
    I love your blog, I will give this a try too!!!

    God bless
    Giovana

  12. Kathyon 19 May 2008 at 4:28 pm

    Thanks for brightening up my day with this pretty card! I never would have thunk it that blue flowers would pop against a blue sky, but they do so beautifully here! Hope you are feeling much better soon!

  13. Beth Van Brunton 19 May 2008 at 5:12 pm

    Love your combination of blues, sorry to hear you are blue too.

  14. Jamie Wilcoxon 19 May 2008 at 7:29 pm

    Michelle, I hope you get to feeling better soon! I think this card is fantastic — so happy and bright! Can’t look at it without smiling!

  15. Glitter Queenon 19 May 2008 at 7:43 pm

    Totally amazing as usual. Love the colours you put together, so bright and cheery. Lets hope this gets you feeling better.

  16. Melissa (SCS: stampin_melissa)on 19 May 2008 at 8:26 pm

    Gorgeous! I bought that Stampendous Marble Texture cube you use and a new VersaMarker today just because of you! ;) Don’t lose any sleep over it, I just had to have someone to blame! LOL!

  17. Sandyon 19 May 2008 at 8:51 pm

    I’m sorry you are not feel well. After this picture you should be feeling much better. This card is gorgeous. The brilliant colors say today is the day to be alive. It’s beautiful.

  18. Rebekkaon 19 May 2008 at 9:59 pm

    So sorry you are not feeling well, hope you felt better after you got done with this awesome card :). You do take the plain and make it beautiful, thanks.
    Becky

  19. Joanneon 20 May 2008 at 2:32 am

    Gorgeous card Michelle - I love the warm tones - and, of course, the flowers! Hope you’re feeling better soon.

  20. Nicole Steeleon 20 May 2008 at 3:45 am

    Michelle, I just love this card! You have great talent in creating colorful, gorgeous cards with minimal stamps. You really know how to take an ordinary image and make it something spectacular. I can’t tell you enough how much I look forward to your blog everyday! Thank you so much for sharing!

  21. Kerryon 20 May 2008 at 4:03 am

    So beautifil Michelle. I love the frilly, soft look that the little watercolor flowers added to the design. Another idea that would not have occurred to me. :(
    Every day you amaze me.

  22. DeanneSMon 20 May 2008 at 4:22 am

    Stunning! I just love what you have done with this set. I really hope we get it in Australia this year!! I am hanging for some gardening stamps like these.

    Just love this card so much.

    Deanne
    xx
    Sydney Australia

  23. Dawnon 20 May 2008 at 5:41 am

    love it Michelle…feel better soon…might help if it would quit raining and the sun would shine in OHIO!!!

  24. Tonnieceon 20 May 2008 at 7:50 am

    Hope you are feeling better real soon.
    Another great card that adds a bit of sun to this otherwise drab day.

  25. HBon 20 May 2008 at 7:22 pm

    EGADS! You can create like this when you aren’t feeling well? Michelle, I bow down to your amazing amazing talent.

  26. Fabrizioon 20 May 2008 at 7:32 pm

    Thoroughly enjoyed the tutorial, thank you for sharing the step by step….I learn so much every time I visit your blog. I’ve starred your post in my Google reader. Stunning cards as always.

  27. Sara in WIon 22 May 2008 at 9:38 pm

    That’s just so beautiful!

  28. Lori Penaon 14 Jun 2008 at 6:53 pm

    You are a treasure! What a talent and you SHARE! Your step-by-step tutorials are so much fun. To those of us who do not have natural talent with shading, etc., it opens a whole world to us. T H A N K Y O U!!!

Trackback URI | Comments RSS

Leave a Reply