
This card was created for the Innovative Stamp Creation’s Color Challenge ISC C5 that can be found here: https://innovativestampcreations.blogspot.com/
All images are by Innovative Stamp Creations. Here is a link to their online store:
https://www.innovativestampcreations.com/ischomepage.html
Let’s get started with this morning’s tutorial. 🙂
Supplies:
| Stamps: Innovative Stamp Creations – Textures Backgrounds/Sentiments and Fancy Designs |
| Paper: Stampin’ Up Whisper White, Cool Caribbean, Real Red and Black |
| Ink: Stampin’ Up Basic Black, Real Red, Taken with Teal, Cool Caribbean, Soft Sky and Palette Noir Black |
| Accessories: Sponges, White Gel Pen, Versamark Marker, Clear embossing powder, heat gun, Black marker, Prismacolor markers Light Blue & Crimson Red |

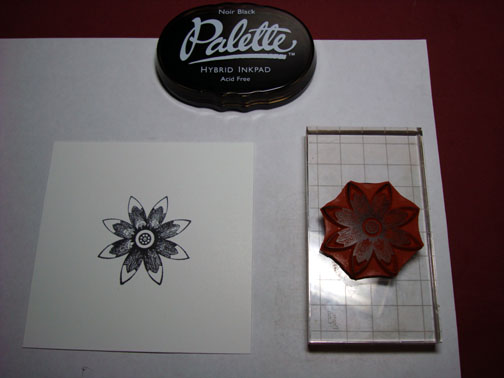
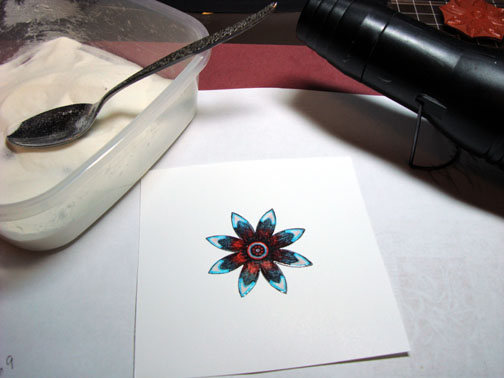
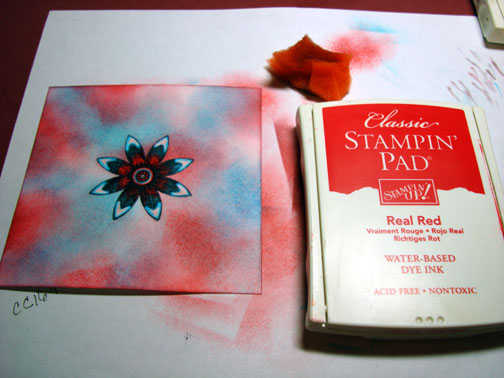
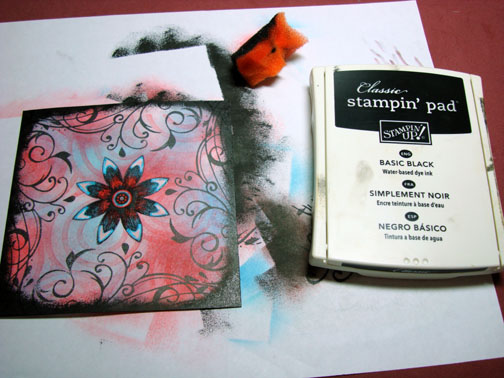
Stamped flower with Palette Noir Black ink on Whisper White card stock.
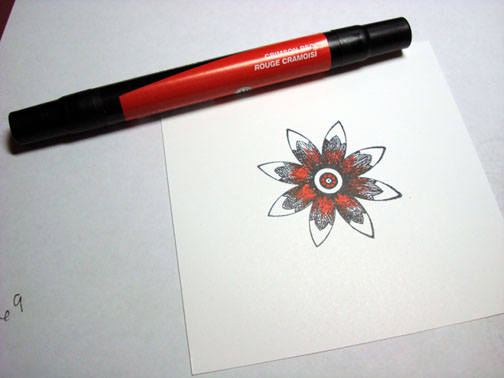
Colored the middle and center of the flower with a Prismacolor Crimson Red marker.
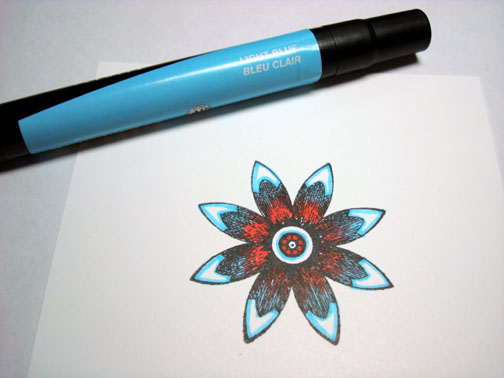
Colored ends of the petals and circle in the center with a Prismacolor Light Blue marker.
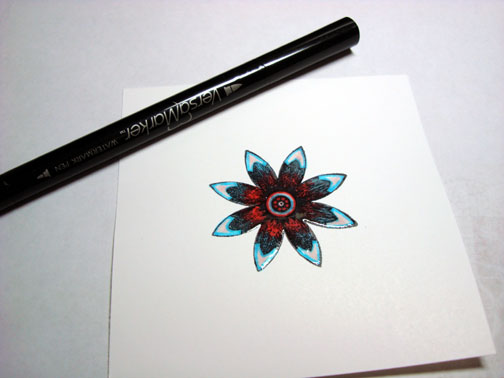
Colored over the entire flower with a Versamark marker and heat embossed using fine detail clear embossing powder and a heat gun.
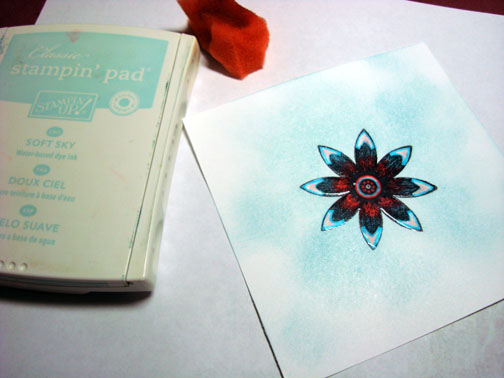
Randomly sponged Soft Sky ink on the background.
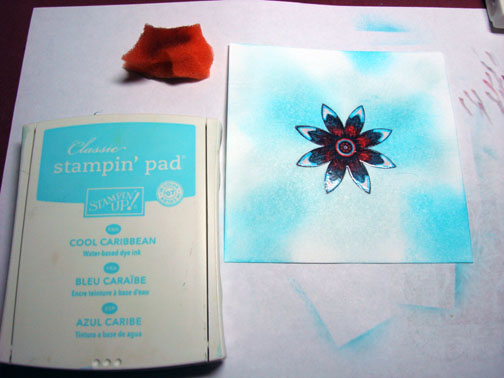
Randomly sponged Cool Caribbean ink on background.
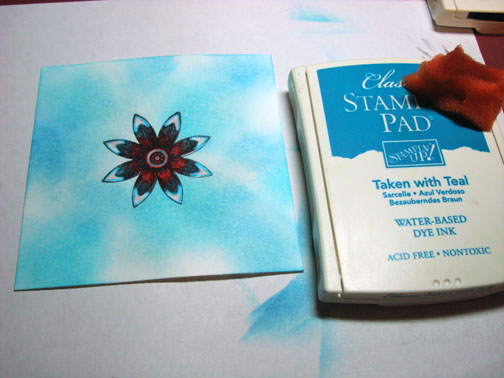
Randomly sponged Taken with Teal ink on the background.
Randomly sponged Real Red ink on the background.
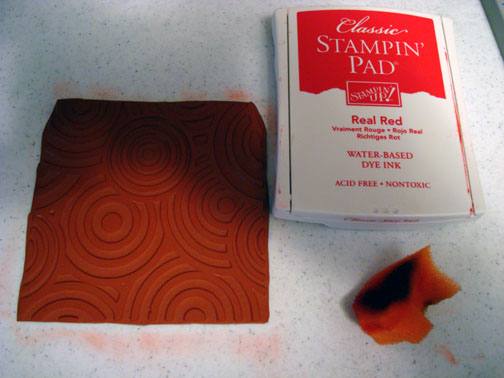
Flipped the background stamp over on the table, design side up and inked it using a sponge so I would get a soft impression.
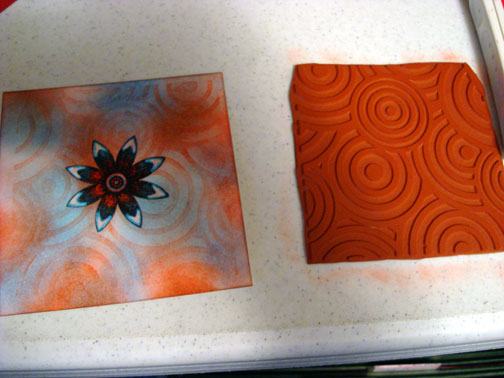
Flipped my card stock over, face down on the stamp and gentle went over it with my hand to make the impression on the card stock.
Stamped Flourishes with Palette Noir Black ink around the edges of the card stock.
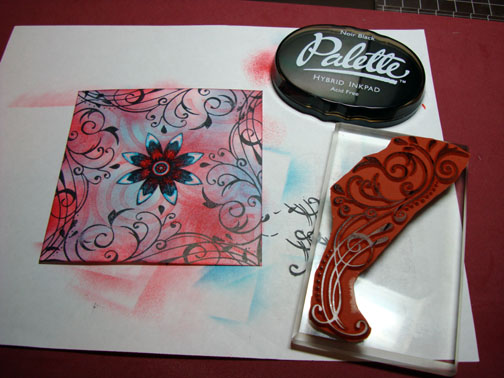
Sponged black ink around the edges of the card stock.
Darkened some of the flourishes with a black marker.
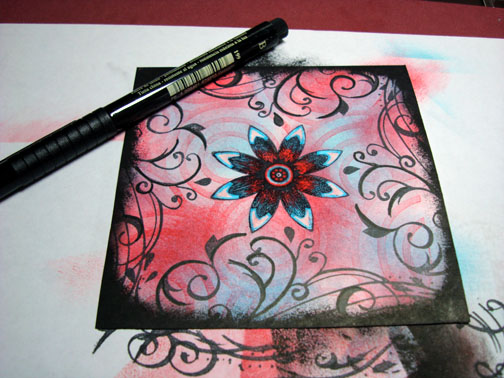
Missed taking this picture, but I took a white gel pen and accented some of the flourishes. Now that makes them pop. I also, make three white dots in each corner of the card stock.
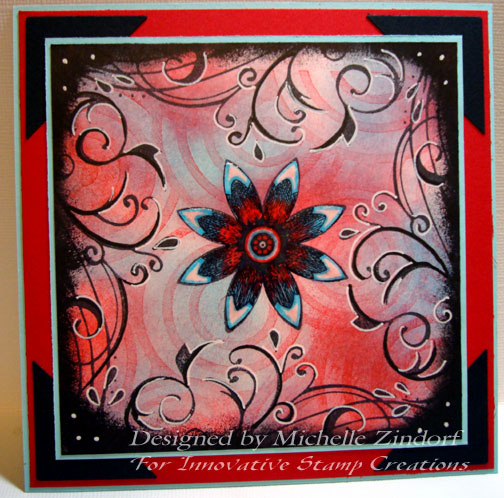
The corners in the finished piece were made with a Photo corner punch and black card stock. The photo corners are put under the main image panel.
Assembled the card and here it is finished measuring 5.25″ x 5.25″.
I hope you have some time to get inky and try this tutorial and join in the Innovative Stamp Creations challenge.
May your day be filled with flowers and flourishes.
Until my next post. . . . . . . .
Michelle
24 responses to “Flower and Flourishes – Tutorial”