
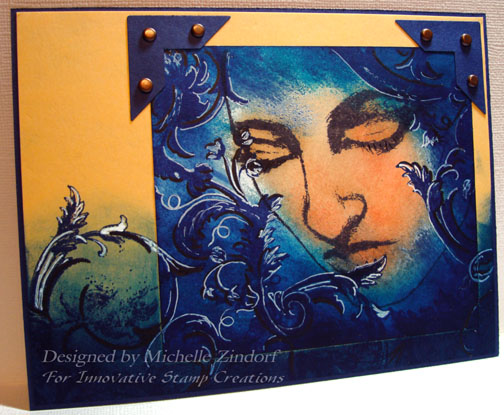
My tutorial today includes a sneak peek of two of the stamps that will be released by Innovative Stamp Creations on June 13, 2008. The ladies face is from the stamp sheet “Thoughtfulness” and the flourish is from the stamp sheet “Artsy Victorian“. Love them!
Here is a link to Innovative Stamp Creations online store: https://www.innovativestampcreations.com/ischomepage.html
Let’s get started. 🙂
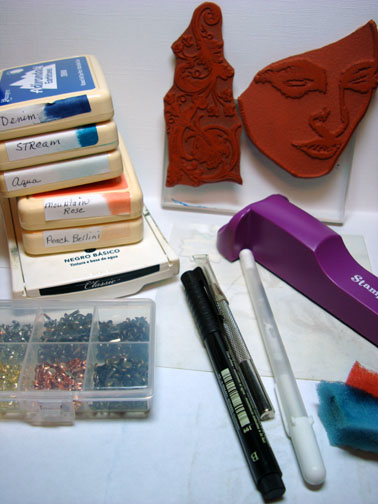
Supplies:
| Stamps: Innovative Stamp Creations – Thoughtfulness & Artsy Victorian |
| Paper: Stampin’ Up Whisper White, Apricot Appeal & Night of Navy |
| Ink: Stampin’ Up Black, Adirondack Denim, Stream, Aqua, Mountain Rose, Peach Bellini |
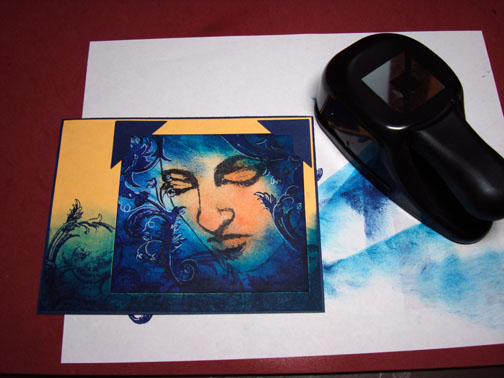
| Accessories: Brads, Black marker, White Gel Pen, Piercing Tool, Sponges, Stamp-a-ma-jig, Photo Corner Punch |
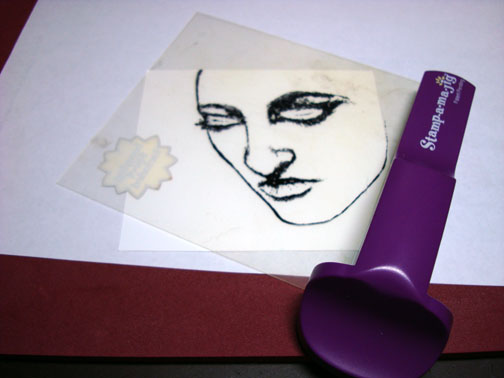
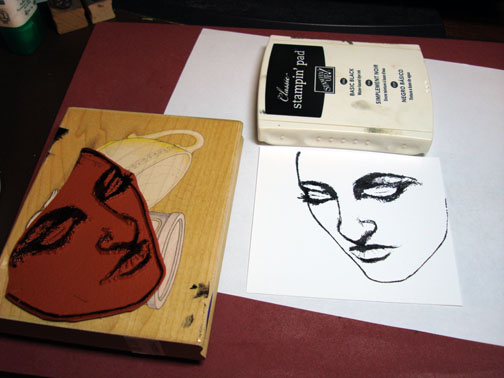
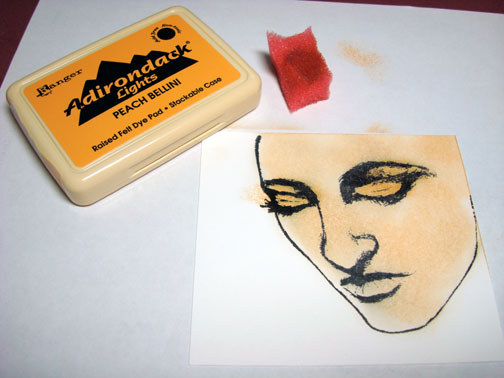
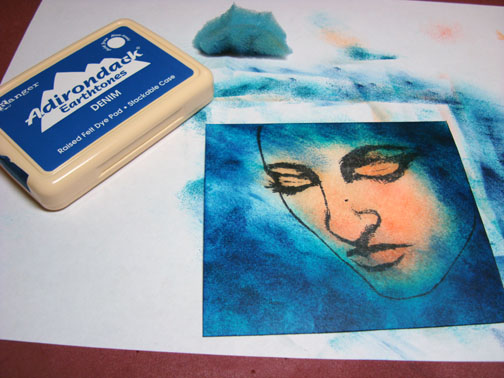
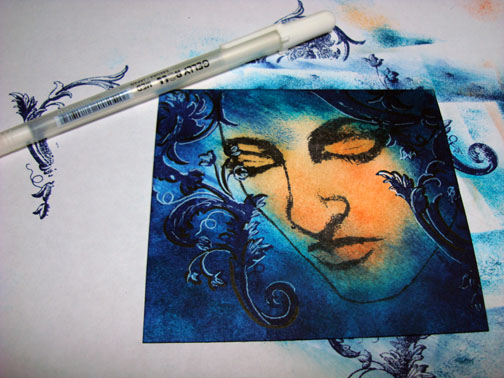
Using a Stamp-a-ma-jig for place, stamped the Thoughtfulness face with Black ink on Whisper White card stock.
Sponged Peach Bellini ink on the image. Heavier on the eye lids.
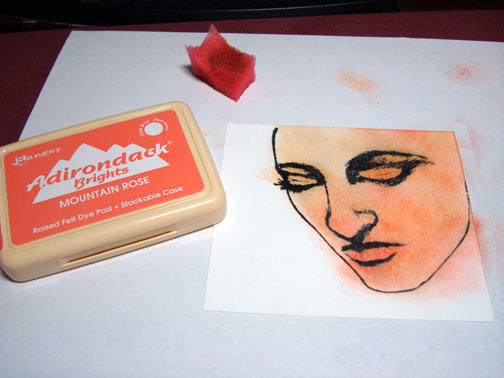
Sponged Mountain Rose on the the image, leaving the upper left side lighter.
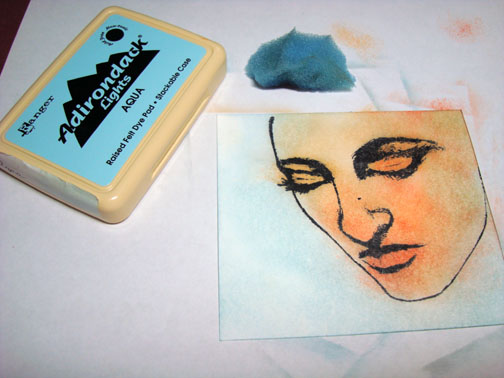
Sponged Aqua ink over the remaining white area of the card stock and a little around the edges of the image.
Sponged Stream ink on, leaving a light area to the left of the image.
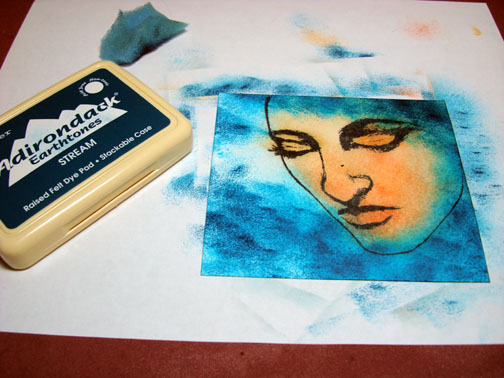
Continuing to get darker yet, sponged on Denim ink really getting dark on the right and bottom.
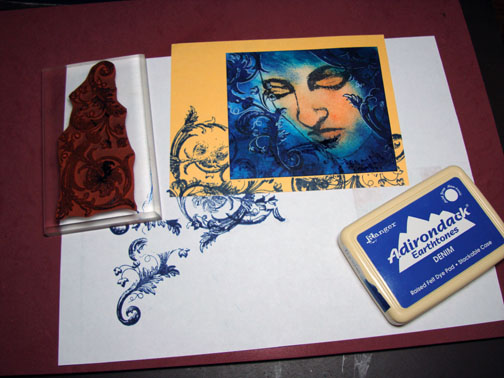
Using the Stamp-a-ma-jig again for placement, stamped the flourish with Denim ink around face. How did we ever get along without flourishes!
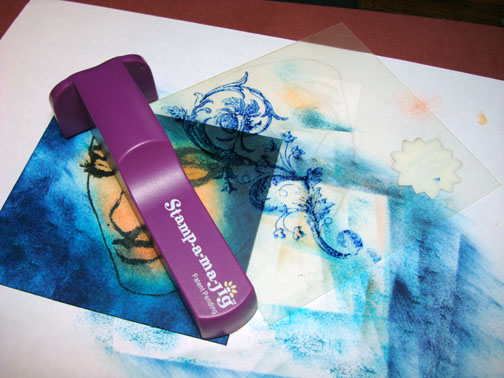
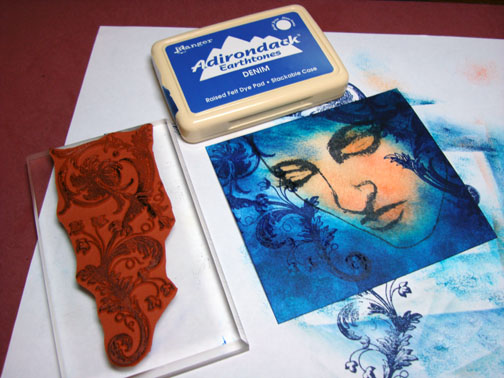
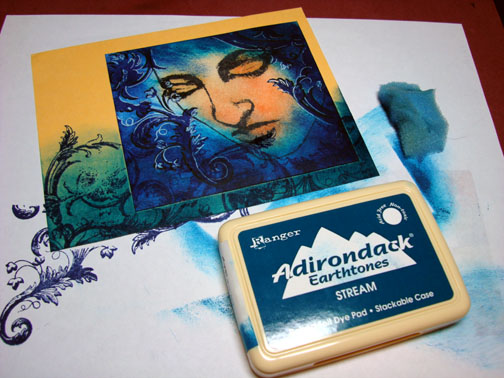
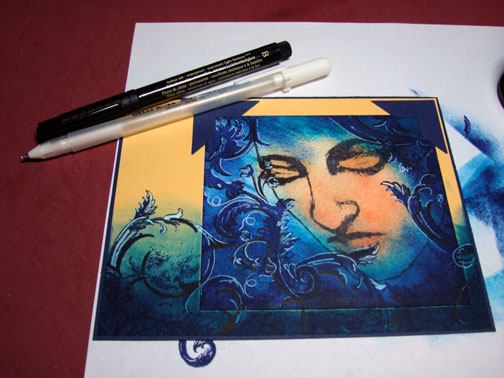
Put in a shadow by tracing the side of the flourish that is furthest from the face with a black marker.
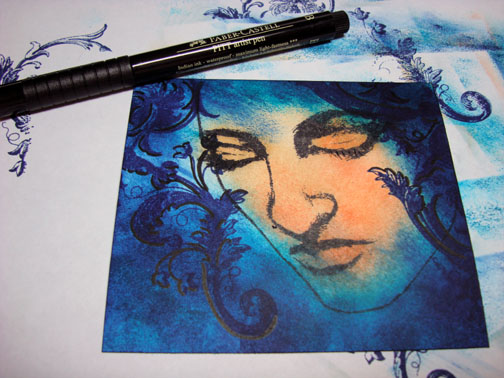
Highlighted the side of the flourish that is facing the face with a white gel pen. Now this helps create depth.
Glued main image panel to a panel of Apricot Appeal. Stamped more flourishes using Denim ink of both the bottom panel and the main panel.
Sponged on Stream ink over the bottom 1/3rd of the card stock.
Sponged Denim ink at the bottom of the card stock.
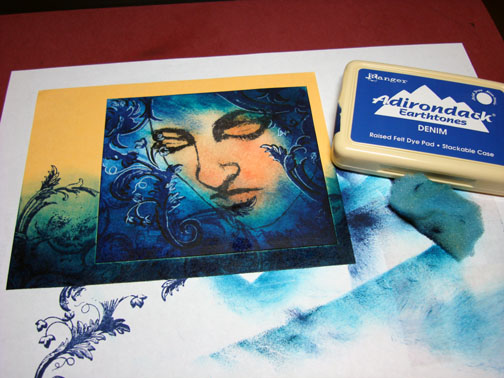
Added Punched Photo Corners and a bottom layer of Night of Navy Card stock.
Decided to accent the flourishes last stamped with a black marker and a white gel pen the same as I had done on the main image panel.
Using my piercing tool I added brads to the photo corners.
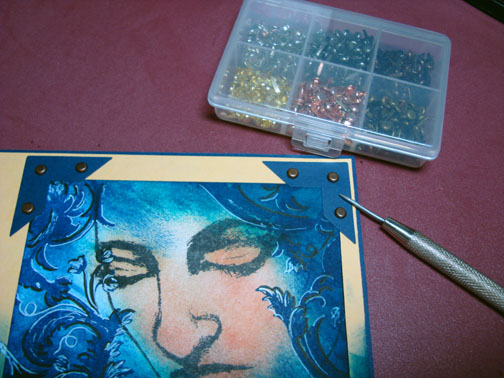
Here you have it the completed card measuring 5″ x 6.5″.
Hope you enjoyed this sneak peek tutorial and will accent those flourishes the next time you stamp them. I think it makes a huge difference. What do you think?
May your day be one of peace and serenity.
Until my next post. . . . . . .
Michelle
22 responses to “ISC Thoughtfulness Sneak Peek – Tutorial”