
As I said before, I love feeding and watching the birds. I’m a city girl (spent my first 43 years in the city) and then I moved to a rural town and I’m pretty much surrounded by farm land. Well being a city girl, I got a lesson at the feed store, yep my town has a feed store, lol. I went in and asked for bird seed. I was promptly told you can’t grow birds with seed, what I was looking for was bird feed. Now how did I make it all these years not knowing the correct term for bird feed. 🙂 Lesson learned!
NOTE: TIMES UP FOR THE BLOG CANDY! THANKS TO ALL WHO ENTERED.
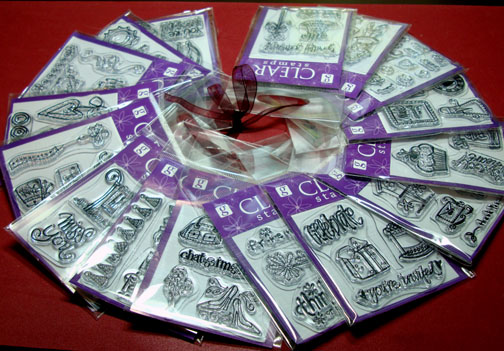
Anyway, I have blog candy for you all today! A set of (16) sixteen, Series 7, Studio G, Clear Stamps. All you have to do to enter to win these stamps is leave a comment on this post. If you are getting this by e-mail, please click this link to be able to leave a comment on the post: https://zindorf.splitcoaststampers.com/2008/07/16/in-the-nest-tutorial-blog-candy/
I will use a random number generator and will announce the winner on Friday morning, July 18th. Good Luck everyone!
Below is a picture of the new Stampin’ Up in colors I just received in the mail. These colors won’t be available until the new Catty comes out. I just couldn’t resist playing with them, so I used a couple of them in today’s tutorial. Please forgive me, I just had to, lol.
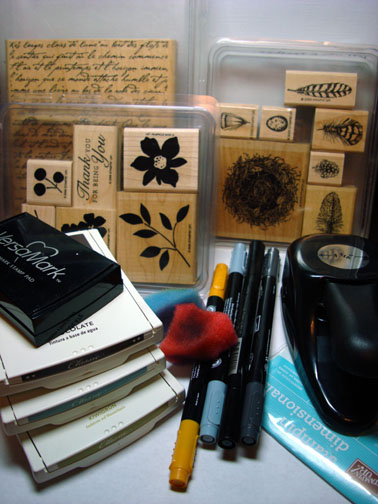
Supplies:
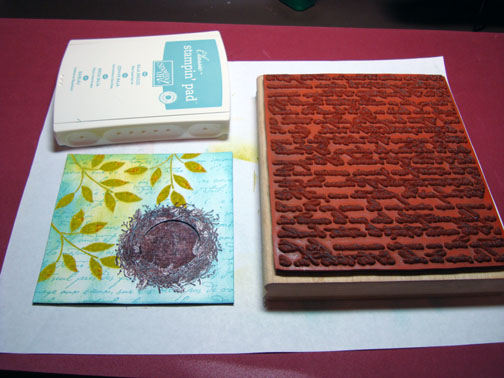
| Stamps: Stampin’ Up Soft as a Feather, Best Blossoms & French Script |
| Paper: Stampin’ Up Baja Breeze, Kiwi Kiss & Whisper White |
| Ink: Stampin’ Up Baja Breeze, Kiwi Kiss & Chocolate Chip |
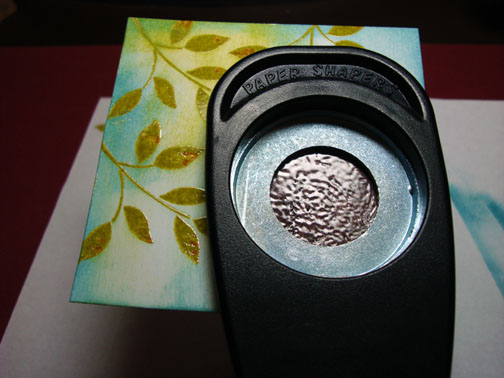
| Accessories:Stampin’ Up markers, Versamark pad, 1 1/4 circle punch, Sponges, Stampin’ Dimensionals, Clear embossing powder & heat gun |

OK, so I was so excited about my new color options, I started this project and realized that I wasn’t taking pictures, lol. So the first 3 pictures were staged after the fact. Bare with me it is 4:00 a.m after all. 🙂
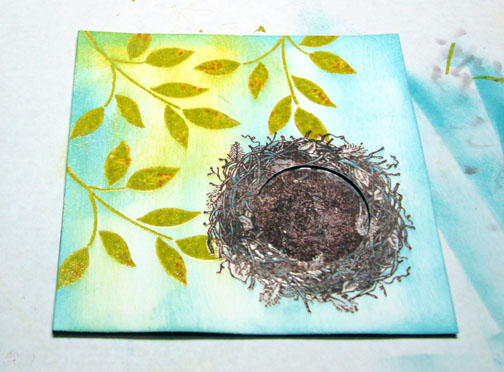
Stamped Nest by first loading the stamp with Versamark then with Chocolate Chip ink before stamping on a 4″ x 4″ piece of Whisper White card stock.
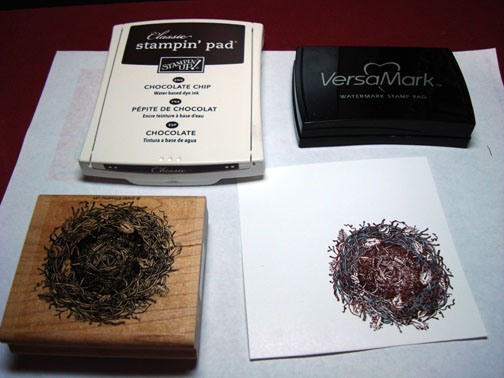
Heat embossed image with clear embossing powder and a heat gun.
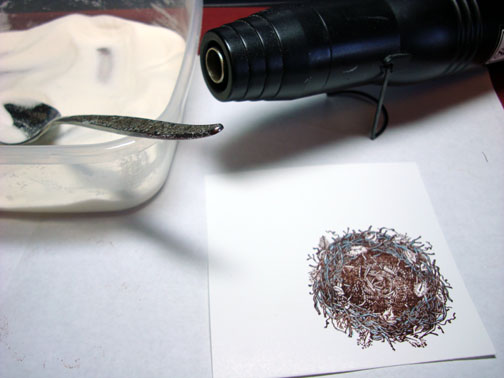
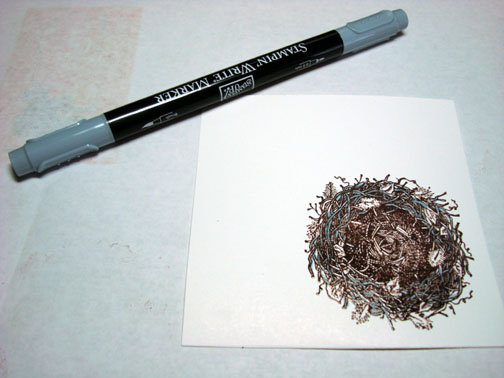
Colored the sides of the nest with a Going Gray marker.
Stamped the leaves by first loading the stamp with Versamark, then Kiwi Kiss ink, then dabbed a few dots of More Mustard marker on the stamp before stamping. I like a little texture in my leaves. 🙂
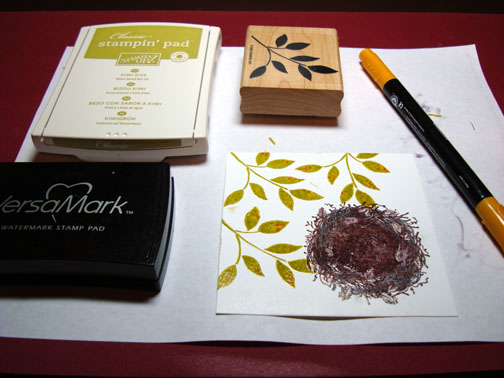
Heat embossed leaves with clear embossing powder and a heat gun.
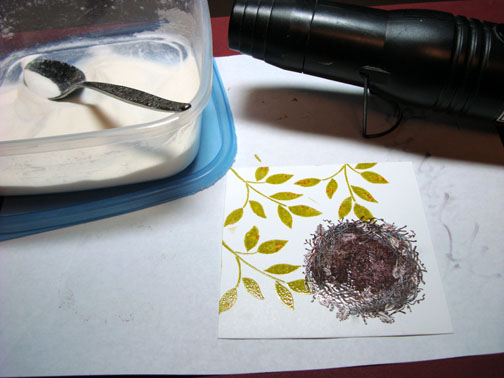
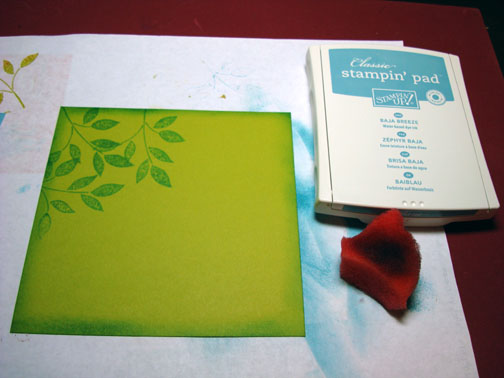
Sponged some Kiwi Kiss ink on the top left side of the card stock.
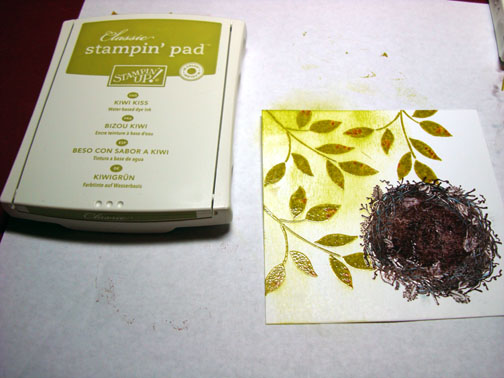
Randomly sponged some Baja Breeze ink on the card stock.

Used a 1 1/4″ circle punch and punched the center out of the nest.
Flipped the card stock over and stuck on Stampin’ Dimensionals and stuck it to a 4″ x 4″ piece of Black card stock.
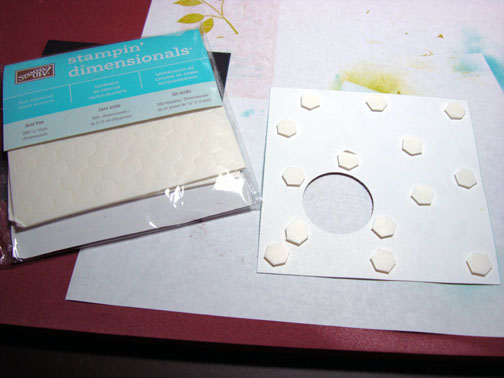
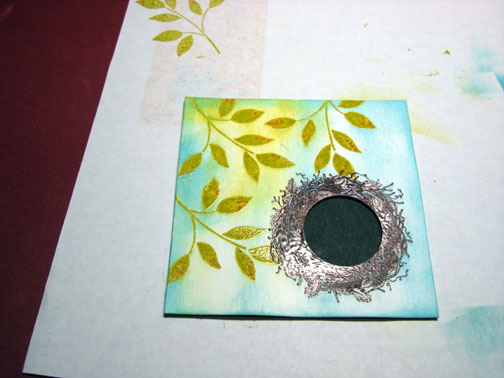
Glued the punched piece of nest on the black card stock.
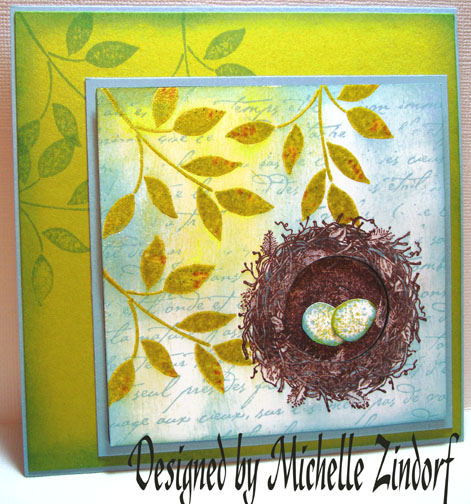
Stamped the French Script Stamp on the card stock using Baja Breeze ink.
Stamped two eggs on Whisper White card stock using Baja Breeze ink. Cut them out.
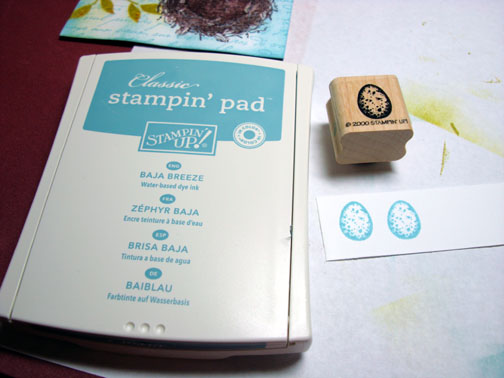
Lightly pressed eggs on to the Kiwi Kiss ink pad to give them a hint of green.
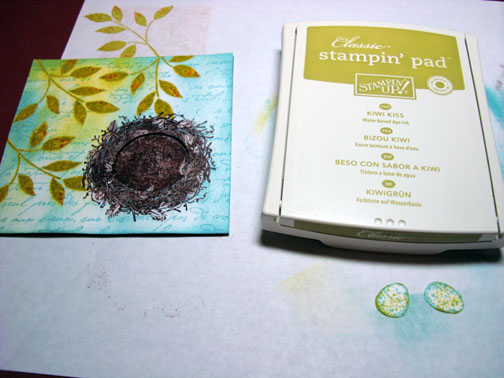
Stamped leaves with Baja Breeze ink on a Kiwi Kiss card stock panel.
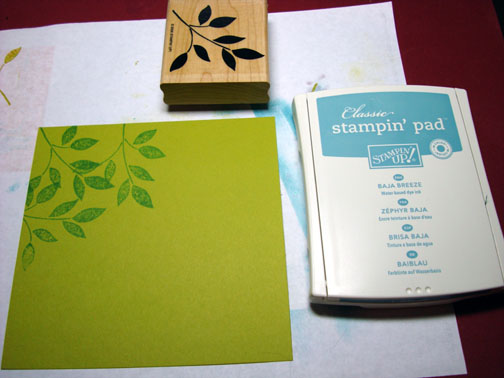
Sponged Baja Breeze ink around the card stock edge.
Assembled card and here it is finished measuring 5.25″ x 5.25″.
Don’t forget to comment to enter to win the Blog Candy for today!
Hope you feel safe and secure in your own nest today. 🙂
Until my next post. . . . . .
Hugs to all,
Michelle
Pingback: Ophthalmology Pediatrics