Aug 08 2008
Flourish Butterfly - Tutorial
Announcement, Announcement! I will be teaching brayer workshops in the following towns:
Dayton, Ohio at Marco Paper Store (http://www.marcopaper.com/) on September 6th
Fort Collins, Colorado on September 19th & 20th
San Jose, California on October 24th & 25th
For information on these workshops or to host one in your town, please contact Lisa Itatani at litatani@pacbell.net or http://flatfishpaperarts.blogspot.com/ while there are still spots open.
Come join me and let’s take the frustration out of using that brayer an create some dramatic skies together in the process. :) Hope to see you soon.
Now on to today’s tutorial. :)
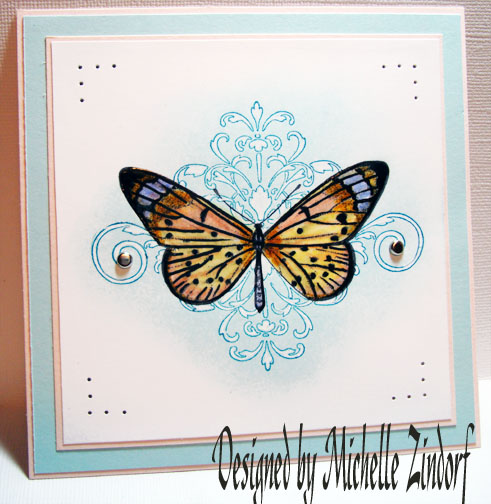
Today’s project shows off the emboss resist technique. Also, I thought I would celebrate the butterfly while they are still fluttering around in my yard.
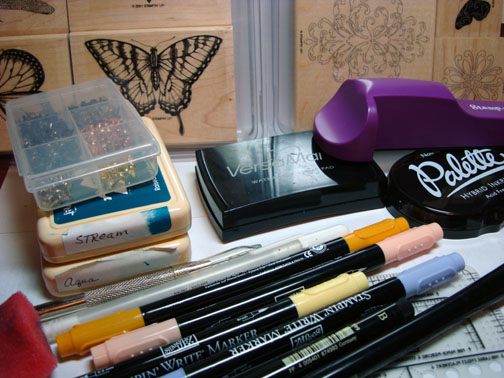
Supplies:
| Stamps: Stampin’ Up Kind Thoughts & Wonderful Wings |
| Paper: Stampin’ Up Whisper White, Soft Sky and Blush Blossom |
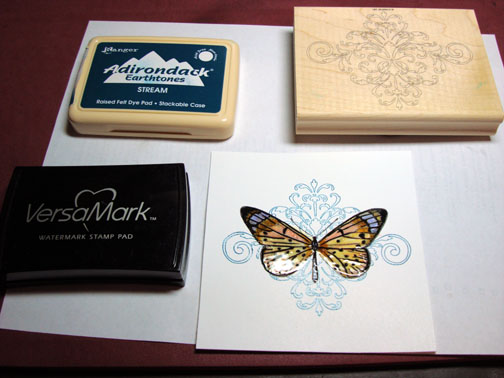
| Ink: Adirondack Stream & Aqua, Palette Noir Black |
| Accessories: Stampin’ Up markers More Mustard, Blush Blossom, Barely Banana, Almost Amethyst, Faber-Castell Black marker, Piercing Tools, Silver Brads, Versamark Marker and Pad, Sponge, Stamp-a-ma-Jig, Clear embossing Powder and Heat gun |
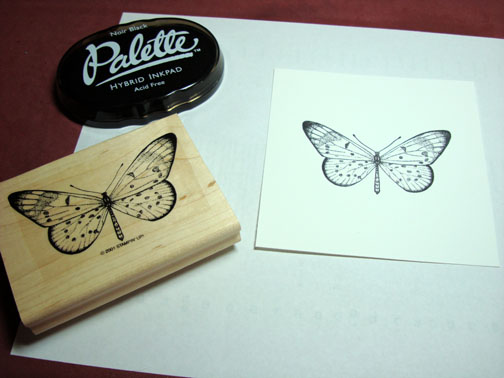
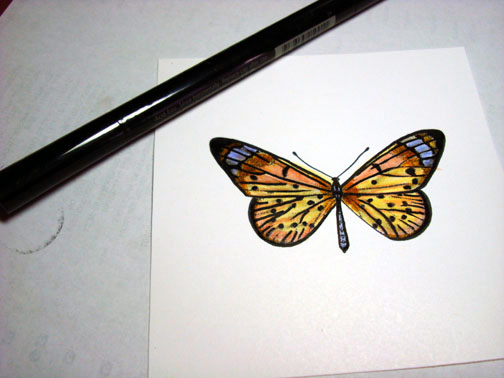
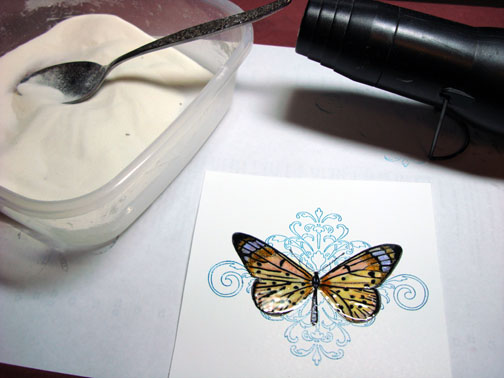
Stamped butterfly with Palette Noir Black ink on a 4.5″ x 4.5″ piece of Whisper White card stock.
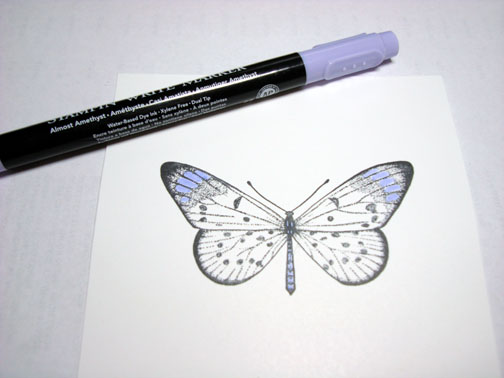
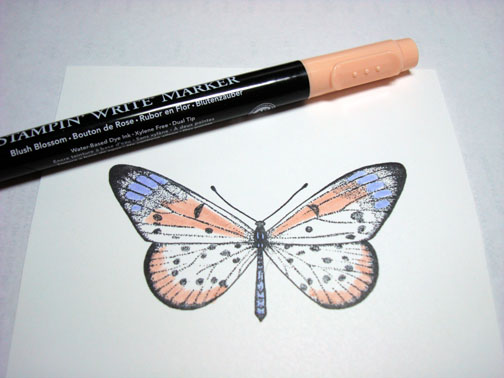
Colored the part of the Butterfly’s wings and the body with an Almost Amethyst marker.
Colored a part of the Butterfly’s wings with a Blush Blossom marker.
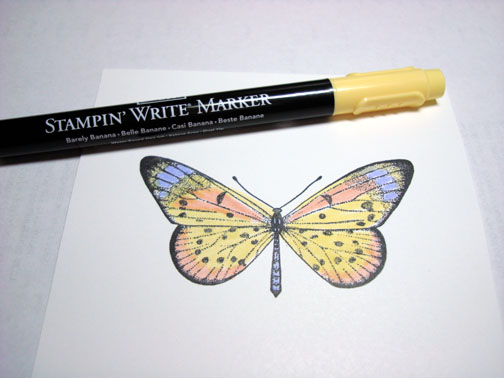
Colored part of the Butterfly’s wings with a Barely Banana Marker.
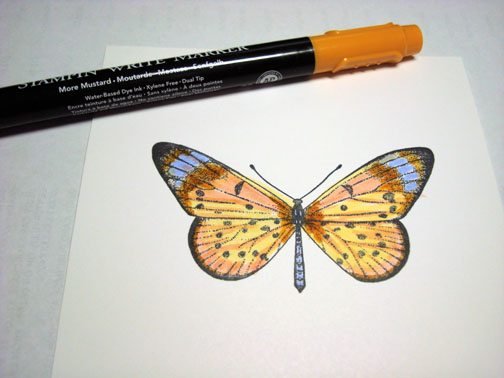
Colored part of the butterfly’s wings with a More Mustard marker.
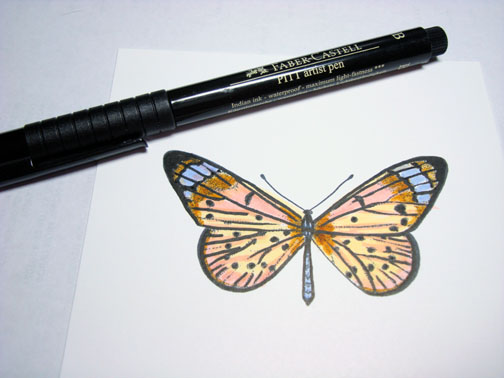
Darkened the black lines on the butterfly with a Faber Castell black marker to make the butterfly really pop!
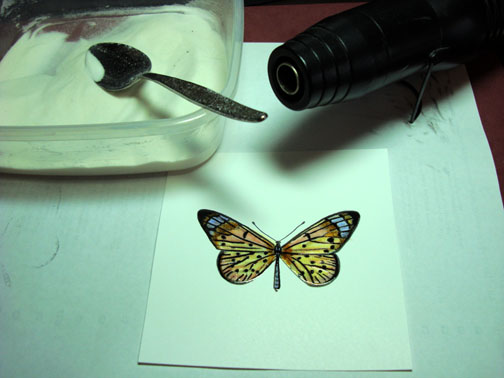
Colored over the entire butterfly, being very careful to stay within the design area, with a Versamark marker.
Heat embossed the butterfly with clear embossing powder and a heat gun.
Using a Stamp-a-ma-jig for placement, stamped the flourish by first loading it with Versamark and then with Stream ink before stamping.
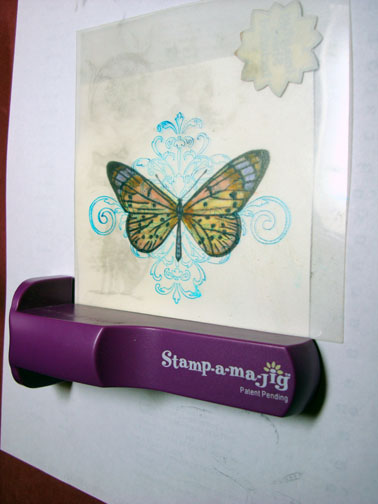
Heat embossed flourish with clear embossing powder.
Note: it was not necessary to clean the stream ink off of the butterfly, it just melts right into the embossing on the butterfly when heated.
Sponged Aqua ink onto the flourish area in a circular motion.
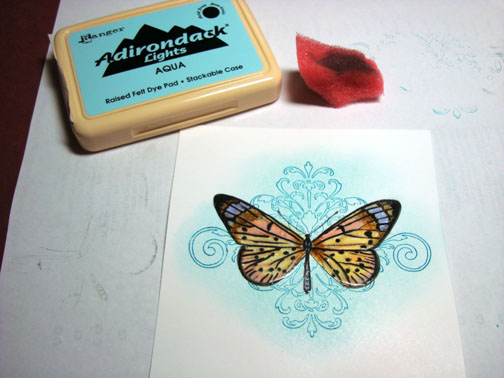
Colored in the flourish with a white gel pen to make it stand out.
After assembling card front, used piercing tools and pierced each corner of of the main image panel.
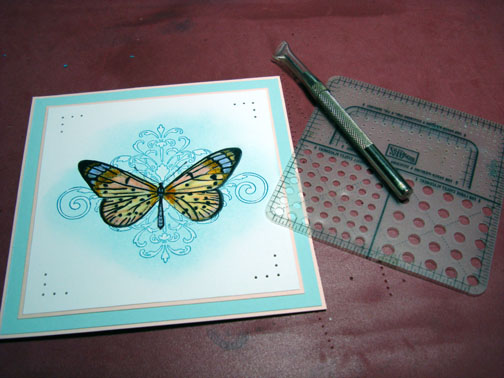
Added a silver brad to each side of the flourish.
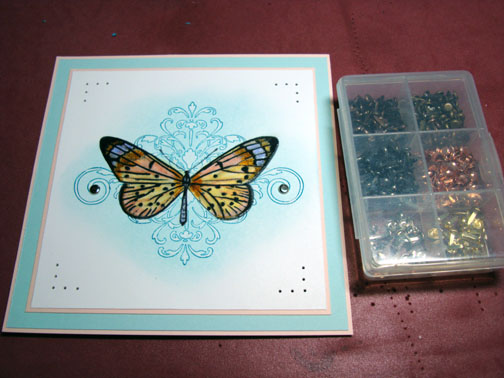
Here you have it the finished card measuring 5.25″ x 5.25″.
Hope you enjoyed today’s tutorial and will give emboss resist a try.
May your day be filled with filtered light and colorful butterflies.
Until my next post. . . . . . . . . . .
Hugs,
Michelle

Beautiful card and great tutorial!
I love the simple and elegant look of this card! this is one I’ll be making:)
Very pretty! Love the boldness of the butterfly and softness of the flourish.
OMG!!!!!!!!!! This is stunning…your butterfly looks so real…. I love the flourish stamp over it…
TFS
Debbie
Very nice card Michelle. I too love the elegant look of this one. Thanks for sharing! ~Debie
This butterfly looks so real, this card is gorgeous, but then all your work is.
Gorgeous, absolutely lovely. I need a piercing set!
Gorgeous, Michelle! Your butterfly really does look real!
You are the master! I never even looked at that “Kind Thoughts” set before. As usual you have created a wonder. Thanks
That butterfly is my absolute FAVORITE stamp in the entire stamping world! I even have it tattooed on my back!
THIS IS GORGEOUS! Your layout choices so rock. Thanks for the inspiration.
Lovely card, I want to try your tutorial, it looks like fun!
Beautiful. Love the colors. I have the flourish stamp but didin’t know what to do with it yet. I like the way you used it. What is the name of the butterfly stamp set? I believe its retired but don’t know the name.
Very nice–love the colors on the butterfly!
Have a great day!
Teresa
WOW….I am loving this! Your tutorials inspire me to get stamping! Thanks for all you hard work! When I grow up I want to be artistic just like you!!!
Beautiful butterfly - the coloring is so realistic. I can almost feel the soft texture of it’s wings.
Have an awesome day,
-mary
What a wonderful treat to read and see your tutorials! Truly inspiring! I don’t miss a day.
I had to make sure I was on the right blog. Lovely card as always but softer colors today. The color combination on the butterfly makes it look flouresent. Some of the pictures (7 & 13) show the colors as more vibrantl.
Have a wonderful day.
Michelle the butterfly is gorgeous! Have a great day!
that simply beautiful or wonderful it better.
This is a lovely card; it’s so elegant! Thanks for sharing =]
Oh! I didn’t even catch the part about you coming to San Jose! That’s just a hop and a skip away from me; I’m so there! X]
Gorgeous art as usual Michelle!!!! Absolutely am astounded by your work, each and every time I visit your blog (almost daily). I am curious what set the flourish is from. I am not really a SU kinda girl…..I’m from the TAC side of the fence. Would love to know what set that flourish came from. I’m thinking that perhaps a large Damask stamp would work well too!!! Thanks for the frequent inspiration. You truly do rock. Hope you teach in the Milwaukee WI or Chicago IL area at some point in my lifetime!!! I live in Kenosha, WI and would definitely make the trek to learn from the “master” of the brayer!!! Hisses, Rockin Robin
Robin asked “I am curious what set the flourish is from?”
Robin so sorry, I just realized I didn’t put the supply list in.
I’ll update it.
wow!
Most EXCELLENT! I wish you would come to Arkansas!
Brilliant! Thanks so much for the tutorial. Have a great weekend.
Absolutely beautiful!
This is so beautiful! And such a wonderful technique and design.
I just got home from taking care of my daughter and could not wait to see all i have missed. This is just beautiful Michele, great color and lay out. Very elegant!
Michelle, this is exquisite!!!!!
Just beautiful Michelle!
Michelle, you are amazing!!! Once again, (like almost every day) I observe your beautiful creations and am simply in awe. I love what you do and am so grateful that you share it with the rest of us. Thank you for your lovely visions.
OMGOSH That butterfly looks so real, Michelle you are soooo good at what you do. Your talent, and your kind heart. You are appreciated…. Thanks again for all the tutorials I can’t say that enough. God blessed you with a great talent.
Evelynn
Another wonderful tutorial, Michelle! You make it look so easy. A beautiful card!
I was going through your past work and learned you started the blog in February of 2008. Your talent with cards and the clear directions made me think you had your own blog for years.
What a lovely card! I love this butterfly set and picked it up after seeing it in one of your tutorials. Your style and selection of stamps is always amazing. I was wondering if you could share a list of some of your favorite classic sets. All of us would love to know!
I really like the way you made that butterfly really POP off the paper. Such a beautiful card you made Michelle.Thanks for sharing all your work and doing the tutorials.
Just beautiful.
The butterfly jumps off the card.
It often takes me a while to do one of the tutorials and get it loaded onto SCS but here is mine.
http://www.splitcoaststampers.com/gallery/photo/1023508?cat=500&ppuser=10233