
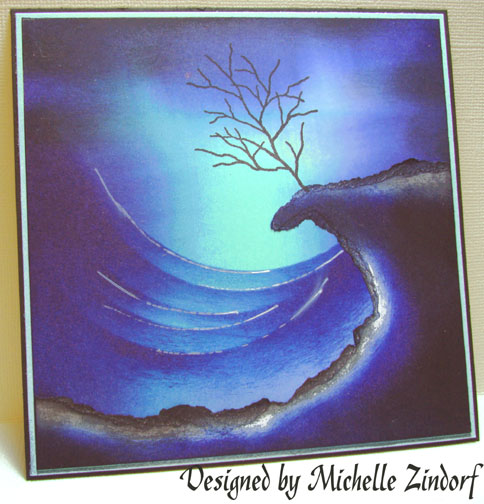
I have a stormy ocean scene for you today. I swear when my allergies act up and I’m not feeling well I always reach for shades of blue ink. The color blue must sooth me. 🙂
Maybe this card will sooth someone else too, so I’ll give it away as blog candy.
To enter for a chance to win this card, please leave me a comment on this post telling me your all time favorite rubber stamping tool, besides rubbers stamps, lol. I love reading your comments that tell me a bit about yourself. If you are getting this blog update by e-mail you will need to click this link to leave a comment on this blog post:
I will use a random number generator to pick the winner on the morning of Sunday, September 7th.
OK then, it is time to get on with this stormy scene tutorial. 🙂
Supplies:
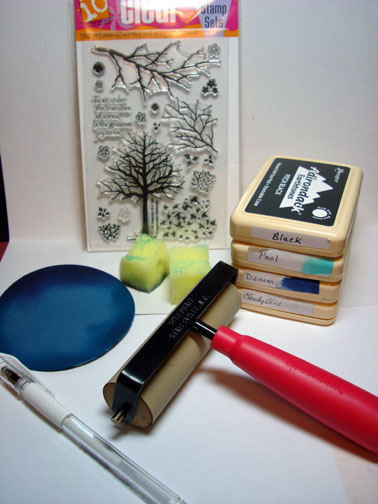
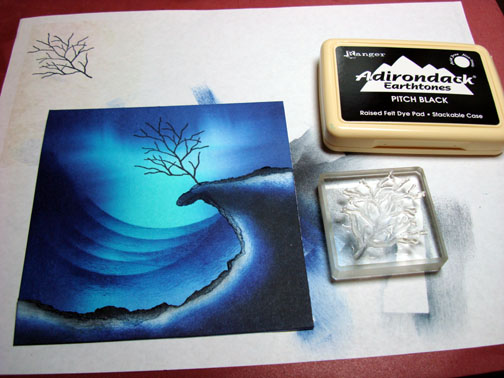
| Stamps: Impression Obsession “Branches of a Tree” |
| Paper: Stampin’ Up Whisper White, Basic Black and Tempting Turquoise |
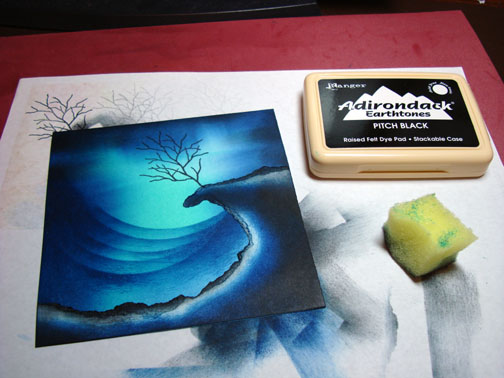
| Ink: Adirondack Pitch Black, Pool, Denim & Cloudy Blue |
| Accessories: Brayer, Sponges, White Gel Pen, Circle Coluzzle Template |
Brayered on Pool ink on the right side of a 5″ x 5″ piece of Whisper White card stock.

Brayered Denim ink at the right and left sides of the card stock.
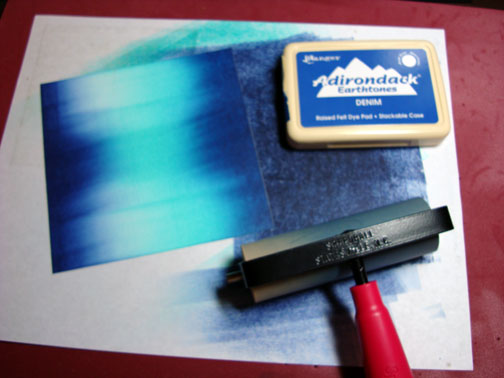
Brayered Denim ink at the top of the card stock.
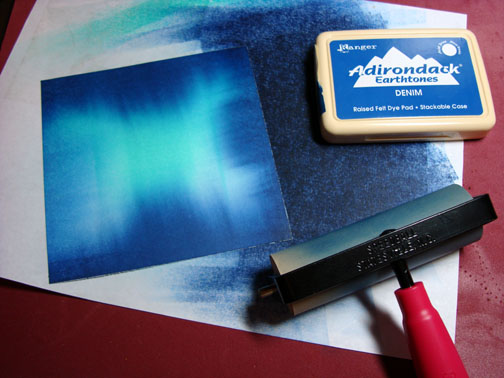
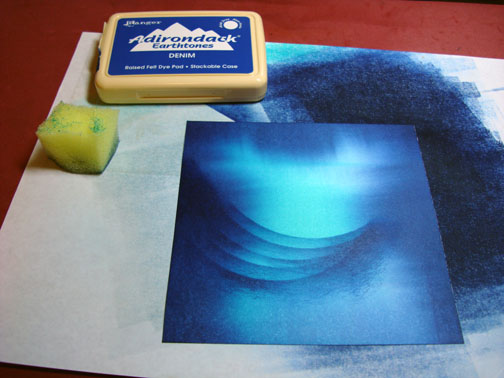
Used a circle cut with a coluzzle that measures 3 5/8″ and sponge Denim ink lightly at the edge of one side of the circle. Move the circle up a bit and sponged again. I did this a total of 5 times.
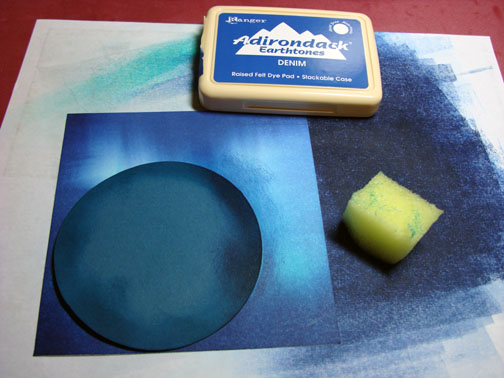
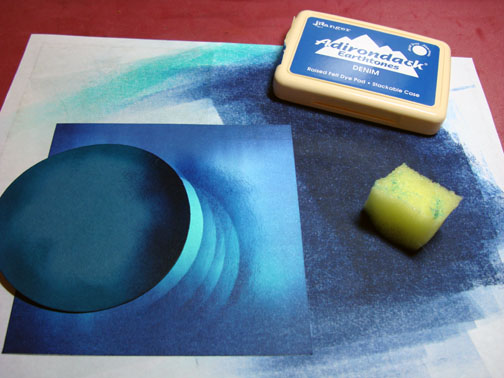
Sponged Denim ink at the left side of the card stock to blend the sponged lines in a bit.
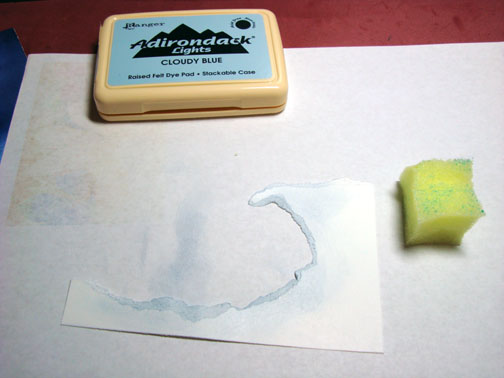
Tore a cliff shape from a piece of Whisper White card stock.
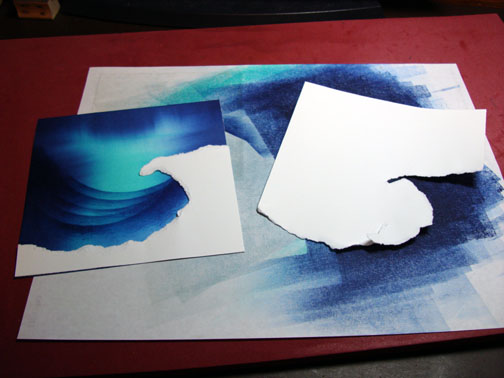
Sponged Cloudy Blue ink on the cliff shape.
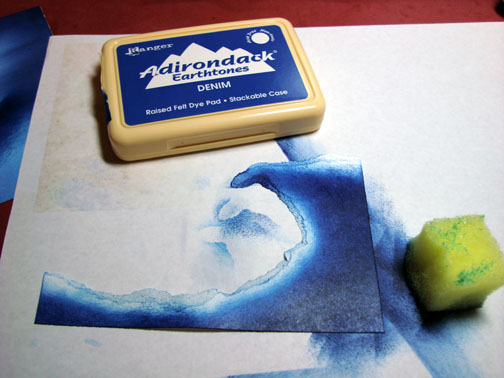
Sponged Denim ink on the cliff shape not covering all of the Cloudy Blue ink.
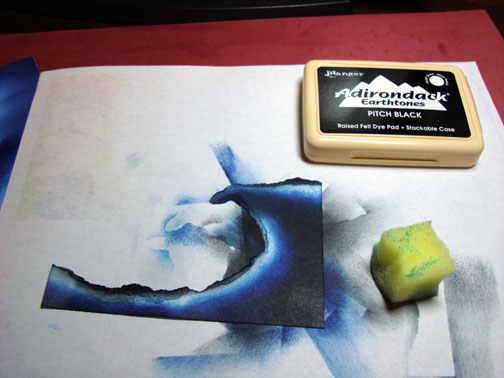
Sponged Pitch Black ink on the cliff shape not covering the Denim ink entirely. I also sponged Pitch Black ink on the top of the cliff shape and along the top of curve shape.
Adhered the cliff shape to the main panel.
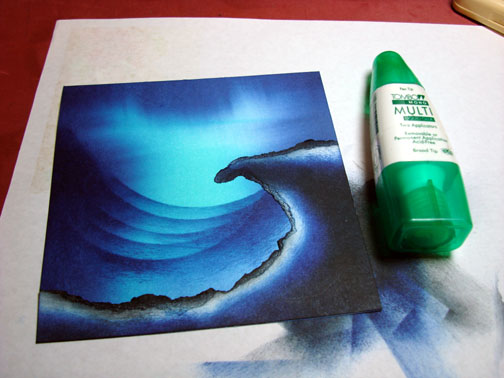
Stamped the tree with Pitch Black ink.
Sponged some Pitch Black ink at the top of the sky area to add some drama.
Used the circle mask again and traced one side of it at the top of each wave to create a highlight in the water.

Assembled the card and here it is finished measuring 5.25″ x 5.25″.
I hope this tutorial has inspired you to get inky today.
May your day be filled with calm seas.
Until my next post. . . . . . . . .. .
Hugs,
Michelle
Note: Links to all my tutorials can be found here: https://zindorf.splitcoaststampers.com/tutorials-ive-written/
Here is a link to my workshop calendar if you want to get info on beginner and advanced Brayer workshops: https://zindorf.splitcoaststampers.com/workshop-calendar/
Pingback: It Takes More Than Talent - 20 Ways To Boost Your Fine Art Career. | 7Wins.eu