Sep 23 2008

No More Leaves Rabbit - Tutorial #121

Published by zindorf at 5:49 am under Tutorials

dsc06063.JPG

Happy Tuesday!  I’m back to the regularly scheduled program today since I have all that traveling business out of the way, lol.  So I’m coming to you with another Autumn themed tutorial.

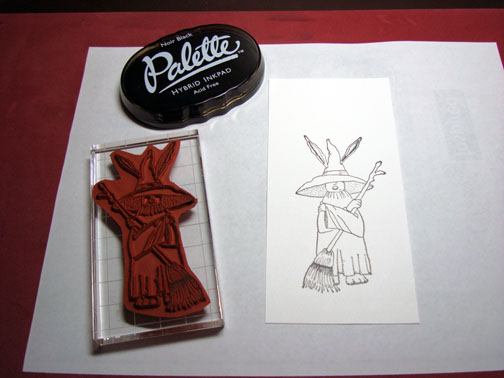
I found some great rabbit images by Stamp La Jolla at a Stamp convention this year.  I purchased mine unmounted.  I bought mine as single stamps, not sets.  Here is a link to their web page:  www.stamplajolla.com

I’m dedicating this tutorial to my new friend Lydia, who told me she loves my long tutorials.  Girl, I’ve got a long one for you today, lol.  Anywho, let’s get started.  :)

Supplies:

Stamps: Stamp La Jolla Rabbit, Inkadinkadoo Fall Season
Paper: Stampin’ Up Whisper White, Basic Black & Orchid Opulence
Ink: Stampin’ Up White, Basic Black, More Mustard, Elegant Eggplant, Old Olive, Summer Sun & Orchid Opulence, Palette Noir Black
Accessories: Versmark Marker, Fine Detail Clear embossing powder, heat gun, brayer, sponges, Prismacolor markers & Pencils, White Gel Pen, Coluzzle for cutting mask, Green & Purple Ribbon, Brads

dsc06071.JPG

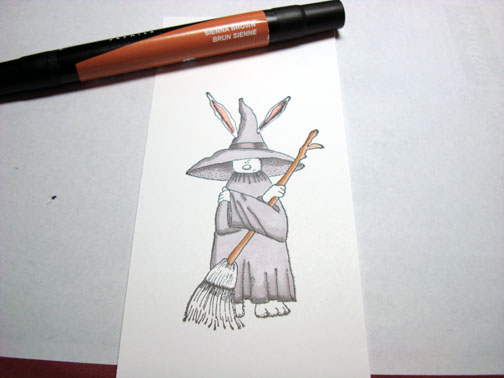
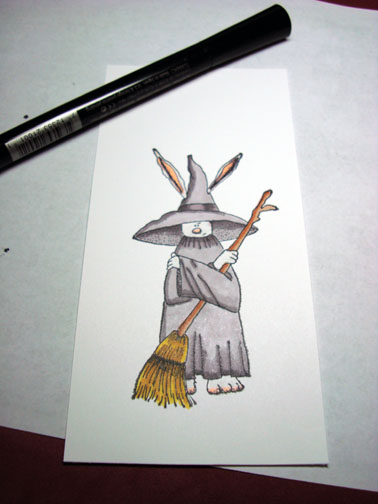
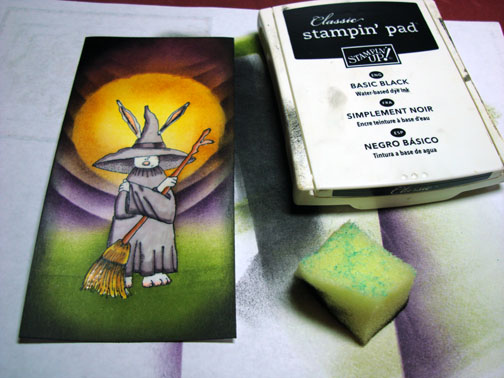
Stamped my Rabbit image on a 3″ x 6.25″ piece of Whisper White card stock with Palette Noir Black ink.

Note:  I used this Palette black ink because it doesn’t smear when using alcohol based markers, such as Prismacolor.

dsc06032.JPG

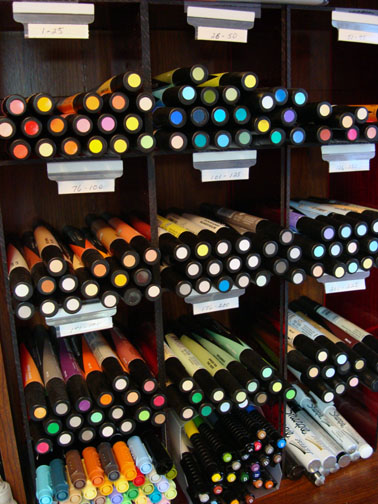
I’ve shown this before, but I think they are pretty all together.  This is my organization system for my Prismacolor markers.  Not fancy, but functional.  :)  You can find more detail on my marker organization in the tools section of this blog. 

dsc06038.JPG

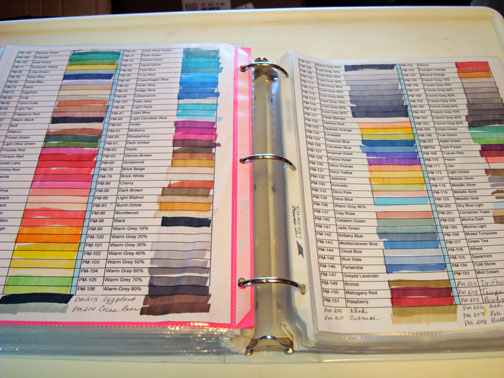
My marker sheets showing the color number, name and a stripe of marker color for easy selection.

dsc06036.JPG

Anyway, back to the tutorial, focus Michelle!

Colored the rabbits hat and robe in with a Prismacolor 30% Warm Grey marker.

dsc06033.JPG

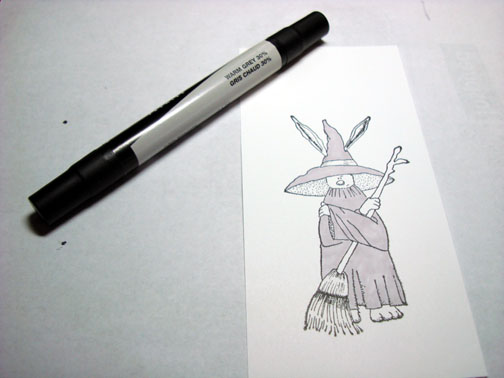
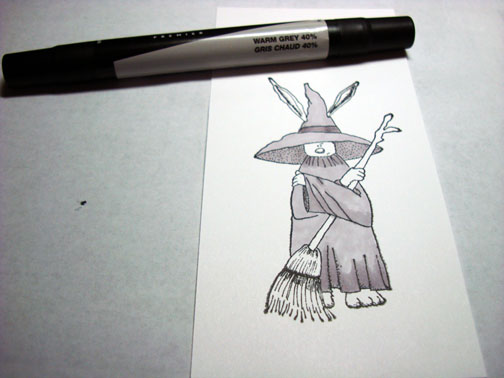
Colored in the shadow areas with a  Prismacolor 40% Warm Grey marker.

dsc06034.JPG

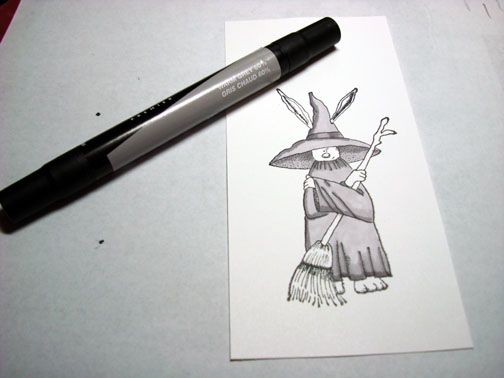
Added some Prismacolor 60% Warm Grey marker to the folds shadows in the hat and robe.

dsc06035.JPG

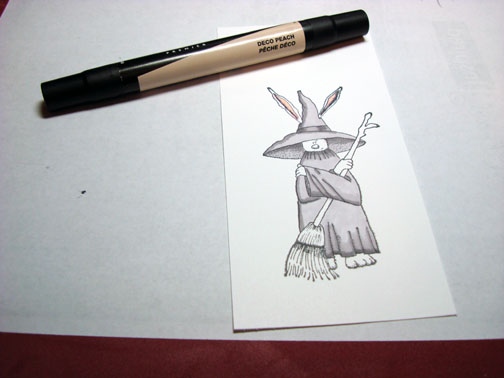
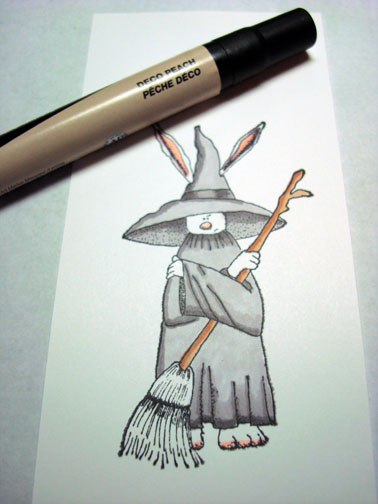
Colored in his inner ear with a Prismacolor Deco Peach marker.

dsc06037.JPG

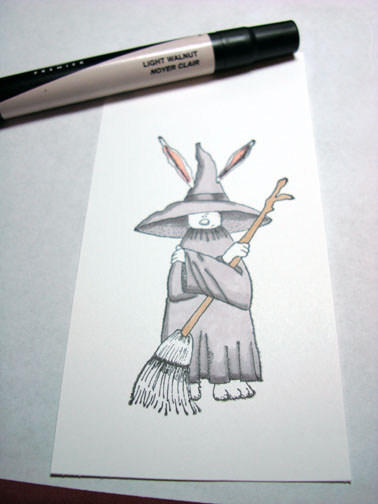
Colored the broom handle with a Prismacolor Light Walnut marker.

dsc06039.JPG

Added more color to the left side of the broom handle with a Prismacolor Sienna Brown marker.

dsc06040.JPG

Colored the Rabbits nose and bottom of his feet with a Prismacolor Deco Peach marker.

dsc06041.JPG

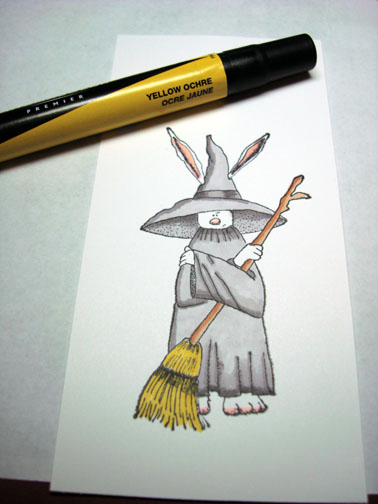
Colored the broom bristles with a Prismacolor Yellow Ochre marker.

dsc06042.JPG

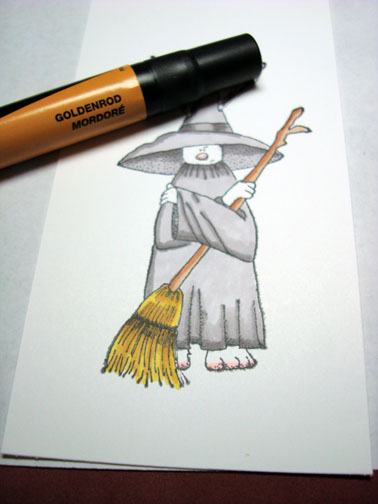
Colored the darker areas of the broom bristles with a Prismacolor Goldenrod marker.

dsc06043.JPG

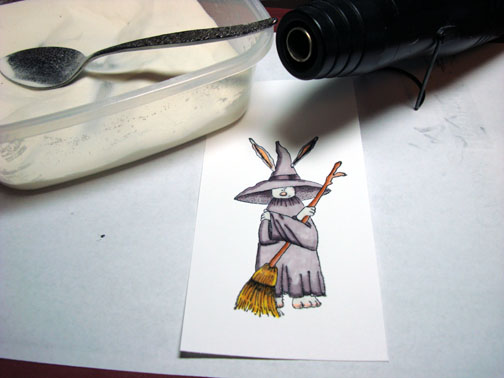
Colored over the entire image with a Versamark marker being very careful to stay inside the lines of the image.

dsc06044.JPG

Heat embossed the image using fine detail clear embossing powder and a heat gun. 

Note:  I heat embossed the image so it will resist the inks I am going to use for the back ground.  This is called emboss resist.

dsc06045.JPG

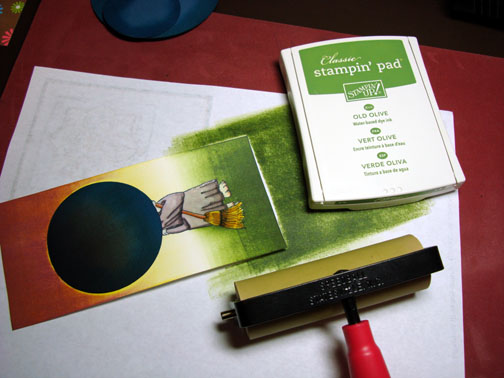
Brayered on Summer Sun ink.

dsc06046.JPG

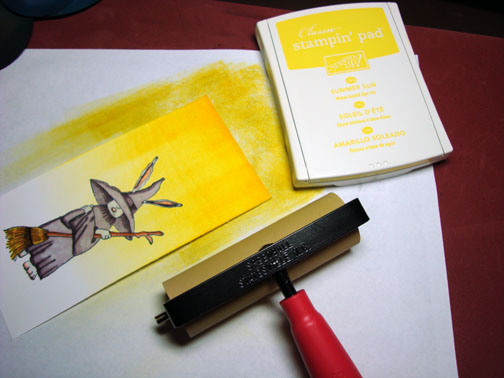
Used a 2.5″ circle of card stock to mask for the sun.  Held the mask in place as I brayered on Orchid Opulence ink at the top of the card stock.

dsc06047.JPG

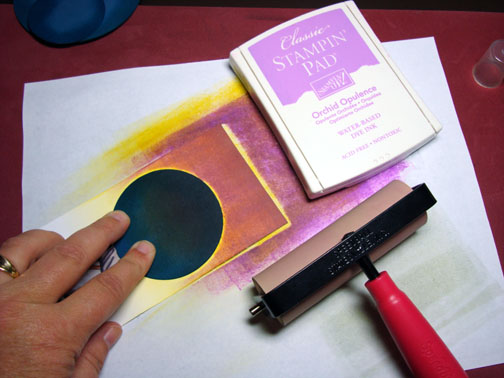
Brayered Old Olive ink at the bottom of the card stock.

dsc06048.JPG

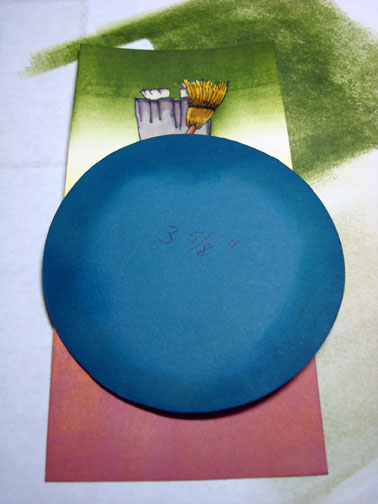
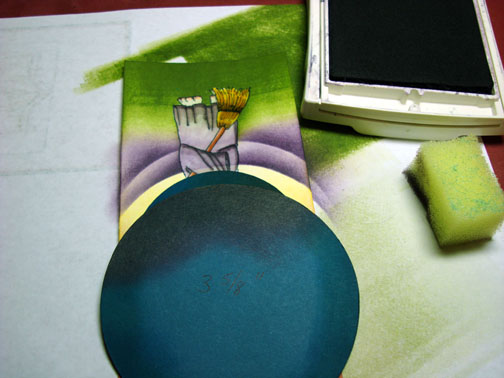
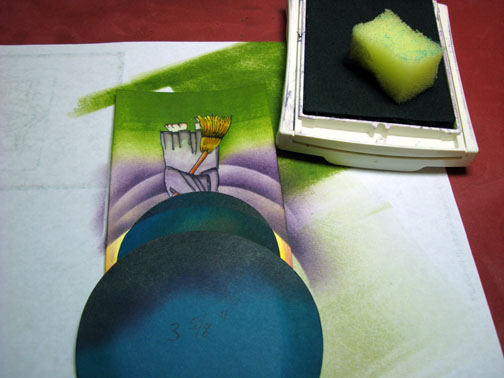
Used a 3 5/8″ card stock circle to mask so I could sponge Elegant Eggplant at the edge of it to create a interesting sky area. 

dsc06049.JPG

I masked, sponged Elegant Eggplant ink at edge and then moved the masked and repeated.

dsc06050.JPG

dsc06051.JPG

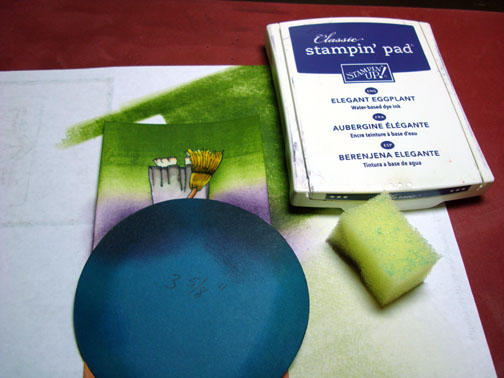
Once I got to where the sun mask is I made sure to hold both masks in place so I was sponging around the sun mask at the same time.

dsc06052.JPG

dsc06053.JPG

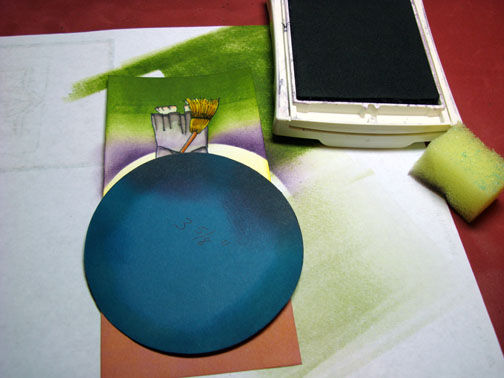
Removed card stock masks.

dsc06054.JPG

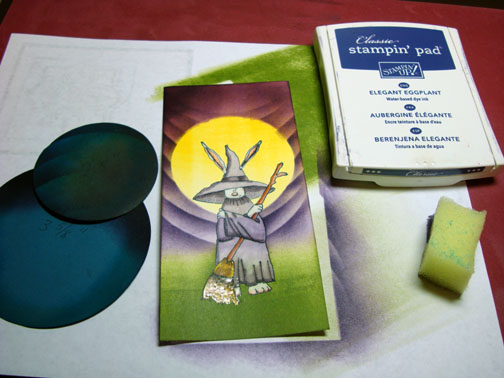
Sponged More Mustard ink around the edge of the sun leaving the middle bright.

dsc06055.JPG

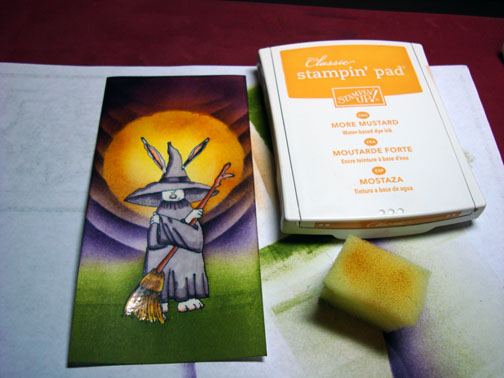
Sponged Basic Black ink around the edge of the card stock.

dsc06056.JPG

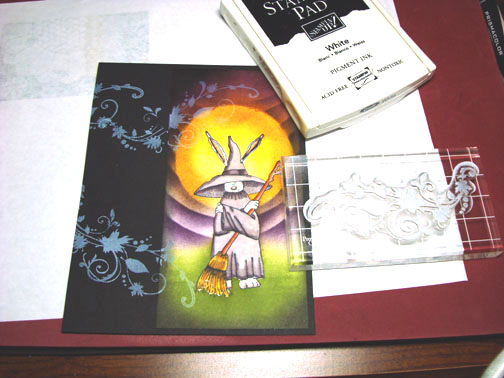
Glued the main image panel to a 5″ x 6.5″ panel of black card stock.

dsc06057.JPG

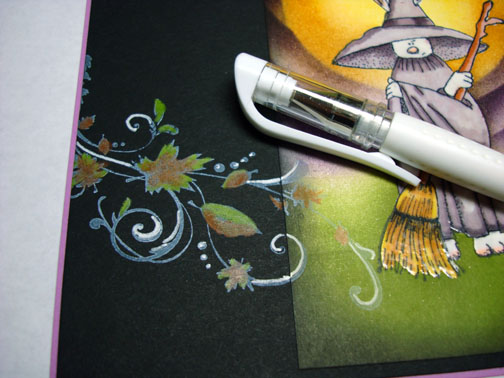
Stamped the Inkadinkado leaf flourish with White Craft ink over both panels.

dsc06058.JPG

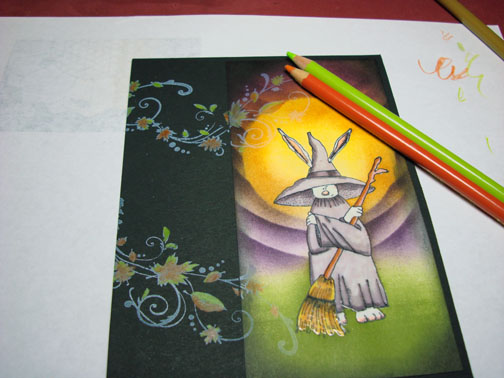
Colored the leaves in with Chartreuse & Pumpkin Orange Prismacolor pencils.

dsc06059.JPG

Added White Highlights to the flourish with a White Gel Pen.

dsc06060.JPG

dsc06061.JPG

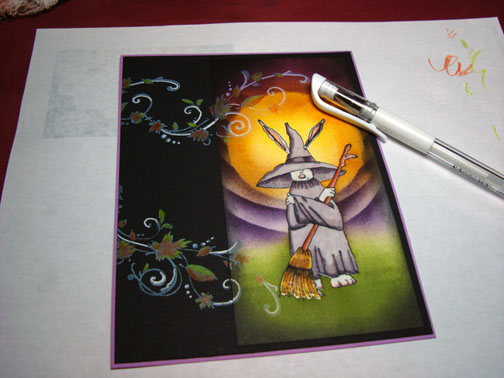
Added some ribbon and here you have the finished card measuring 5 1/8″ x 6 5/8″.

dsc06063.JPG

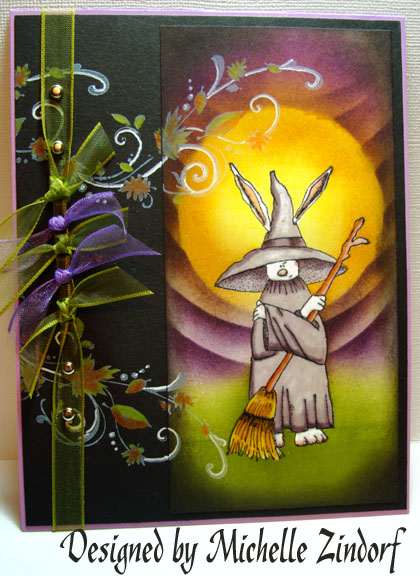
Now that’s a rabbit with attitude! But he sure is stinking cute, lol.

May your day be filled with the spectacular colors of a sunset.

Until my next post. . . . . . .. . . . . . . .

Hugs,

Michelle

Links to all my tutorials can be found here:  http://zindorf.blogs.splitcoaststampers.com/tutorials-ive-written/

Here is a link to my workshop calendar if you want to get info on beginner and advanced Brayer workshops:  http://zindorf.blogs.splitcoaststampers.com/workshop-calendar

48 Responses to “No More Leaves Rabbit - Tutorial #121”

  1. Bethon 23 Sep 2008 at 6:05 am

    Very cute rabbit. Love your “Black Magic” portion of the tutorial, just beautiful.

  2. michelleon 23 Sep 2008 at 6:08 am

    Wow! I tried to imitate your fisherman card and followed your tutorial - which was great. However, I would love to see a video tutorial because my friend and I think you have a magic wand that you wave over your paper and brayer!! Ours still didn’t look like your!!!! Funny! Anyway, thanks for sharing your tutorials, freely! You are awesome and this card today is fantastic!!!! Have a great day!

  3. janiceon 23 Sep 2008 at 6:20 am

    gorgeous! fun! thanks for taking the time to
    teach us (or try with me, mine NEVER looks
    like yours!) i love all that you do, and i appreciate
    that you share it with us!
    THANKS SO MUCH!
    jan

  4. yvonnewon 23 Sep 2008 at 6:58 am

    What a cute, fun card!! Michelle, I enjoyed meeting you so much here in Austin, your class was FANTASTIC and you’re the BEST!!!

  5. Eveline van Heijston 23 Sep 2008 at 7:03 am

    Michelle, you outdid yourself.
    I love this card. That rabbit looks super cute. My DH has the same expression on his face after working in the garden.
    Thanks for sharing your awesome work.
    Eveline.

  6. Debieon 23 Sep 2008 at 7:21 am

    Welcome home Michelle. This one is, well, WOW. Love the sky/moon effect.

  7. Sandra Doumaon 23 Sep 2008 at 7:34 am

    I love your tutorials ! you take card making to another level !
    thanks for sharing

    Sandra Douma
    Netherlands

  8. Lydia Fiedleron 23 Sep 2008 at 7:37 am

    I LOVE IT!!!! :)

    That rabbit is so stinking cute too. What a great card!!!

    Thanks for the marker pic too - I definitely have to rethink my marker storage.

    Come back soon! :)

  9. Theresa Forsethon 23 Sep 2008 at 7:55 am

    Wow - what an amazing talent you have!!! Thanks for sharing!!!

  10. scrappin bethon 23 Sep 2008 at 8:16 am

    This is splendid! That wascully wabbit is so cute. Thanks for that wonderfully long tutorial; that’s what makes it easy for me to follow along and actually try to copy your creations. I have made a directory on my laptop where I copy your tutorials into a word document and then I take it along with me (downstairs to my stamping desk… camping where there’s no internet… last night you came along with me to a show box swap.. who knew you were my travelling campaign!?!?) SO grateful that you take the time to share these!!
    Actually, I’m getting so adventurous that I’m trying to make my own scene right now… Zindorfian style. I have the main images stamped & embossed (dinosaurs from Basic Grey) and then I’ve done the sky and the grass… Now I’m stumped…I need some rocks or plant stamps yet….. I’ll let you know if it works out for my or not….
    Inky Hugs,
    Beth Greco

  11. Beckyon 23 Sep 2008 at 8:37 am

    awesome!!! Love this rabbit. And I love your long tutorials also. Great to have you back.

  12. Bellawhoopon 23 Sep 2008 at 8:44 am

    Another fabulous tutorial, Michelle! I love the darling rabbit and that background is so clever! Your coloring is unbelievable!

  13. Phyllison 23 Sep 2008 at 8:57 am

    Such a wickedly precious wabbit. Awesome colors and techniques as usual. I’ll try it this weekend. Thanks again for sharing your Prisma color storage system that’s a great idea. I do something like it on a smaller scale for my copics. I keep a 3X5 piece of CS in my purse with colors marked and the code numbers next to it. If I find myself somewhere that sells copics (and they’re on sale) I know what I have and what I need.

  14. Melon 23 Sep 2008 at 9:08 am

    Hi Michelle - Love the card - very funny I was out at a show over the weekend in Rhinebeck NY and LaJolla Stamps were there. I had this stamp in my hand (with quite a few other bunny stamps that were just hysterical) and I had to make choice which ones I was going to buy, I ended up putting this one back (I had already spent way to much money). Now I regret doing that, this card is sooooo cute.

  15. Dawn Froston 23 Sep 2008 at 9:37 am

    I love your cards and techniques. Each morning is like a gift at Christmas waiting to be opened, lol!!

  16. AngelaCon 23 Sep 2008 at 9:38 am

    Wow, what a fantastic card! I love the effect of using the circles as masks - wonderful idea. Your colours and blending are always so stunning Michelle.

  17. Christineon 23 Sep 2008 at 10:16 am

    wow Michelle this card is so amazing. I love all those halloween colours. Love it, love it , love it.

  18. Niki Winchellon 23 Sep 2008 at 10:38 am

    Michelle,
    Your creativity is boundless. I could look at those stamps all day and not come up with the wonderful combination you created.

    Love the tutorials, thanks for sharing your talent so generously!

    Niki

  19. Suzy Tyleron 23 Sep 2008 at 11:25 am

    One of these days I’m going to get brave and try one of these tutorials. Your art is FABULOUS!!!!

  20. Barb Fon 23 Sep 2008 at 11:29 am

    Amazing! Thanks for sharing a wonderful tutorial!

  21. Janeon 23 Sep 2008 at 11:33 am

    Love the rabbit!

    By the way you have been tagged!

    Jane

  22. Gidget-Trishon 23 Sep 2008 at 11:34 am

    Love this card! The sky is awesome. What a great idea to use the circle masks. Very clever. Sure wish I could go to your workshops.
    Take care,
    Trish

  23. Rockin Robin Caldwellon 23 Sep 2008 at 11:45 am

    OMG Michelle…this is exquisite!!!! The depth and dimension are unreal!!! If you decide to offer this as blog candy….please throw my name into the hat!!! Do you ever think that you will do a class close to Kenosha, WI? Kenosha (I refer to it as Kenowhere) is midway between Milwaukee, WI and Chicago, IL if you were to draw a line between the 2 cities. I would love to take a class from you. You are the “mistress of the brayer”!!! Love the tutes and check in every day!! Hisses, Rockin Robin

  24. Phreeon 23 Sep 2008 at 12:37 pm

    Not very original I know, but what else is there to say except “WOW!”. Thank you for another fab tutorial.

  25. Angeliqueon 23 Sep 2008 at 1:04 pm

    This is beautiful.

    Hobby Lobby has some pigment inks on sale so I just bought several pads in the hopes they will be easier to use the brayer with so I can try this more. (My first attempt didn’t go so well, lol.)

    I really love your stamps though and am hoping to do more like that. I have a question. When you say you use “whisper white” cardstock. Is it a plain cardstock or is it glossy?

    Thank you.

  26. Cathy Hon 23 Sep 2008 at 1:22 pm

    Wow. Thank you so much. I love the way you use inks as paints. Gorgeous all. –Cathy

  27. Debbie Don 23 Sep 2008 at 1:28 pm

    Love this card and how appropriate for the season. I enjoy your tutorials. They provide the details needed to recreate the card. Thanks again.

  28. Janeton 23 Sep 2008 at 3:57 pm

    I like how you used the leaves and flourish together. Your rabbit is so cute! Another great card! Thanks Michelle

  29. Cindy H.on 23 Sep 2008 at 4:02 pm

    Wow, this is so beautiful!!! Love that cute little Hula Bunny and all the pretty colors that you used! Your brayering and coloring are spectacular, as always!!! TFS

  30. maryon 23 Sep 2008 at 5:51 pm

    Oh no, another stamp company to add to my ever growing list of favorites - I love that bunny! Michelle, this is a totally awesome card and tutorial. Thanks for sharing your huge talent with us.
    -mary

  31. Kathyon 23 Sep 2008 at 6:59 pm

    How cool is this card. Love it. The bunny is adorable, and your sky is awesome! Don’t even get me started on the leaf flourish and ribbon you added :) So many wonderful details! Thanks so much for the step by step on how you layer your colors and images. Oh how we love you Michelle!!!!

  32. Debbie8400on 23 Sep 2008 at 7:23 pm

    Geeze… you never ever seem to amaze me at your talent…. you look at stamps in a whole new light. It is truly amazing what your eye sees and your mind puts together… if I lived to be 100 I would ever come up with such ideas. God gave you a gift, and I thank you for sharing and most of all for sharing your wonderful tutorials…

    now only to get you to come to NYC… I would love to attend one of your classes you can always come to my house and play, I’m a great cook

    Debbie

  33. Heather Fullerton (Retired Heather)on 23 Sep 2008 at 7:26 pm

    Wow. Love the circles and the choice of color….purple lover by nature. I am so excited…I will be getting my Prismacolor markers for Christmas. I ordered the largest one at Michaels…48 but it looks like you have lots more. Where do you purchase? I love your tutorials and as always Thanks for Sharing your talent.
    Heather

  34. Jamieon 23 Sep 2008 at 8:19 pm

    This is so darn cute, Michelle!!! Love it!

  35. Lynon 23 Sep 2008 at 8:27 pm

    WOW!! All of your work is always amazing, but this is by far one of my most favorites so far!! Thanks for sharing!

  36. Barb Hardemanon 23 Sep 2008 at 8:29 pm

    Thank you for your amazing tutorials! I love this one, you are so creative with all your work, but this one is fantastic. I love how you used the circle around the rabbit, I love the rabbit!! What a fantastic card. Thanks for sharing your incredible talent.

  37. Robbie Rubalaon 23 Sep 2008 at 9:45 pm

    Great card. Question about the coloring on craft ink. Do you heat set the ink first or color on it right away?

    Thanks,
    Robbie

  38. lindaon 24 Sep 2008 at 2:01 am

    This card is one of the best i’ve seen today, and your tutorial is so informative. Thank you so much for sharing the techniques with us, your blog is truly inspirational. This is my first visit, but certainly not my last. I love your blog. Hugs Lindax

  39. Kellyon 24 Sep 2008 at 5:49 am

    I LOVE how you show each marker you use, and step by step pictures of the shading! (PS…I have 4 copic markers total, so I have a ways to go before inventing a storage system like yours…drooling!) And I am still in awe that you go over the image with Versamark…and not have a single splotch of embossing powder out of place! Thanks so much for taking the time to teach all of us your gorgeous techniques!

  40. zindorfon 24 Sep 2008 at 6:20 am

    Robbie asked “Do you heat set the ink first or color on it right away?”

    I just let it dry a moment and then colored on it. If you want really intense colors, you might want to dry well with a heat gun. :)

  41. zindorfon 24 Sep 2008 at 6:24 am

    Heather asked “I will be getting my Prismacolor markers for Christmas. I ordered the largest one at Michaels…48 but it looks like you have lots more. Where do you purchase?”
    Heather, I bought a set that included every marker, plus metallics for $240.00 off of ebay. :)

  42. Marlieseon 24 Sep 2008 at 8:01 am

    Michelle, love the rabbit and another fabulous card! Thank you so much for your daily tutorials. Marliese

  43. Conniecrafteron 24 Sep 2008 at 9:00 am

    Love it, so neat to see it all come together, terrific shading and the sun just glows :)
    Such lovely stamping, coloring and highlighting of the border!!

  44. Debbieon 24 Sep 2008 at 11:10 am

    I was wondering if you feel the prisma markers are as good as copic and where do I puchase them? your site and cards are amazing so TALENTED!!! thanks debbie

  45. Tinaon 25 Sep 2008 at 6:40 am

    Yet another stunning, stunning, stunning creation. I’m so grateful that you share your amazing talent with us. Thank you!!!!!!

  46. Curt OBrienon 25 Sep 2008 at 11:11 pm

    I am simply in awe of your talent. You are truly an artist and your creations are absolutely amazing! Thanks so much for sharing your creativity and talent through your tutorials. Such time you spend to share with us mere mortals! LOL Best, Curt

  47. melissaon 26 Sep 2008 at 1:43 am

    Hi Michelle,

    Not sure why but I really love this card, I love all of your tutorials but this one really is something that caught my interest and eye, it must be the colours…keep it up, is there a non halloween image that these colours would work with? Thanks for always sharing your talent.

    Melissa

  48. zindorfon 26 Sep 2008 at 4:30 am

    Melissa asked “is there a non halloween image that these colours would work with?

    Melissa, there is a million images these colors would work with. :)

Trackback URI | Comments RSS

Leave a Reply