
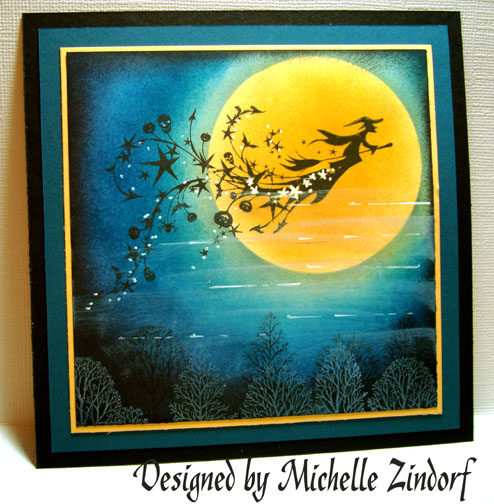
This morning I brought back out this witch from the set “All Hallow’s Eve” by Inkadinkado. This has to be one of the funniest images for the Autumn season this year. The trees at the bottom of this card are from the Stampin’ Up set “Lovely As a Tree”.
Let’s get started on today’s tutorial. 🙂
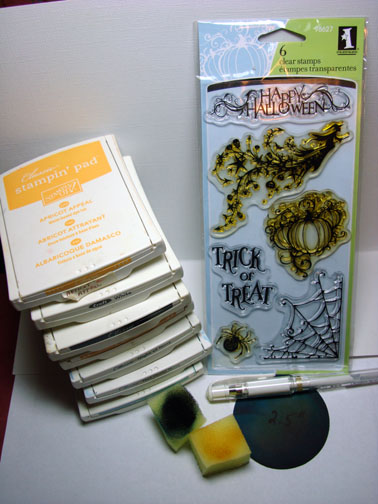
Supplies:
| Stamps: Inkadinkado “All Hallow’s Eve” & Stampin’ Up “Lovely As a Tree” |
| Paper: Stampin’ Up Whisper White, Apricot Appeal, Not Quite Navy & Basic Black |
| Ink: Stampin’ Up Apricot Apeal, Craft White, Basic Black, More Mustard, Night of Navy, Not Quite Navy, Baja Breeze |
| Accessories: Circle template & Coluzzle, White Gel Pen, Sponges |
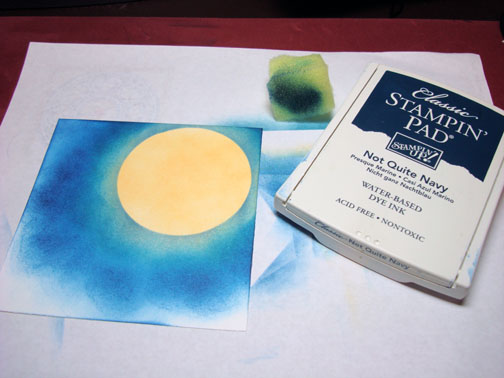
Sponged Apricot Appeal ink on the upper right hand corner of a 4.5″ square piece of Whisper White card stock.

Cut a 2.5″ circle of card stock with my Coluzzle to use as a mask for the moon.
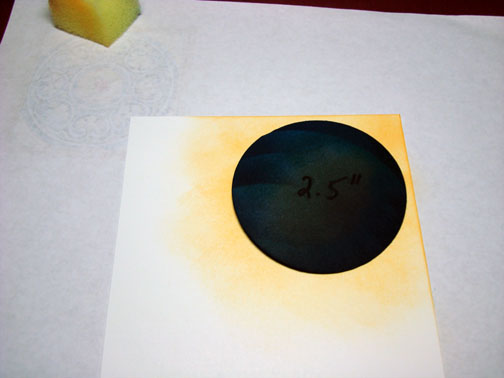
Held the circle mask in place as I sponged Baja Breeze ink around the out side of the mask.
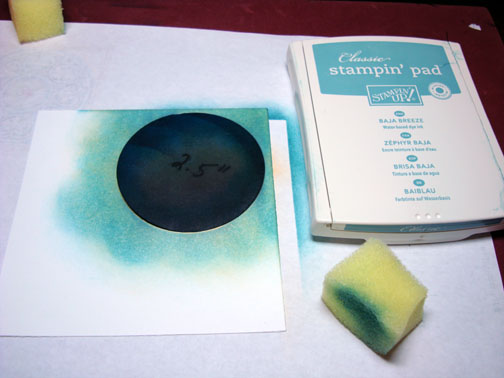
Removed the masked and sponged Not Quite Navy on the card stock, not covering the Baja Breeze ink entirely.
Ignore the witch being stamped, lol. Missed taking a photo. 🙂
Sponged Night of Navy ink on the card stock, not covering the Not Quite Navy ink entirely.
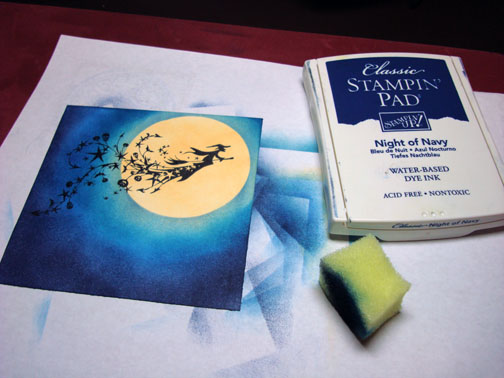
Then I stamped the Witch with Basic Black ink.
Stamped Trees with Basic Black ink at the bottom of the card stock.
Sponged More Mustard ink on the moon leaving the outer edge light.
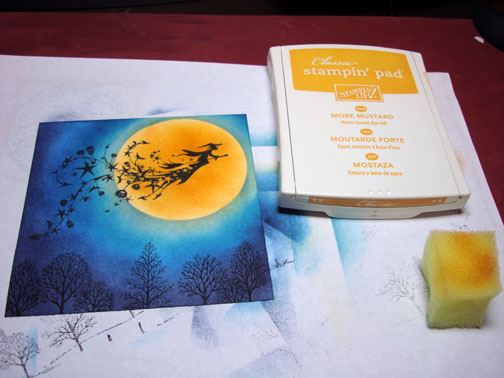
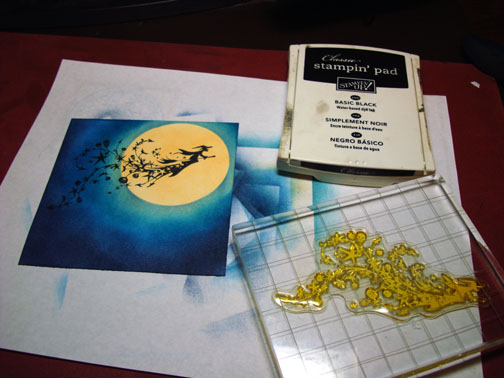
Sponged Basic Black ink around the edges of the card stock.
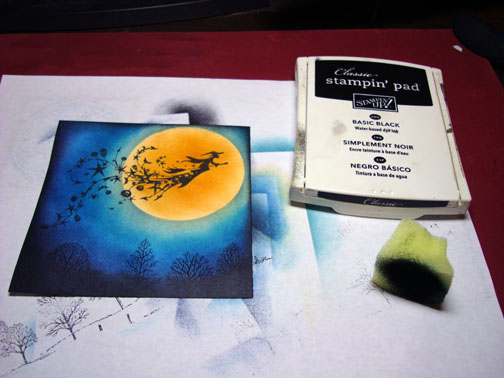
Stamped more trees at the bottom of the card stock. Used White Craft ink this time.
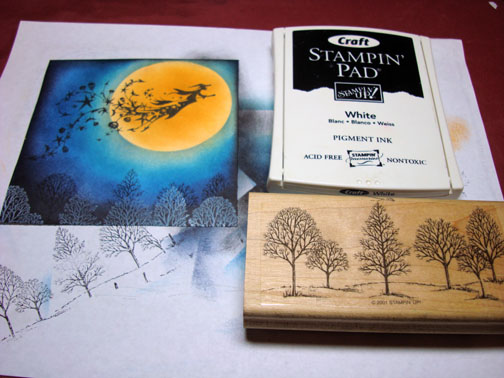
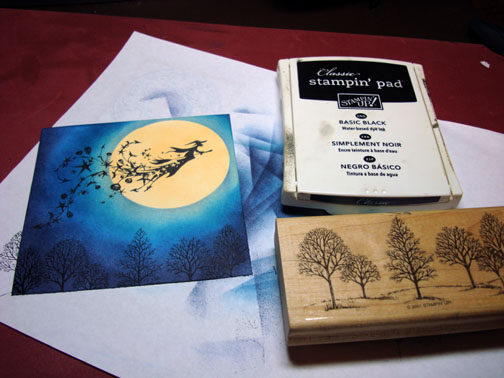
Using the edge of the stamp pad, smeared some stripes of White Craft ink across the card stock.
Using a ruler and a white gel pen, made some dashy lines across the card stock. Also, colored in the stars and added a few dots here and there.

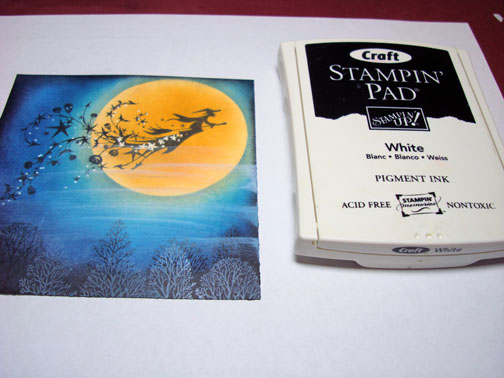
Here is the finished card front measuring 5.5″ square.
Thought I would show you my new tool. I’m so excited! No more crooked card bases for me. 🙂 I got a Scor-it Board so I can make the scores on my card bases. I never show it in my tutorials but I attach all of my card fronts to a White card stock base card. I’ve tried to get an even fold by folding my card base in half, but it never is really straight. Now that I have this Scor-it Board, I won’t have that problem any longer, YEAH!!!
Let me show you how simple I found this tool to be.
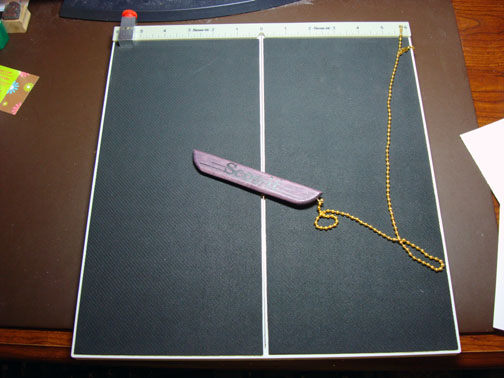
This is what the board looks like. It looks heavy, but is very light.
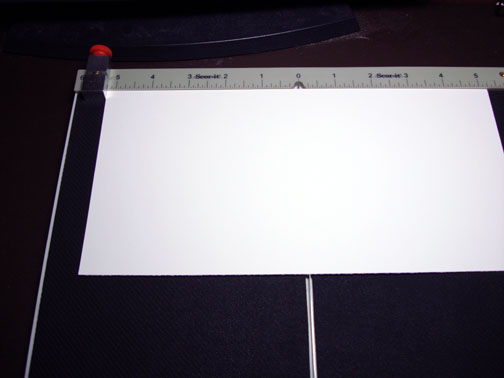
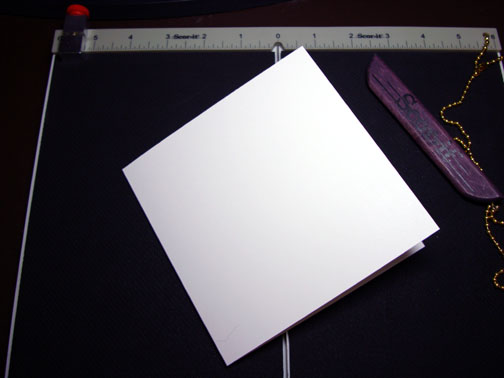
I cut my card stock for my base card. Move the little brace at the top to the measurment I want.
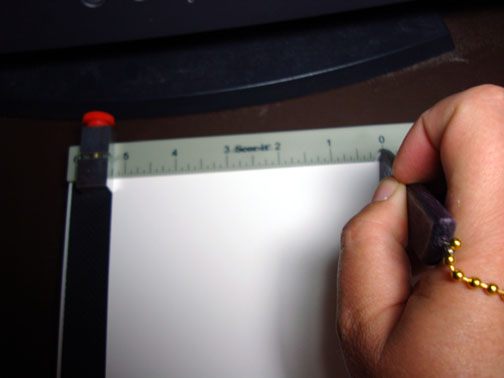
Insert the scor-it tool at the “zero” notch and pull in streight down the middle rail.
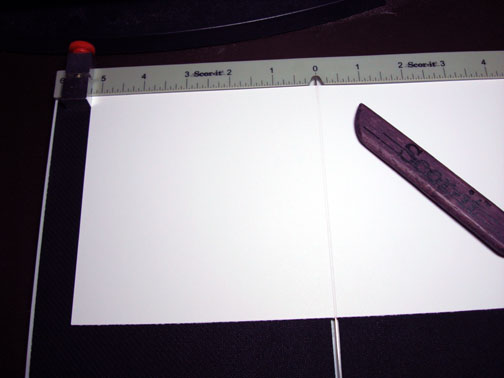
Nice straight score line. This makes me so happy.
Fold the card at the score line and there you have a straight card base. There are all kinds of folded cards, bags, etc. you can make with a scoring tool. I’ll have to check those out.
I got my Scor-it board from Marco’s Paper. Here is a link: https://www.marcopaper.com/
Hope your day is filled with crisp Autumn breezes and sunshine.
Until my next post. . . . . . . . . .
Hugs,
Michelle
Links to all my tutorials can be found here: https://zindorf.splitcoaststampers.com/tutorials-ive-written/
Here is a link to my workshop calendar if you want to get info on beginner and advanced Brayer workshops: https://zindorf.splitcoaststampers.com/workshop-calendar
49 responses to “A Witchie Night – Tutorial #125”