
BEWARE, enablers are every where!!!!!
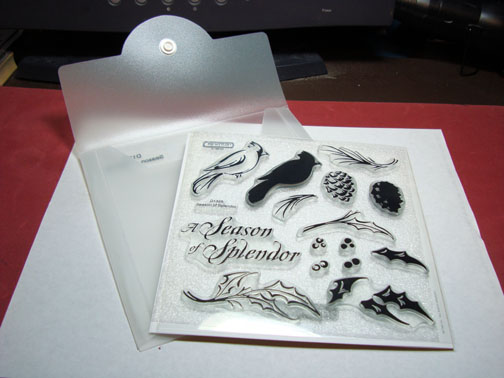
I found an enabler in Austin, TX at one of my workshops, her name is Joy McHargue. Joy showed me this set “Season of Splendor” from Close To My Heart. She wanted to know what I would do with this set. Well I took one look at the beautiful stamps and the great envelope packaging with the cute snap closure and I instantly wanted to see more of this line.
Joy the Enable gave me a catolog. I can’t believe I haven’t seen this line of stamps before. Anyway, I had a nice crisp Close to My Heart Catolog and a long plane ride from Austin, TX to Ohio. The very next day I was placing my order, lol. I’m so very, very weak!
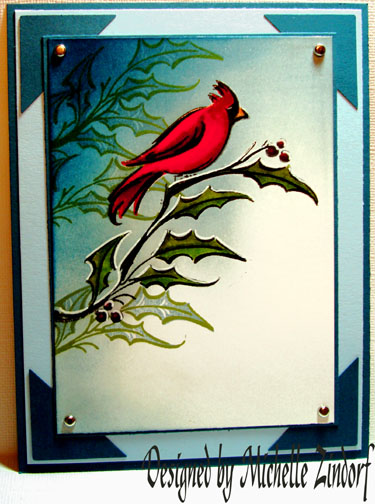
Long story short, Joy, here is an example of what I would do with this set, lol.
If you wish to be enabled too, here is Joy’s website at Close to My Heart: https://joysfunprojects.myctmh.com/WebSites/Templates/MyCTMH/Template1.aspx?Reload=Yes you can shop 24/7.
Let’s get started on the tutorial. 🙂
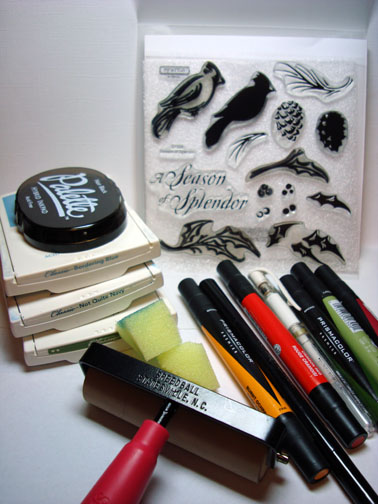
Supplies:
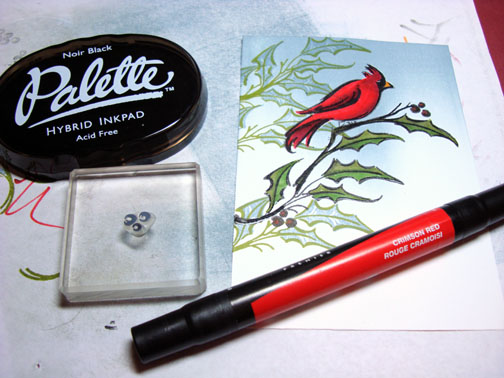
| Stamps: Close to my Heart “Season of Splendor” |
| Paper: Stampin’ Up Whisper White, Bordering Blue, Not Quite Navy |
| Ink: Stampin’ Up Bordering Blue, Not Quite Navy, Old Olive |
| Accessories: Prismacolor Markers, Brayer, Versamark Marker, Fine Detail Clear embossing Powder, Heat Gun, Silver Brads, Photo Corner Punch, White Gel Pen, Sponges |
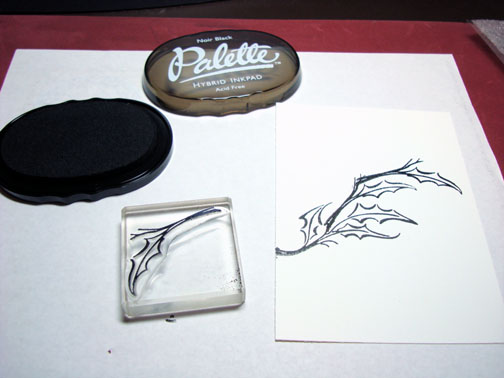
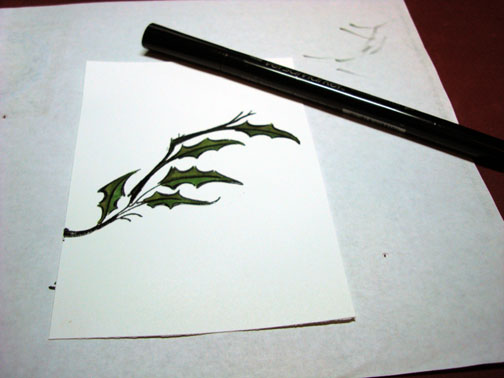
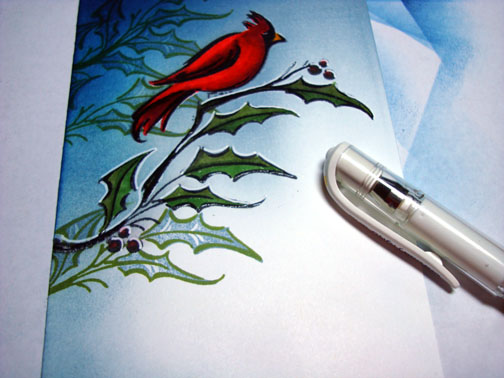
Stamped Holly leaves with Palette Noir Black ink on a 4″ x 5.5″ piece of Whisper White card stock.
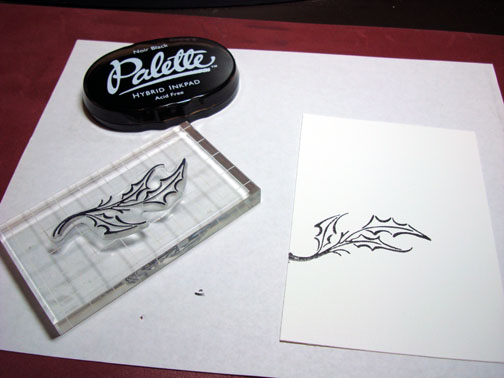
Stamped the Holly Leaf stem stamp with Noir Black to extend the branch.
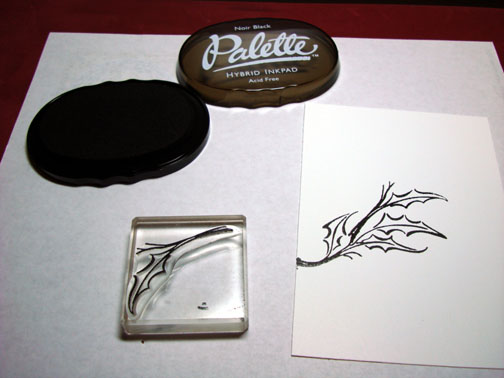
Stamped the image one more time to continue to extend the branch.
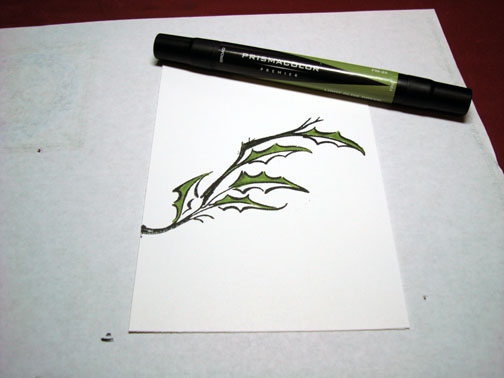
Colored the top half of the leaves with a Prismacolor Light Olive Green marker.
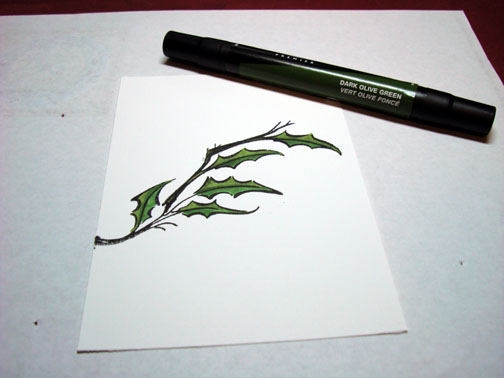
Colored the bottom half of the leaves with a Dark Olive Green Marker.
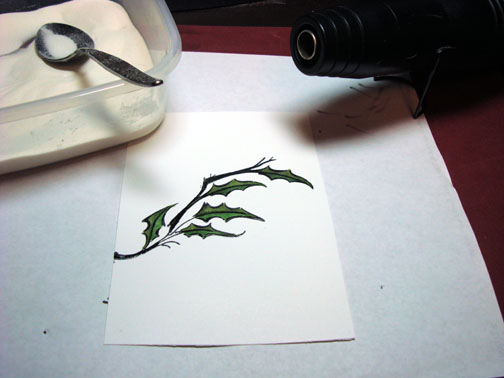
Went over the Leaves and branch with a Versamark marker.
Heat embossed the images with fine detail clear embossing powder and a heat gun.
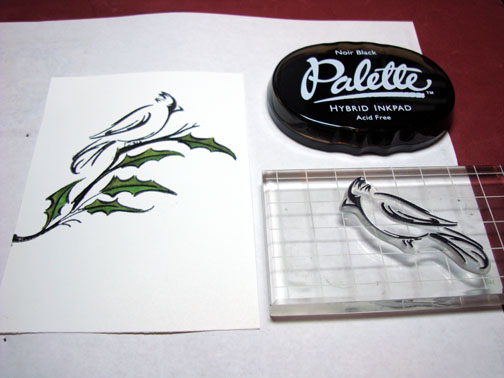
Stamped the Cardinal with Palette Noir Black ink.
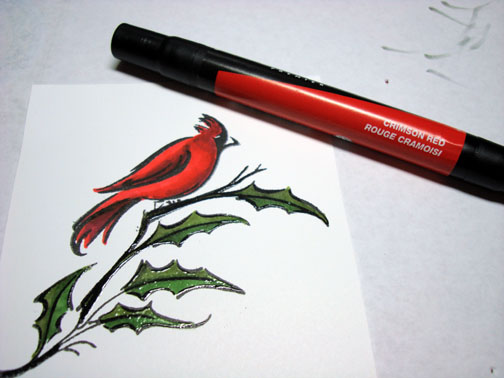
Colored the Cardinal in with a Crimson Red marker.
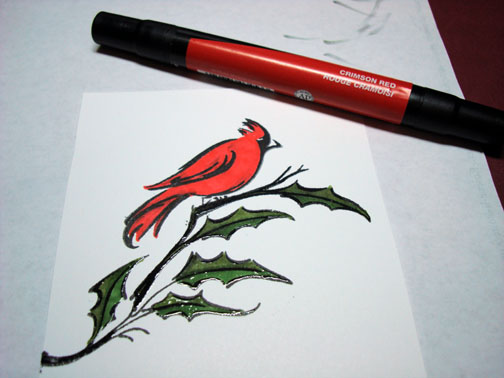
Added Mahogany Red to the bottom of the bird, wing and head.
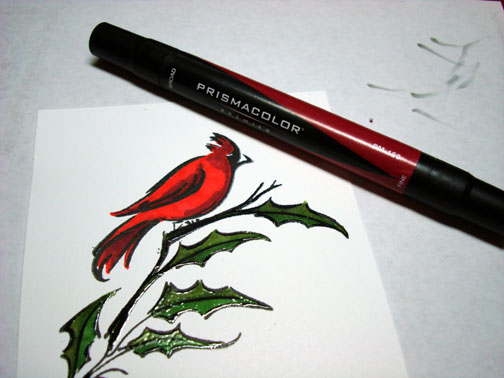
Went over the bird again with the Crimson Red marker to blend the colors together.
Colored in the beak with a Burnt Ochre marker.
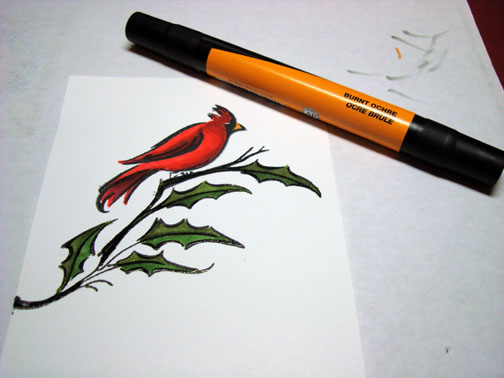
Colored over the entire Cardinal with a Versamark marker.
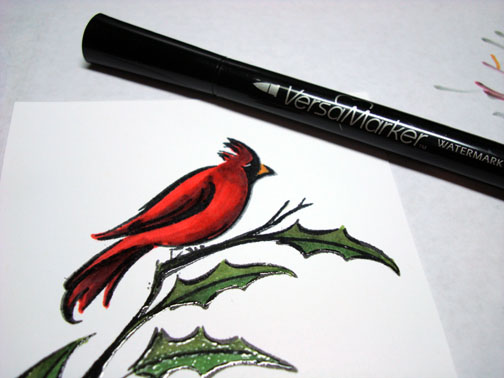
Heat embossed the Cardinal with clear embossing powder and a heat gun.
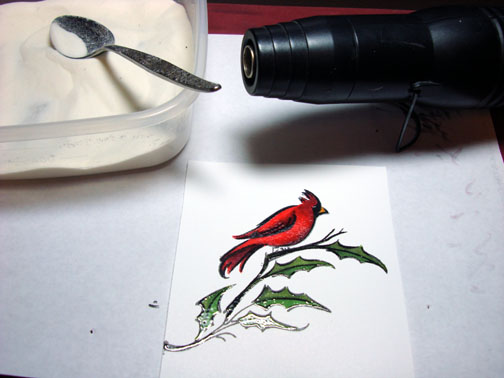
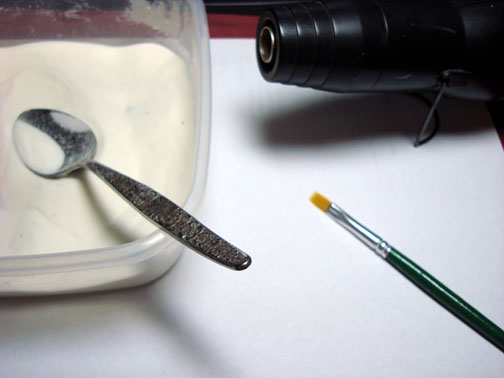
Note: I use a small paint brush to brush away any stray embossing powder before heating the image.
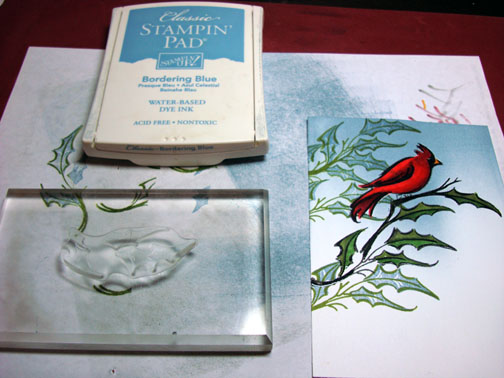
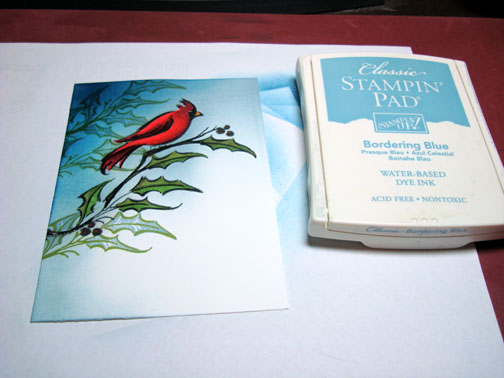
Brayered Bordering Blue ink at the top of the card stock.
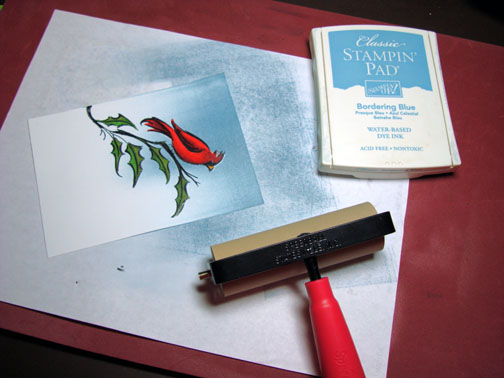
Note: I test images and colors on my scrap paper before I stamp them on my project. This helps to keep me from groaning in agony so early in the morning. 🙂

Stamped Olive leaves with Old Olive ink.

Stamped the leaves solid image with Bordering Blue to fill the leaves in.
Stamped some berries with Palette Noir Black ink and colored them in with a Prismacolor Crimson Red marker.
Sponged Bordering blue on the left side top half of the card stock.
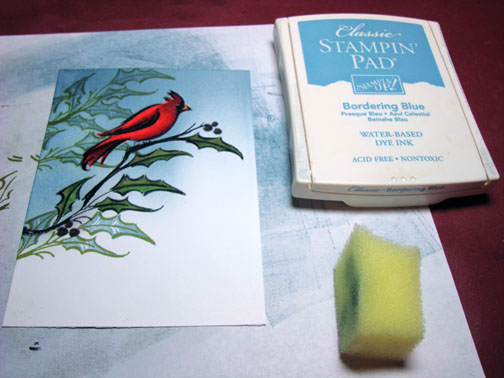
Added some Not Quite Navy ink at the top left side of the card stock.
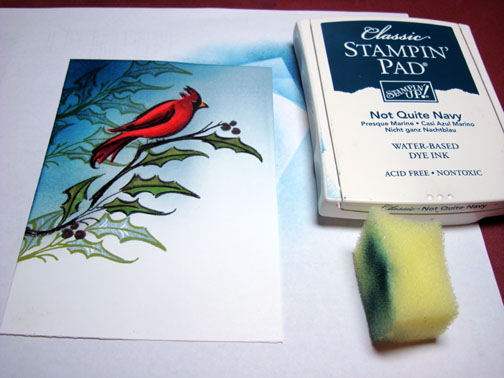
Oops! I had an ink smug at the lower left side of the card stock. Time to sponge some Bordering Blue to cover that up. Yep, I do that all the time. 🙂
Added some highlights to the tops of some of the embossed leaves and stems with a White Gel pen.
Assembled the card front and here you have it finished measuring 5″ x 6.5″.
Note: those are Photo corner punches in the corners under the main image. 🙂
May your day be filled with the sweet sounds of birds singing and please watch out for those enablers! They can be deadly to your check book.
Until my next post. . . . . . . . . . .
Hugs,
Michelle
Links to all my tutorials can be found here: https://zindorf.splitcoaststampers.com/tutorials-ive-written/
Here is a link to my workshop calendar if you want to get info on beginner and advanced Brayer workshops: https://zindorf.splitcoaststampers.com/workshop-calendar
33 responses to “Mister Cardinal – Tutorial #127”