
Today I thought I would warm things up a bit and use some really bright colors, but first I have some blog candy to tell you about. 🙂
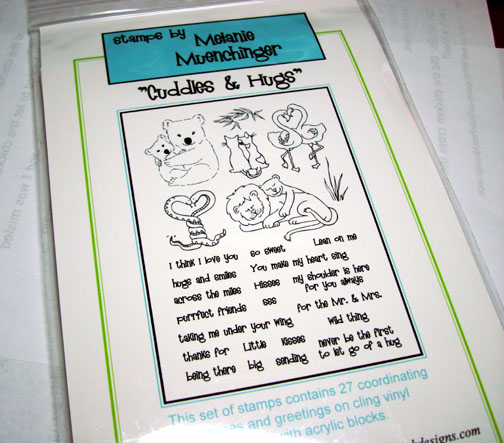
The Blog Candy for this week is a very cute set of 27 Stamps by Melanie Muenchinger and Manufactured by Gina K. Designs titled “Cuddles & Hugs”. Cute, cute, cute!
To enter for a chance to win this stamp set leave a comment on this post telling me you want entered. If you are getting this blog update by e-mail you will need to click this link and leave a comment on this post: https://zindorf.splitcoaststampers.com/2008/11/06/using-white-floral-tutorial-144-and-some-blog-candy/
I will select a winner of this blog candy on Sunday, November 9th using a random number generator. Good luck to you all!
Now on with the tutorial. 🙂
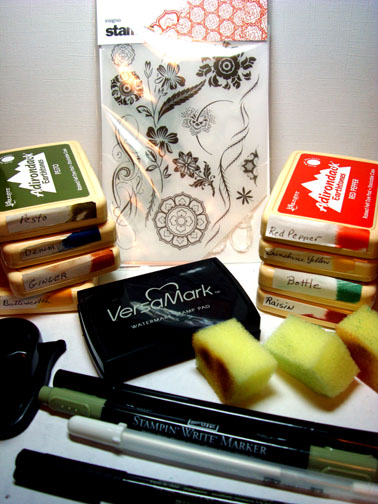
Supplies:
| Stamps: Basic Grey “Insignia” |
| Paper: Stampin’ Up Whisper White & Night of Navy |
| Ink: Adirondack Red Pepper, Sunshine Yellow, Bottle, Raisin, Pesto, Denim, Ginger, Butterscotch |
| Accessories: Mellow Moss Marker, Black Marker, White Gel Pen, Versamark pad & Marker, Sponges, Brads, Ticket Corner Punch, Fine Detail Clear embossing Powder & Heat Gun |
Stamped Flowers on a 4″ x 5.5″ piece of Whisper White card stock by loading the stamp first with Versamark and then Pesto ink before stamping it.
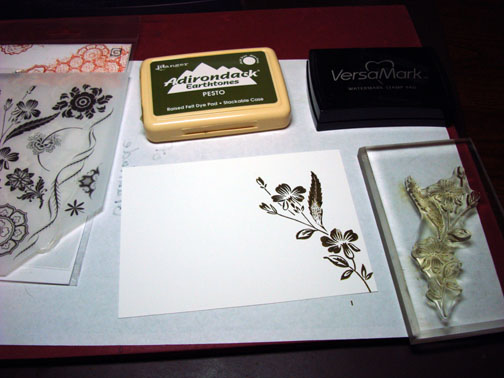
Repeated the last step to add the second flowers.
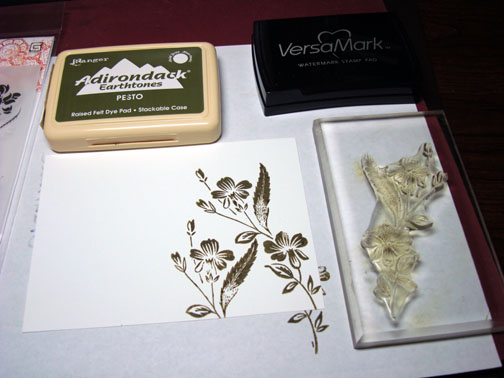
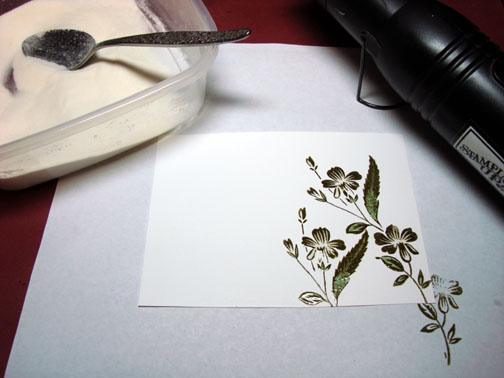
Heat embossed the images using fine detail clear embossing powder and a heat gun.

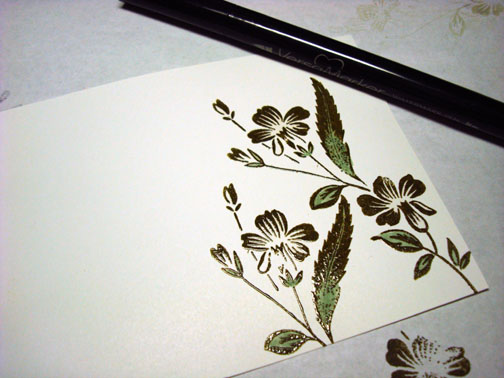
Colored the middle of the leaves with a Mellow Moss Marker.
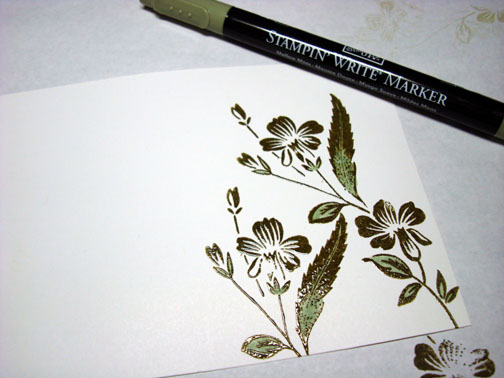
Colored over the leaves and colored the white middle of the flowers with a Versamark Marker and then heat embossed them with clear embossing powder and a heat gun.
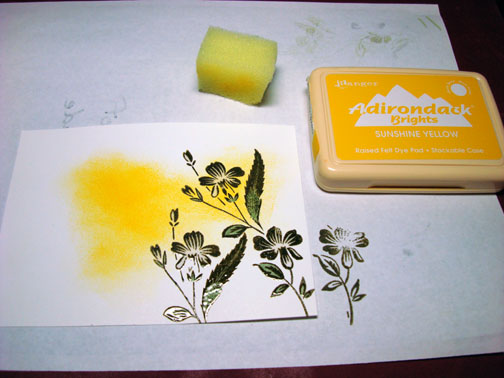
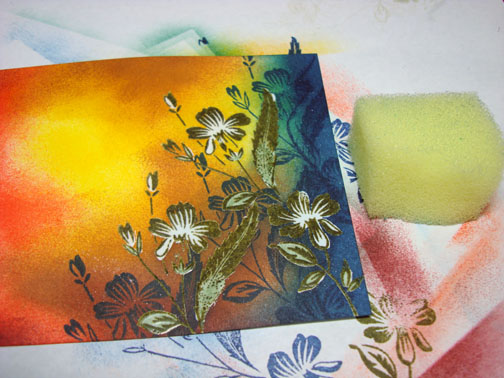
Sponged on Sunshine Yellow ink.
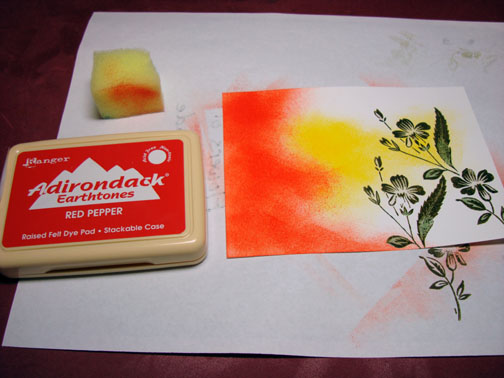
Sponged on Red Pepper ink.
Sponged on Butterscotch ink.

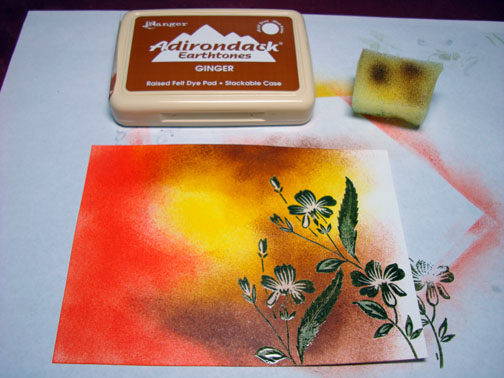
Sponged on Ginger ink.
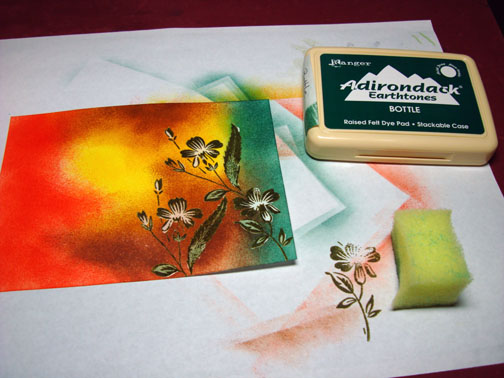
Sponged on Bottle ink.
Sponged on Denim ink.

Sponged on Raisin ink.
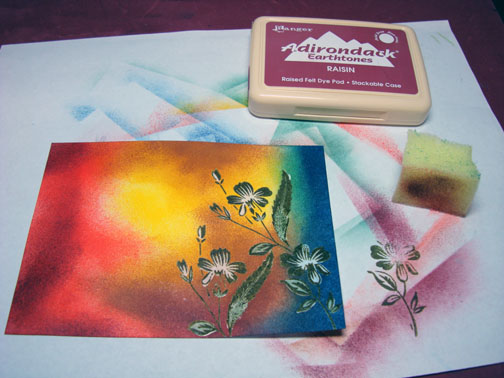
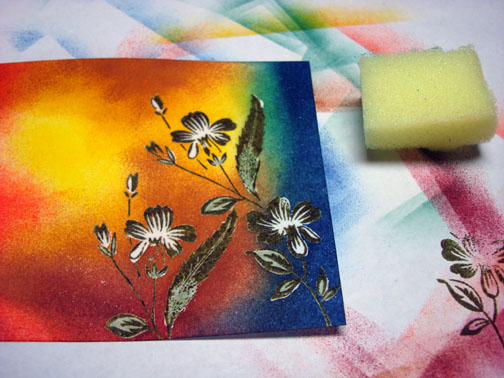
Wiped the ink from the embossed images using a clean sponge.
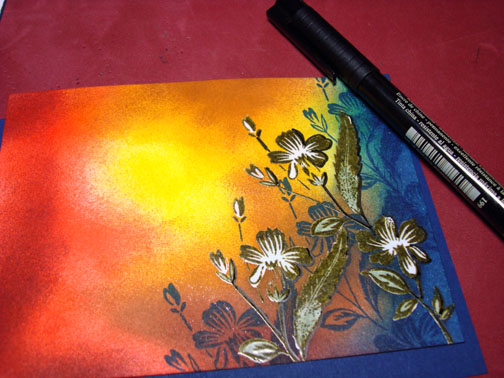
Over stamped the embossed images with the weed stamp and more flowers using Denim ink.
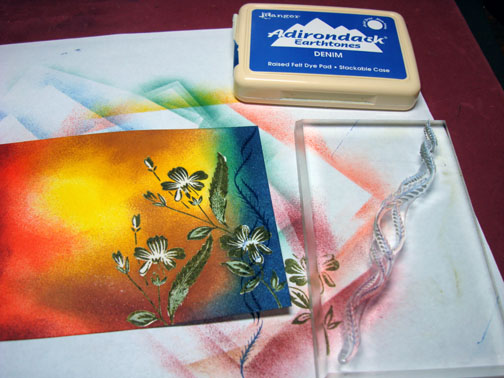
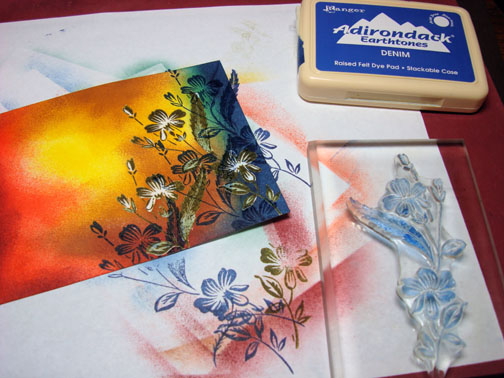
Wiped off the embossed images again with a clean sponge.
Outlined the right sides of the embossed flowers with a fine point black marker.
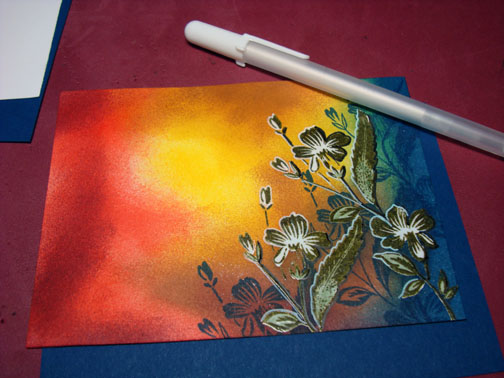
Outlined the tops and left side of the embossed images with a white gel pen.
Used a ticket corner punch on the main image panel and the two panels below it.
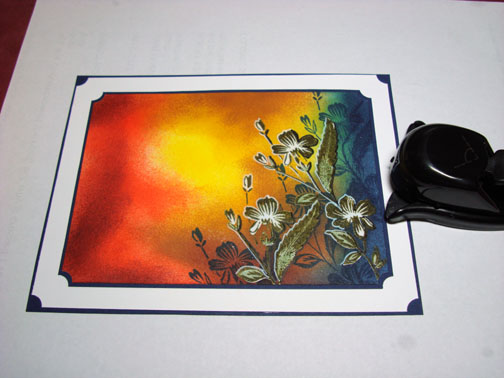
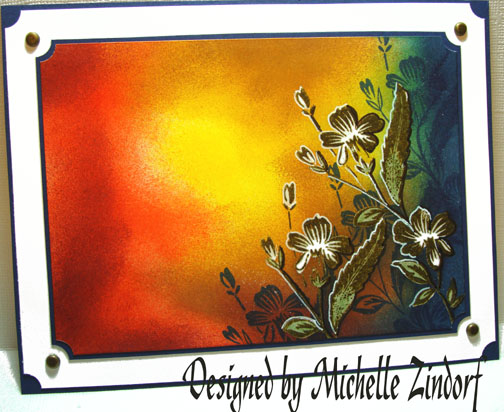
Assembled card and added brass brads. Here it is finished measuring 5″ x 6.5″.
I hope this tutorial has encouraged you to use the white of your paper to add a bit of drama to your cards. Also this sponged background can be used for sooooo many scenes.
May your day be filled with lots of color.
Until my next post. . . . . . . . . .
Hugs,
Michelle
Links to all my tutorials can be found here: https://zindorf.splitcoaststampers.com/tutorials-ive-written/
Here is a link to my workshop calendar if you want to get info on beginner and advanced Brayer workshops: https://zindorf.splitcoaststampers.com/workshop-calendar
Frequently asked questions answers: https://zindorf.splitcoaststampers.com/frequently-asked-questions/
327 responses to “Using White Floral – Tutorial #144 and Some Blog Candy”