
Good morning, it is with great sadness that I must part with my Sister for a little while. She will be flying back to Colorado this morning. We had such a wonderful visit together over the weekend. Thank you to everyone that wished us a good time. 🙂 My blog readers are the very BEST!
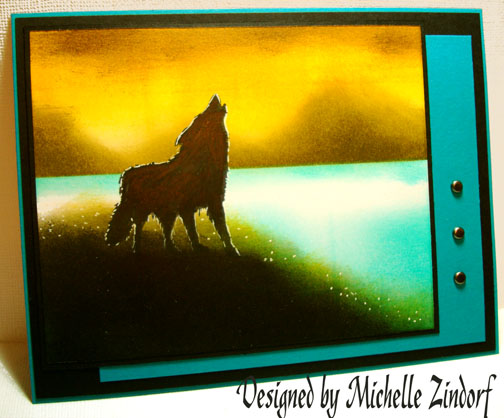
I have this Lone Wolf tutorial for you this morning. It is kind of how I feel today. 🙁
But first I have a happy announcement!!!!
 The winner of Friday’s blog candy is . . . . . . . . . .. . . . . . .. . ..
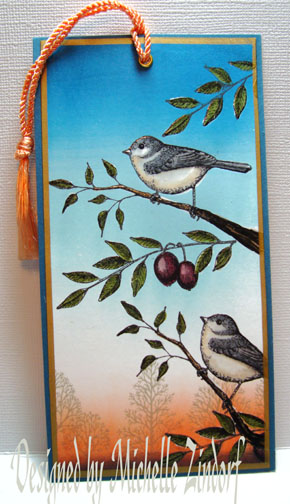
JenMarie who wrote “Oh how beautiful! STUNNING!”
JenMarie, please e-mail your address to [email protected] and I will put this bookmark in the mail to you.
Thanks everyone for playing along. Wish I had a bookmark to send all 380 of you!
All right then, let’s get going on the tutorial. 🙂
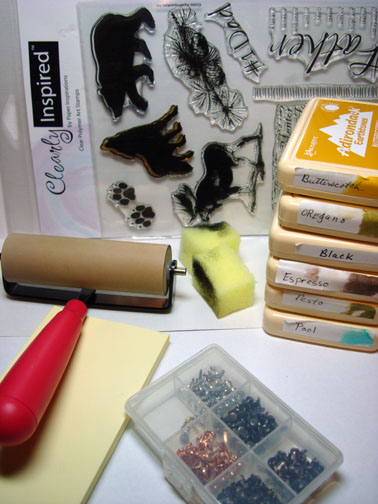
Supplies:
| Stamps: Clearly Inspired LCS101 Nature/Father |
| Paper: Stampin’ Up Whisper White, Basic Black & Taken with Teal |
| Ink: Stampin’ Up Basic Black, Adirondack Butterscotch, Oregano, Black, Espresso, Pesto, Pool |
| Accessories: Brayer, Sponges, White Gel Pen, Brads, Post it Notes |
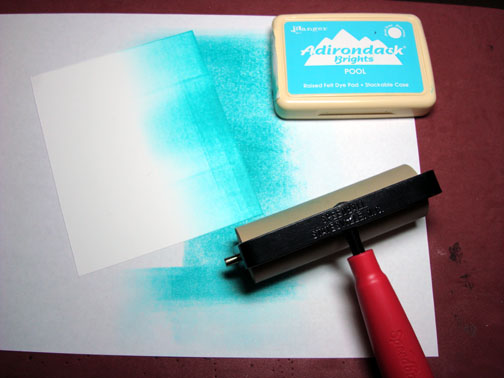
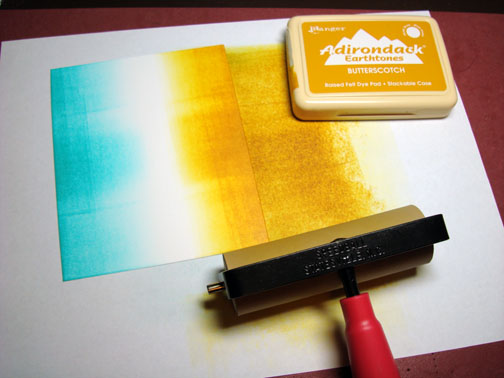
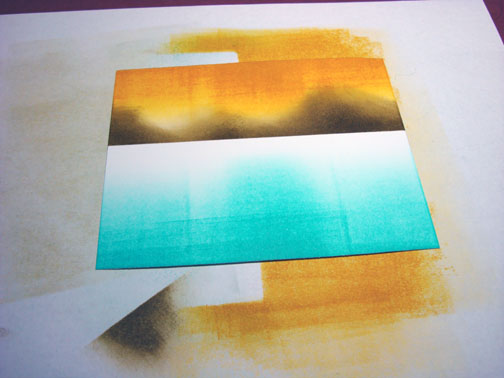
Brayered Pool ink on a 4.25″ x 5.25″ piece of Whisper White Card stock.
Brayered Butterscotch ink at the top of the card stock.
Masked the water area of the card stock with a couple of post it notes.
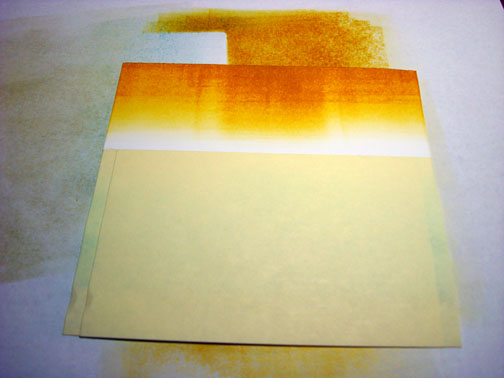
Sponged in some mountain shapes with Oregano ink.
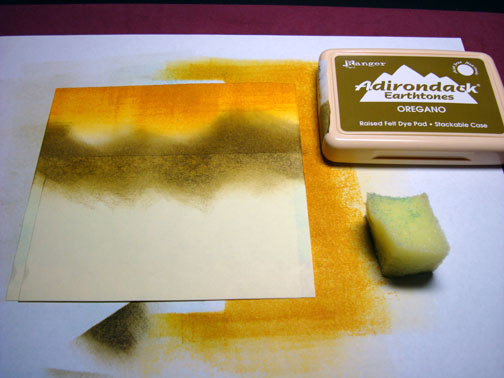
Sponged some Pesto ink at the bottom of the mountains.
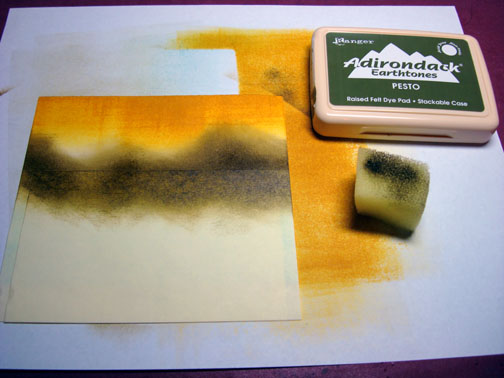
Removed the post it notes.
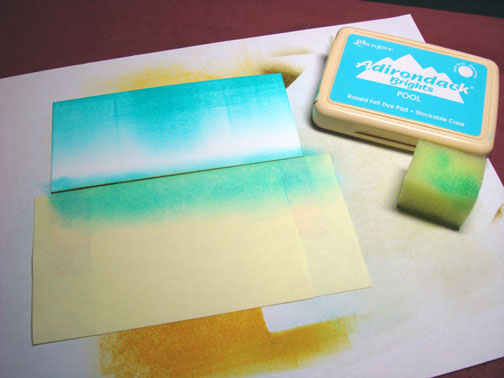
Put new post it notes on to mask the sky area. I left just a bit of the mountains showing at the bottom of the post it notes so I would not get a halo effect (white line).
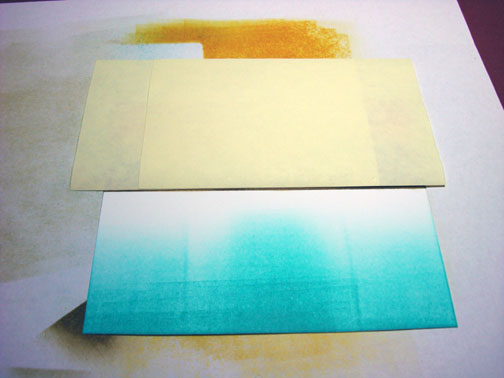
Sponged on Pool ink right at the post it note edge using a back and forth motion.
Stamped the Wolf with Black ink.
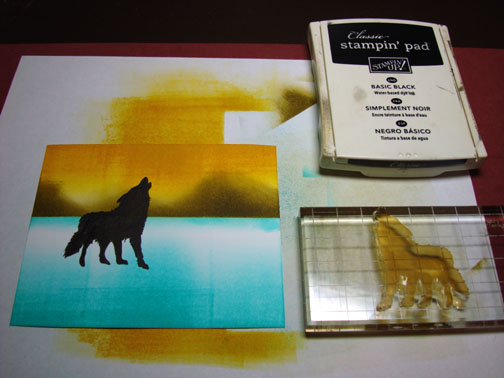
Sponged in the hill using Black ink.
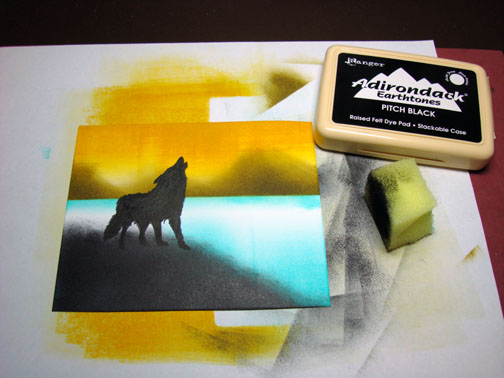
Sponge just a bit of Butterscotch ink around the top of the hill.

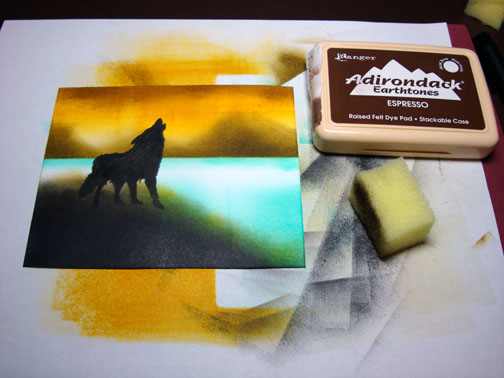
Sponge a bit of Espresso ink at the top of the card stock to create some clouds.
With a White Gel Pen, added a light broken outline to the wolf and a few dots at the top of the hill to create highlights.
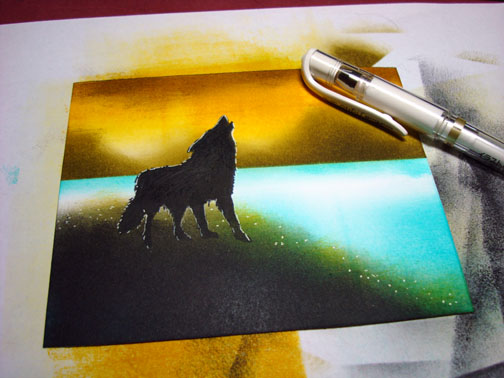
Assembled card and here it is finished measuring 5″ x 6.5″.
One more thing before I close today. My friend Karen Barber, had a wonderful group of ladies come in from the other side of Ohio to stay the night at her house and stamp their little hearts out. My sister and I were fortunate enough to have lunch at my local tea house with them and then travel back to Karen’s house to stamp for a little while. Here is a picture of the group.

Thanks Ladies for including me. I had a wonderful time and it was so nice meeting you! See you next year. 🙂
Everyone have a Super, Super Monday!
Until my next post. . . . . . . . . . . .
Hugs,
Michelle
Links to all my tutorials can be found here: https://zindorf.splitcoaststampers.com/tutorials-ive-written/
Here is a link to my workshop calendar if you want to get info on beginner and advanced Brayer workshops: https://zindorf.splitcoaststampers.com/workshop-calendar
Frequently asked questions answers: https://zindorf.splitcoaststampers.com/frequently-asked-questions/
23 responses to “Lone Wolf – Tutorial #148”