Nov 30 2008

Snow Covered Trees - Tutorial #153

Published by zindorf at 7:26 am under Tutorials

dsc06969.JPG

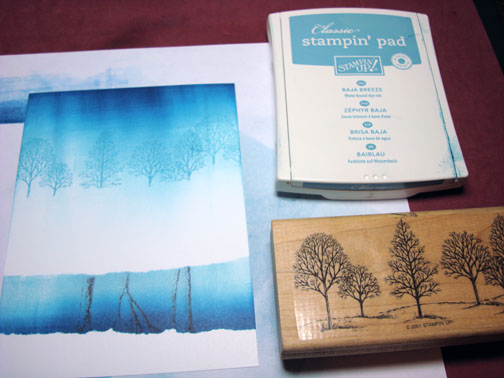
Hello again, today’s tutorial gives me a chance to show you my two most favorite tools to use while stamping.  The Stamp-a-ma-jig and the reverse image stamp. 

I also used a brand new stamp by Innovative Stamp Creations “Sketch of Nature I”.  Here is a link to their online store:  http://www.innovativestampcreations.com/catalog/item/1516071/6518501.htm

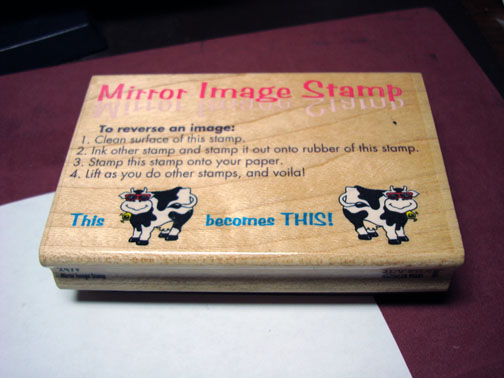
The Rubber Stampede Mirror image Stamp can be found at various places.  Here is a link to a post I did regarding this stamp and there were a lot of great suggestions on different ways to get a mirror image along with where to find this stamp in the comments left on the post:  http://zindorf.blogs.splitcoaststampers.com/2008/03/16/searchink-for-a-mirror-image-stamp/

I framed my piece today, but the finished main image panel is 4.5″ x 6″ so this could easily be a turned into a card.  The 8″ x 10″ frame I used is a barn wood frame I found at a thrift store for $2.00.  Got to love those thrift stores and garage sales.  :)

Let’s get started on the tutorial.

Supplies:

Stamps: Innovative Stamp Creations “Sketch of Nature I” and Stampin’ Up “Lovely as a Tree”, Rubber Stampede “Mirror Image Stamp”
Paper: Stampin’ Up Whisper White, Baja Breeze and Basic Black
Ink: Stampin’ Up Not Quite Navy, Basic Black and Baja Breeze
Accessories: 8′ x 10″ opening Barn wood Frame (Thrif Store find), White Gel Pen, Black marker, Brayer, Post it notes, Stamp-a-ma-jig, Sponge

dsc06971.JPG

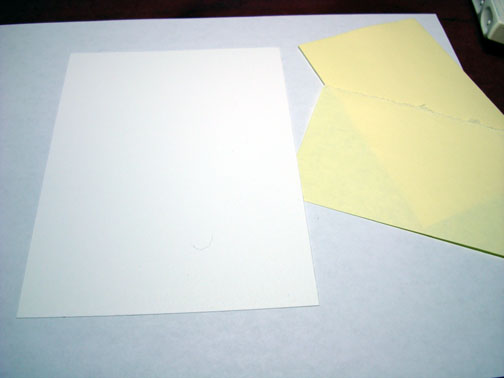
Started with a 4.5″ x 6″ piece of Whisper White Card stock.

dsc06945.JPG

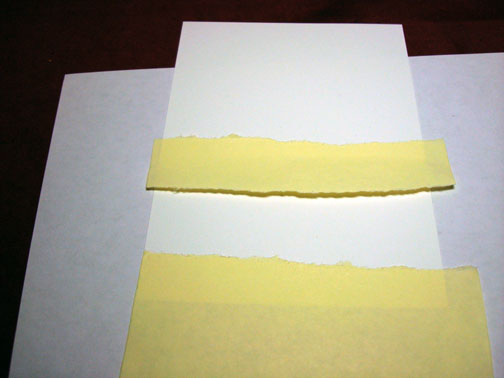
Tore two post it notes through the stick part and used them as masks.

dsc06946.JPG

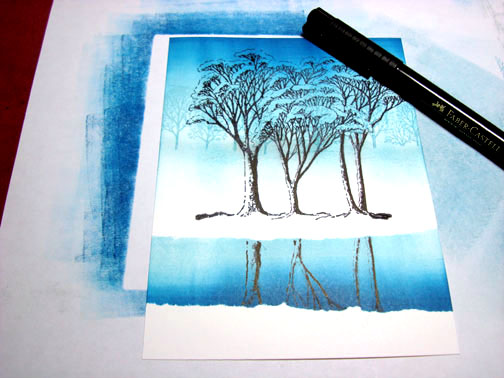
Stamped my tree stamp with Black ink on my Reverse image stamp and then stamped the reverse image stamp on the card stock creating a reverse image of the original stamp.

dsc06947.JPG

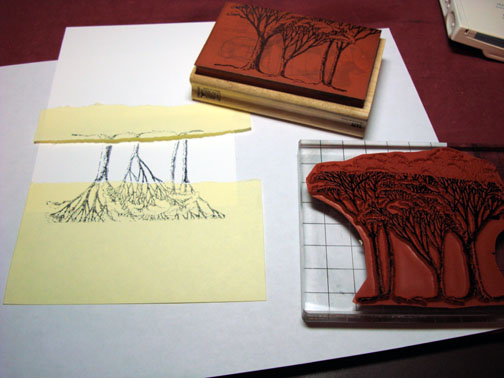
Photo of the reverse image stamp top.

dsc06948.JPG

Turned my card stock and brayered Baja Breeze ink in between the two post it notes.

dsc06949.JPG

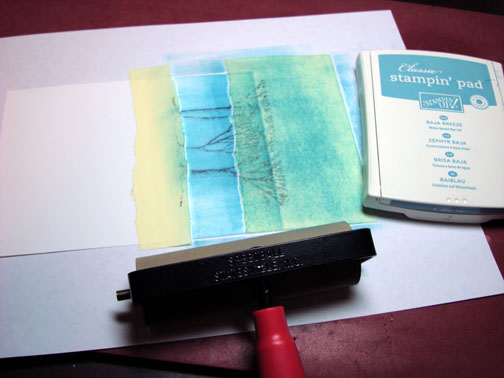
Brayered Not Quite Navy ink over the bottom post it note and onto the card stock, not covering the Baja Breeze ink entire.

dsc06950.JPG

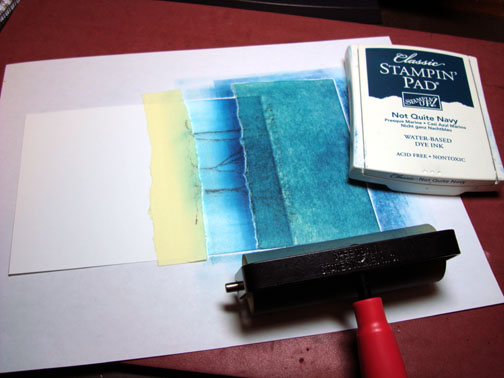
Removed the post it note masks.

dsc06951.JPG

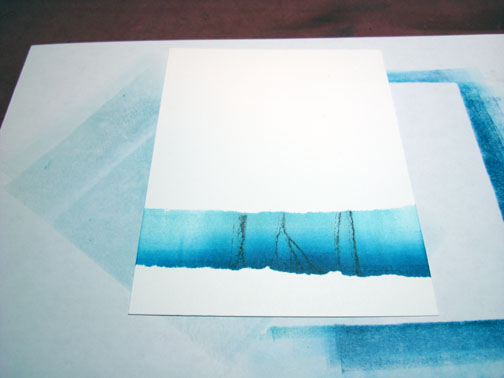
Brayered Baja Breeze ink at the top of the card stock.

dsc06952.JPG

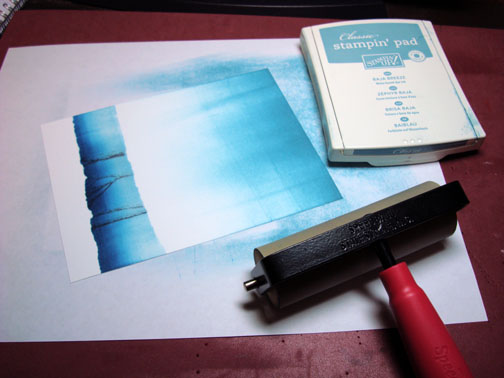
Brayered Not Quite Navy at the very top of the card stock not covering the Baja Breeze ink entirely.

dsc06953.JPG

Stamped the Lovely as a Tree image across the card stock using Baja Breeze ink.

dsc06954.JPG

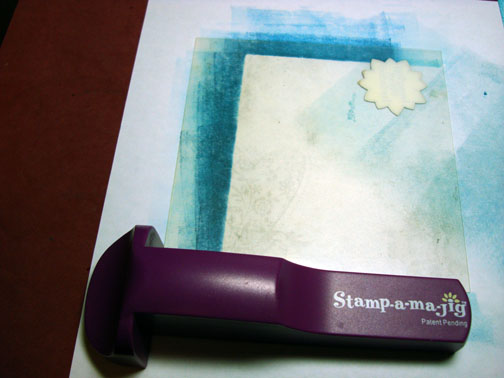
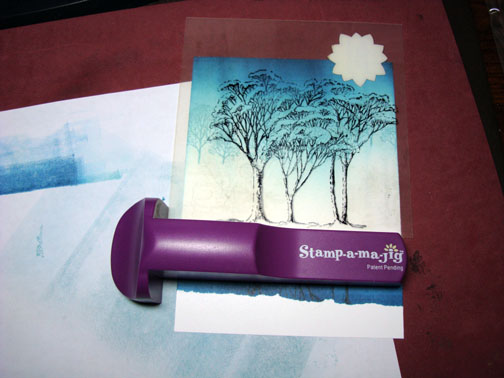
Now it is time to stamp my main (focal) image and I really don’t want to risk stamping it crooked or off center from the reverse image previously stamped so I am going to use my Stamp-a-ma-jig.  I know I have a lot of new stampers that have not experience using some tools so I’m going to show the step by step process of using the Stamp-a-ma-jig.  Bare with us you seasoned stampers.  :)

I line the plastic piece up in the “L” of the stamp-a-ma-jig.

dsc06956.JPG

Ink my stamp up with Black ink and line the stamp up in the “L” of the Stamp-a-ma-jig as I lower it and stamp the image on the plastic piece.

dsc06957.JPG

dsc06958.JPG

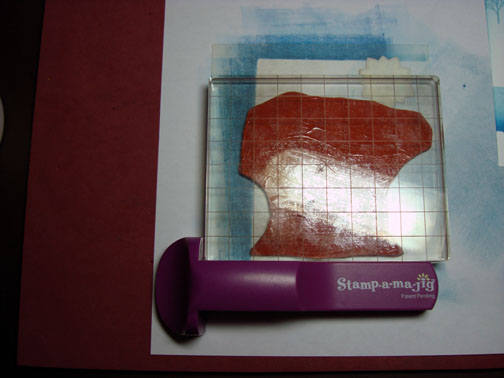
I can now take the plastic piece and move it around on my main image panel to see exactly where I want my image.

dsc06959.JPG

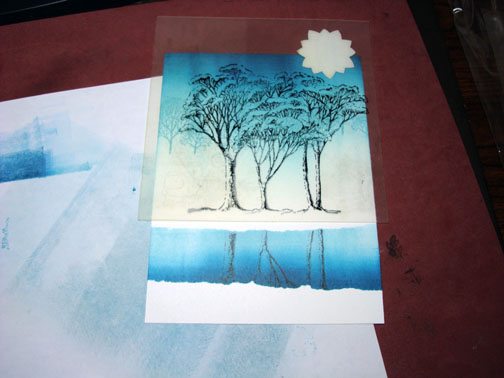
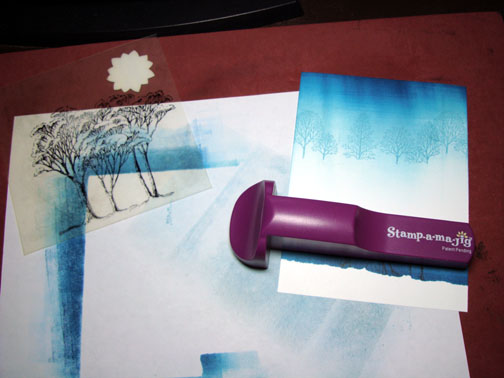
Line the Stamp-a-ma-jig handle “L” up on the Plastic Piece.  Hold the Handle in place and move the plastic piece away from the panel.

dsc06960.JPG

dsc06961.JPG

Ink my stamp up with Black ink.  Hold the Stamp-a-ma-jig handle firmly and line my stamp up with the “L” on the handle as I lower to the card stock.  Press down firmly on the stamp to make my impression.

dsc06962.JPG

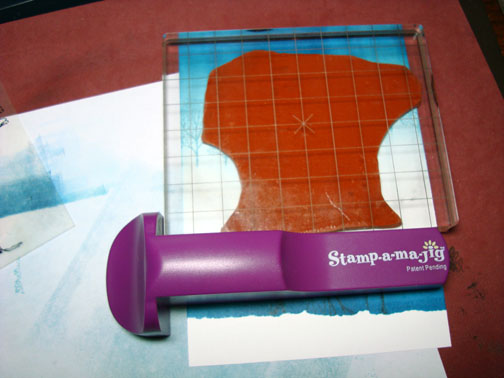
Remove stamp and handle.

dsc06963.JPG

Sponged a bit of Baja Breeze ink under the small trees.

dsc06964.JPG

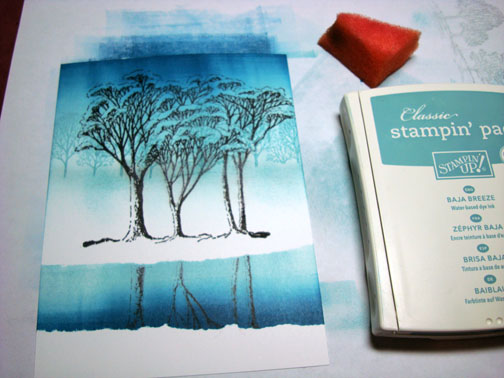
Used a black marker and went down the right sides of the large trees and the right sides of the reverse image to make them stand out a bit more.

dsc06965.JPG

Colored the tops of the trees with a white Gel Pen.

dsc06966.JPG

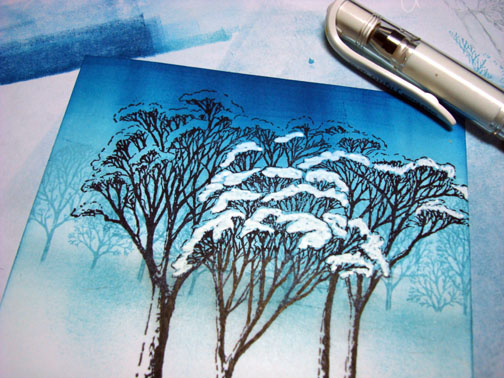
Used the White Gel pen and went down the Left sides of the large trees and the left sides of the reverse image.

dsc06967.JPG

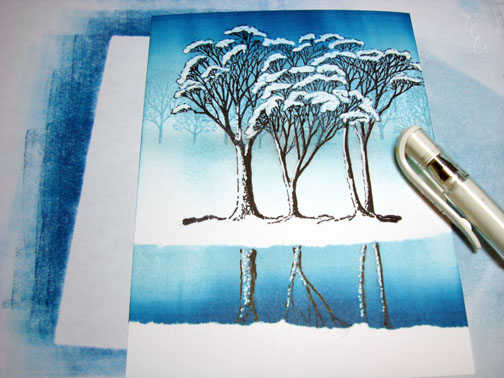
Layered the main image panel on Black and Baja Breeze card stock panels and framed it. 

dsc06969.JPG

I hope you enjoyed today’s winterly tutorial and find yourself inspired to get out those stamps today.

May your day be filled with peaceful scenes.

Hugs,

Michelle Zindorf

Links to all my tutorials can be found here:  http://zindorf.blogs.splitcoaststampers.com/tutorials-ive-written/

Here is a link to my workshop calendar if you want to get info on beginner and advanced Brayer workshops:  http://zindorf.blogs.splitcoaststampers.com/workshop-calendar

Frequently asked questions answers:  http://zindorf.blogs.splitcoaststampers.com/frequently-asked-questions/

37 Responses to “Snow Covered Trees - Tutorial #153”

  1. Evelyn----Ks.stamperon 30 Nov 2008 at 9:28 am

    Great tutorial, love those trees. Makes us think that the white stuff will be coming soon. I love thes snow on your cards, but don’t like it too much when we get it covering everything, hard to feed cattle and get chores done. It is beautiful tho.
    Evelynn

  2. Janeton 30 Nov 2008 at 9:49 am

    Michelle, i like the picture you made with this stamp, amazing as always. I also had to place a order to get some of the stamps you use.I love your tutorials and can’t wait for the holidays to get over so i have more time to try them. You will help me get threw the winter and a good start on my next years Christmas cards.

  3. Phyllison 30 Nov 2008 at 10:00 am

    Brrrr can you feel the winter crispness in the air???? Appreciate your step by step instructions for the Stamp-a-magig. I am familiar with the technique as the Mr. made an “L” shape wooden piece for me and I use a piece of acetate. Have not, however, used a reverse image stamp. Gotta get me one of those!!! Back to trimming the tree! Thanks once again for a beautiful piece and tutorial. Trying to keep this comment brief as yesterday’s was a bit lengthy. HA!

  4. Bethon 30 Nov 2008 at 10:04 am

    Now that’s chilly! Fantastic winter scene and tutorial

  5. johannaon 30 Nov 2008 at 10:09 am

    this is how it looks for a few days ago, but now its to hot…
    verry nice picture.
    johanna

  6. stampersuzzon 30 Nov 2008 at 11:15 am

    Gorgeous. I love just looking at what you create in your tutorials.

  7. sandyh50on 30 Nov 2008 at 11:44 am

    Love your picture, Michelle. I have wanted try the reverse image technique. I have a big rubber stamp of a frame that I bought at a garage sale. I am going to cut away the frame part and just use the flat rubber for my mirror stamp. I think it will work!

  8. Sandy Kon 30 Nov 2008 at 12:30 pm

    Beautiful, thank you for the tutorial. I need a brayered swap this week so this looks like a quick one and it is so beautiful. Thanks for sharing.

  9. Karenon 30 Nov 2008 at 12:42 pm

    This is a lovely scene again! Thanks for letting us see that rubber stamping is an art, not only a craft.

  10. Barbon 30 Nov 2008 at 12:47 pm

    Michelle, this is another beautiful card. I can’t tell you how much I love your work. Its inspirational. Thanks too for all the work you put into your tutorials.

  11. Harriet Skellyon 30 Nov 2008 at 12:56 pm

    Wow another awesome work of art! You really inspire me Michelle!! Thank you for your tutorials! Hugs from a Zindorfian wannabe! Hope you had a great Thanksgiving.

  12. rebekkaon 30 Nov 2008 at 1:23 pm

    WOW Michelle this is just gorgeous. Thank you for the in depth tutorial, this new tree is just beautiful, I think their sales will go up today :).

  13. Christine Aon 30 Nov 2008 at 1:50 pm

    wow, what a beautiful scene, you really do inspire with your amazing creativitiy.

  14. Elaineon 30 Nov 2008 at 2:30 pm

    You seriously are THE MASTER at creating these kinds of cards! I am just in awe of your never ending talent and inspiration. This is soooo beautiful! I love the scene and send you many thanks for sharing your time and talents with us!

  15. Teresaon 30 Nov 2008 at 2:48 pm

    This is beautiful!

  16. Ritaon 30 Nov 2008 at 3:16 pm

    I luv this tree picture, its so beautiful & peaceful! By the way you can order the reverse stamp at Hanna stamps, I just ordered one a few days ago & can’t wait to use it! Now I can try this too! Thanks so much for all your fantastic tutorials!

  17. Tonyaon 30 Nov 2008 at 3:55 pm

    Wow! This is totally beautiful! Very serene & peaceful! Love it. Thank you so much for sharing it with us.

  18. Cindy H.on 30 Nov 2008 at 4:15 pm

    Wow! This is just stunning!!! TFS

  19. Darlene Gabrielon 30 Nov 2008 at 4:45 pm

    Wow!! I don’t know what else to say. Just gorgeous!!

  20. Deanneon 30 Nov 2008 at 4:48 pm

    I love this technique. I have one of those reverse image stamps but i have never been able to get a good image with it. :( . However, I haven’t tried it with my SU Basic Black, so I will give it another go.
    Just a quick question - because the reverse image stamp is so big, do you use a mouse pad or foam pad under your surface when you stamp?
    Thanks
    Deanne
    xx

  21. Wanda Hon 30 Nov 2008 at 5:10 pm

    Gorgeous!!!! You are amazing with this stuff!!!!

  22. Karen Ion 30 Nov 2008 at 5:57 pm

    There is something about trees covered in snow that is so soothing. Thanks so much for the tutorial today. I really needed it after a hectic day at work (I’m a nurse on a Alz wing) Im going to print it out and keep it with my stamping stuff just so I can look at it and feel refreshed. Again thank you so much for sharing your talent with us. You touch so many of us. PS I also love my stamp-a-ma-jig

  23. Gidget-Trishon 30 Nov 2008 at 6:04 pm

    Wow! I just love this stamp and you did a great job with the reverse image. I must look for this stamp. Yes you are an enabler!*L*
    Trish

  24. Wendyon 30 Nov 2008 at 6:12 pm

    This is another stunner! Have you ever considered making a book from your blog postings? I know I would buy it if you did! Thanks so much for sharing!

  25. Marilyn Kudraon 30 Nov 2008 at 6:26 pm

    Stunning. I am learning so much from you about reflections and shadows. Thank you for generous heart. Marilyn

  26. Kat Prystaion 30 Nov 2008 at 7:53 pm

    Beautiful. I love it, so simple and elegant.

  27. Lydia Fiedleron 30 Nov 2008 at 8:17 pm

    I’m not sure how many times I can say this is my all time fave but this is my all time fave!! Except all the others!!
    WOWZA.

  28. barbaraon 30 Nov 2008 at 8:19 pm

    This is so beautiful. Do you ever come to the Dallas Fort Worth area to teach classes?

  29. Linda C.on 30 Nov 2008 at 9:38 pm

    Love your artwork, your inspiration & your tutorials!!

  30. lauraon 30 Nov 2008 at 10:59 pm

    wow gorgeous. I really need to get a reverse stamp

  31. Sonjaon 01 Dec 2008 at 8:38 am

    Michelle what a wonderful peaceful winterscene you have created.
    Thanks for excellent tutorial ;-)

  32. Conniecrafteron 02 Dec 2008 at 2:53 pm

    Lovely project, what a great deal on that frame!

  33. Marion 02 Dec 2008 at 6:26 pm

    Oh, Michelle! You have completely outdone yourself! I’m not exactly sure why, but this really ’speaks’ to me. I really, truly love it. I can see that resistance is futile (ha, ha!) you’ve finally convinced me to get the mirror stamp…. :D

  34. Lisa Robbon 02 Dec 2008 at 8:27 pm

    All I can say is WOW! I Love it.

  35. Sharion 03 Dec 2008 at 5:37 pm

    Wow! I stumbled across your work on SCS. I now look on your blog religiously! I have ordered this stamp set and other tree stamp from your Light & Shadows tutorial. Now all I need to do is practice my brayering skills. Your work is fabulous. TFS with all of us.

  36. Kari V.on 05 Dec 2008 at 6:13 pm

    Oh WOW!! I really love this one!!!The trees and the background…well for that matter the whole thing is gorgeous! Fantastic job!!!

  37. Trena in Napervilleon 11 Dec 2008 at 1:30 pm

    Michelle,
    Thank you for all you share. Have a wonderful, relaxing, and safe Holiday Season.

    Take care and STAY POSITIVE!

Trackback URI | Comments RSS

Leave a Reply