
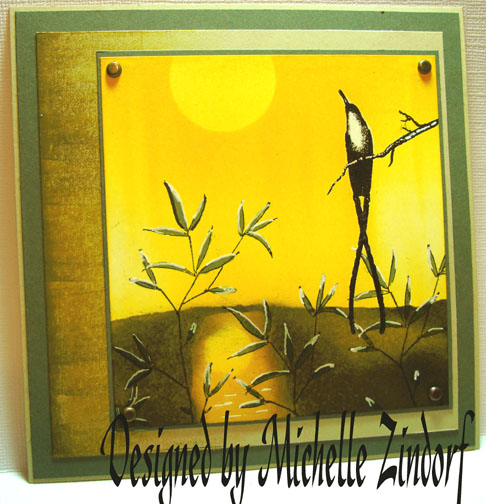
Here is a tutorial using another bird from a stamp sheet by Katzelkraft at www.katzelkraft.fr I’ve seen this bird before in other people’s projects and I just love it, love it, love it!
This is my attempt as showing the suns reflection in a puddle. It didn’t turn out the way I had envisioned it, but I like it just the same.
Before we get started I wanted to let everyone know that I am teaching my Beginner and Advanced Brayer workshops at Marcos Paper in Dayton, OH the month of February. If you are interested you can get more information on Marcos Paper website https://www.marcopaper.com/classzindorf2.htm .
The beginner class will take the mystery out of how to use the brayer. You will come away confident in your new skill and with some really great projects too. If you have already taken the beginner class and want to take your new brayering skill further I encourage you to take the Advanced class. I have revamped the Advanced class and have come up with some great new projects.
Ok, let’s get started on today’s tutorial.
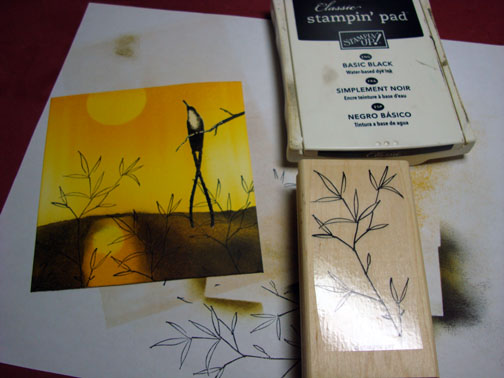
Supplies:
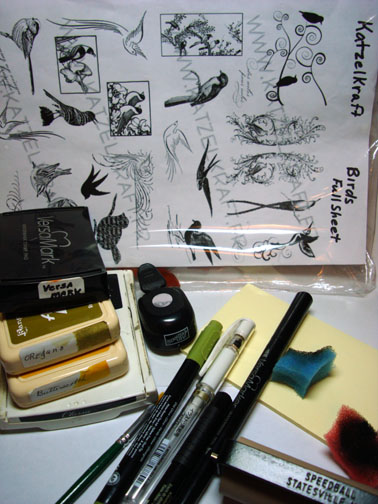
| Stamps: Katzelkraft “Bird” & Stampin’ Up “Embrace Life” |
| Paper: Stampin’ Up Whisper White, River Rock & Always Artichoke |
| Ink: Stampin’ Up Basic Black, Adirondack Oregano & Butterscotch |
| Accessories: Brads, White Gel Pen, Clear embossing powder, Heat Gun, Brayer, Olive Marker, Versmark pad and Marker, Post it notes, sponges, 1/2″ & 1 1/4″ Circle Punches |
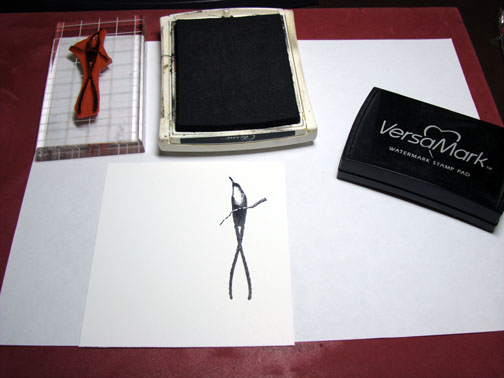
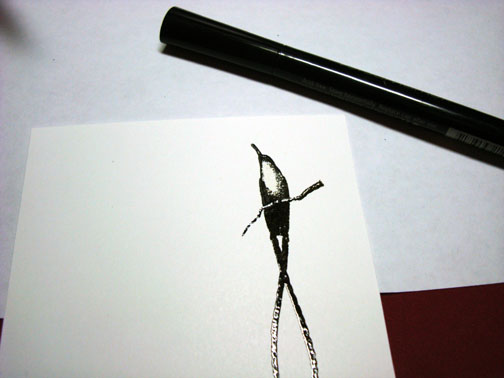
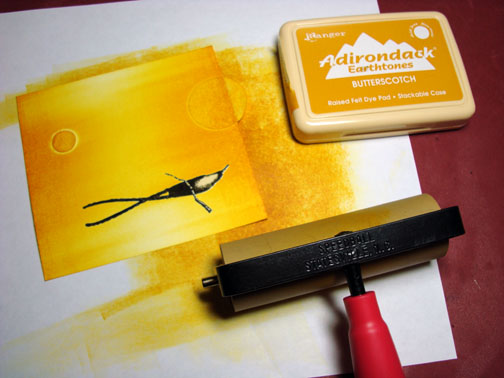
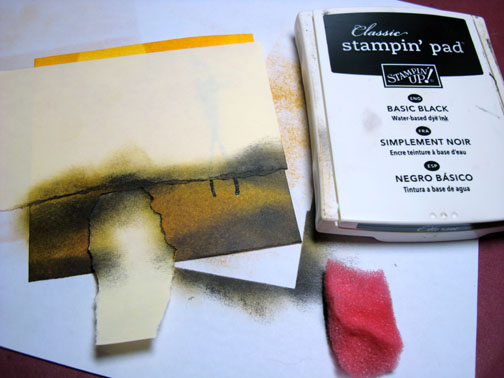
Stamped bird by first loading the stamp with Versamark marker then loading it with Black ink before stamping it. I stamped it on a 4 1/8″ x 4 3/8″ piece of Whisper White Card stock.
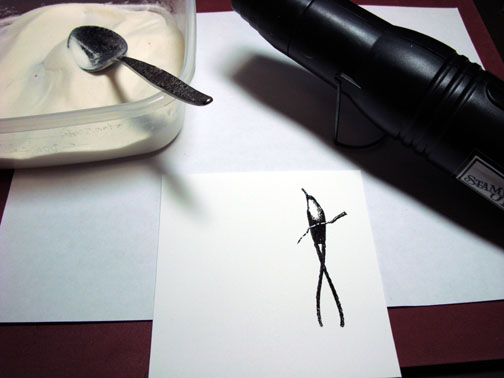
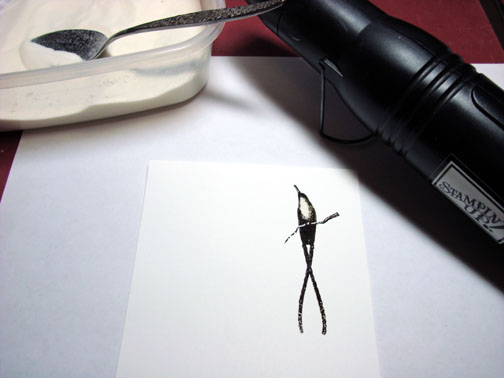
Heat embossed the image using clear embossing powder and a heat gun.
Went over the white part of the bird’s chest with a Versamark marker.
Heat embossed the image using clear embossing powder and a heat gun.
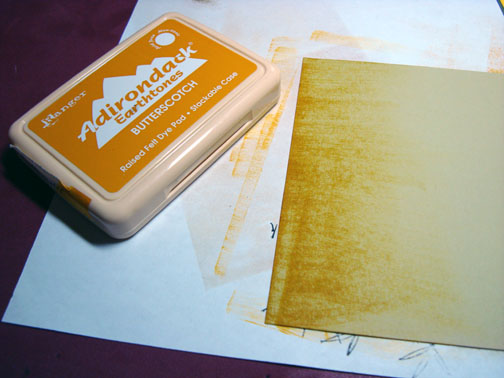
Brayered Butterscotch ink at the top and at the bottom of the card stock leaving it light in the middle.
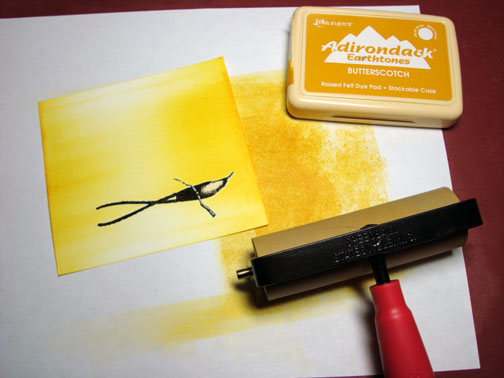
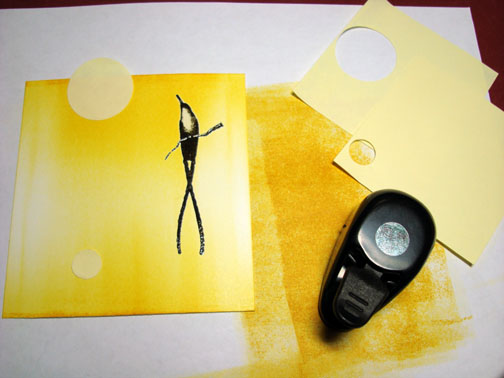
Punched a 1 1/4 circle and 1/2″ circle from the sticky part of a post it note and used them as masks for the sun and the sun’s reflection.
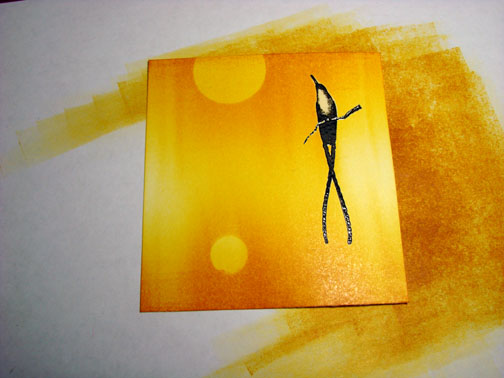
Brayered more Butterscotch ink at the top and bottom of the card stock.
Removed the masks.
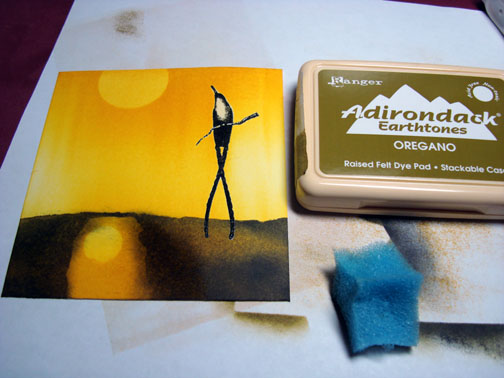
Ripped through the stick part of a post it note and masked the sky area of the card stock.
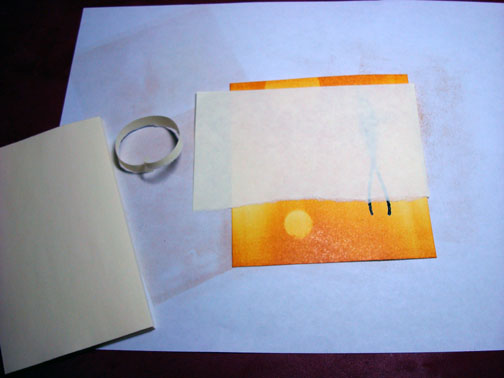
Tore another post it note and masked the water area.
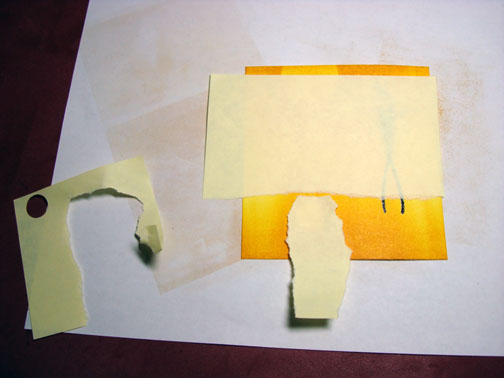
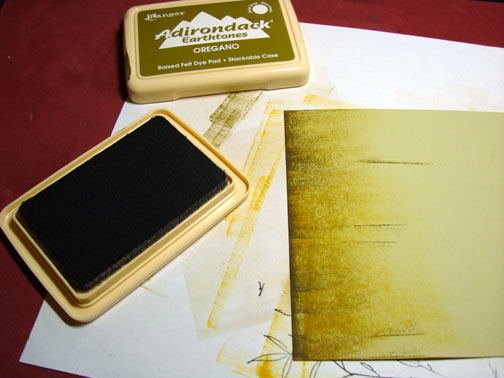
Sponged Oregano ink on the unmasked portion of the card stock.

Added some black sponging on the unmasked area of the ground leaving a few light areas.
Removed the post it note masks.

Sponged some Oregano ink around the edges of the water area to soften them.
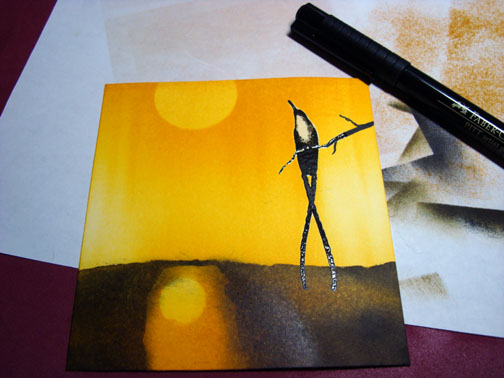
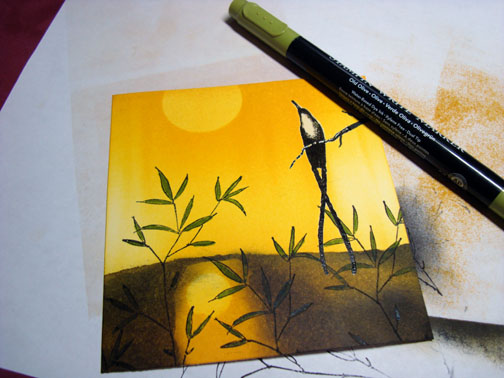
Extended the branch the bird is sitting on to the edge of the card stock with a black marker.
Stamped the plants with Black in a few times staggering the heights of the plants.
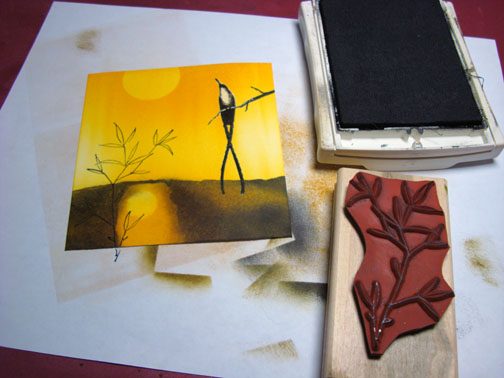
Colored the leaves in with an Olive marker.
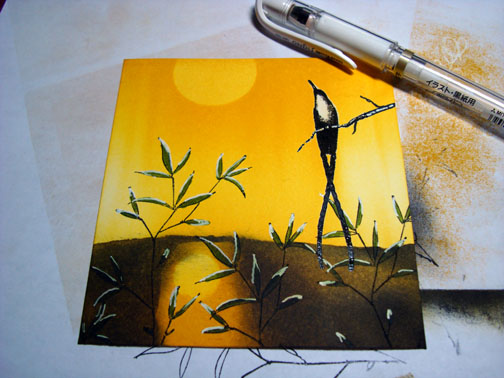
Added White highlights to the leaves with a White Gel pen.
Used the direct to paper technique and streaked the left side of a River Rock card stock panel with Butterscotch ink.
Over streaked the panel with Oregano ink not covering the Butterscotch ink entirely.
Assembled the card and added brads. Here it is finished measuring 5.5″ square.
May your day be a golden one.
Until my next post. . . . . . . . . . . ..
Hugs,
Michelle
Links to all my tutorials can be found here: https://zindorf.splitcoaststampers.com/tutorials-ive-written/
Here is a link to my workshop calendar if you want to get info on beginner and advanced Brayer workshops: https://zindorf.splitcoaststampers.com/workshop-calendar
Frequently asked questions answers: https://zindorf.splitcoaststampers.com/frequently-asked-questions/
37 responses to “Golden Day – Tutorial #161”