
Hey, thanks everyone for the great tips, leads, prayers and kind word yesterday. I really needed lifted up and you all came through for me. Huge Hugs!
Enough with me and my personal problems. Let’s Stamp!!!!
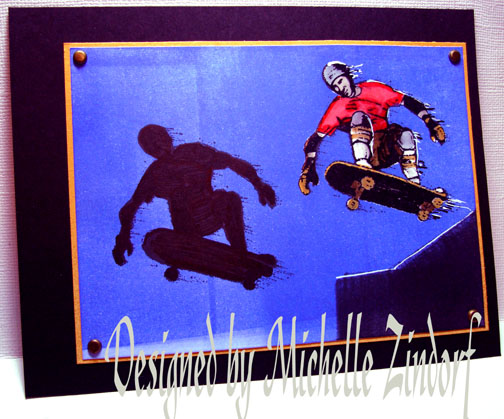
Today’s project is for that teen that you just can’t give that sappy, mushy greeting card to. This card even came out to look a little like a comic book picture, bonus!
I decided to add a shadow today, which I love!
Let’s get started. 🙂
Supplies:
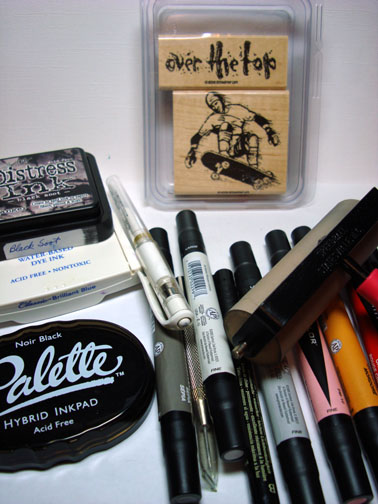
| Stamps: Stampin’ Up Over The Top |
| Paper: Stampin’ Up Whisper White, More Mustard & Basic Black |
| Ink: Stampin’ Up Brilliant Blue, Distress Ink Black Soot & Palette Noir Black |
| Accessories: Prismacolor Markers, Brayer, Fine Detail Clear embossing Powder, Heat Gun, Versamark marker, White Gel Pen, Black Faber Castell Marker |
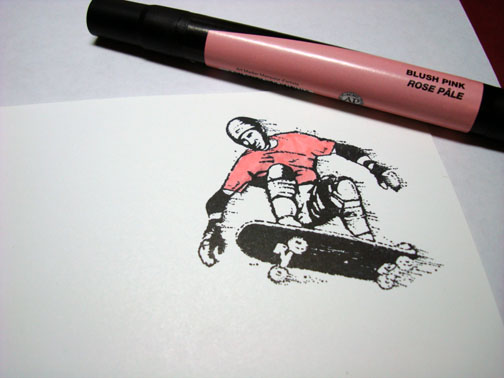
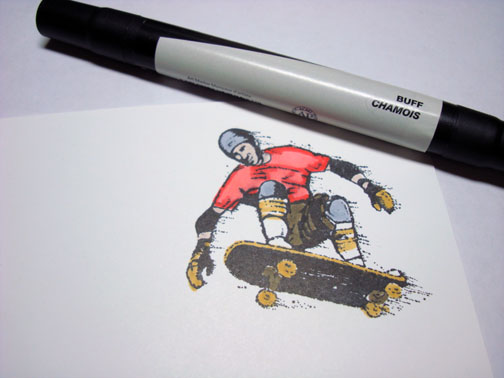
Stamped image using Palette Hybrid Noir Black ink. I chose this ink because it works well with solvent based coloring mediums like the Prismacolor Markers I will be using.

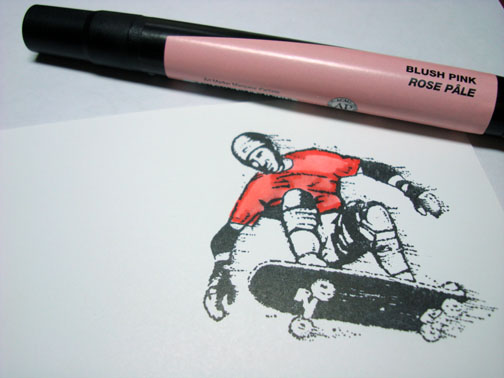
Colored his shirt with a Blush Pink Prismacolor Marker.
Added Crimson Red to his shirt.
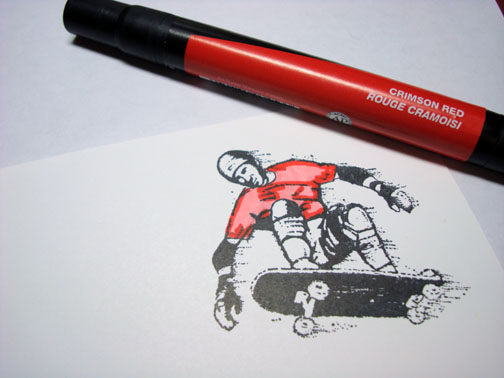
Went over his entire shirt with the Blush Pink marker to blend the harsh lines between the two colors.
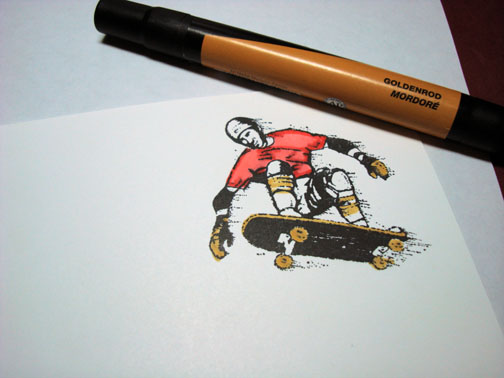
Colored his board, gloves and stripes on his socks with Goldenrod.
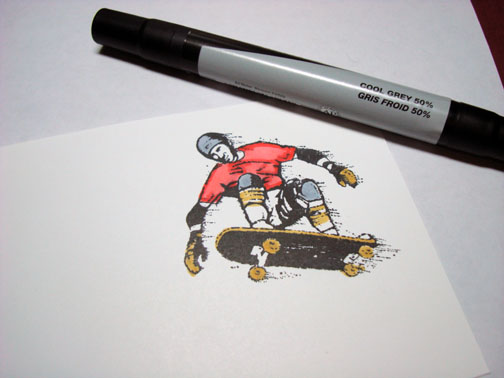
Colored his knee pads & helmet with Cool Grey 50%.
Colored his Shorts with Sepia.
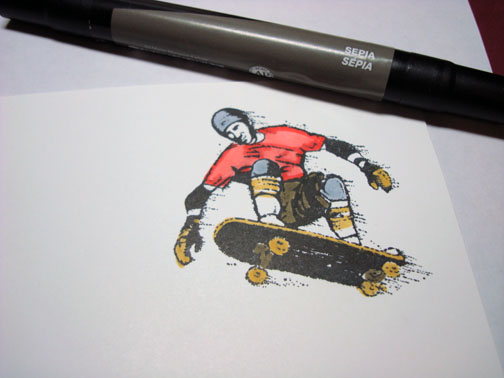
Colored his skin with Buff.
Colored over the entire image with a Versamark marker.
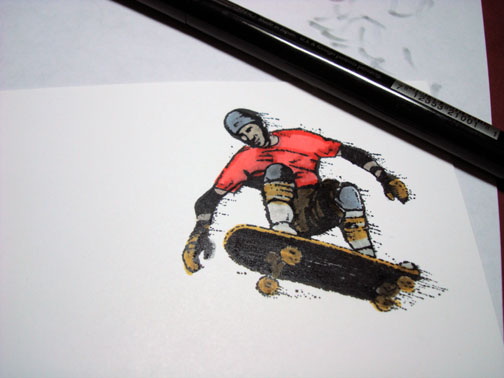
Heat embossed the image using clear embossing powder and a heat gun.
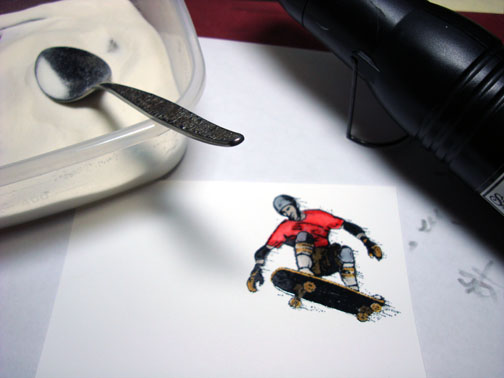
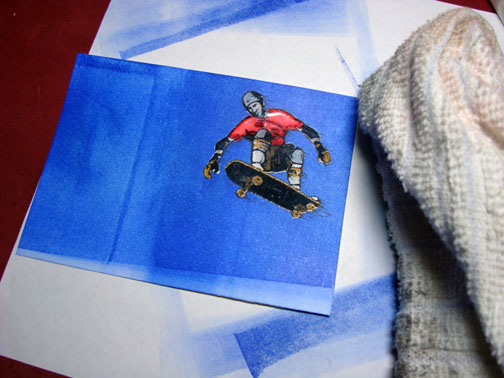
Now that my image is heat embossed I can brayer over the image and the embossing will resist the brayered ink (emboss resist technique).
Brayered over the entire card stock with Brilliant Blue ink. I only brayered back and forth a couple of times. It came out streaked and I liked the look so I left it that way.
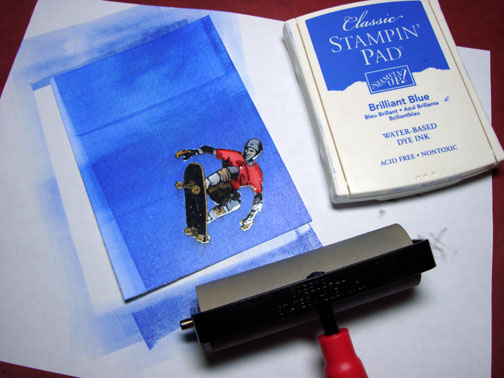
Wiped the ink off of the embossed image with an old soft rag.
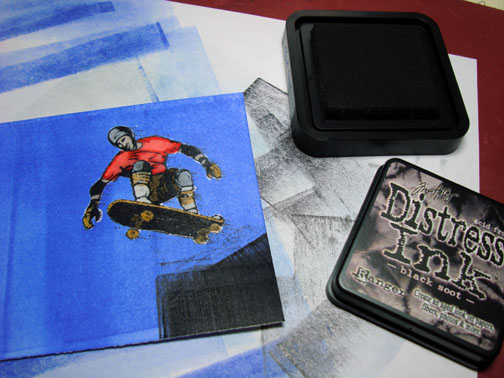
Smeared a Black Soot Distress Ink Pad directly on the card stock to create a ramp.
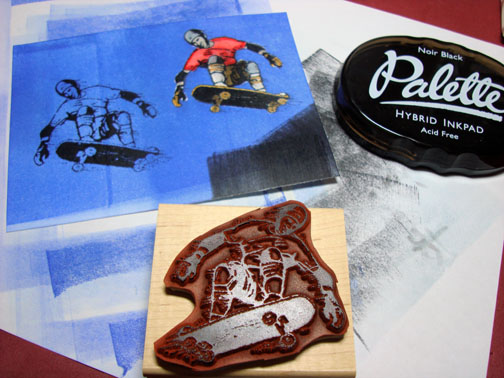
Stamped the image again with Palette Noir Black ink.
Colored the image in with a black marker creating the shadow.
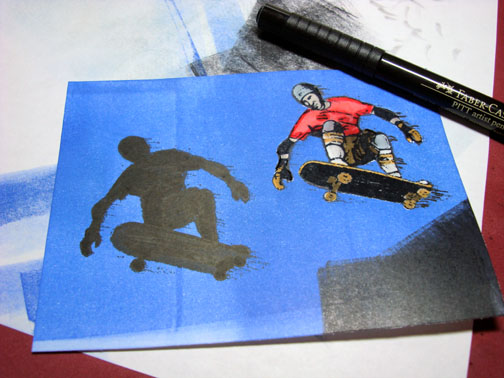
Added a few white highlights to the right side of the original image with a White Gel Pen.
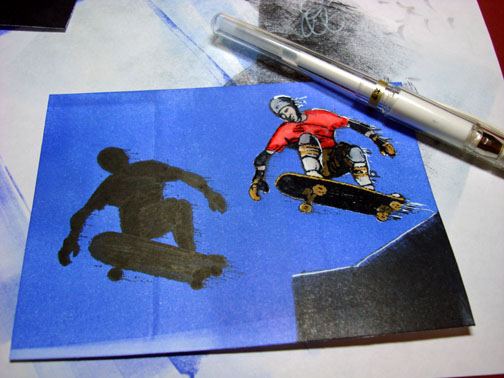
Add a couple of simple panels and some brads, no frills for this card.
Here it is finished measuring 5″ x 6.5″.
I hope this gets you looking at your stamps to see if you can come up with some sort of scene using a shadow in it.
May your day be filled with only good things.
Until my next post.. . . . . . . . .
Hugs,
Michelle
Links to all my tutorials can be found here: https://zindorf.splitcoaststampers.com/tutorials-ive-written/
Here is a link to my workshop calendar if you want to get info on beginner and advanced Brayer workshops: https://zindorf.splitcoaststampers.com/workshop-calendar
Frequently asked questions answers: https://zindorf.splitcoaststampers.com/frequently-asked-questions/
45 responses to “Skateboarder’s Shadow – Tutorial #165”