
Today I created a little different scene for you using a masking technique with Post it Notes. Grab your favorite beverage and hang out a while with me.
Let’s get started. 🙂
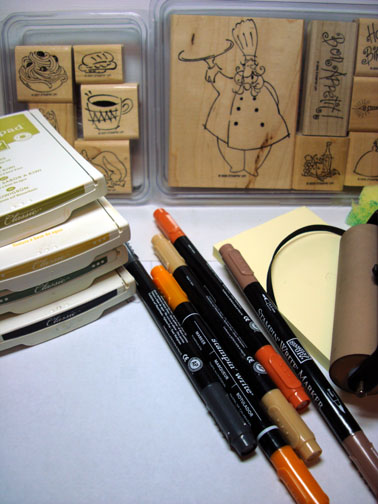
Supplies:
| Stamps: Stampin’ Up Voil`a & Voil`a to Go |
| Paper: Stampin’ Up Whisper White, Basic Black & Pumpkin Pie |
| Ink: Stampin’ Up Kiwi Kiss, So Saffron, Always Artichoke & Basic Black |
| Accessories: Sponges, Post it Notes, Stampin’ Up Markers, Black Ribbon, Copper Brads & a Brayer |
Please don’t forget you can order your Stampin’ Up products from me 24-7 from this link: https://michellezindorf.stampinup.net or e-mail me at [email protected] if you are within the United States.
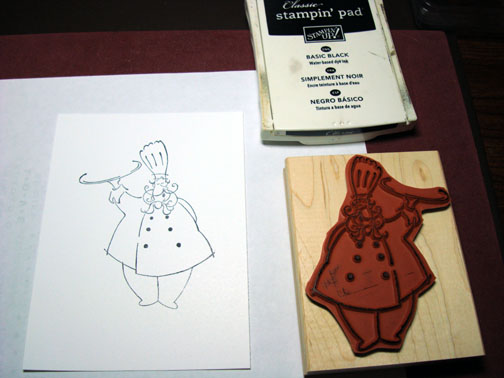
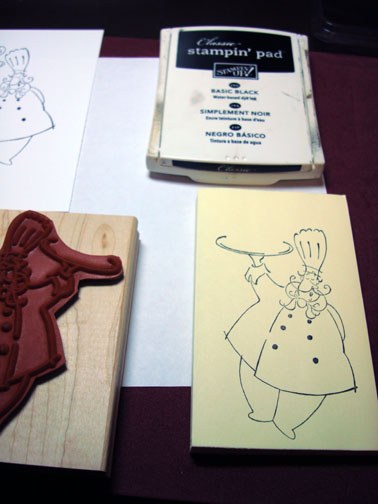
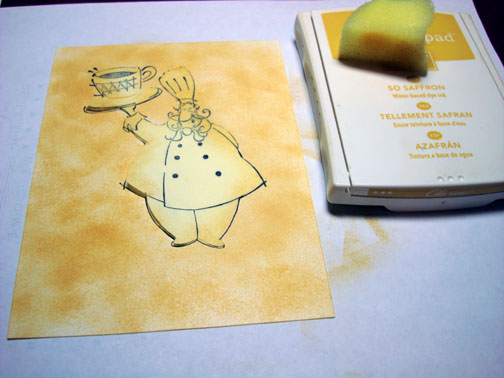
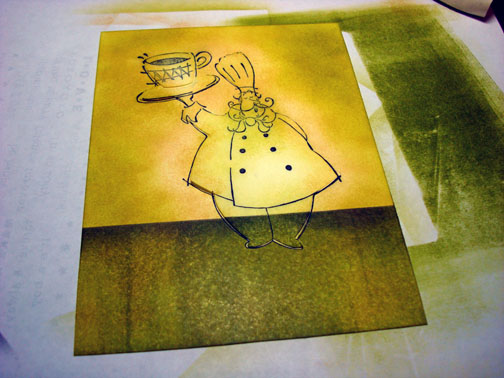
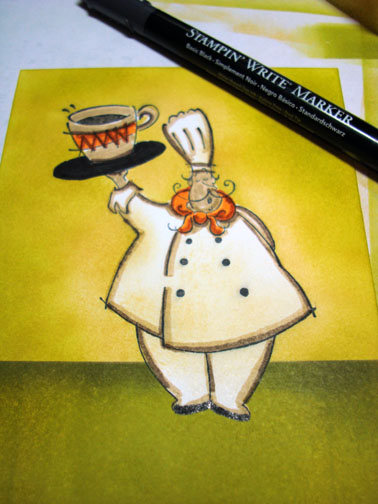
Stamped the Chef with Basic Black ink on a 4.5″ x 6″ piece of Whisper White card stock.
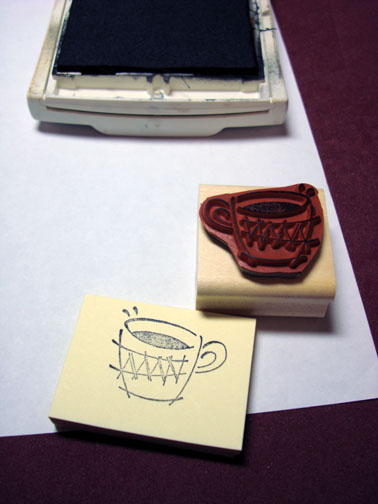
Stamped the coffee cup with basic black ink.
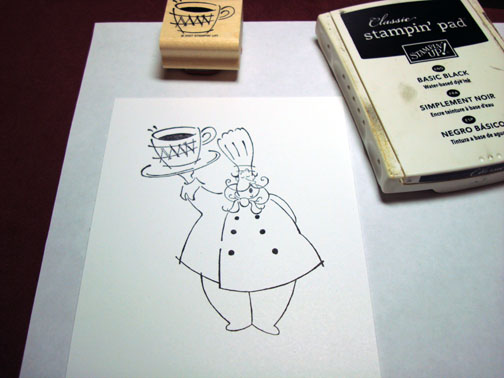
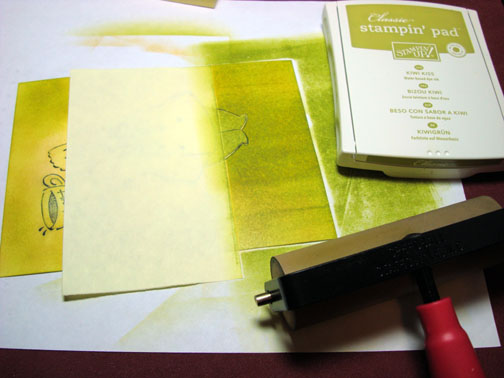
Stamped the Chef and the coffee cup again on post it notes and cut them out to use as mask. Try to stamp as much of the image as you can on the sticky part of the post it note. When cutting your mask out cut inside the design area a bit so you don’t end up with a white shadow around your image after coloring in the background.
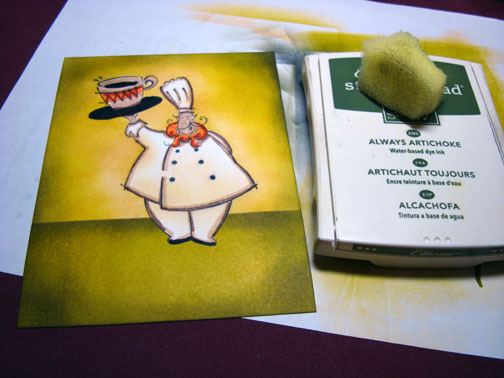
Sponged So Saffron ink all over the background of the card stock using a pouncing up and down motion to get a speckled look.
Sponged Kiwi Kiss ink on the card stock, not covering the So Saffron ink all the way.
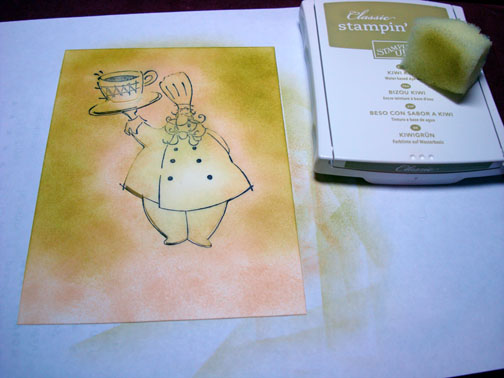
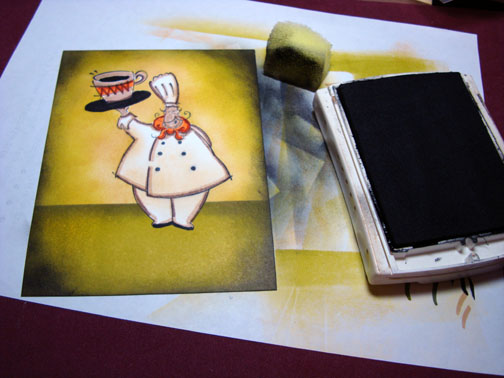
Masked the top of the card stock with a post it note right over the other masks.

Brayered Kiwi Kiss ink at the bottom of the card stock.
Sponged Basic Black ink at the edge of the post it note mask.
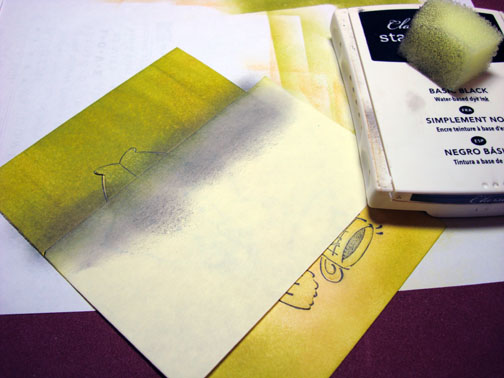
Removed all the masks.

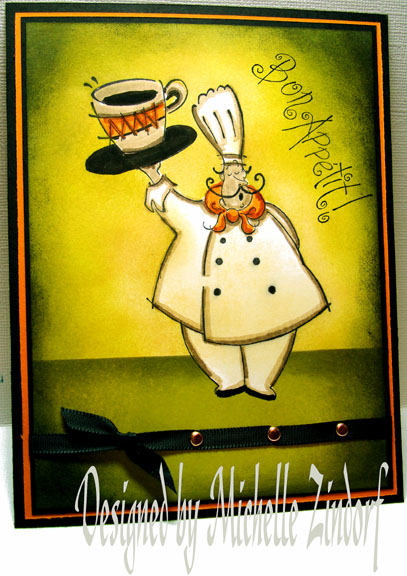
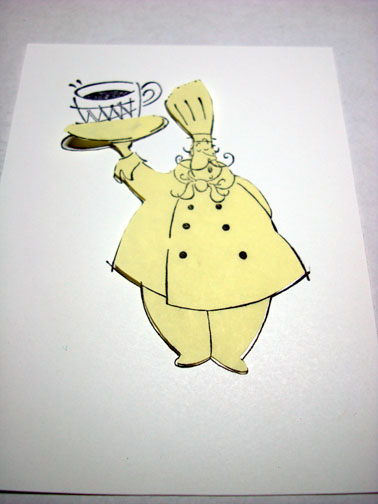
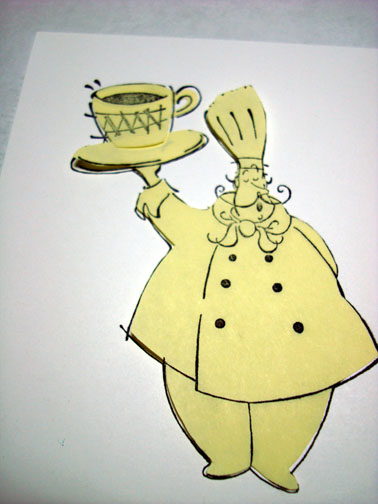
Colored the chef’s skin, cup and outlined his suit with a Creamy Caramel marker.

Did some outlining with a Close to Cocoa Marker.
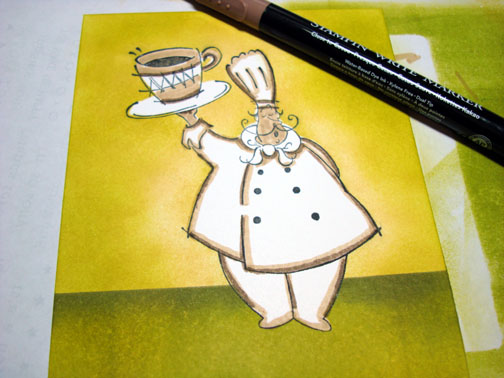
Colored his scarf and part of the cup with a Pumpkin Pie marker.
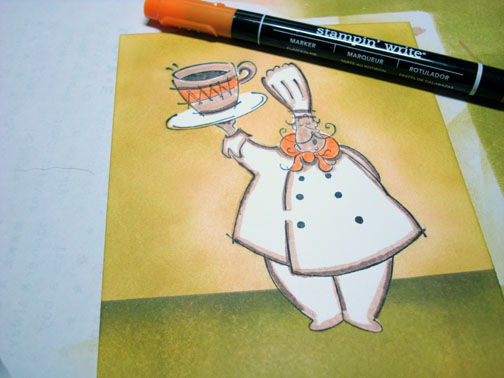
Outlined the scarf and the detail on the cup with a Really Rust marker.
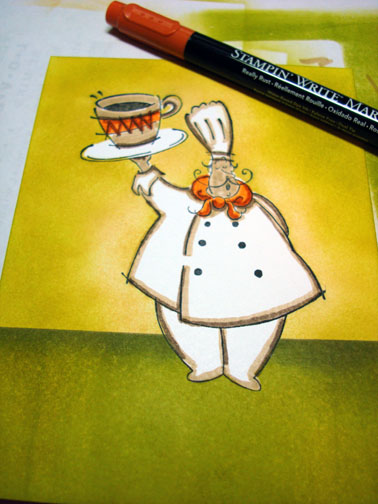
Colored the tray and the bottom of the chef’s feet with a black marker.
Sponged Always Artichoke around the outside of the card stock.
Sponged Basic Black ink around the edge of the card stock not covering the Always Artichoke ink entirely. If you get really dark around the edge of your card stock the lighter center of the card stock pops!
Added a few simple layers and stamped the sentiment with Basic Black ink. Added the ribbon and 3 copper brads.
Here it is finished measuring 5″ x 6.5″.
I hope this tutorial has inspired you to try masking with post it notes. It is an easy way to create a scene.
P.S. I have updated my sales page with more retired Stamp Sets.
May you be content in whatever you are doing today!
Until my next post. . . . . . . . .
Hugs,
Michelle
Link to my Stampin’ Up website were you can order all of your must have Stampin’ Up products from me 24-7: https://michellezindorf.stampinup.net
Here is a link to all of my tutorials: https://zindorf.splitcoaststampers.com/tutorials-ive-written/
Here is a link to my workshop calendar if you want to get info on beginner and advanced Brayer workshops: https://zindorf.splitcoaststampers.com/workshop-calendar
Frequently asked questions answers: https://zindorf.splitcoaststampers.com/frequently-asked-questions/
Pingback: I need a Chef - Tutorial #178 | Tutorials | Scrapbook Faves