
Well! This card was a bear to photograph. I ended up going outside in the cold and wind to take this photo in my PJ’s and I am still not happy with the way the photo looks compared to the original piece. On top of that my computer is acting up so I am holding my breath as I type this hoping I can get this posted some time today. It is one of those days when things keep going wrong, so much so you just have to laugh it off.
Well I better get on with the tutorial while the getting is good. . . .
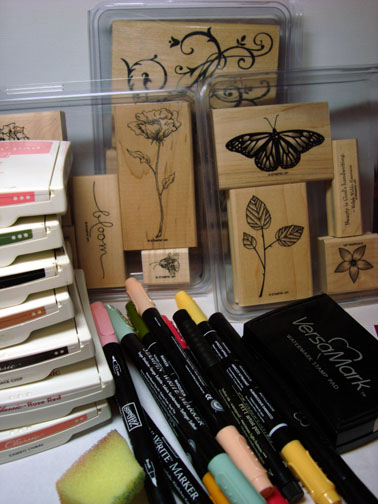
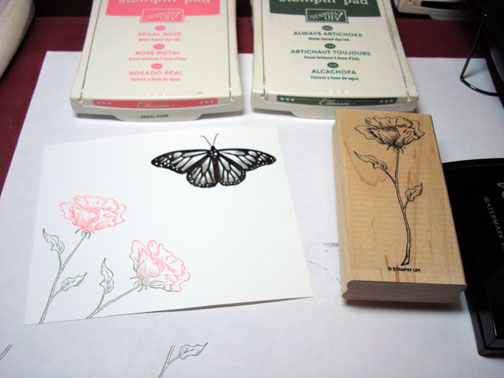
Supplies:
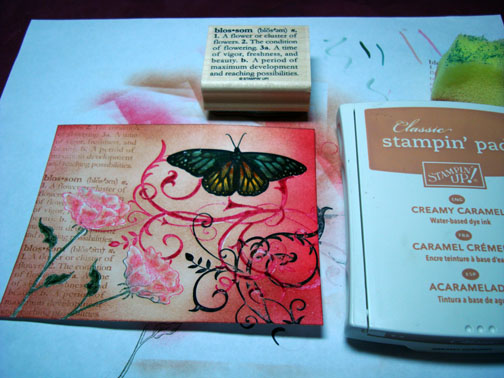
| Stamps: Stampin’ Up God’s Beauty, Bloomin’ Beautiful & Baroque Motifs |
| Paper: Stampin’ Up Whisper White, Basic Black & Cameo Coral |
| Ink: Stampin’ Up Regal Rose, Cameo Coral, Rose Red, Chocolate Chip, Creamy Caramel, Basic Black & Always Artichoke |
| Accessories: Versamark Pad and Marker, Stampin’ Up Markers, Brads, Clear embossing powder, heat gun & Sponge |
Please don’t forget you can order your Stampin’ Up products from me 24-7 from this link: https://michellezindorf.stampinup.net or e-mail me at [email protected] if you are within the United States.
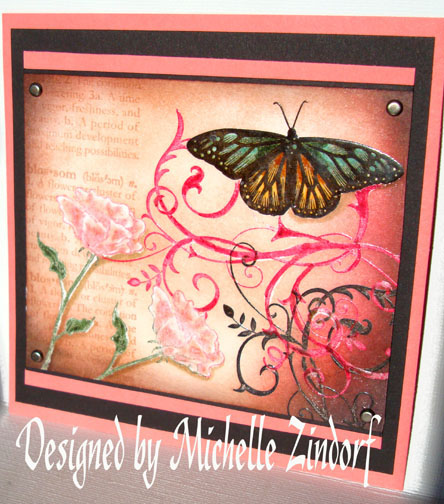
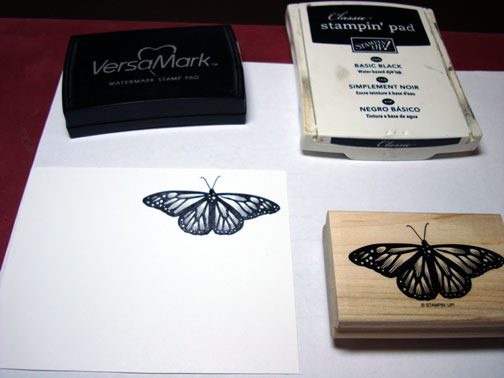
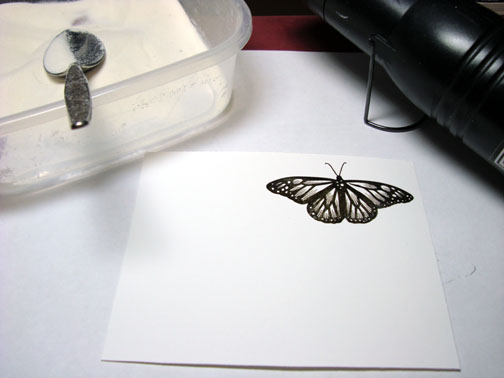
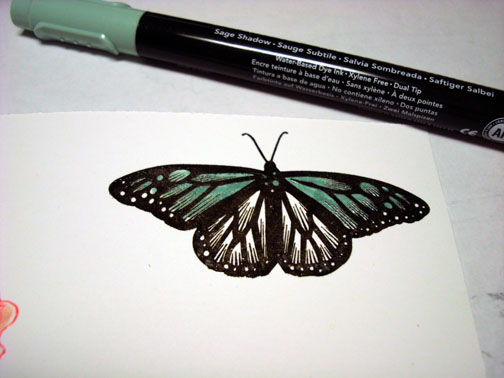
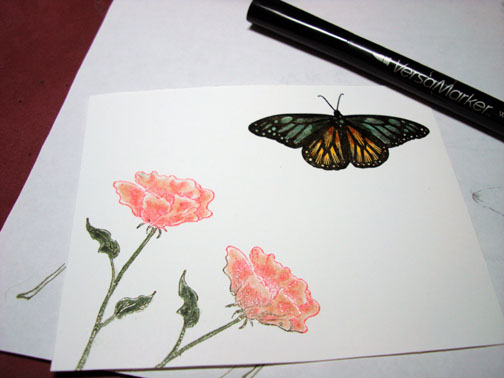
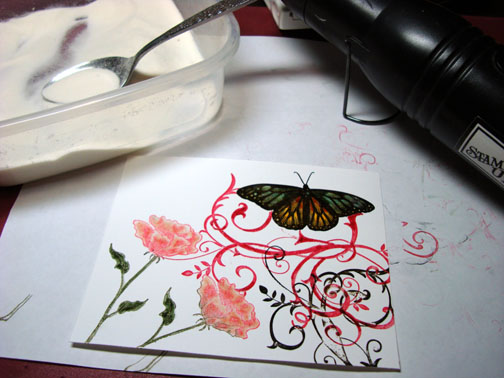
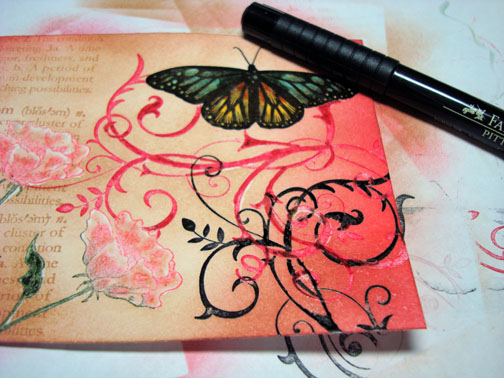
Stamped Butterfly by first loading my stamp with Versamark and then Black ink before stamping it on a piece of 5″ x 4″ Whisper White card stock. I then heat embossed it using clear embossing powder and a heat gun.
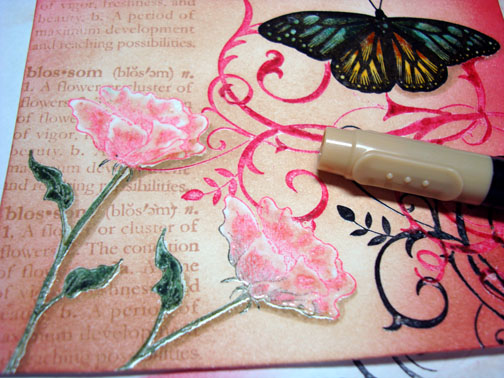
Stamped flowers by first loading the stamp with Versamark and then Regal Rose, and patted the Artichoke ink pad on the stem area of the stamp. All of the coloring was done with ink pads before stamping. Heat embossed the images using clear embossing powder and a heat gun.
Colored the flowers with a Blush Blossom marker.
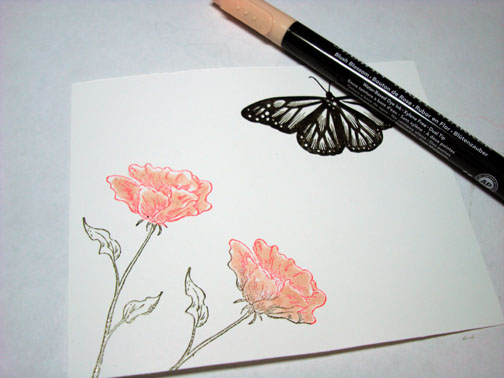
Colored the darker areas of the flower with a Pretty in Pink marker.

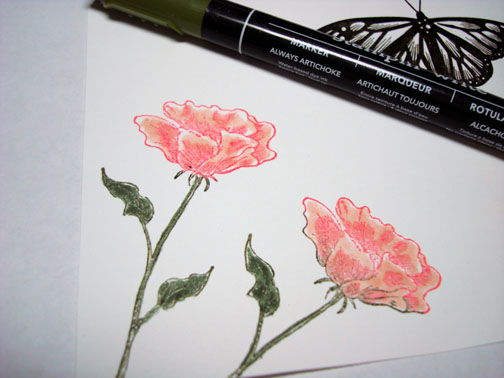
Colored in the leaves and stem with an Always Artichoke Marker.
Colored the Top part of the butterfly’s wings with a Sage Shadow marker.
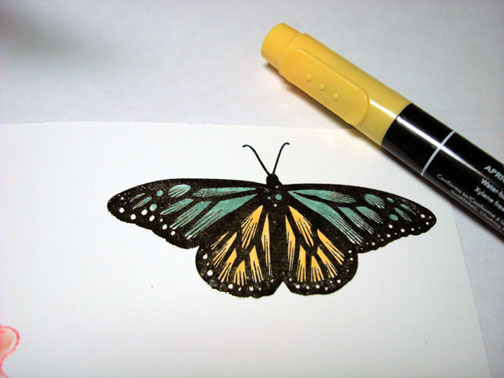
Colored the bottom part of the wings in with an Apricot Appeal marker.
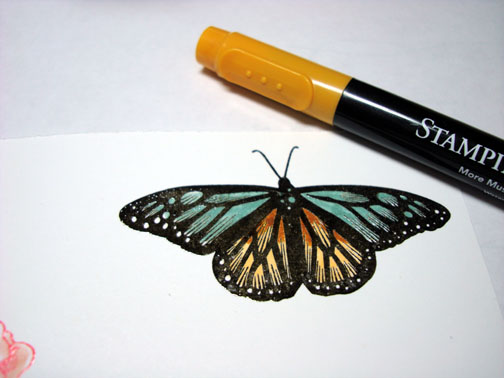
Added a bit of More Mustard marker to the bottom part of the wings.
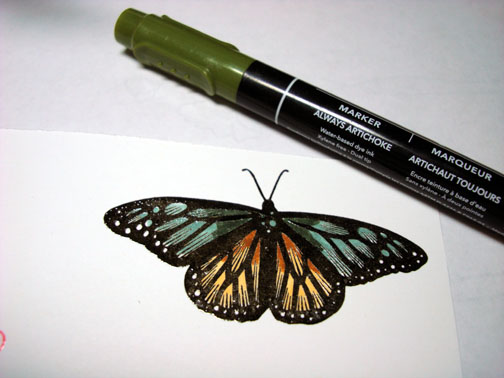
Added Always Artichoke marker to the top middle of the wings.
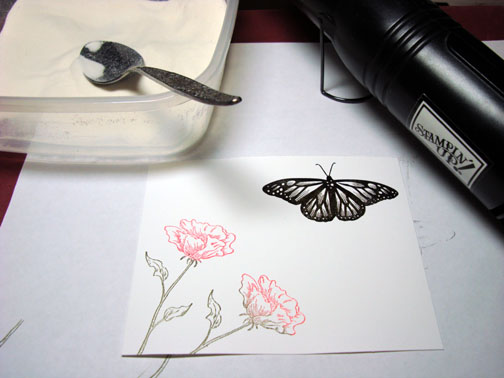
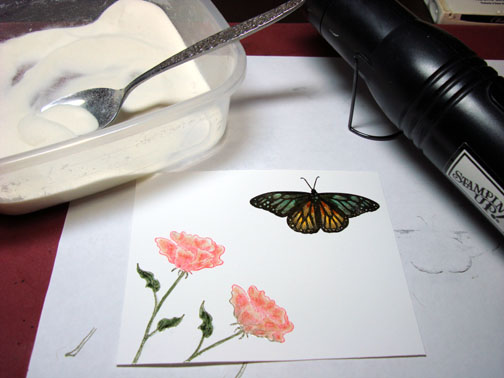
Colored the flowers and butterfly with in with a Versmark marker and heat embossed the images using clear embossing powder and a heat gun.
Stamped the Flourish by first loading the stamp with Versamark and then Rose Red ink before stamping it. Heat embossed the image using clear embossing powder and a heat gun.
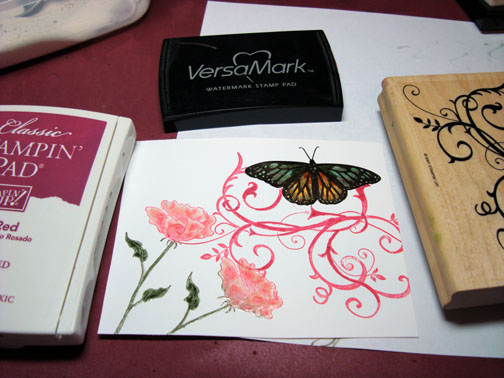
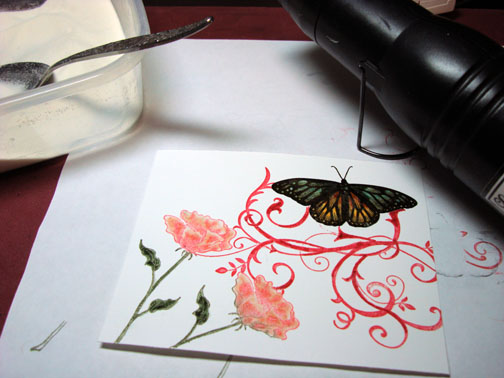
Stamped the flourish again by first loading the stamp with Versamark and then black ink before stamping it. Heat embossed the image using clear embossing powder and a heat gun.
Sponged Creamy Caramel ink all over the card stock being heavier on the edges.
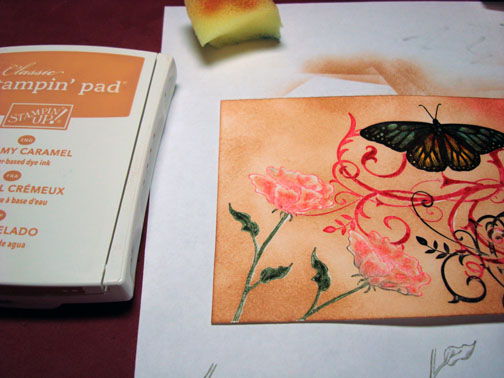
Sponged on Cameo Coral around the edges.
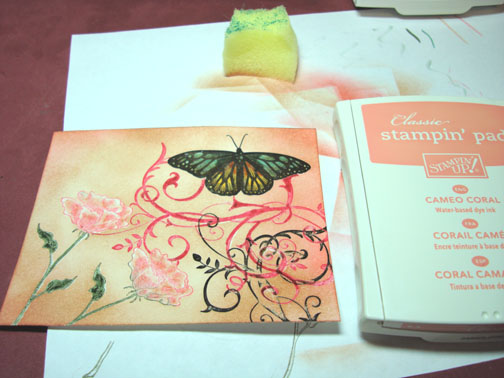
Sponged Rose Red on.
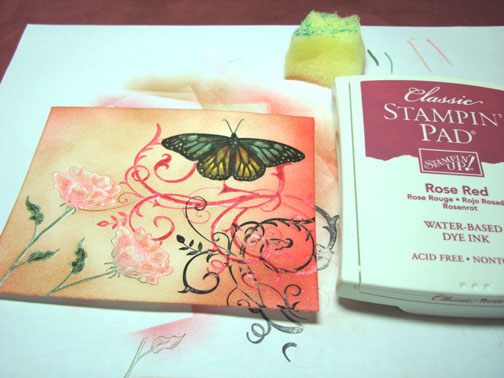
Stamped the wording on the left side of the card stock with Creamy Caramel ink.
Sponged Chocolate chip and then added a bit of black to the edge of the card stock.
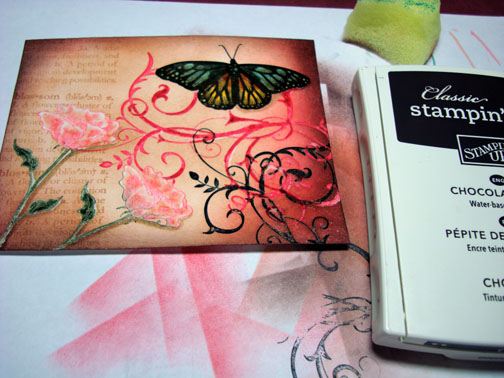
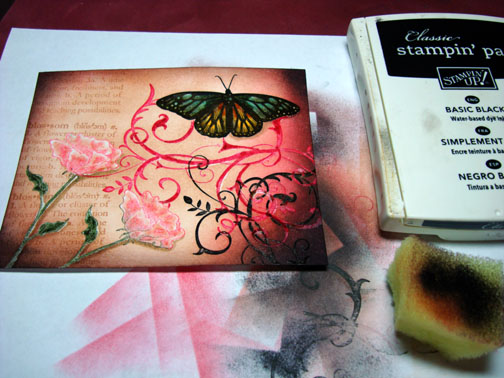
Assembled the card front, took a million pictures, lol and here you have it the finished card measuring 5″ x 6.5.
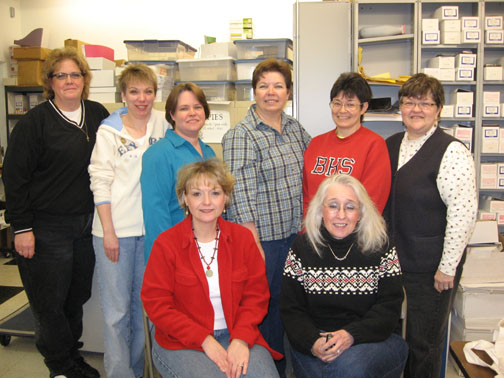
Before I end my post for today I wanted to share a couple of photos. The first one is of some great ladies from my Advanced Brayer workshop last weekend. Hi ladies!!!
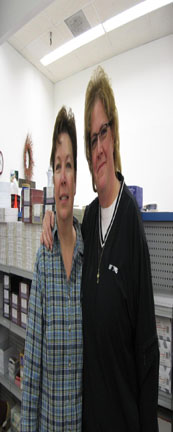
Now I told them they could take pictures with me if they made me tall and skinny. This made me laugh when I received it! Gotta love it!
May you have a terrific, fun filled day!
Until my next post. . . . . . . . . .
Huge Hugs,
Michelle
Get ready for Brayer Workshops! I am coming to:

Wheaton, Illinois
Fort Smith, Arkansas
Dayton, Ohio
Savannah, Georgia
Covington, Indiana
Buffalo, Minnesota
Webster, New York
Stoughton, Wisconsin
Here is a link to my workshop calendar where you can see all of my travel schedule and to get info on beginner and advanced Brayer workshops: https://zindorf.splitcoaststampers.com/workshop-calendar
Link to my Stampin’ Up website were you can order all of your must have Stampin’ Up products from me 24-7: https://michellezindorf.stampinup.net
Here is a link to all of my tutorials: https://zindorf.splitcoaststampers.com/tutorials-ive-written/
Frequently asked questions answers: https://zindorf.splitcoaststampers.com/frequently-asked-questions/
Pingback: » Butterfly and Flowers - Tutorial # 182