
Hello out there . . . . .. . I hope your Easter Holiday was super special yesterday. I cooked the traditional ham and spent the day with my husband, Russ. The Easter Bunny no longer visits my house since we have no little ones at home. I miss working my way through a chocolate bunny with some Peeps on the side, lol. Anyway, I got some much needed down time and feel really refreshed today.
For some odd reason I no longer have a card stash of my own to give to people, Gasp! I know, you would think I would have tons of cards lying about, but no. My friends and family are the most neglected people when it comes to cards. It is like the Mechanic that has two broken down cars or the CPA that had to file an extension for his tax returns.
Well today I am going to try to start putting some cards back for personal use for special occasions. I thought I would start with a wedding card. It is Spring and we are invited to a wedding that is taking place next month.
Let’s get started. 🙂
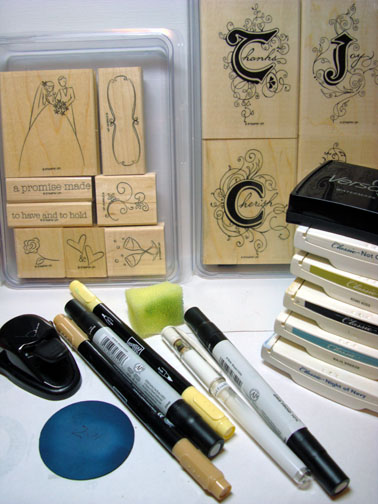
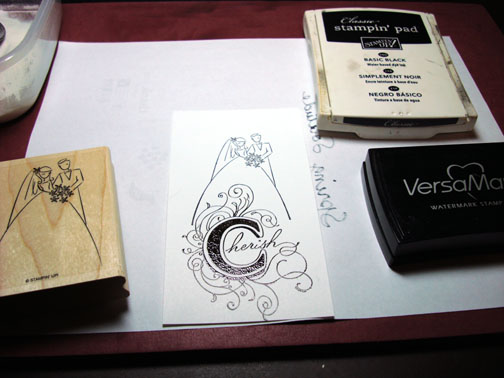
Supplies:
| Stamps: Stampin’ Up To Have & To Hold, Illuminations |
| Paper: Stampin’ Up Whisper White & Basic Black |
| Ink: Stampin’ Up Not Quite Navy, Kiwi Kiss, Basic Black, Baja Breeze, Night of Navy |
| Accessories: White Gel Pen, Versamark Pad, Clear embossing powder, Heat gun, Prismacolor Markers, Stampin’ Up Markers, Sponge, Silver Brads, Photo Corner and Ticket Corner Punches, Black Ribbon, Curvy Cutter, Big Shot Die Cut Machine, Texture Embossing Plate |
Please don’t forget you can order your Stampin’ Up products from me 24-7 from this link: https://michellezindorf.stampinup.net or e-mail me at [email protected] if you are within the United States. Also, please consider being part of my Stampin’ Up Team. We have valuable monthly meetings in Miamisburg, Ohio.
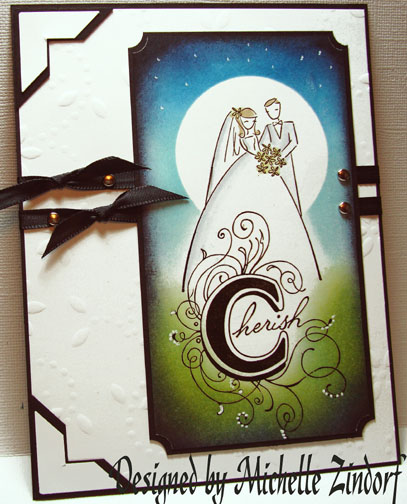
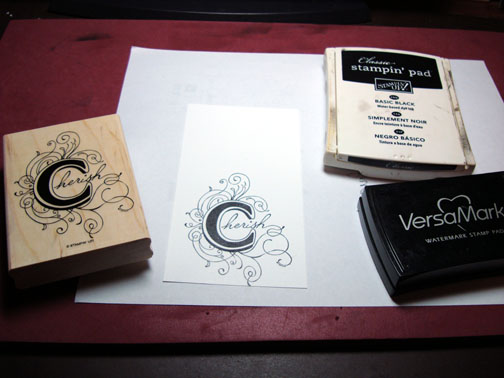
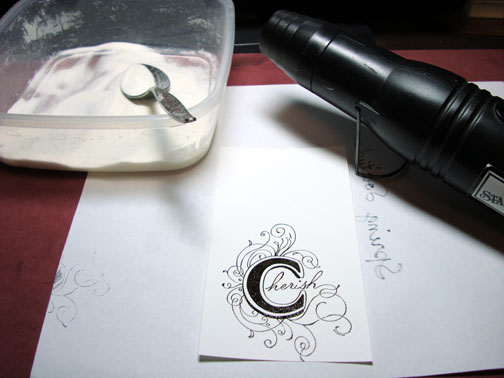
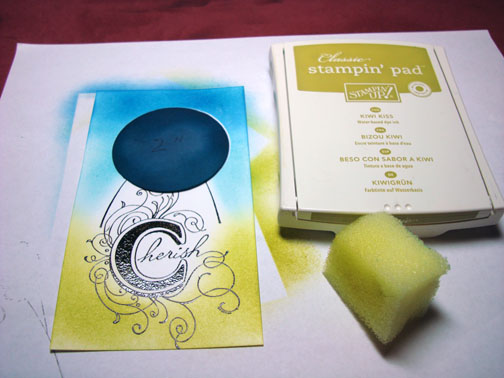
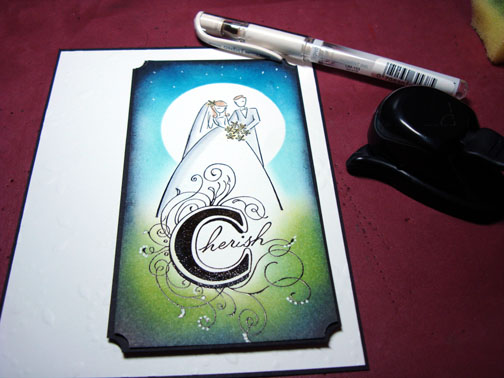
I stamped the Cherish stamp on a 3″ x 5.5″ piece of Whisper White Card-stock by first loading my stamp with Versamark and then loading it with Basic Black ink before stamping. I heat embossed the image using clear embossing powder and a heat gun.
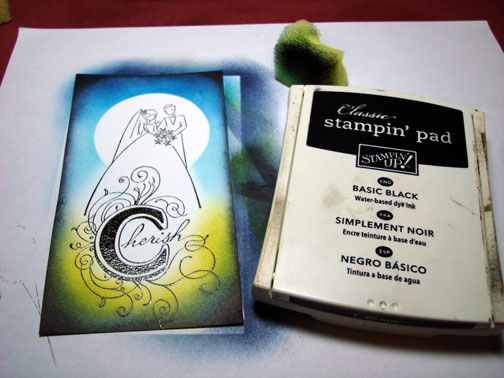
Stamped the Bride and Groom by first loading the stamp with Versamark and then loading it with Basic Black ink before stamping it. Heat embossed it using clear embossing powder and a heat gun.

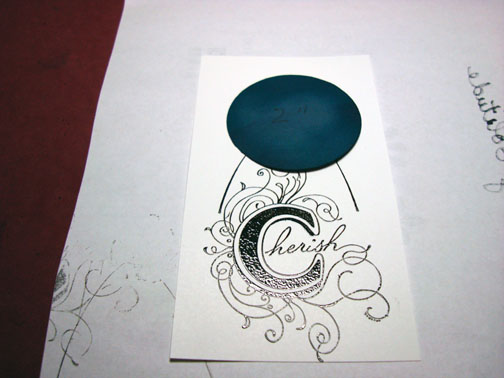
Cut a 2″ circle with my Curvy Cutter out of scrap card stock and used it as a mask for my moon.
Holding the moon mask in place I sponged Baja Breeze around it making sure not to get it on the Bride and groom.
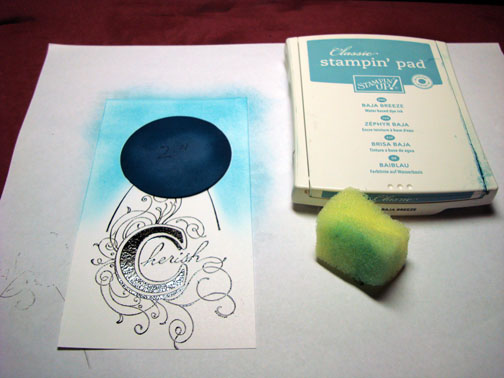
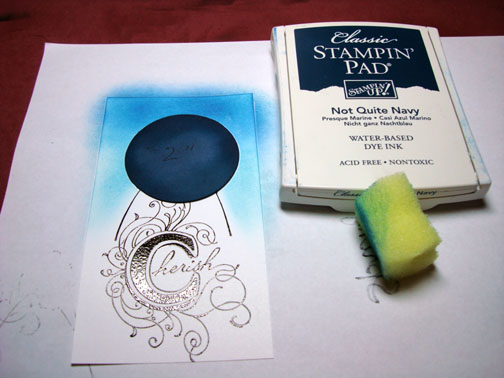
Sponged Not Quite Navy ink at the top of the card stock still holding the mask in place.
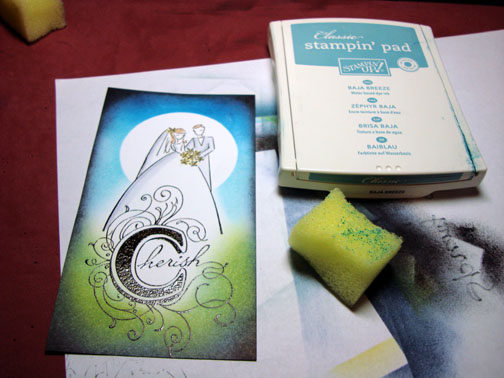
Sponged Kiwi Kiss ink at the bottom of the card stock around the Cherish image.
Sponged Night of Navy ink all around the outside edge of the card stock.
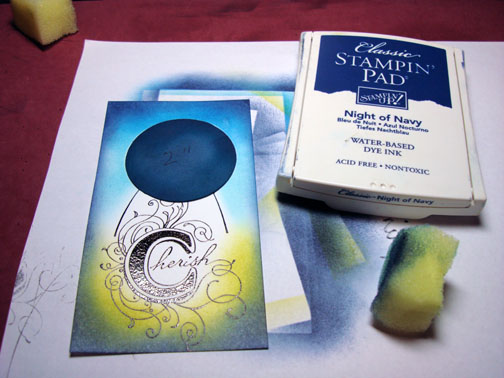
Sponge Basic Black ink all around edge of the card stock not covering the Night of Navy ink entirely.
Colored in the brides flowers with a Barely Banana marker.
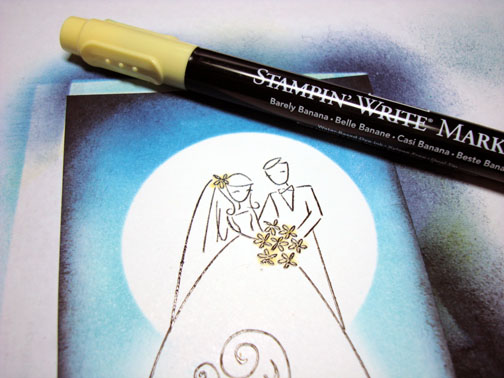
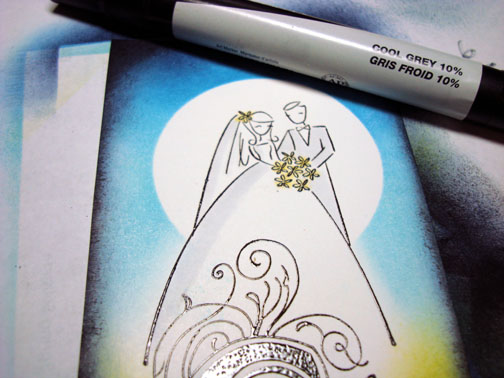
Colored the grooms suit and created shadows on the bride’s veil and gown with a Cool Grey 10% Prismacolor marker.
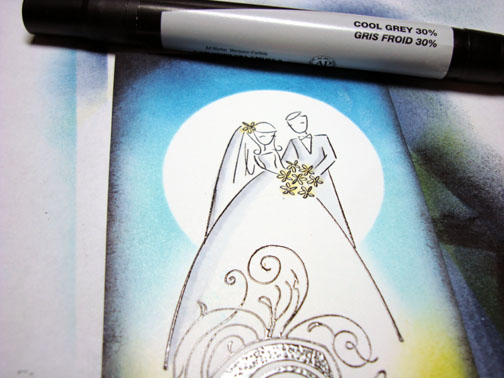
Deepened the shadows on the bride and groom with a Cool Grey 30% marker.
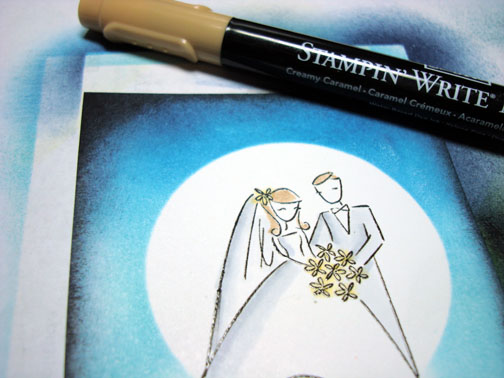
Colored the images hair in with a Creamy Caramel marker.
Decided the Kiwi Kiss ink was too yellow and bright so I sponged Baja Breeze ink over it. Remember Yellow and Blue make green. This is one of those times where that rule worked in my favor.
Used a ticket corner punch on my main image panel and the black card stock panel beneath it. Added white dots to the sky area for stars and a few dots on the flourish at the bottom of the card stock to simulate flowers.
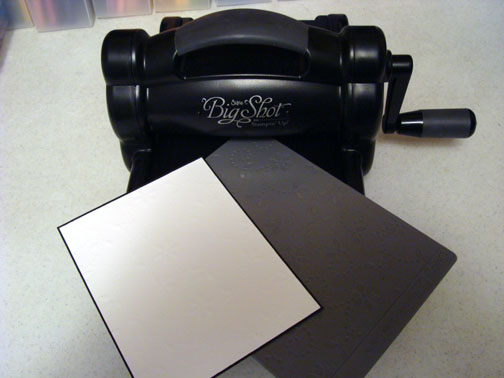
Used my Big Shot die cut machine and a texture plate to emboss the white panel.
Assembled card and added black ribbons and silver brads.
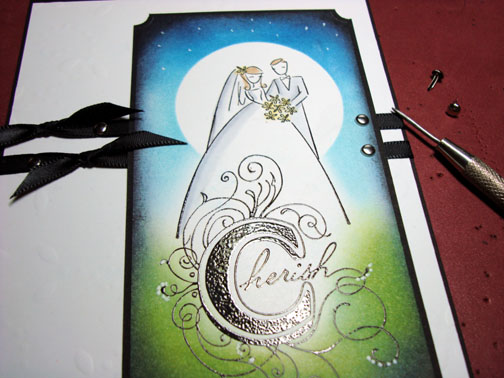
Added photo corners in black and white on the left side of the card to balance it out a bit.
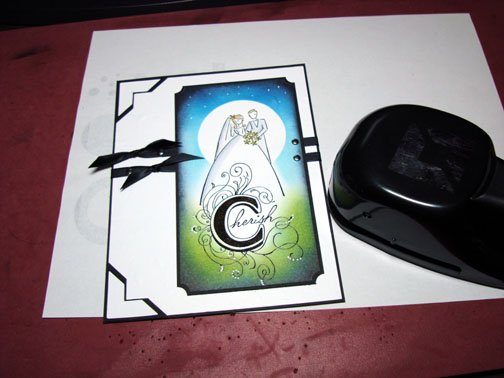
Here is the finished card measuring 5″ x 6.5″. This card is much more elegant in real life, where you can see the embossed white panel better.
I hope this tutorial has inspired you to expand your occasions card stash.
Until my next post. . . . . . . . . . . . .
Hugs,
Michelle
Get ready for Brayer Workshops! I am coming to:

Fort Smith, Arkansas
Dayton, Ohio
Savannah, Georgia
Covington, Indiana
Buffalo, Minnesota
Webster, New York
New Johnsonville, Tennessee
Stoughton, Wisconsin
Castro Valley, California
Yardley, Pennsylvania (near Philadelphia)
Knox, Maine
Broomfield, Colorado
Lynchburg, Virginia
Columbia, Missouri
Portland, Michigan
Here is a link to my workshop calendar where you can see all of my travel schedule and to get info on beginner and advanced Brayer workshops: https://zindorf.splitcoaststampers.com/workshop-calendar
Link to my Stampin’ Up website were you can order all of your must have Stampin’ Up products from me 24-7: https://michellezindorf.stampinup.net
Here is a link to all of my tutorials: https://zindorf.splitcoaststampers.com/tutorials-ive-written/
Frequently asked questions answers: https://zindorf.splitcoaststampers.com/frequently-asked-questions/
Pingback: soma on line