
I am so addicted to stamping! Are you? Are you constantly thinking about your next creation? I am so addicted that I dream about stamping my next projects. This card was first created in my dream last night, sick huh. 🙂 Since I did this in my dream already, when I actually put it on paper this morning it was like I was doing for the second time.
Please tell me I am not the only one that dreams about stamping. Maybe I need to go to Stamper Anonymous. I could see it now, we would all be swapping cards and stamps in the parking lot before and after the session, lol. No wait, I think that is called convention! ROTFLMAO!!! I crack myself up sometimes, lol. Just humor me this morning. I haven’t had my whole pot of coffee yet.
Before you think I have completely lost it, let’s get start on the tutorial. . . . .
Supplies:
| Stamps: Stampin’ Up Branch Out |
| Paper: Stampin’ Up Whisper White, Baja Breeze & Creamy Caramel |
| Ink: Stampin’ Up Baja Breeze, Close to Cocoa & Always Artichoke, Distress Inks Old Paper, Milled Lavender, Weathered Wood, Walnut Stain, Brushed Corduroy, Frayed Burlap |
| Accessories: Stampin’ Up Basic Black Marker, Signo White Gel Pen, Sponges, Clear embossing powder and Heat gun |
Are you inspired by this Blog? One way for you can help support this blog is by ordering your Stampin’ Up products through me. You can order from me 24-7 from this link: https://michellezindorf.stampinup.net or e-mail me at [email protected] if you are within the United States. Want to become a Stampin’ Up Demonstrator and earn instant income? Consider being part of my Stampin’ Up Team. My Upline, Karen Barber and I have valuable monthly meetings in Miamisburg, Ohio.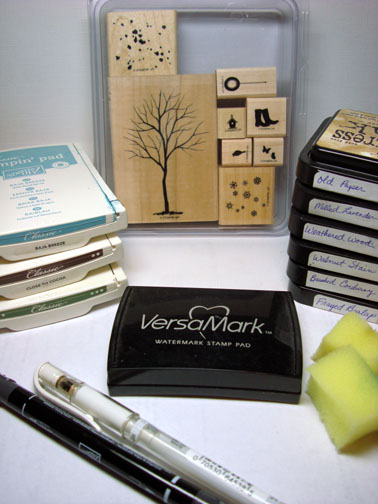
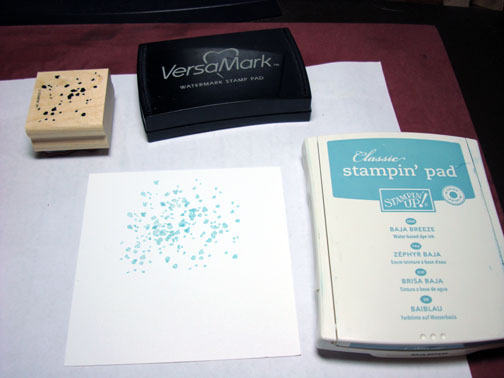
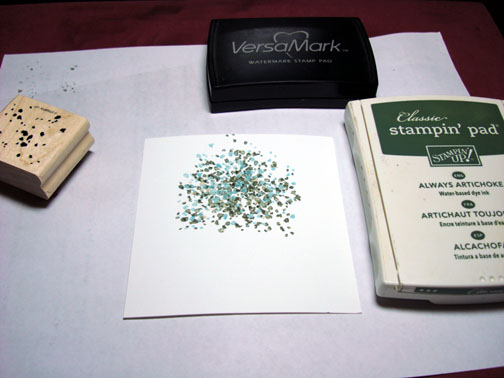
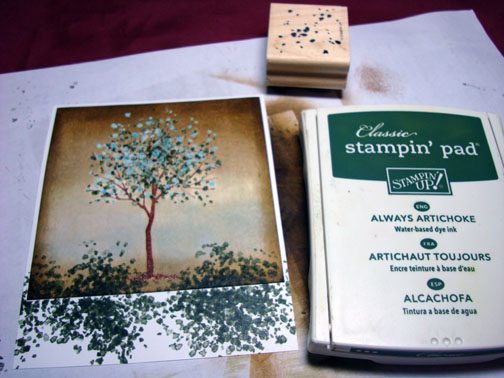
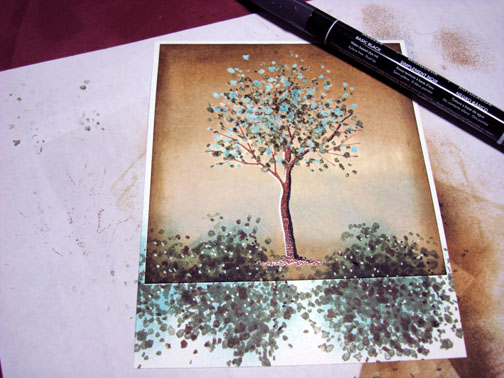
Stamped the, I’m going to call it the leaf stamp, but it is just a stamp with splotches on it, on a 4″ x 4″ piece of Whisper White card stock by first loading the stamp with Versamark and then Baja Breeze ink before stamping it. I had to envision (guess, lol) where the leaves would be on the tree. I reloaded my stamp with Versamark and Baja Breeze ink and stamped it quite a few times here.
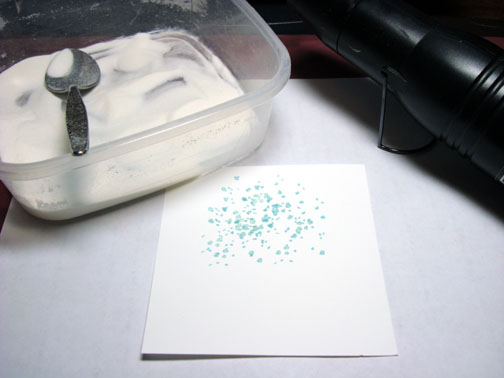
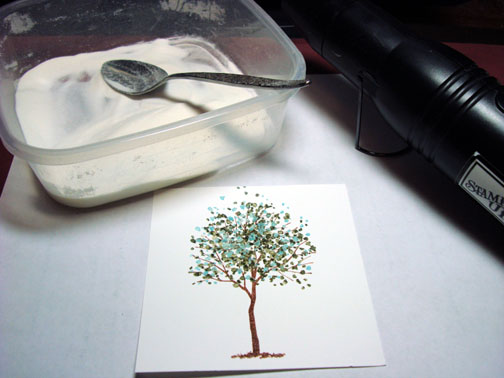
Heat embossed the leaves using clear embossing powder and a heat gun.
Using the same method I stamped Always artichoke leaves by first loading my stamp with Versamark and then with Always Artichoke ink before stamping it repeatedly. Heat embossed the leaves using clear embossing powder and a heat gun.
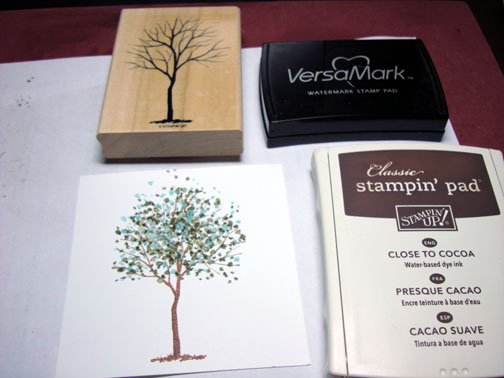
Stamped the tree by first loading the stamp with Versamark and then Close to Cocoa ink before stamping it over the leaves. Heat embossed the tree with clear embossing powder and a heat gun.
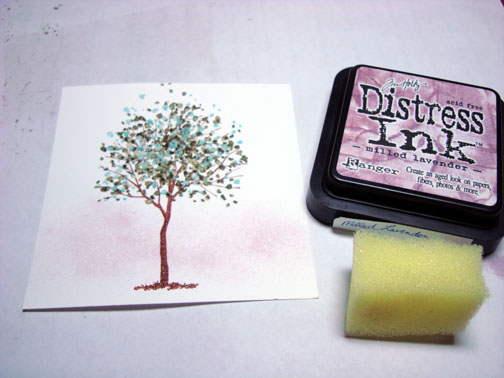
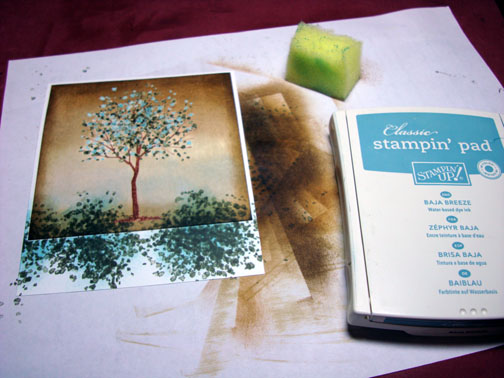
Sponged on a bit of Milled Lavender Distress ink.
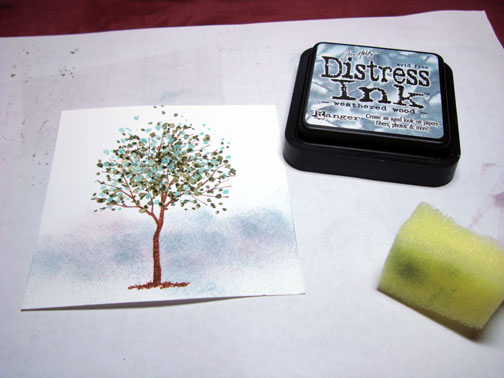
Sponged on a bit of Weathered Wood Distress ink.
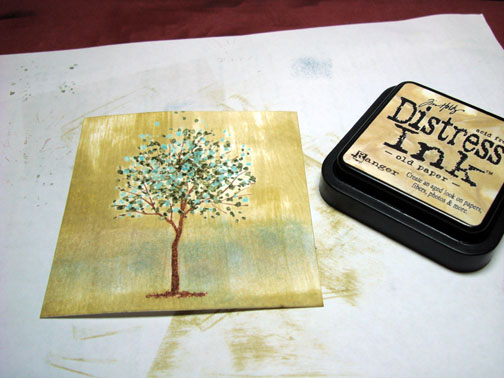
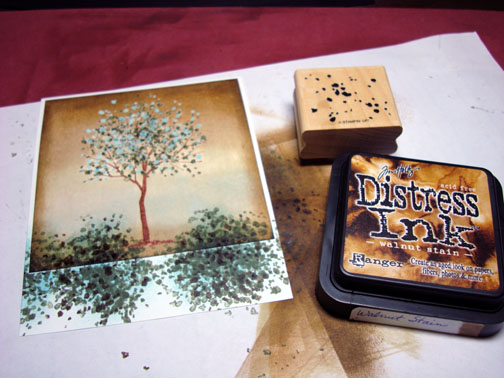
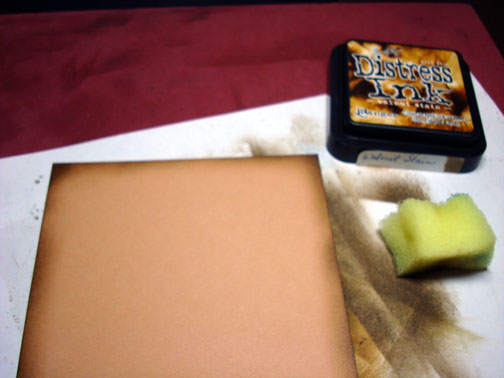
Swiped the edge of the Old Paper Distress ink pad from top to bottom on the card stock.
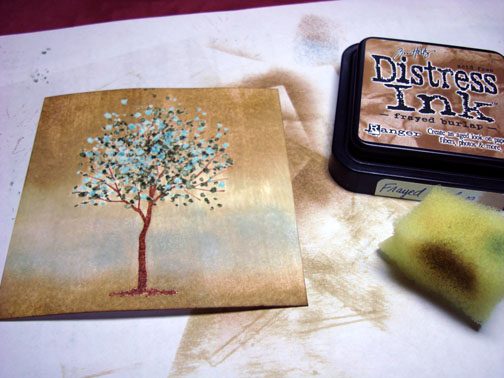
Sponged Frayed Burlap Distress ink at the top and bottom of the card stock.
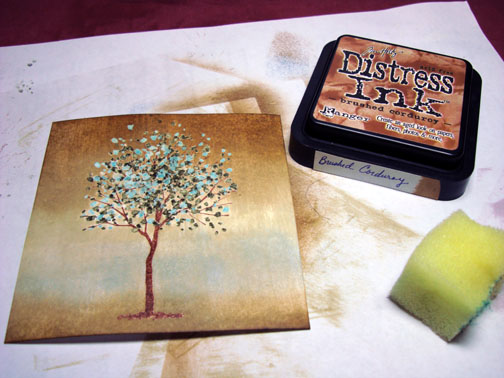
Sponged Brushed Corduroy Distress ink at the top and bottom of the card stock, not covering the Frayed Burlap ink entirely.
Ooops, missed a picture. Sponged Walnut Stain Distress ink all around the edge of the card stock.
Adhered the main image panel to a 4 1/8″ x 5 1/8 piece of Whisper White card stock.
Stamped the leaf stamp with Always Artichoke ink at the bottom of the two panels to simulate vines.
Sponged Baja Breeze ink over the vines.
Stamped the few leaves with Walnut Stain Distress ink over the vines.
Added a White Gel pen highlight down the left side of the tree and a few white gel pen dots in the vines.
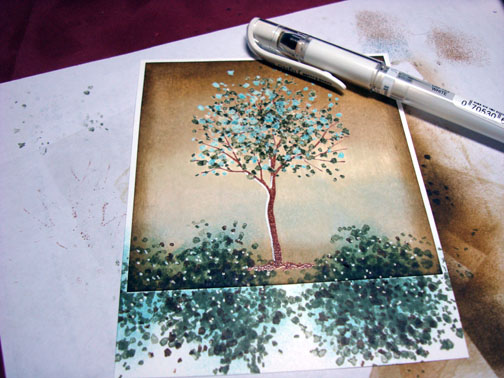
Added a Basic Black marker line down the left side of the tree and a few Basic Black dots in the vines.
Sponged Walnut Stain Distress ink around the outside edge of a Creamy Caramel card stock panel.
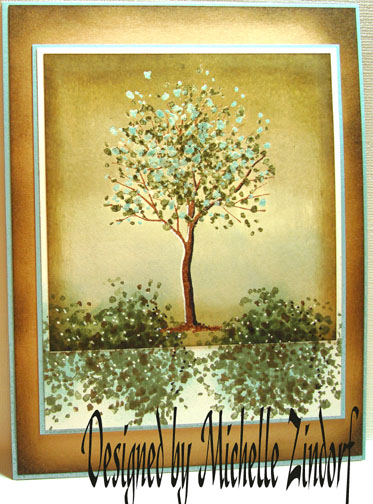
Assembled my card and here it is finished measuring 5″ x 6.5″.
May your day be one of utter joy!
Until my next post. . . . . . . . . . . . .
Hugs,
Michelle
Get ready for Brayer Workshops! I am coming to:

Dayton, Ohio
Savannah, Georgia
Covington, Indiana
Buffalo, Minnesota
Webster, New York
New Johnsonville, Tennessee
Stoughton, Wisconsin
Castro Valley, California
Yardley, Pennsylvania (near Philadelphia)
Knox, Maine
Broomfield, Colorado
Lynchburg, Virginia
Columbia, Missouri
Portland, Michigan
Here is a link to my workshop calendar where you can see all of my travel schedule and to get info on beginner and advanced Brayer workshops: https://zindorf.splitcoaststampers.com/workshop-calendar
Link to my Stampin’ Up website were you can order all of your must have Stampin’ Up products from me 24-7: https://michellezindorf.stampinup.net
Here is a link to all of my tutorials: https://zindorf.splitcoaststampers.com/tutorials-ive-written/
Frequently asked questions answers: https://zindorf.splitcoaststampers.com/frequently-asked-questions/
36 responses to “Tree & Vines – Tutorial #204”