
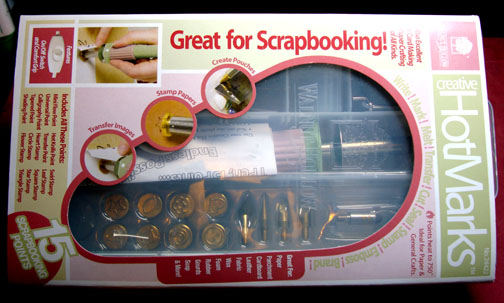
 Before we start today’s tutorial I need to announce the winner of the Creative Hot Marks tool. The random number generator selected. . . . . . . . .. .. . .. .
Cledith who wrote “After discovering your website, I’ve bought a brayer. Now I have to use it!”
Congratulations Cledith, please e-mail address to [email protected] and I will pop this set in the mail to you.
Thank you to all 459 of you that entered the drawing. Wish I had a set for each of you.
One other announcement, I will be teaching my Beginner & Advanced workshops for one day only in Greenwood, Indiana (right outside of Indianapolis) at Sharon’s Crop Studio Store on August 29, 2009. E-mail me at [email protected] for information on the workshops or to register. Warning, these workshops are filling very fast.
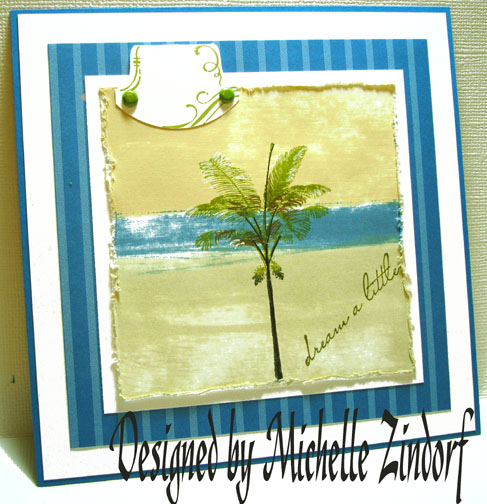
Now a bit about today’s project. This project was done using the direct to paper technique for the background. I wanted to demonstrate how effective it is to leave the white of the paper showing through on your backgrounds to give the scene a real sparkle of light. Hang out a few moments with me and check it out.
Let’s get rolling or smearing, lol . . . .
Supplies:
| Stamps: Innovative Stamp Creations “Marvels of Nature” & Stampin’ Up Totally Tabs and Dream a Little |
| Paper: Stampin’ Up Design Paper, Whisper White & Pacific Point card stock |
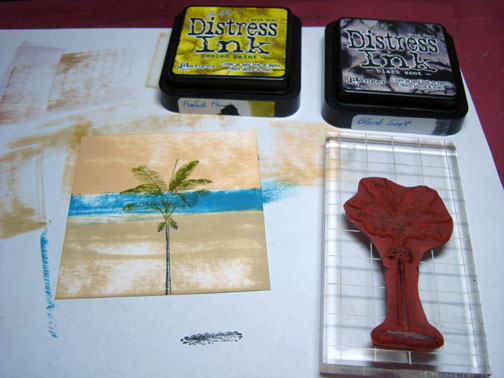
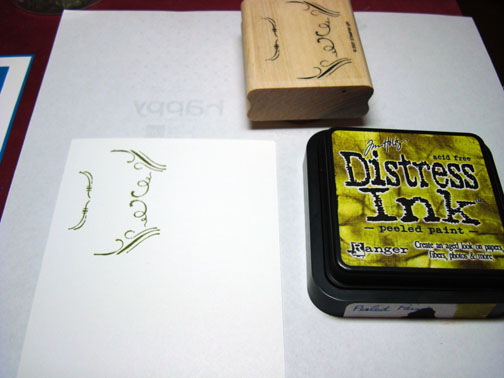
| Ink: Distress Inks Peeled Paint, Black Soot, Old Paper, Faded Jeans, Antique Linen |
| Accessories: Stampin’ Up Basic Black & Close to Cocoa Markers, White Gel Pen, Tim Holtz Distress Tool, Stampin’ Up Old Olive Brads, Tab Punch, Stamp-a-ma-Jig, Piercing Tool |
Are you inspired by this Blog? One way for you can help support this blog is by ordering your Stampin’ Up products through me. You can order from me 24-7 from this link: https://michellezindorf.stampinup.net or e-mail me at [email protected] if you are within the United States. Want to become a Stampin’ Up Demonstrator and earn instant income? Consider being part of my Stampin’ Up Team.
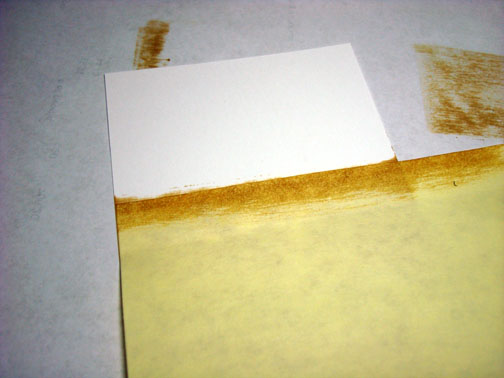
Start out with a 3.5″ square piece of Whisper White card stock.

Mask a little over half the bottom of the card stock with a post it note.
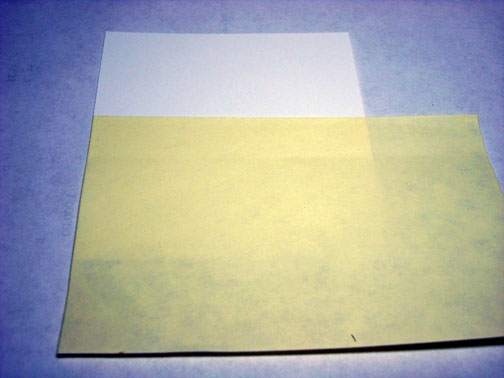
Drag one edge of the Antique Linen Distress ink pad across the unmask portion of the card stock, LEAVE SOME OF THE WHITE PAPER SHOWING THROUGH.

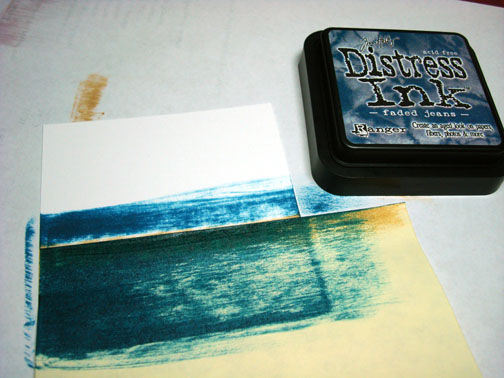
Flip your card stock upside down and cover the sky area you just smeared in with the post it note to mask it.
Smear about 3/4 of an inch of Faded Jeans Distress ink right above the post it note, LEAVE SOME WHITE OF THE PAPER SHOWING THROUGH!
Smear Old Paper Distress ink on the rest of the card stock that is unmasked, LEAVE SOME OF THE WHITE PAPER SHOWING THROUGH.
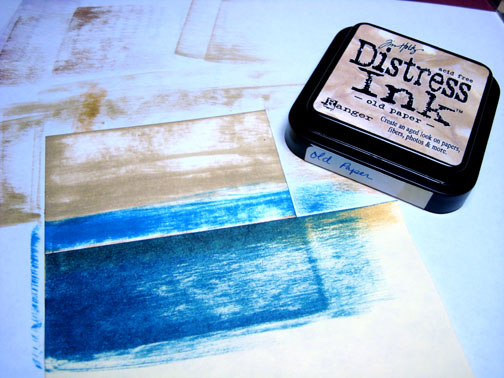
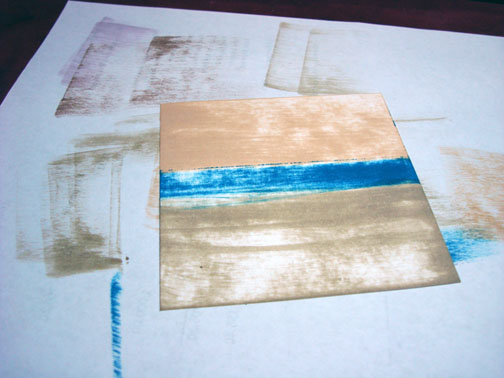
Unmask the scene and turn it around so it is upright.
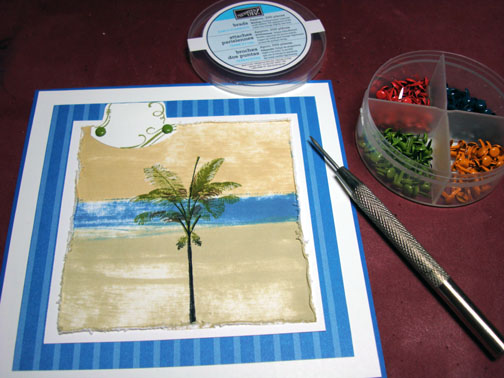
Load this great Palm tree from Innovated Stamp Creations with Peeled Paint ink, then load the trunk of the tree with Black Soot ink before stamping it.
Colored in the trunk of the tree with a Stampin’ Up Basic Black marker.
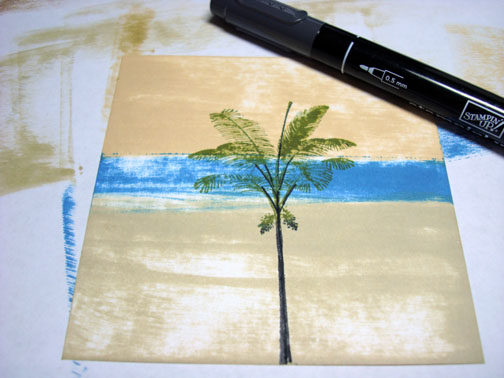
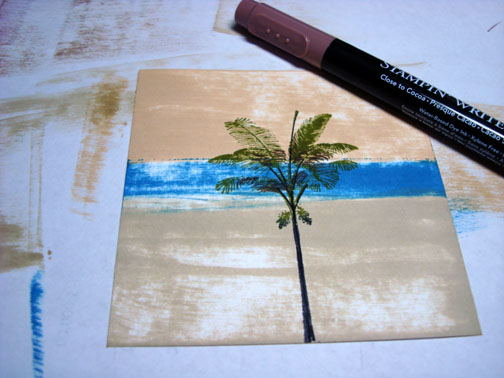
Added a bit of Close to Cocoa marker to the leaves of the tree.
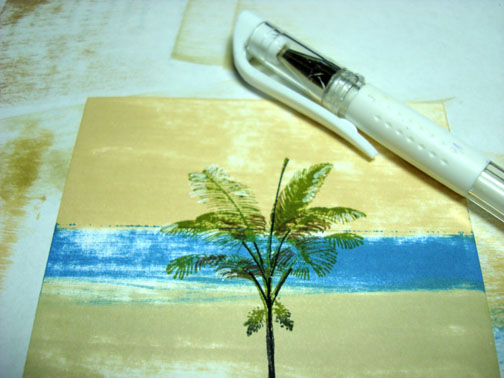
Added White Highlights to some of the leaves on the tree.
Oops! Missed a photo, after I applied the White Gel pen Highlights I used a Tim Holtz Distressing Tool to fray the edges of the main image panel.
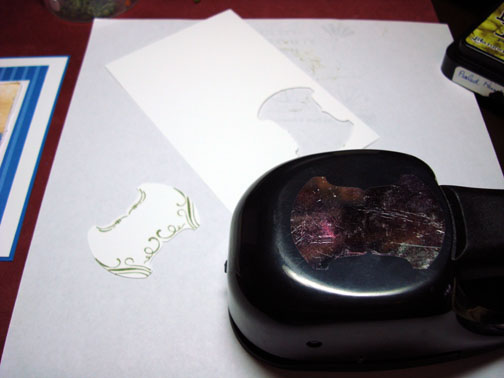
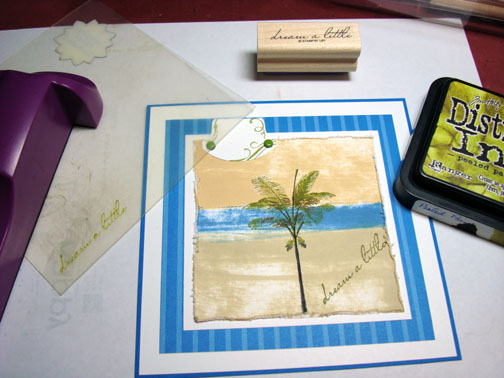
Next, stamped the Totally Tab image on a piece of Whisper White card stock and then punched it out with the Stampin’ Up Tab Punch. Folded it in half and adhered it to the main image panel while assembling the card front.
Look at this, I’m using pattern paper! Gasp! I know, I know, I never use pattern paper. Well you will probably be seeing me use more of it since I went wild and purchased about every piece of pattern paper Stampin’ Up has. They have a sale going on right now, buy 3 packs and get one free. Yep, I love a sale!
I added some Old Olive brads to the tag, by starting the hole for the brad with my piercing tool.
Stamped the sentiment from the Stampin’ Up “Dream a little set”, using my Stamp-a-ma-jig for placement.
Here is the finished card measuring 5.25″ square. Check out that sparkle.
Now it is your turn to leave a little white showing in your backgrounds!
Until my next post. . . . . . . . . . . . . . .
Hugs,
Michelle
Get ready for Brayer Workshops! I am coming to:

Dayton, Ohio
Covington, Indiana
Buffalo, Minnesota
Webster, New York
New Johnsonville, Tennessee
Stoughton, Wisconsin
Columbia, Missouri
Lynchburg, Virginia
Greewood, Indiana
Castro Valley, California
Yardley, Pennsylvania (near Philadelphia)
Knox, Maine
Broomfield, Colorado
Moore, Oklahoma
Portland, Michigan
2010
Jacksonville, Florida
Pocatello, Idaho
Salem, Oregon
Here is a link to my workshop calendar where you can see all of my travel schedule and to get info on beginner and advanced Brayer workshops: https://zindorf.splitcoaststampers.com/workshop-calendar
Link to my Stampin’ Up website were you can order all of your must have Stampin’ Up products from me 24-7: https://michellezindorf.stampinup.net
Here is a link to all of my tutorials: https://zindorf.splitcoaststampers.com/tutorials-ive-written/
Frequently asked questions answers: https://zindorf.splitcoaststampers.com/frequently-asked-questions/
17 responses to “Dream a Little – Tutorial #210”