
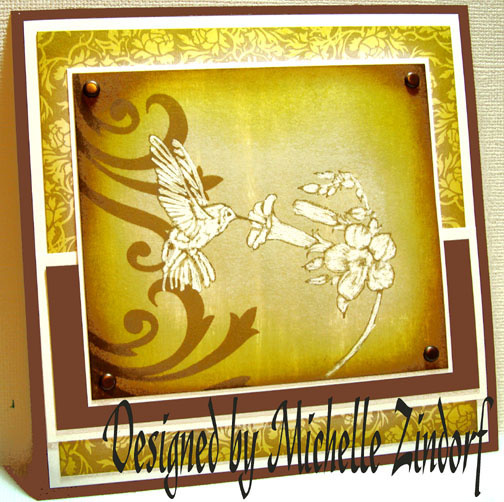
Today’s tutorial gives you another way in which to use White in your projects. The darker you make your background the more your white image will stand out.
Let’s get right into the tutorial today.
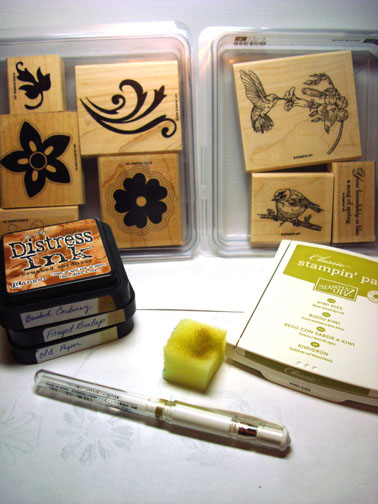
Supplies:
| Stamps: Stampin’ Up “Spring Song” & “Stitched Exotics” |
| Paper: Stampin’ Up Designer Paper, Whisper White & Chocolate Chip Card stock |
| Ink: Stampin’ Up Kiwi Kiss, Tim Holtz Distress ink Brushed Corduroy, Frayed Burlap & Old Paper |
| Accessories: White Gel Pen, Sponge |
Are you inspired by this Blog? One way for you can help support this blog is by ordering your Stampin’ Up products through me. You can order from me 24-7 from this link: https://michellezindorf.stampinup.net or e-mail me at [email protected] if you are within the United States. Want to become a Stampin’ Up Demonstrator and earn instant income? Consider being part of my Stampin’ Up Team.
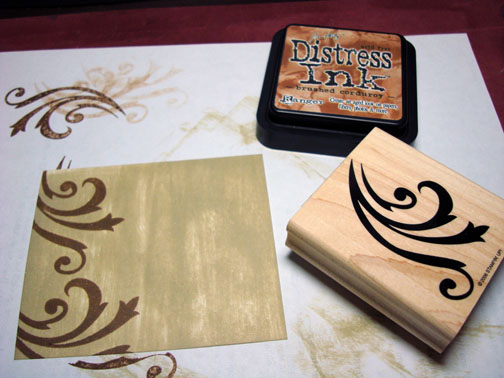
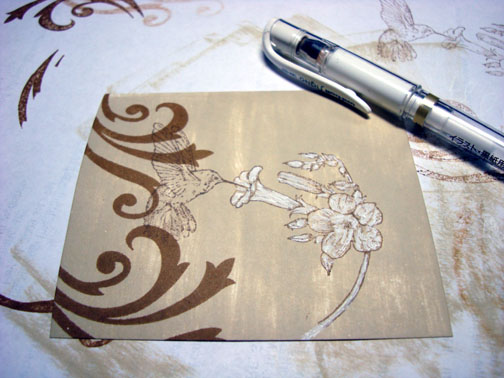
Used the direct to paper technique, by smearing my Old Paper Distress ink pad from top to bottom on a 3.5″ x 4″ piece of Whisper White card stock.

Stamped the Flourish with Brushed Corduroy on the left side of the card stock twice.
Stamped the Hummingbird image with Frayed Burlap Distress ink.
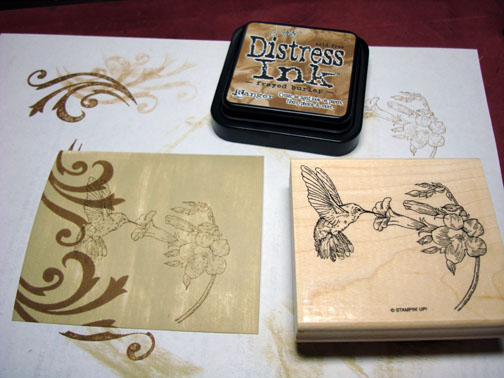
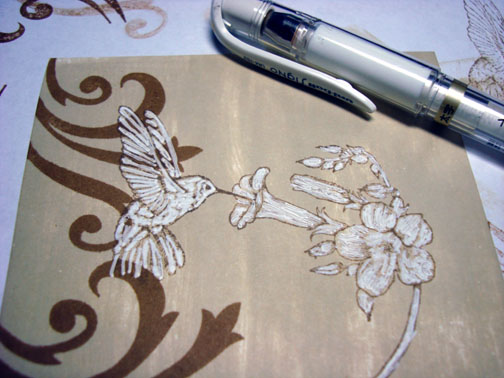
Colored in my images being careful to color inside of the outlines with a white Gel pen.
Sponged Kiwi Kiss ink around the outside edge of the card stock.

Sponged Brushed Corduroy ink around the outside edge of the card stock, not covering the Kiwi Kiss ink entirely.

Cut a 4.75″ square piece of Stampin’ Up Designer paper and sponged Kiwi Kiss around the edge of it to coordinate with my main image panel.

Assembled the card and here it is finished measuring 5.25″ square.
I hope this tutorial has inspired you to try using your white gel pen to add a bit of drama to your creation today.
May you have time today to feel the sun on your face. I am heading out to my gardens. 🙂
Until my next post. . . . . . . . . . . . . . .
Hugs,
Michelle
Get ready for Brayer Workshops! I am coming to:

Dayton, Ohio
Buffalo, Minnesota
Webster, New York
New Johnsonville, Tennessee
Stoughton, Wisconsin
Columbia, Missouri
Lynchburg, Virginia
Greewood, Indiana
Castro Valley, California
Yardley, Pennsylvania (near Philadelphia)
Knox, Maine
Broomfield, Colorado
Moore, Oklahoma
Portland, Michigan
2010
Jacksonville, Florida
Pocatello, Idaho
Salem, Oregon
Here is a link to my workshop calendar where you can see all of my travel schedule and to get info on beginner and advanced Brayer workshops: https://zindorf.splitcoaststampers.com/workshop-calendar
Link to my Stampin’ Up website were you can order all of your must have Stampin’ Up products from me 24-7: https://michellezindorf.stampinup.net
Here is a link to all of my tutorials: https://zindorf.splitcoaststampers.com/tutorials-ive-written/
Frequently asked questions answers: https://zindorf.splitcoaststampers.com/frequently-asked-questions/
18 responses to “White Hummingbird – Tutorial #211”