
Hello out there! Did you miss me? LOL
***********************************************************************************
I have an announcement to make before my tutorial today. I will be teaching in Raleigh, North Carolina for just one day on March 14, 2010 and in Colorado Springs, Colorado on April 10-11, 2010. 🙂 E-mail me at [email protected] for workshop information and registration.
***********************************************************************************
I am feeling a bit patriotic today after driving from Ohio to Minnesota. My 12 hour route took me through Indiana, Illinois, Wisconsin and then into Minnesota. How can you not feel patriotic driving through such beautiful farm land.
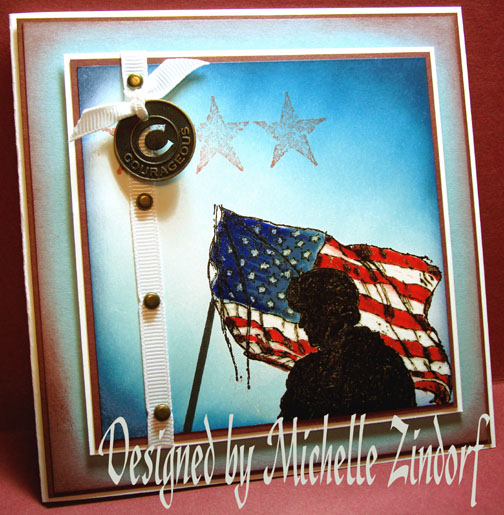
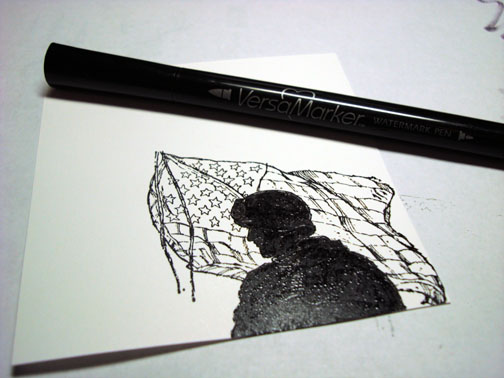
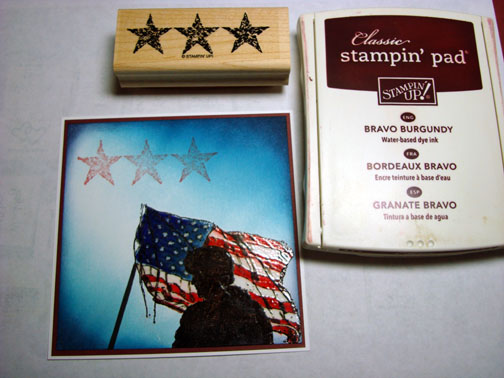
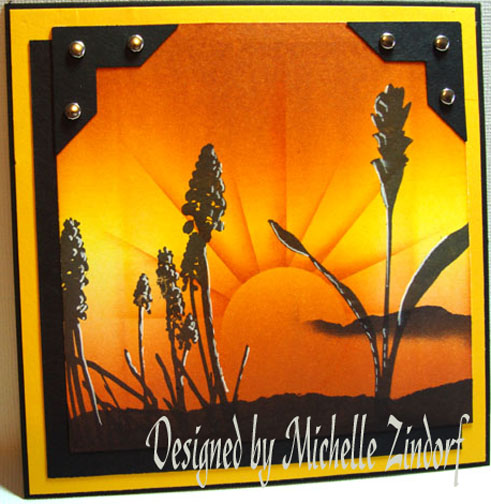
So today’s tutorial uses the Stampin’ Up set “The Free & the Brave”. I altered the image after stamping, making the soldier a silhouette. Check it out in today’s tutorial below.
Let ‘s get started. 🙂
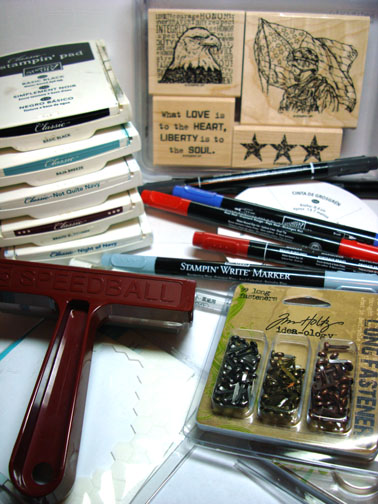
Supplies:
| Stamps: Stampin’ Up “The Free & the Brave” |
| Paper: Stampin’ Up Whisper White, Baja Breeze & Bravo Burgundy |
| Ink: Stampin’ Up Basic Black, Baja Breeze, Not Quite Navy, BravoBurgundy & Night of Navy |
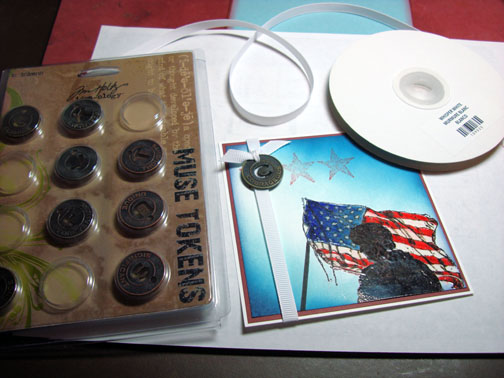
| Accessories: Stampin’ Up Markers, Ruler, Tim Holtz Muse Tokens & Brads, Versamark marker & pad, Sponge, Clear embossing powder, Heat gun, Brayer, White Ribbon, White Gel Pen |
Are you inspired by this Blog? One way you can help support this blog is by ordering your Stampin’ Up products through me. You can order from me 24-7 from this link: https://michellezindorf.stampinup.net or e-mail me at [email protected] if you are within the United States. Want a copy of the current mini catalog, just e-mail me your address and I will pop one in the mail to you.
Want to become a Stampin’ Up Demonstrator and earn instant income? Consider being part of my Stampin’ Up Team.
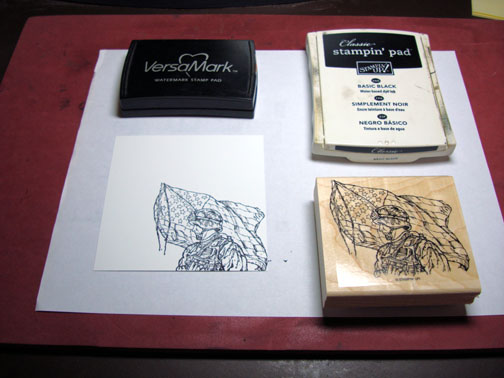
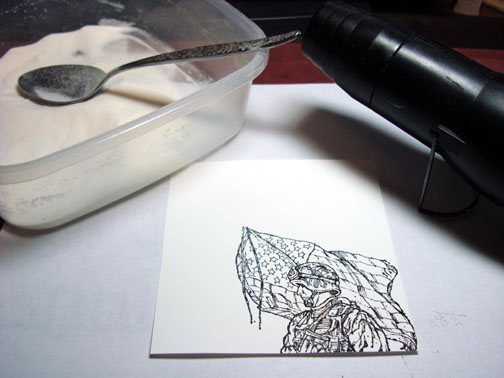
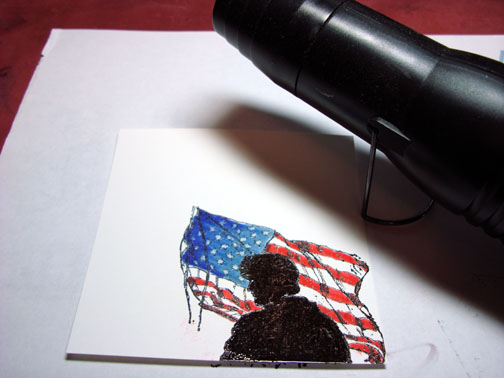
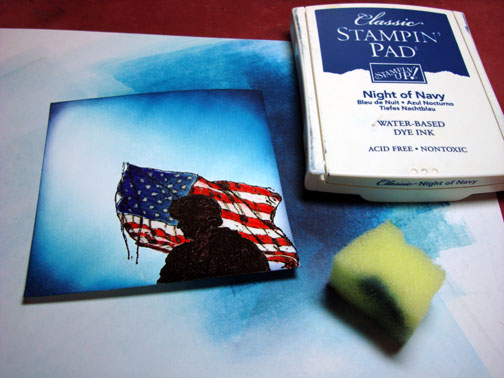
Stamped image on a 4″ square piece of Whisper White card stock by first loading my stamp with Versamark and then loading my stamp with Basic Black ink before stamping it. Heat embossed the image using clear embossing powder and a heat gun.
Colored in the soldier with a Basic Black marker.

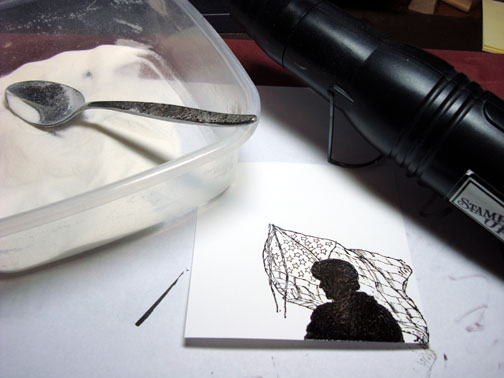
Colored over the soldier with a Versamark marker and then heat embossed the image using clear embossing powder and a heat gun.
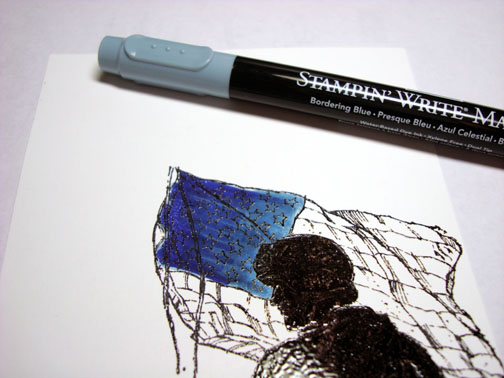
Added Bordering Blue marker to the flag.
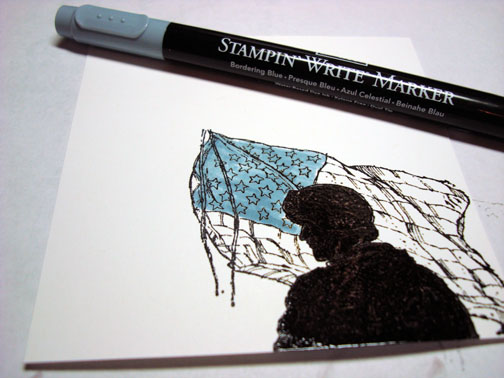
Added Brilliant Blue marker to the flag. Working fast before the ink dried I went over the two blues again with the Bordering Blue Marker to blend them a bit.
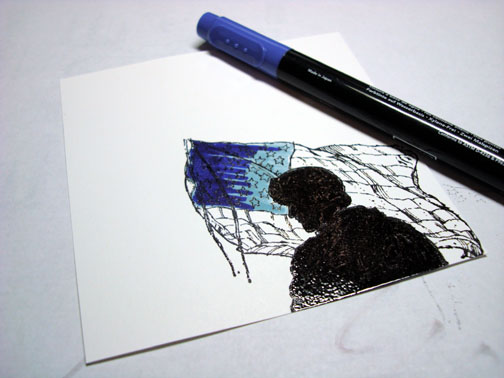
Added Real Red marker to the flag.
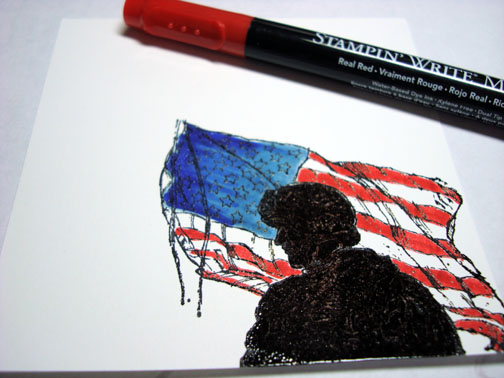
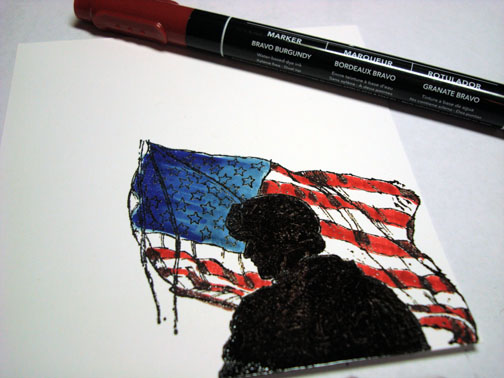
Added a bit of Bravo Burgundy Maker to the darker red areas of the flag.
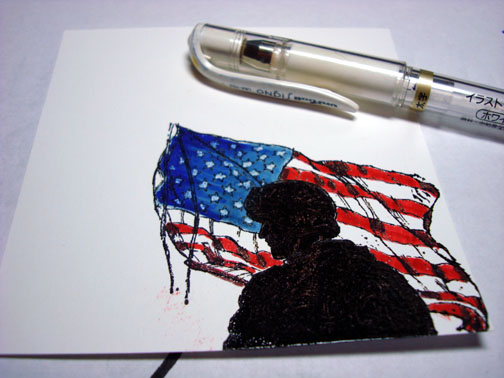
Colored over the stars with a White Gel pen and heated the ink to set it with a heat gun.
Colored over the flag with a Versamark marker being careful to work from light to dark areas and cleaning my Versamark marker on my scrap paper often.
Note: The colors will smear. Color one color area at a time and clean your marker in between colors.
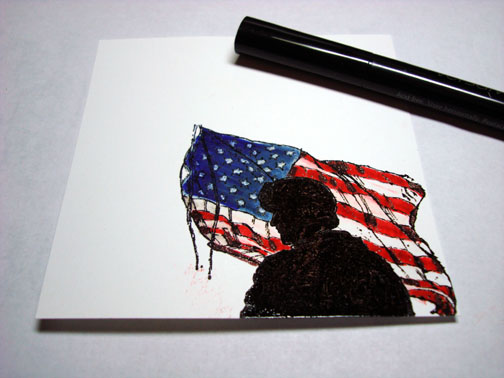
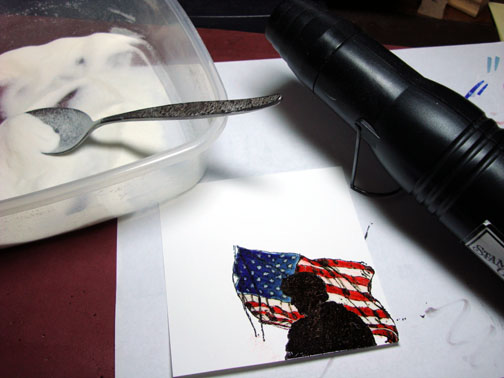
Heat embossed the flag using clear embossing powder and a heat gun.
Brayered Baja Breeze at an angle on the top and bottom of the card stock.
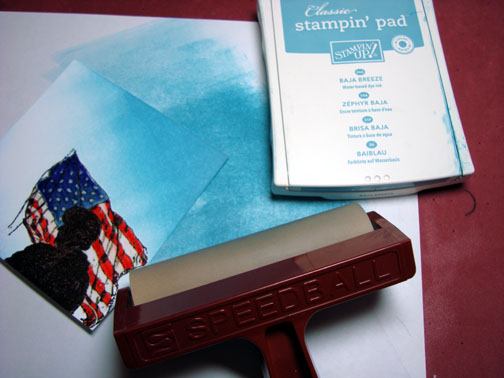
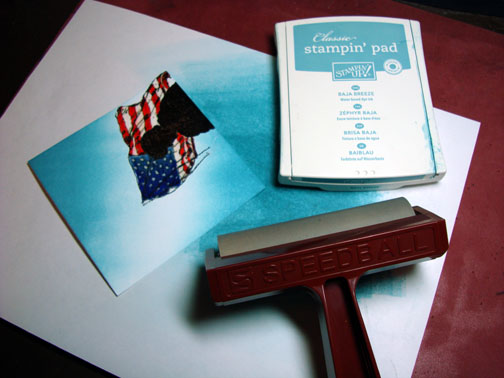
Brayered Not Quite Navy ink at an angle at the top and bottom of the card stock, not covering the Baja Breeze ink entirely.
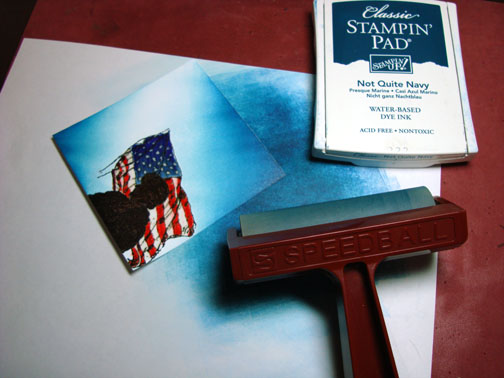
Sponged Night of Navy ink around the outside edge of the card stock.
Using a ruler, drew in a flag pole with a Basic Black marker.

Sponged Bravo Burgundy ink around the outside edge of a 5″ square Baja Breeze panel.
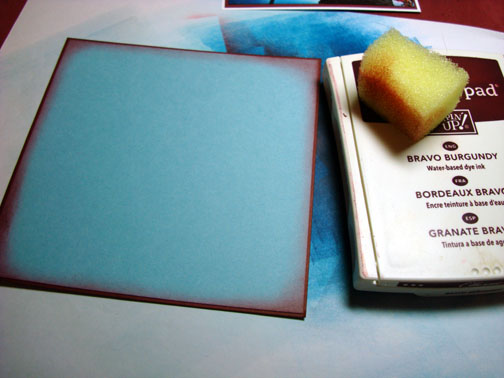
Stamped second generation stars with Bravo Burgundy ink.
Note: Second Generation means to load your stamp with ink and stamp off on your scrap paper once before stamping it on your project. 🙂
Added Ribbon and Tim Holtz Muse Token that reads “Courage”.
Added making Brads.
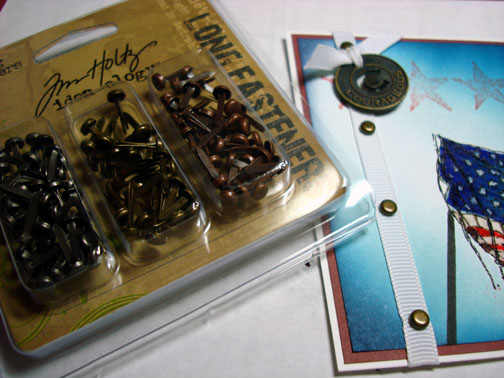
Assembled the card front putting Stampin’ Dimensionals under my top three layers.
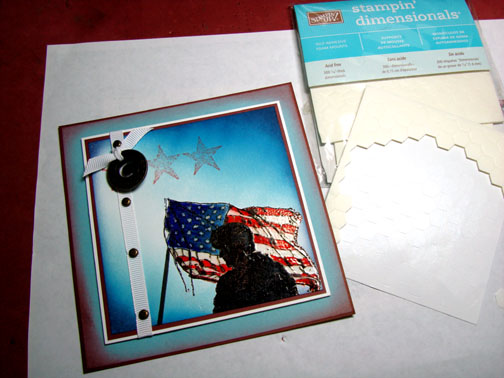
Here is my completed card measuring 5.25″ square.
Next I have some photos from my trip to Minnesota.
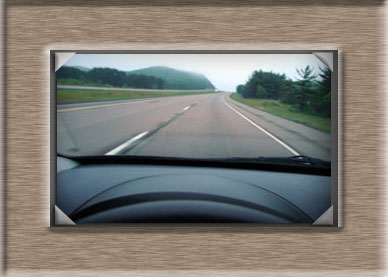
This was taken while I was driving (I don’t recommend doing this). I am a morning person so my journey started at around 3:30 a.m. So as you see I don’t deal with much traffic the first part of the drive. 🙂 One thing, if you take a trip and you are going to drive through Wisconsin be sure to remember to bring a cooler. I wish I had so I could have brought some Cheese home with me. 🙂
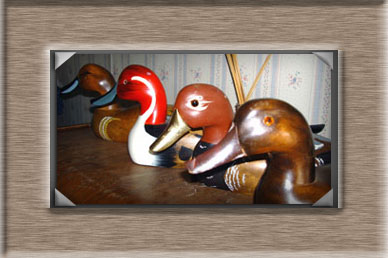
Now this is what I seek out on my frequent stops at antique stores. A girls got to stretch her legs, right? My wooden duck decoy collection is expanding fast! Here are a few of my treasures.
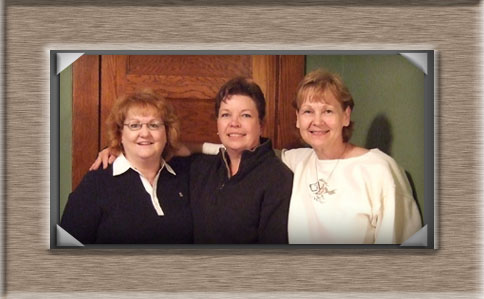
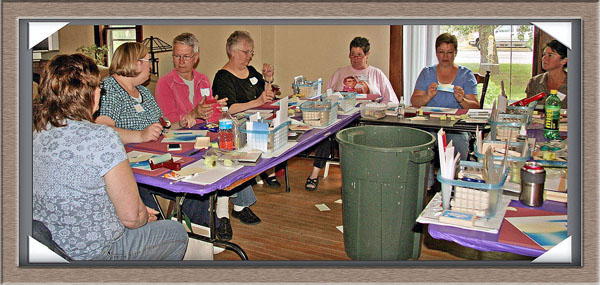
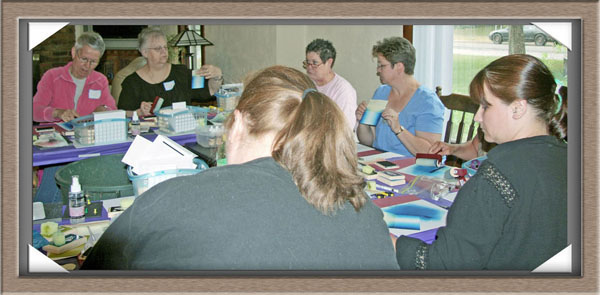
The rest of the photos are of the terrific ladies I had the pleasure of meeting.
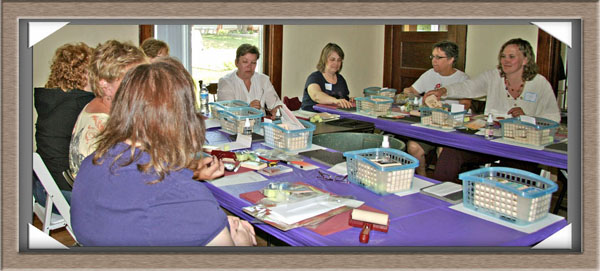
See how small I keep my workshops, way more fun this way!
A big thank you and huge hugs to Deb Murray for hosting me.
Also thank you for hanging out with me today. I hope the tutorial has inspired you to create an unexpected silhouette in your project.
Until my next post. . . . . . . . . . . . . . . . .
Hugs,
Michelle
 Get ready for Brayer Workshops! I am coming to:
Dayton, Ohio
Webster, New York
New Johnsonville, Tennessee
Stoughton, Wisconsin
Columbia, Missouri
Lynchburg, Virginia
Greenwood, Indiana
Castro Valley, California
Yardley, Pennsylvania (near Philadelphia)
Knox, Maine
Broomfield, Colorado
Moore, Oklahoma
Nashville, Indiana
Portland, Michigan
2010
Phoenix, Arizona
Monroe, Louisiana
Jacksonville, Florida
Mechanicsville, Virginia
Raleigh, North Carolina
Colorado Springs, Colorado
Salem, Oregon
Here is a link to my workshop calendar where you can see all of my travel schedule and to get info on beginner and advanced Brayer workshops: https://zindorf.splitcoaststampers.com/workshop-calendar
Link to my Stampin’ Up website were you can order all of your must have Stampin’ Up products from me 24-7: https://michellezindorf.stampinup.net
Frequently asked questions answers: https://zindorf.splitcoaststampers.com/frequently-asked-questions/
29 responses to “Getting Patriotic – Tutorial #220”