
Well my Stampin’ Up Pre-Catalog Order came in yesterday afternoon along with my copy of the new Catalog that will be in effect July 1st. Holy Moly! I was out weeding in the garden when the UPS truck pulled in. I literally dropped everything, weeds, gardening gloves, tools and ran toward the truck, lol. In fact my gardening stuff is still laying out there, grin. I did manage to wash my hands before opening the box. There it was my new catalog! Off to the swing in the yard I went with my catalog and sat there for about an hour and a half just leafing through it, savoring it. It’s an addiction I tell you!!! Oh, but wait after looking at the catalog I ran into the house because I almost forgot about the pre-order sets I was able to get since I am a Demonstrator and the new in colors. . . . . . . Hello they are gorgeous!
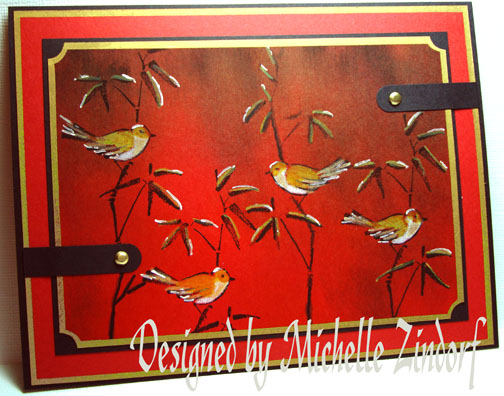
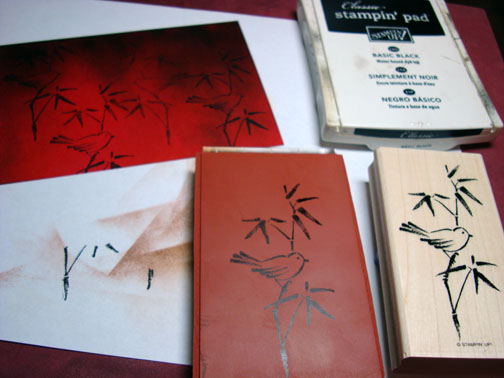
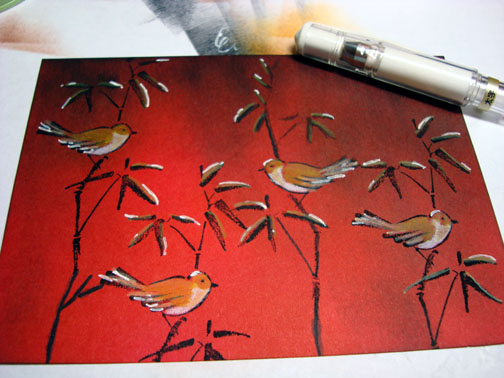
Like, check out this new Hostess Level II set “Asian Artistry” that I am using in this tutorial, love it! Just remember that this set will not be available to hostesses until July 1st.
Anyway, I could not wait to stamp it on paper so here it is colored with Prismacolor Pencils and Odorless Paint Thinner.
Let’s get started on the tutorial. 🙂
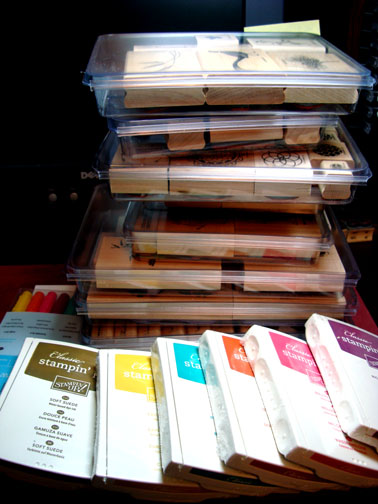
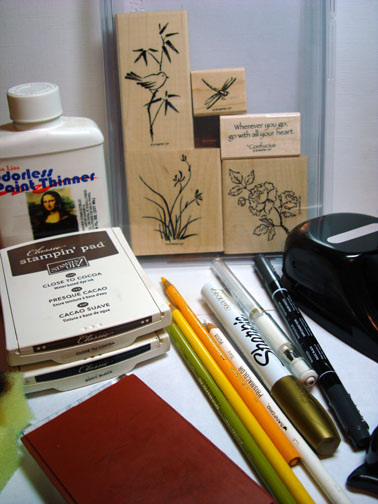
Supplies:
| Stamps: Stampin’ Up Asian Artistry, Innovative Stamp Creations “Opposite” Stamp |
| Paper: Stampin’ Up Real Red & Basic Black |
| Ink: Stampin’ Up Basic Black & Close to Cocoa |
| Accessories: Stampin’ Up Ticket corner & Window Punches, Prismacolor Pencils, Mona Lisa Odorless Paint Thinner, Sponges, White Gel Pen, Basic Black marker, Gold Brads, Sharpie Metallic Gold Marker |
Are you inspired by this Blog? One way you can help support this blog is by ordering your Stampin’ Up products through me. You can order from me 24-7 from this link: https://michellezindorf.stampinup.net or e-mail me at [email protected] if you are within the United States. Want a copy of the current mini catalog, just e-mail me your address and I will pop one in the mail to you.
Want to become a Stampin’ Up Demonstrator and earn instant income? Consider being part of my Stampin’ Up Team.
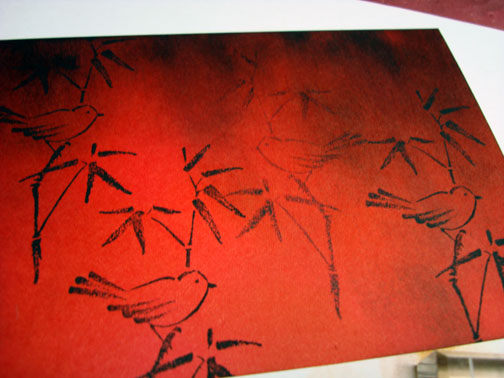
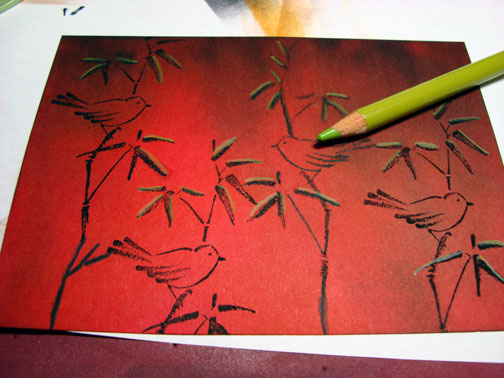
Sponged Close to Cocoa on a 4″ x 5.5″ piece of Real Red card stock.
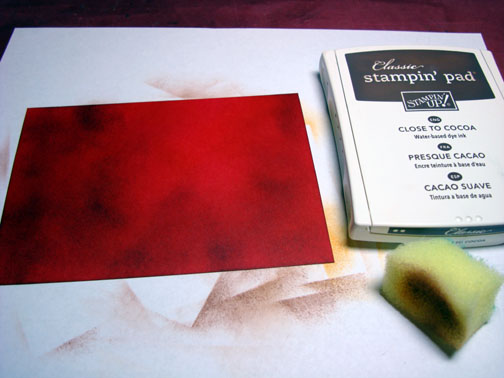
Sponged Basic Black ink at the top of the card stock.

Stamped the bird image 3 times using Basic Black ink.
Now look at this new item from Innovative Stamp Creations, it’s their version of the reverse image stamp. They call it the Opposite Stamp. This stamp is only $4.
I stamped the bird stamp on the Opposite Stamp with Basic Black ink and then stamped it on my card stock to create a verse image of the original. 🙂
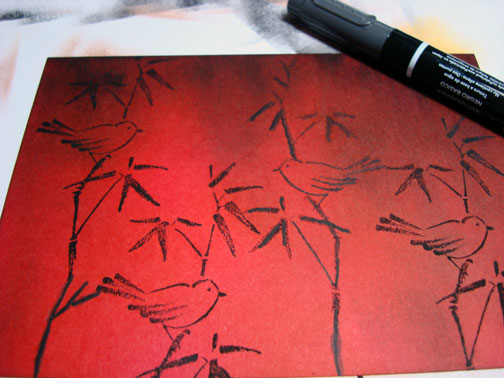
Any time you do a reverse image it stamps lighter than the original image so you will need to go over the image with a marker to darken it, unless you like the lighter effect.
Now it is time for some coloring fun.
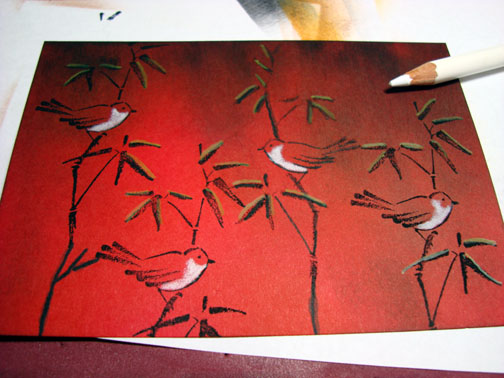
I used my Prismacolor pencils and a little bit of Odorless Paint Thinner in a little container to color my panel images. When you dip the tip of your Prismacolor pencil in the Paint Thinner and than color with it, it melts like butter onto your card stock. It blends beautifully too.
Note this method works great on darker card stock.
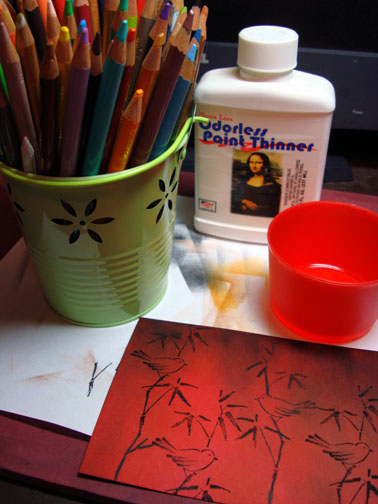
Dipping the point of my pencil in the Odorless Paint Thinner before coloring, added a bit of Limepeel Prismacolor Pencil to the tops of the black leaves.
Colored in the bellies of the birds with Odorless Paint Thinner and White Prismacolor Pencil.
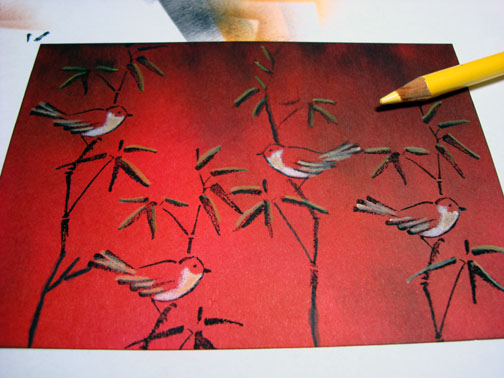
Added Deco Yellow to the birds wings and bellies.
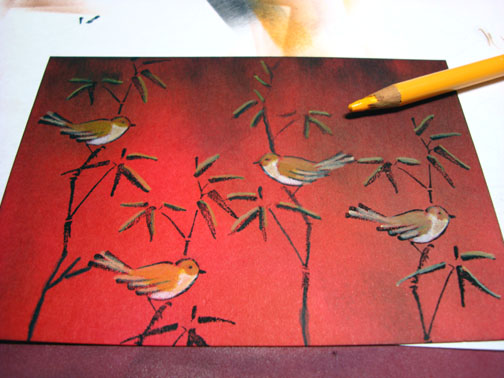
Added Spanish Orange to the birds.
Time for some White Gel pen highlights.
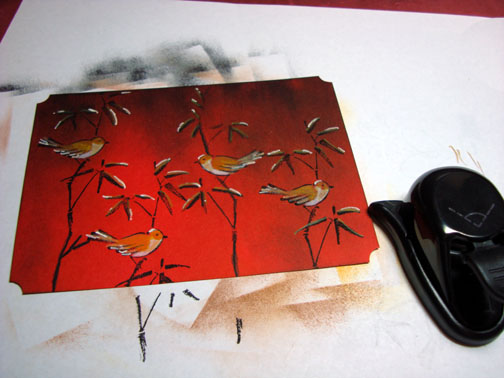
Used the Stampin’ Up Ticket Corner Punch on the main image panel.
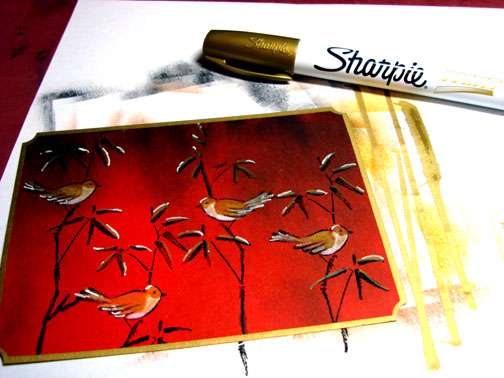
Used my Sharpie Metallic Gold Medium Point Paint marker on the edges of the main image panel and another Real Red panel of card stock.
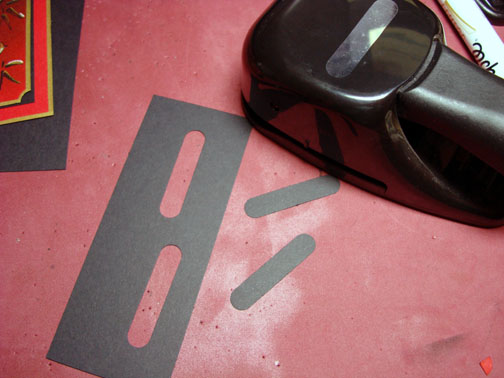
Punch twice the Stampin’ Up Window Punch out of black card stock. Cut one end off of both punches.
Assembled the card and here it is finished measuring 5″ x 6.5″.
May the birdies sweet song reach you today.
Until my next post. . . . . . . . . . . . . . . . . I’ll be drooling over the new catalog, lol
Hugs,
Michelle
 Get ready for Brayer Workshops! I am coming to:
Dayton, Ohio
Webster, New York
New Johnsonville, Tennessee
Stoughton, Wisconsin
Columbia, Missouri
Lynchburg, Virginia
Greenwood, Indiana
Castro Valley, California
Yardley, Pennsylvania (near Philadelphia)
Knox, Maine
Broomfield, Colorado
Moore, Oklahoma
Nashville, Indiana
Portland, Michigan
2010
Phoenix, Arizona
Monroe, Louisiana
Jacksonville, Florida
Mechanicsville, Virginia
Raleigh, North Carolina
Colorado Springs, Colorado
Salem, Oregon
Here is a link to my workshop calendar where you can see all of my travel schedule and to get info on beginner and advanced Brayer workshops: https://zindorf.splitcoaststampers.com/workshop-calendar
Link to my Stampin’ Up website were you can order all of your must have Stampin’ Up products from me 24-7: https://michellezindorf.stampinup.net
Frequently asked questions answers: https://zindorf.splitcoaststampers.com/frequently-asked-questions/
23 responses to “Sneak Peek Asian Artistry – Tutorial #222”