
Good Morning, Good Morning, Good Morning! I finally feel like I could catch my breath this morning and slooooowwww down to create a little something at a leisurely pace. Sometimes the world just seems like it is going 100 miles an hour. I try not to get caught up in the race, but it sneaks in sometimes anyway, lol. We moved to the country 4 years ago to step back from things a bit and enjoy the slower pace. I forget that now and then.
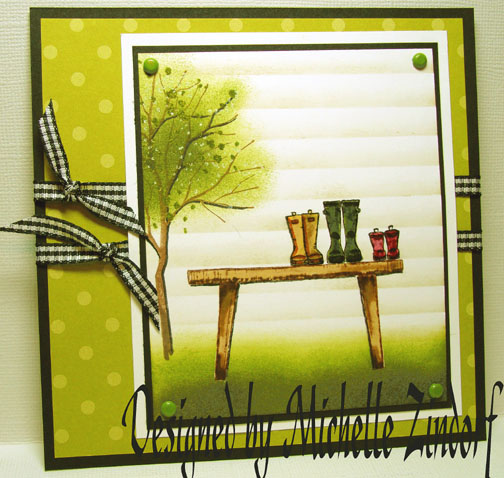
This mornings project hopefully reflects a peaceful scene, that was my intention anyway.
Let’s get started. . . . 🙂
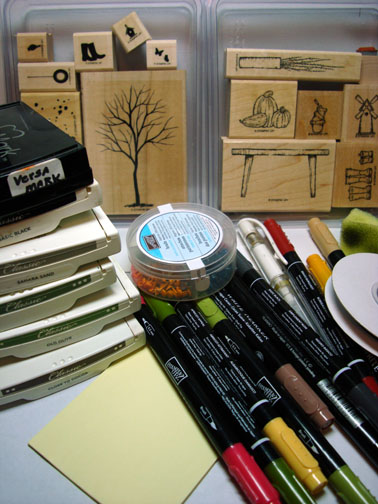
Supplies:
| Stamps: Stampin’ Up “Scene in the Garden” & “Branch Out” |
| Paper: Stampin’ Up Old Olive Designer Paper, Whisper White & Basic Black card stock |
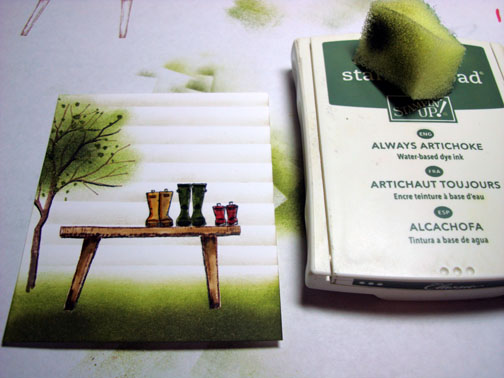
| Ink: Stampin’ Up Basic Black, Sahara Sand, Old Olive, Always Artichoke & Close to Cocoa |
| Accessories: Versamark marker & pad, Stampin’ Up Markers, Old Olive Brads, Black Gingham Ribbon, White Gel Pen, Stamp-A-Ma-Jig, Post it Note, Clear embossing powder, Heat Gun, Sponge |
Are you inspired by this Blog? One way you can help support this blog is by ordering your Stampin’ Up products through me. You can order from me 24-7 from this link: https://michellezindorf.stampinup.net or e-mail me at [email protected] if you are within the United States. Want a copy of the current mini catalog, just e-mail me your address and I will pop one in the mail to you. Want to become a Stampin’ Up Demonstrator and earn instant income? Consider being part of my Stampin’ Up Team.
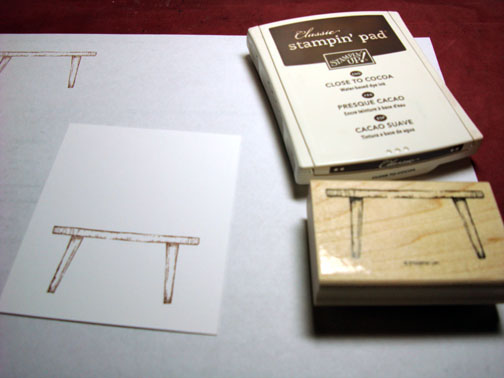
On a 3.5″ x 4.25″ piece of Whisper White card stock stamped the bench with Close to Cocoa ink.
Now this is what happens to your photographs when you accidentally hit the wrong button on your camera, your pictures go out of focus and you don’t realize it until you start to edit them. 🙂
So there are no in focus photos for a few of these next steps, but I will walk you through it.
Colored the bench with a Creamy Caramel marker.
Colored the shadow areas on the legs of the bench with a Close to Cocoa marker.
Colored over the bench legs again to blend the shading with the Creamy Caramel Marker.
Colored over the bench with a Versamark marker and heat embossed the image with clear embossing powder and a heat gun.

Stamped the boots with Basic Black ink using a Stamp-a-ma-jig for placement.
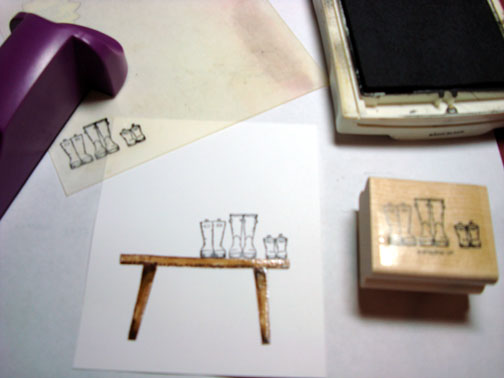
Now we are back in focus, lol.
Colored the middle boots with an Old Olive marker.
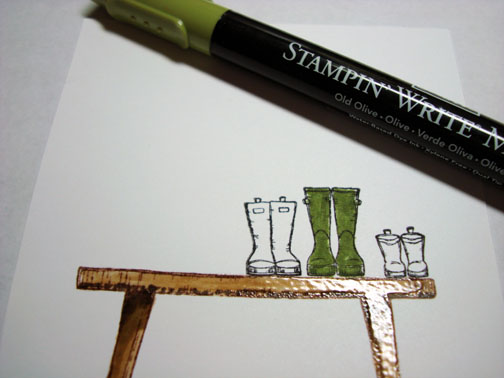
Added Always Artichoke marker to the boots.
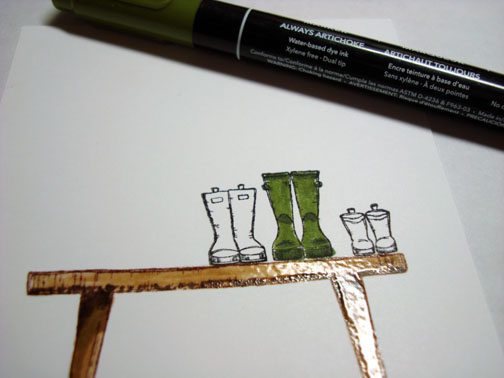
Colored the boots on the left with an Apricot Appeal marker.
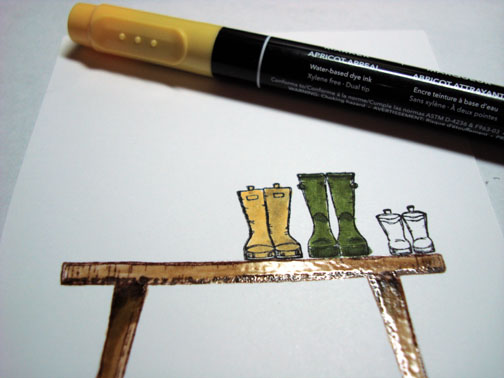
Added More Mustard marker to the boots.
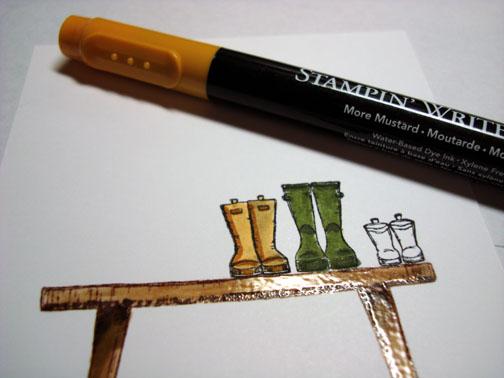
Colored the boots on the right side with a Rose Red Marker.

Added Bravo Burgundy marker to the boots.
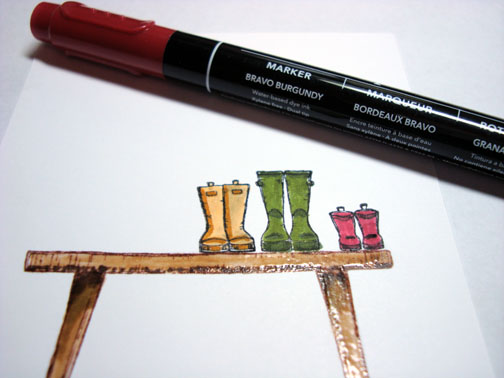
Colored over the boots with a Versamark marker and heat embossed them using clear embossing powder and a heat gun.

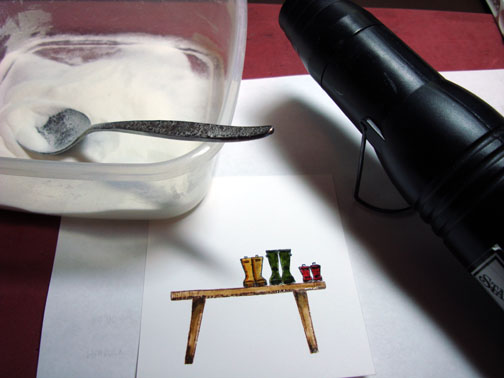
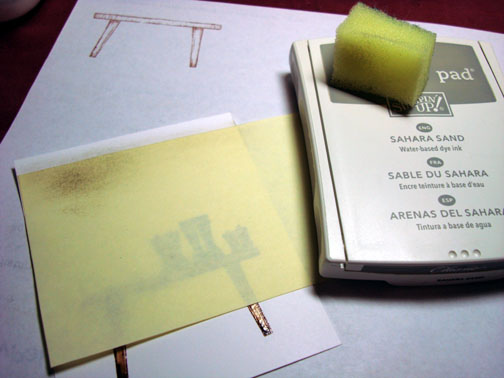
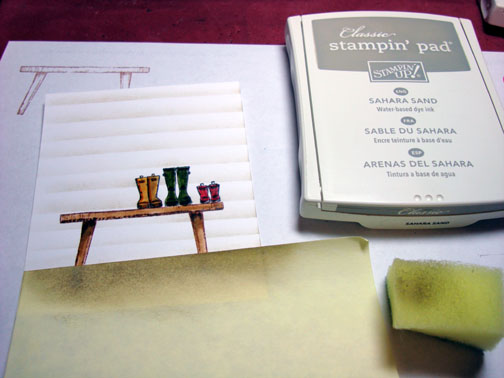
Created a clap board wall behind the bench by using a post it note to mask and sponge at the edge of the post it note with Sahara Sand ink. Moved the mask and repeated sponging over and over until my wall was built. 🙂
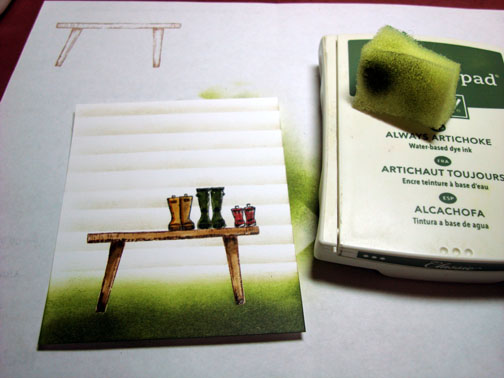
Sponged in the ground with Old Olive ink.
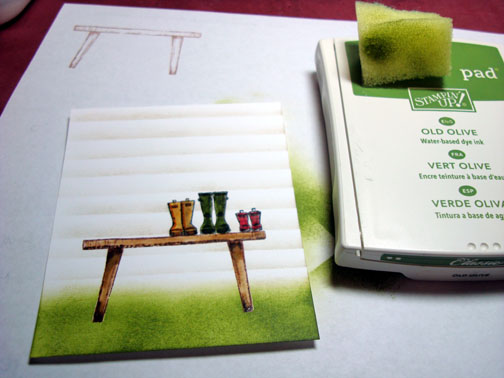
Added Always Artichoke ink with a sponge at the bottom of the card stock.
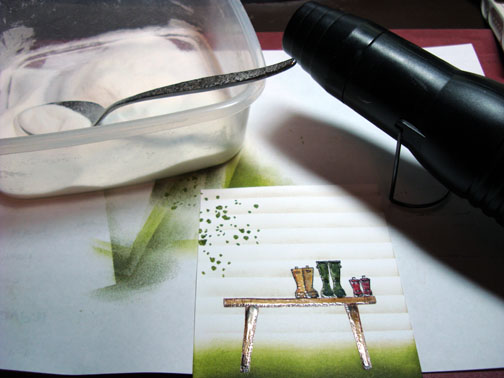
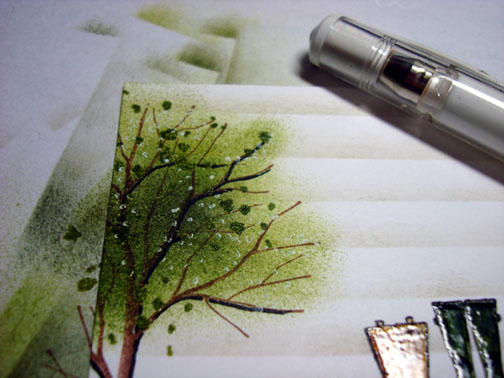
Stamped the tree leaves by first loading the stamp with Versamark and then with Old Olive ink before stamping. Heat embossed the image using clear embossing powder and a heat gun.

Stamped the tree over the leaves using Close to Cocoa ink, omitting the grassy section of the stamp by not inking it. Extended the trunk of the tree at the bottom using a Close to Cocoa marker.

Sponged a bit of Old Olive ink in the leaf area of the tree.
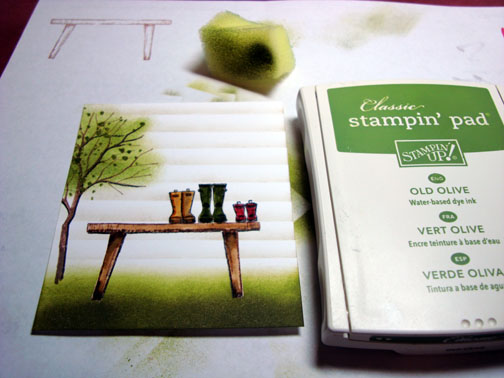
Added a bit of shadow in the middle of the tree by sponging in Always Artichoke ink.
Added a few dots of White Gel pen to the tree.
Assembled and added Black Gingham ribbon and Old Olive Brads.
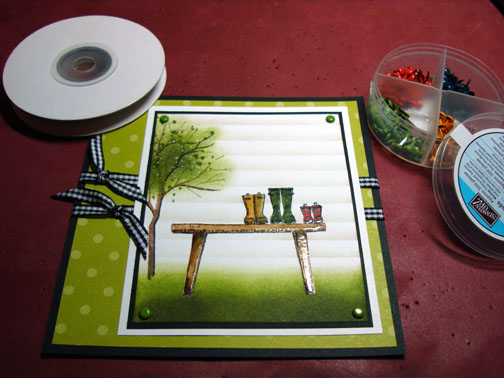
Here it is finished measuring 5.25″ square.
I hope this tutorial has inspired you to create a peaceful scene of your own, either in real life or on paper.
Until my next post. . . . . . . . . . . . . . . . .
Huge Hugs,
Michelle
 Get ready for Brayer Workshops! I am coming to:
Dayton, Ohio
Webster, New York
New Johnsonville, Tennessee
Stoughton, Wisconsin
Columbia, Missouri
Lynchburg, Virginia
Greenwood, Indiana
Castro Valley, California
Yardley, Pennsylvania (near Philadelphia)
Knox, Maine
Broomfield, Colorado
Moore, Oklahoma
Nashville, Indiana
Portland, Michigan
2010
Phoenix, Arizona
Monroe, Louisiana
Jacksonville, Florida
Mechanicsville, Virginia
Raleigh, North Carolina
Colleyville, Texas
Colorado Springs, Colorado
Salem, Oregon
Here is a link to my workshop calendar where you can see all of my travel schedule and to get info on beginner and advanced Brayer workshops: https://zindorf.splitcoaststampers.com/workshop-calendar
Link to my Stampin’ Up website were you can order all of your must have Stampin’ Up products from me 24-7: https://michellezindorf.stampinup.net
Frequently asked questions answers: https://zindorf.splitcoaststampers.com/frequently-asked-questions/
30 responses to “On the Bench – Tutorial #225”