
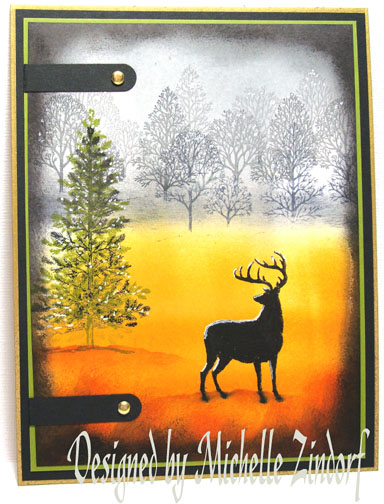
How about a card for the Guys today. Cards for men are always difficult for me and I aways lean towards a wilderness theme when creating them. Perfect example is this mornings card. 🙂
When creating a wilderness card I reach for my Stampin’ Up “Lovely As a Tree” set, time and time again. Stampin’ Up, if you are listening, please, please never retire this set.
Along with the “Lovely As a Tree” set I am using the Deer from the Stampin’ Up “Nature Silhouettes” set. Another great set for guy cards.
Lately, I have been stuck in a blue and green mode and I am purposely using other colors to switch things up a bit. The bright More Mustard ink will wake you up a bit and bring the viewers eye into the scene and hold it a moment.
Ready, let’s get started. . . . . .
Supplies:
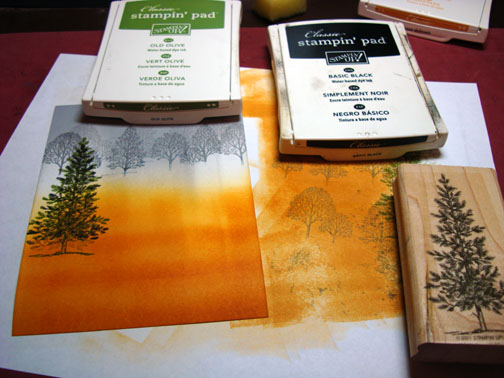
| Stamps: Stampin’ Up “Lovely As A Tree” & “Nature Silhouettes” |
| Paper: Stampin’ Up Whisper White, Old Olive & Basic Black |
| Ink: Stampin’ Up Old Olive, More Mustard, Really Rust, Going Gray, Basic Black & Basic Gray |
| Accessories: White Gel Pen, Word Window Punch, Gold Brads, Post it note, Brayer, Metallic Gold Sharpie Paint Marker |
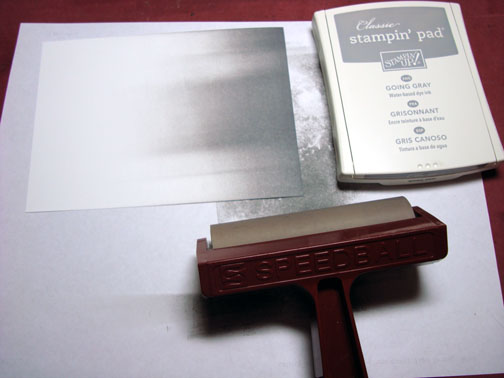
Are you inspired by this Blog? One way you can help support this blog is by ordering your Stampin’ Up products through me. You can order from me 24-7 from this link: https://michellezindorf.stampinup.net or e-mail me at [email protected] if you are within the United States. Want a copy of the current mini catalog, just e-mail me your address and I will pop one in the mail to you. Want to become a Stampin’ Up Demonstrator and earn instant income? Consider being part of my Stampin’ Up Team.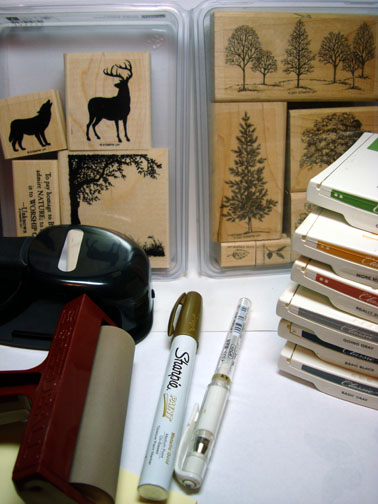 Brayered Going Gray ink at the top of a 4.5″ x 6″ piece of Whisper White card stock.
Brayered More Mustard ink at the bottom of the card stock.

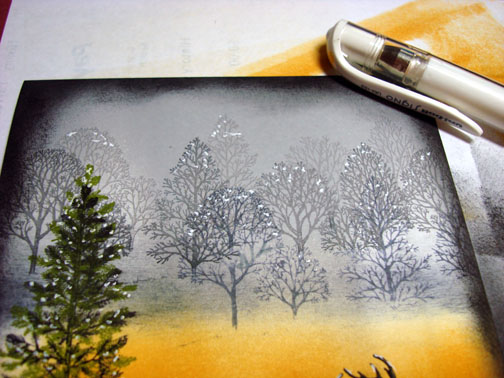
Stamped the trees with Going Gray ink. I did not ink up the ground area on the stamp so it would be omitted when I stamped it.
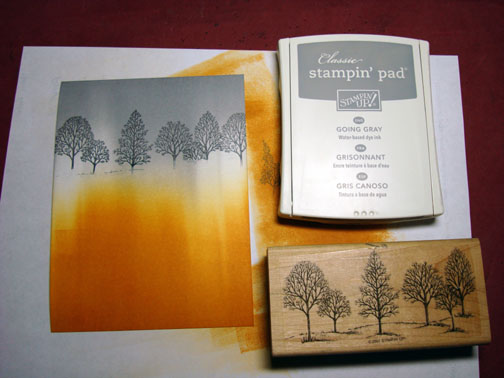
Stamped the trees again with Going Gray. First, I stamped off on my scrap paper, second generation stamping. The lighter trees recess into the background creating depth in the scene.

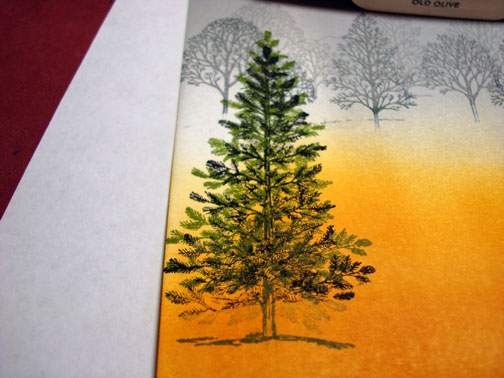
Stamped the pine tree first with Old Olive ink and then over stamped it with Basic Black ink.
I did not ink the ground portion of the stamp when I over stamped in black.
I brought the background trees in a bit closer by stamping them again a bit lower with Basic Gray ink.
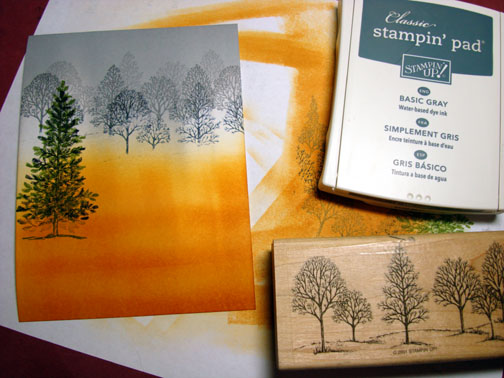
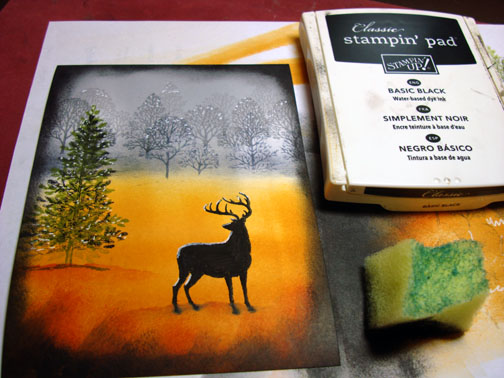
Stamped the deer with Basic Black ink.

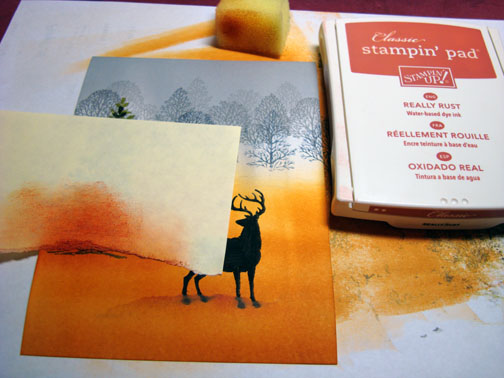
Tore a hill in a post it note and sponged on Really Rust ink, right at the post it notes edge to create the hill on the card stock.
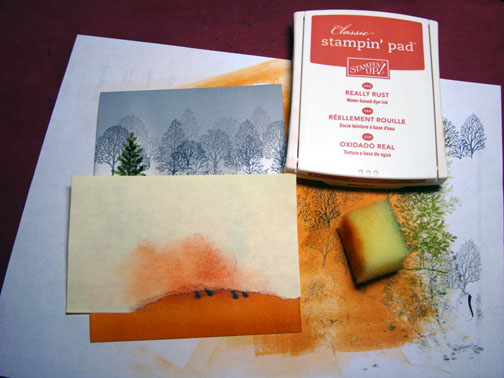
Moved the post it note and sponged really rust again at the post it note edge to create the second hill.
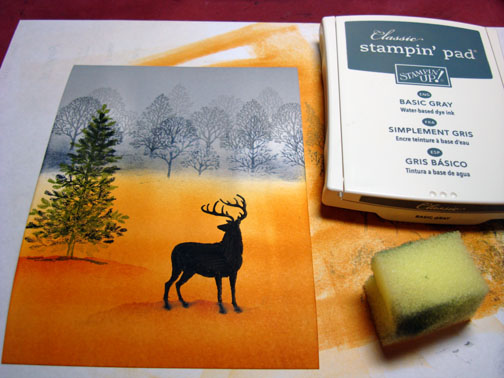
Sponged Basic Gray ink at the bass of the background trees.
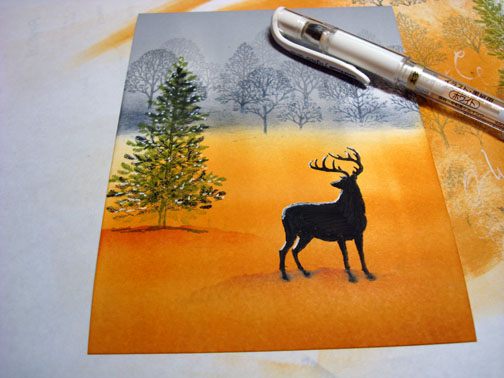
Added white highlights to the pine tree and the deer with a white gel pen.
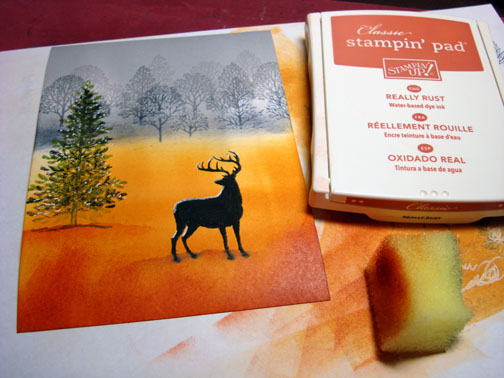
Streaked with a Sponged, Really Rust ink at the bottom of the card stock.
Streaked Basic Black ink at the bottom of the card stock with a sponge and also sponged it around the outside edge of the card stock.
My highlights in the pine tree took on the look of snow so I decided to add some highlights with the white gel pen to the background trees too.
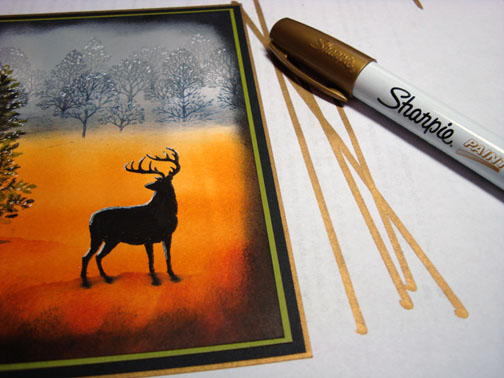
Assembled my card stock layers, Main image panel, Old Olive panel and Basic Black panel. Took a Metallic Gold Sharpie Paint marker and pulled it down the edge of the Basic Black panel to jazz the card stock up a bit. This gives you a look of a gold panel without the cost of gold card stock.
Punched the window punch twice out of Basic Black card stock and cut the ends off of one side of the punches.
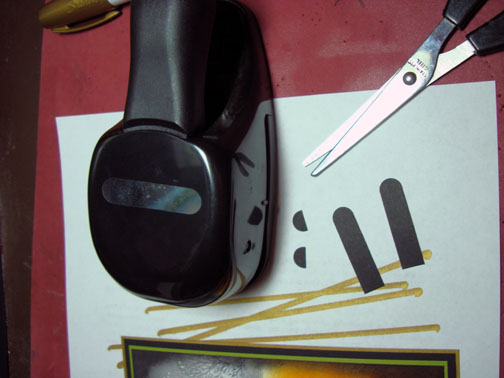
Adhered the punches to the card front, added a couple of gold brads.
Here is the finished card measuring 5″ x 6.5″.
I hope this tutorial has inspired you to get out of your color rut and try something different.
May your day be filled with peaceful moments.
Until my next post. . . . . . . . . . . . . . . . .
Huge Hugs,
Michelle
 Get ready for Brayer Workshops! I am coming to:
Dayton, Ohio
Webster, New York
New Johnsonville, Tennessee
Stoughton, Wisconsin
Columbia, Missouri
Lynchburg, Virginia
Greenwood, Indiana
Castro Valley, California
Yardley, Pennsylvania (near Philadelphia)
Knox, Maine
Broomfield, Colorado
Moore, Oklahoma
Nashville, Indiana
Portland, Michigan
2010
Phoenix, Arizona
Monroe, Louisiana
Jacksonville, Florida
Mechanicsville, Virginia
Raleigh, North Carolina
Colleyville, Texas
Colorado Springs, Colorado
Salem, Oregon
Here is a link to my workshop calendar where you can see all of my travel schedule and to get info on beginner and advanced Brayer workshops: https://zindorf.splitcoaststampers.com/workshop-calendar
Link to my Stampin’ Up website were you can order all of your must have Stampin’ Up products from me 24-7: https://michellezindorf.stampinup.net
Frequently asked questions answers: https://zindorf.splitcoaststampers.com/frequently-asked-questions/
14 responses to “In the Field – Tutorial #226”