
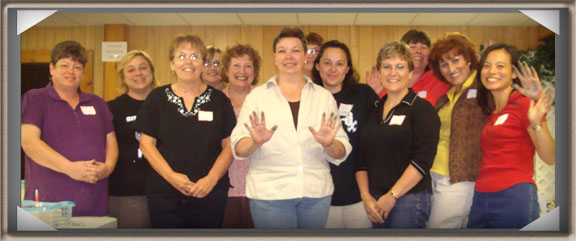
Hi Everyone, I’m back. . . . . . I had a terrific time going down South to New Johnsonville, Tennessee. I met the most terrific group of ladies. Just look at this group of Advanced Brayer Students. We got down and inky and really had a blast. 🙂
In fact, we had so much fun that I am going to return to New Johnsonville, Tennessee next July. So if you missed out on the Brayer workshops this time around contact me and we will get you registered for the next workshops. The advanced workshop is already half full, lol. 🙂
Now, I have an important announcement to make. The winner of the Stampin’ Up Dream Gardens stamp set is. . . . . . Drum-roll please. . . . .. . . . . . . . . . . . . . . . . . .

Evelyn—-Ks.stamper who wrote “Thanks so much for the chance to win this wonderful set. I have loved the last several cards you have posted and the tutorials, cased one yesterday of coarse it was nothing like as gorgeous as yours but I keep trying. I would love to win that gorgeous set please enter me…….Evelynn”
Evelynn CONGRATULATIONS!!!! Please e-mail your address to [email protected] and I will get this set in the mail to you ASAP.
Thanks everyone for playing along.
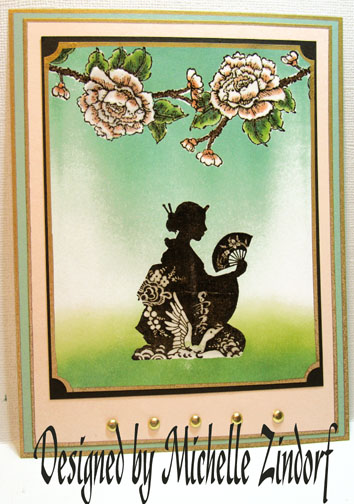
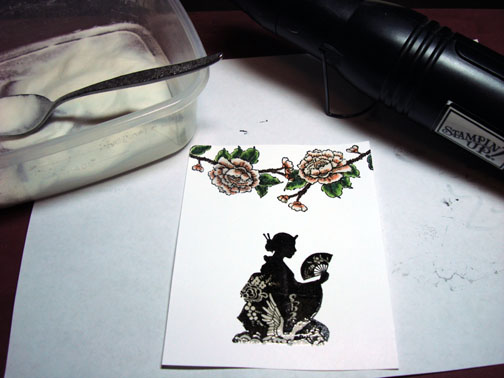
Now on with today’s tutorial. I used the same set that I gave away “Dream Gardens” and paired it up with another great Stampin’ Up set “Eastern Influences”. Ladies you need both of these sets. They go perfect together!
Supplies:
| Stamps: Stampin’ Up Dream Gardens and Eastern Influences |
| Paper: Stampin’ Up Whisper White, Basic Black, Sage Shadow & Blush Blossom |
| Ink: Stampin’ Up Basic Black, Sage Shadow & Certainly Celery |
| Accessories: Stampin’ Up Mat Pack & Piercing Tool, Brayer, Stampin’ Up Markers, Versamark Pad and Marker, Clear Embossing Powder and a heat gun, Stampin’ Up Ticket Corner Punch, Metallic Gold Sharpie Paint marker, Sponge |
Are you inspired by this Blog? One way you can help support this blog is by ordering your Stampin’ Up products through me. You can order from me 24-7 from this link: https://michellezindorf.stampinup.net or e-mail me at [email protected]If you are within the United States. Want a copy of the brand new 2009-2010 Stampin’ Up Catalog for $9.95, just e-mail me at [email protected] and I will get one in the mail to you. Want to become a Stampin’ Up Demonstrator and earn instant income? Consider being part of my Stampin’ Up Team. Through August 31 you can become a Stampin’ Up Demonstrator for as little as $85 with the mini kit. ![]() Also Stampin’ Up is now having a weekly special, click this link to check it out: https://www.stampinup.net/esuite/home/michellezindorf/promotions
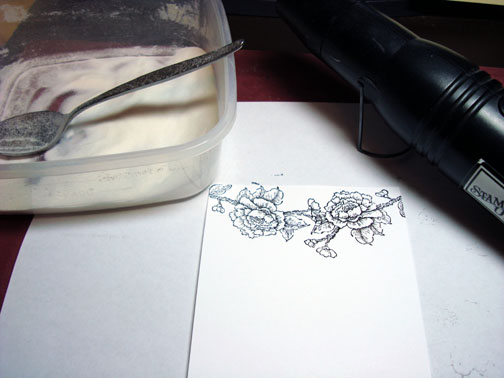
Also Stampin’ Up is now having a weekly special, click this link to check it out: https://www.stampinup.net/esuite/home/michellezindorf/promotions 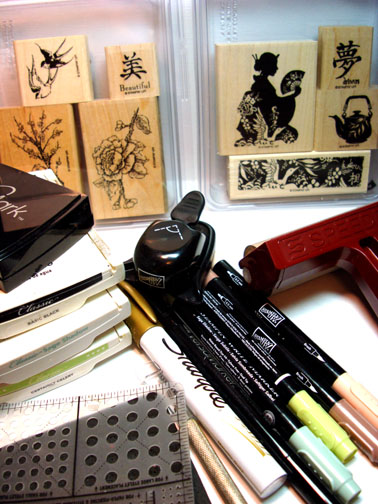 Stamped the flowers from the eastern Influences stamp set on a 4″ x 5″ piece of Whisper White card stock by first loading the stamp with Versamark and then with Basic Black ink before stamping it. I stamped the flowers twice loading the stamp with Versamark and Basic Black ink in between stampings.
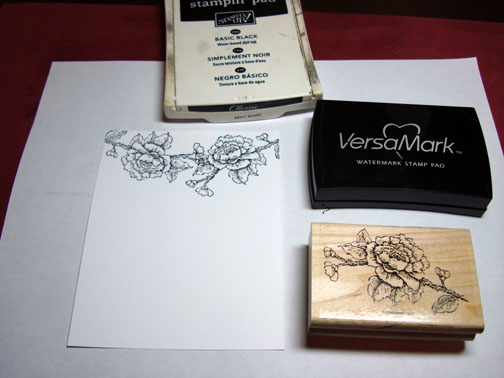
Heat embossed the images using clear embossing powder and a heat gun.
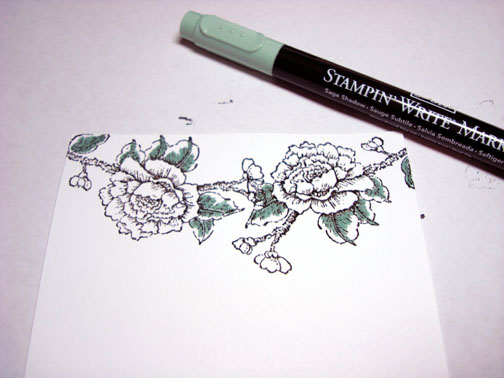
Colored the inside of the leaves with a Sage Shadow marker.
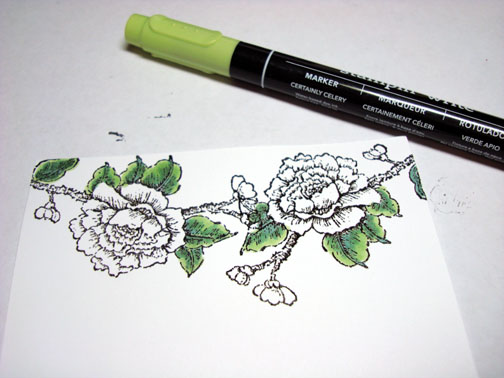
Added Certainly Celery marker to the leaves.
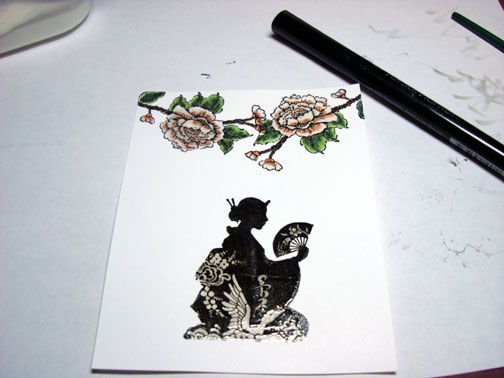
Colored the darker parts of the flowers with a Blush Blossom marker.

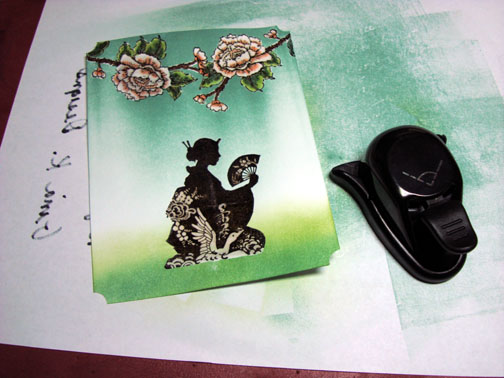
Stamped the image from the “Dream Gardens” set by first loading my stamp with Versamark and then with Basic Black ink before stamping it. Heat embossed the image using clear embossing powder and a heat gun.

Colored over all of the images with a Versamark marker, being very careful to stay within the embossed image lines and then heat embossed the images using clear embossing powder.
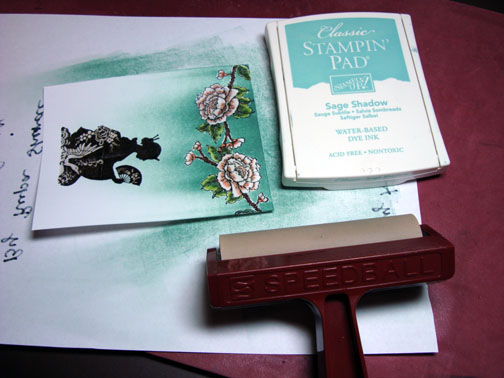
Brayered Sage Shadow ink at the top of the card stock.
Sponged Certainly Celery ink at the bottom of the card stock.
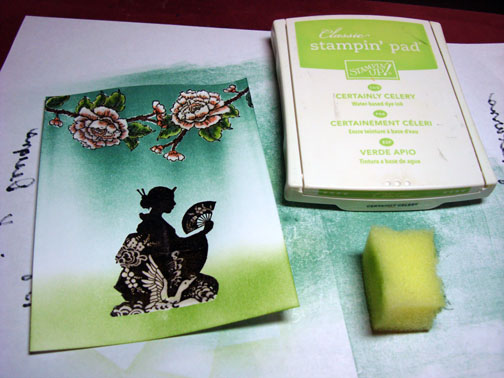
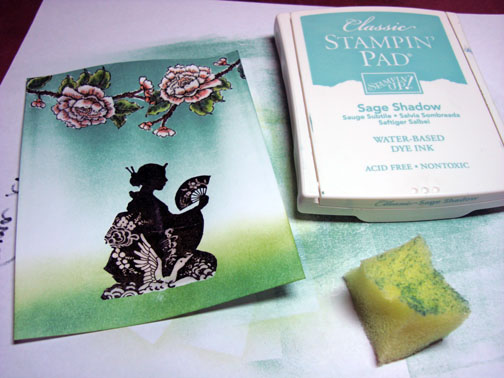
Sponged Sage Shadow ink at the bottom of the card stock, not covering the Certainly Celery ink entirely.
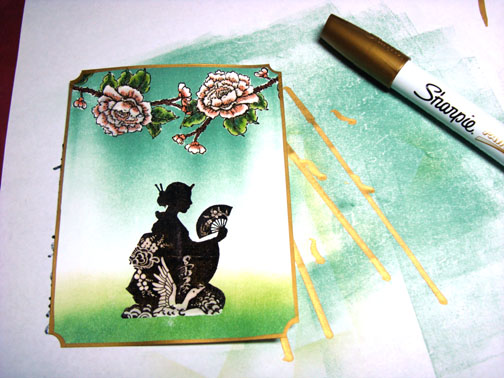
Used a Stampin’ Up Ticket Corner Punch on the corners of the main image panel.
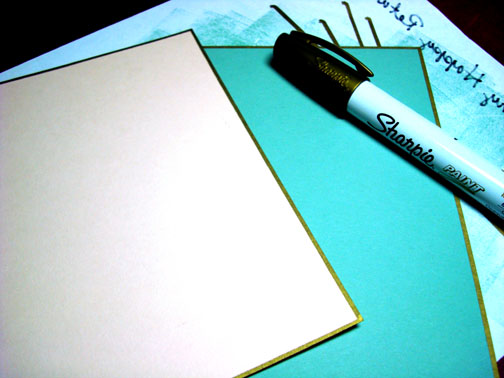
Edged my main image panel, Blush Blossom card stock panel and the Sage Shadow card stock panel with a Metallic Gold Sharpie Paint marker.
Assembled my card front and added 5 gold brads at the bottom. Used my Piercing mats and piercing tools to make the starter holes for the brads and to get them lined up correctly.

Here is the finished card measuring 5″ x 6.5″.
May your day be filled with blossoms and cool breezes.
Until my next post. . . . . . . . . . . .
Huge Hugs,
Michelle
 Get ready for Brayer Workshops! I am coming to:
Stoughton, Wisconsin
Dayton, Ohio
Columbia, Missouri
Lynchburg, Virginia
Greenwood, Indiana
Castro Valley, California
Yardley, Pennsylvania (near Philadelphia)
Knox, Maine
Akron, Ohio
Broomfield, Colorado
Moore, Oklahoma
Nashville, Indiana
Portland, Michigan
2010
Phoenix, Arizona
Monroe, Louisiana
Jacksonville, Florida
Mechanicsville, Virginia
Raleigh, North Carolina
Colleyville, Texas
Colorado Springs, Colorado
Salem, Oregon
Wheaton, Illinois
Rockville, Maryland
North Chili, New York (near Rochester)
New Johnsonville, Tennessee
Here is a link to my workshop calendar where you can see all of my travel schedule and to get info on beginner and advanced Brayer workshops: https://zindorf.splitcoaststampers.com/workshop-calendar
Link to my Stampin’ Up website were you can order all of your must have Stampin’ Up products from me 24-7: https://michellezindorf.stampinup.net
Frequently asked questions answers: https://zindorf.splitcoaststampers.com/frequently-asked-questions/
Pingback: My Blog Picks and Posts from Here and There Around the Web « Rogue Thoughts…Jean's Stamping Studio in the Rogue Valley
Pingback: Frugal Friday: Frugal stamp sets for Spring and beyond « Rogue Thoughts…Jean's Stamping Studio in the Rogue Valley