
I realize this is my third post today, lol. Two tutorials and blog candy to boot. I must really like my Blog Readers!
This is of course, for the boys!
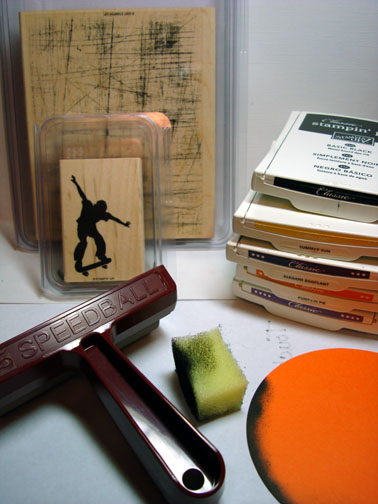
Supplies:
| Stamps: Stampin’ Up Extreme Skateboard & Sanded Background Stamp |
| Paper: Stampin’ Up Whisper White, Summer Sun, Pumpkin Pie, Elegant Eggplant |
| Ink: Stampin’ Up Basic Black, Summer Sun, Elegant Egg Plant, Perfect Plum & Pumpkin Pie |
| Accessories: Sponge, Brayer, Stampin’ Up Circle Scissors to create mask |
Are you inspired by this Blog? One way you can help support this blog is by ordering your Stampin’ Up products through me. You can order from me 24-7 from this link: https://michellezindorf.stampinup.net or e-mail me at [email protected] If you are within the United States. Want a copy of the brand new 2009-2010 Stampin’ Up Catalog for $9.95, just e-mail me at [email protected] and I will get one in the mail to you. Want to become a Stampin’ Up Demonstrator and earn instant income? Consider being part of my Stampin’ Up Team. Through August 31 you can become a Stampin’ Up Demonstrator for as little as $85 with the mini kit. Also Stampin’ Up is now having a weekly special, click this link to check it out: https://www.stampinup.net/esuite/home/michellezindorf/promotions
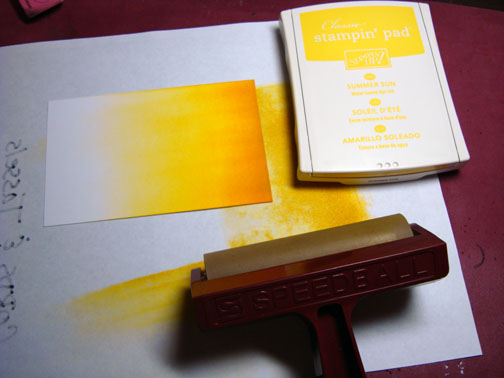
On a 3″ x 5″ piece of Whisper White card stock brayered Summer Sun ink at the bottom.
Brayered Perfect Plum ink at the top of the card stock.
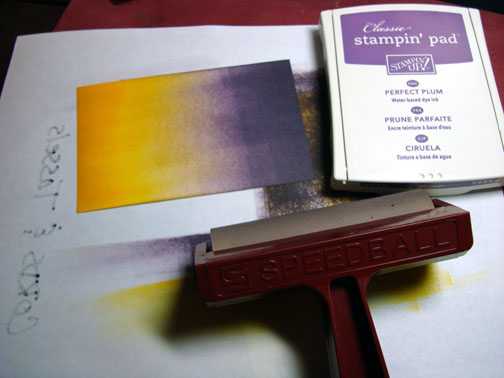
Brayered Elegant Eggplant ink at the top not covering the Perfect Plum ink entirely.
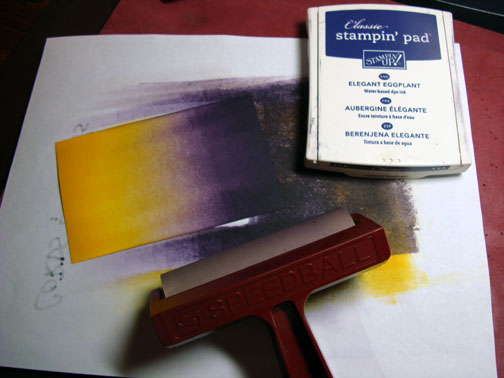
Brayered Pumpkin Pie ink at the bottom of the card stock.
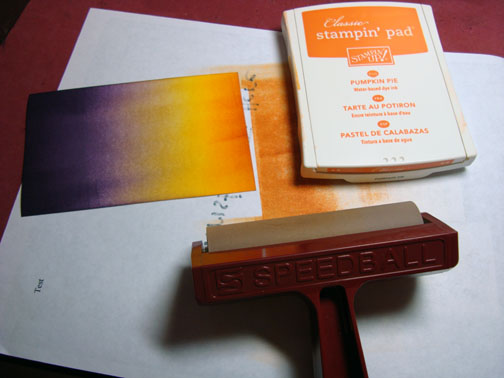
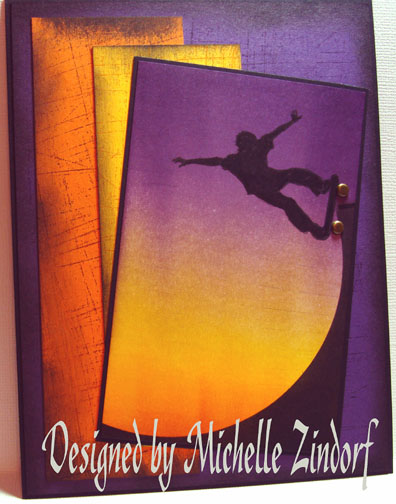
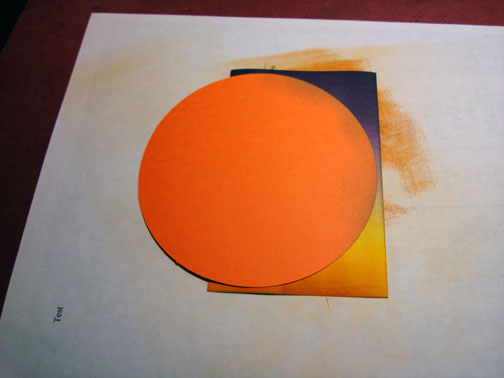
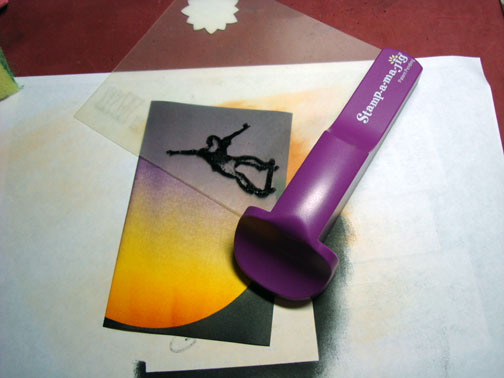
Used a 4.5″ card stock circle to mask the card stock.
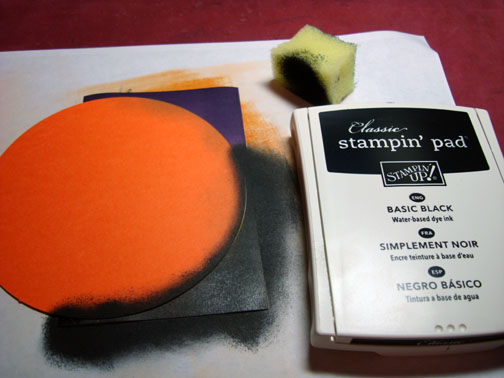
Sponged Basic Black ink at the bottom of the card stock where it is not masked.
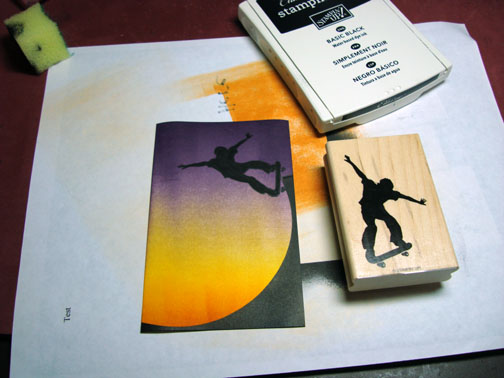
Used my Stamp A Ma Jig for placement and Stamped the Skateboarder with Basic Black ink.
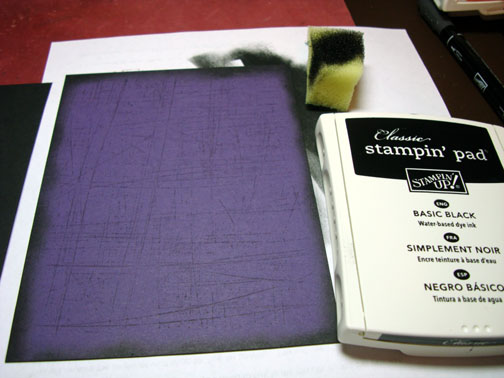
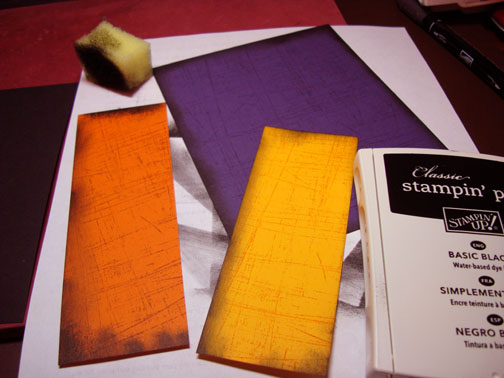
Cut 3 panels, Summer Sun, Pumpkin Pie & Elegant Eggplant. Stamped the Sanded Background Stamp on each one. The Pumpkin Pie Panel and Eggplant panels were stamped in Elegant Eggplant ink and the Summer Sun Panel was stamped in Pumpkin pie ink.
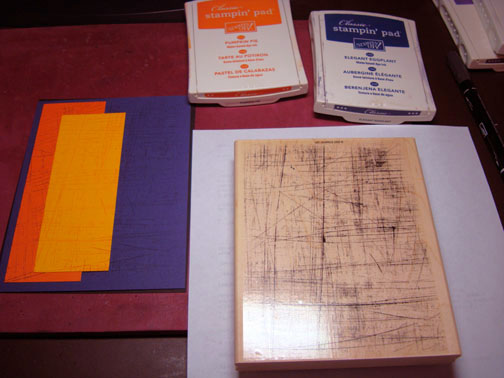
Sponged Black around the edges of the panels to smudge them up a bit.
Assembled my card front and added a couple of brads to enhance the wheels of the skateboard. Here is the finished card measuring 5″ x 6.5″.
Be back on Monday.
Until my next post. . . . . . .
Hugs,
Michelle
35 responses to “Sunset Skateboarder – Tutorial #236”