
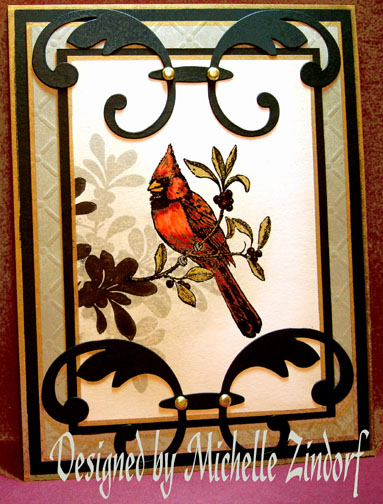
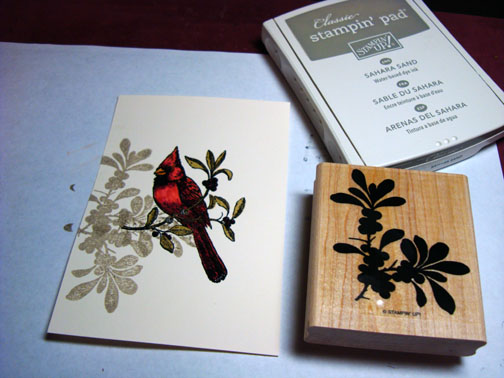
Oh, how I love to take stamps that are out of season and use them on a card that is timeless. This Cardinal is from a Stampin’ Up set “A Cardinal Christmas” and as you can see you can use this set year around.
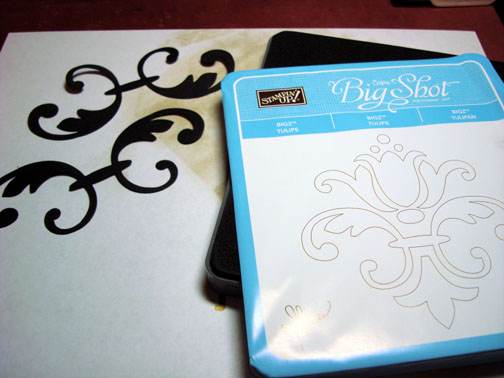
I also tried out my new Big Shot Die “Tulipe”. I only used part of the die cut. This Die has a few different design pieces that can be used by themselves or together for the full design.
FYI, I have updated my sales page with stamp sets I am selling. Here is a link: https://zindorf.splitcoaststampers.com/things-for-sale/
Let’s get started on the tutorial. 🙂
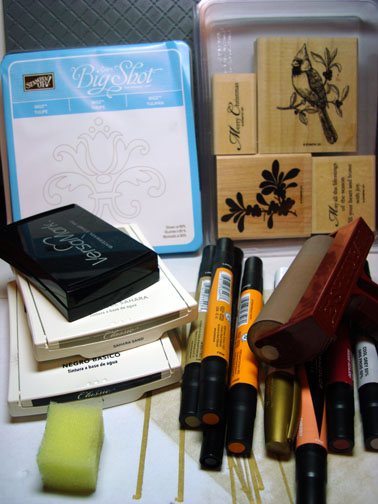
Supplies:
| Stamps: Stampin’ Up “A Cardinal Christmas” |
| Paper: Stampin’ Up Very Vanilla, Sahara Sand, Basic Black |
| Ink: Stampin’ Up Sahara Sand & Basic Black |
| Accessories: Versamark Pad and Marker, Prismacolor Markers, Sharpie Metallic Gold Marker, Brayer, Big Shot Die “Tulipe”, Sizzix Texture Plate, Big Shot Die Cutter, Gold Brads & Piercing Tool |
Are you inspired by this Blog? One way you can help support this blog is by ordering your Stampin’ Up products through me. You can order from me 24-7 from this link: https://michellezindorf.stampinup.net or e-mail me at [email protected] If you are within the United States. Want a copy of the brand new 2009-2010 Stampin’ Up Catalog for $9.95, just e-mail me at [email protected] and I will get one in the mail to you. Want to become a Stampin’ Up Demonstrator and earn instant income? Consider being part of my Stampin’ Up Team. Through August 31 you can become a Stampin’ Up Demonstrator for as little as $85 with the mini kit. Also Stampin’ Up is now having a weekly special, click this link to check it out: https://www.stampinup.net/esuite/home/michellezindorf/promotions
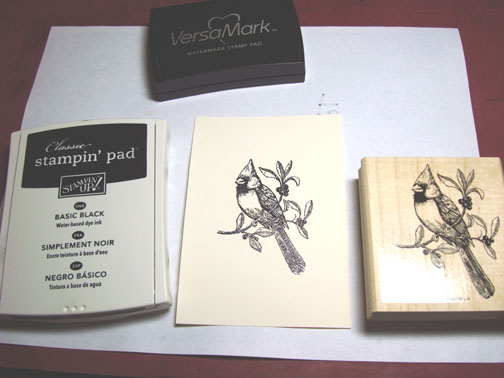
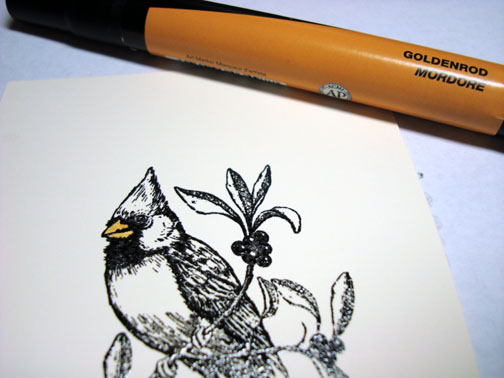
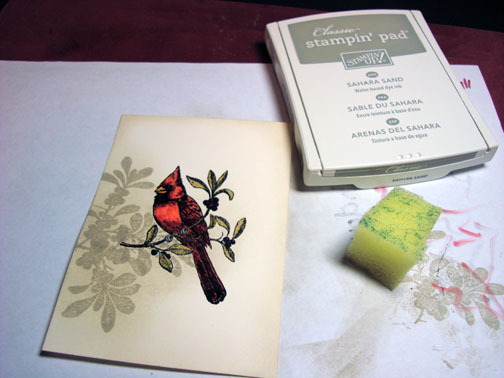
Stamped the Cardinal on a 3.5″ x 5″ piece of Very Vanilla card stock by first loading my stamp with Versamark and then with Basic Black Dye ink before stamping it.
If you have Black pigment ink you do not need the Versamark. 🙂
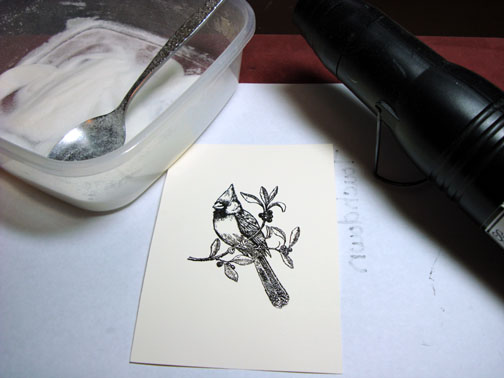
Heat embossed the image using clear embossing powder and a heat gun.
Note: I only own and use clear embossing powder. If you use clear embossing powder you can emboss in any color in which you have ink. 🙂 Saves money and space.
Colored the bird’s beak with a Goldenrod Prismacolor Marker.
Colored the bird in with a Cherry Prismacolor Marker.
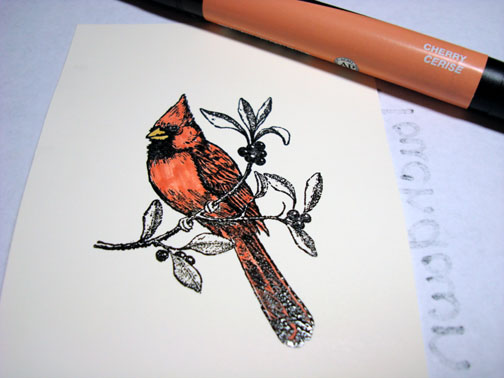
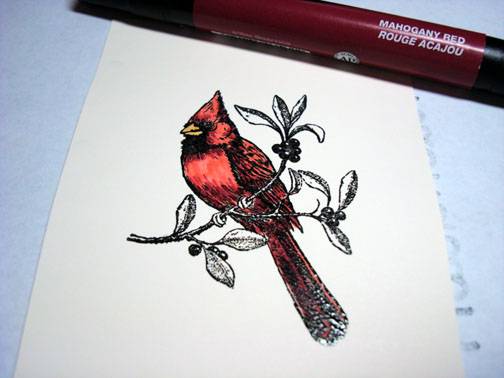
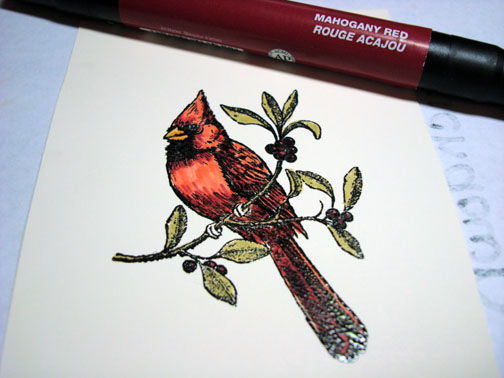
Colored the darker parts of the bird with a Mahogany Red Prismacolor Marker.
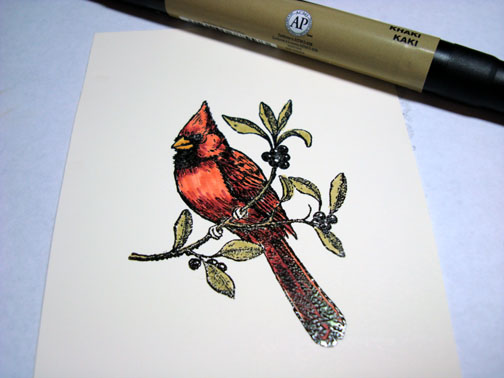
Colored the leaves in with a Khaki Prismacolor Marker.
Colored the Berries in with the Mahogany Red Prismacolor Marker.
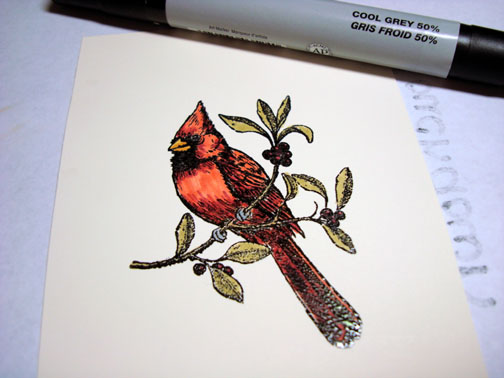
Colored the birds feet with a Cool Grey 50% Prismacolor Marker.
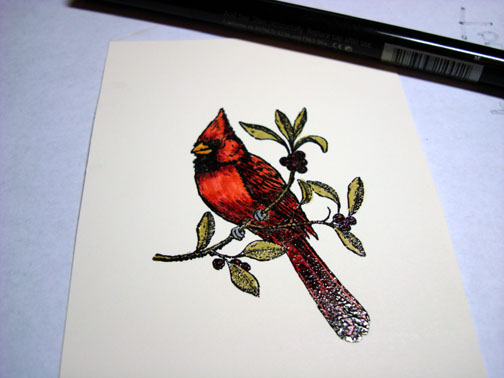
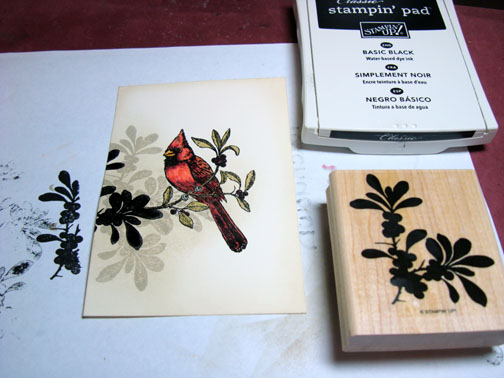
Colored over the image, staying in the embossed lines, with a Versamark Marker.
Heat embossed the image using clear embossing powder and a heat gun.
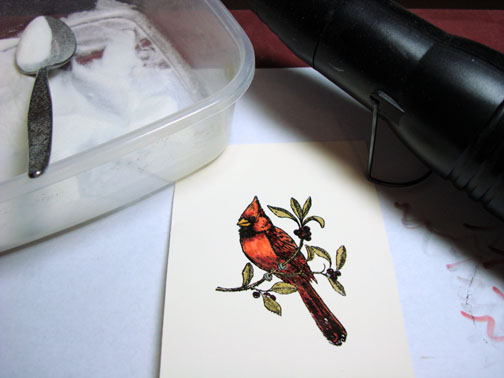
Now that my image has been heat embossed it will resist the ink that is stamped over it.
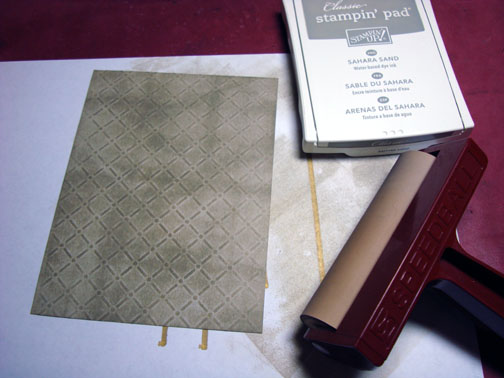
Stamped the Leaf stamp twice with Sahara Sand ink.
Sponged Sahara Sand ink around the outside edge of the card stock and behind the Sahara Sand Leaves.
Stamped the leaf stamp again using Basic Black ink.
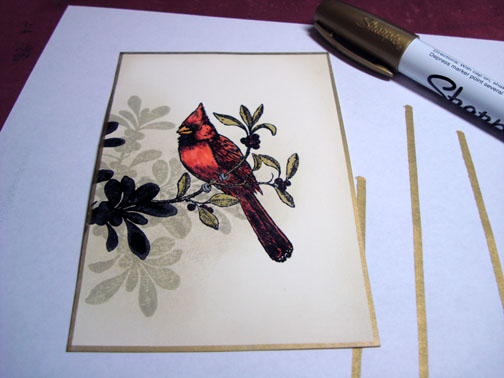
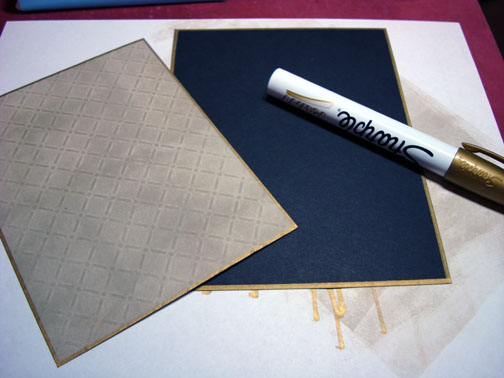
Used a Sharpie Metallic Gold Paint Marker on the edge of the card stock.
Note: Hold the marker half on the card stock and half on the scrap paper and then pull the marker straight down the edge of the card stock. No ruler needed.
Used a Stampin’ Up Sizzix Texture Plate on a Sahara Sand card stock panel using my Big Shot.
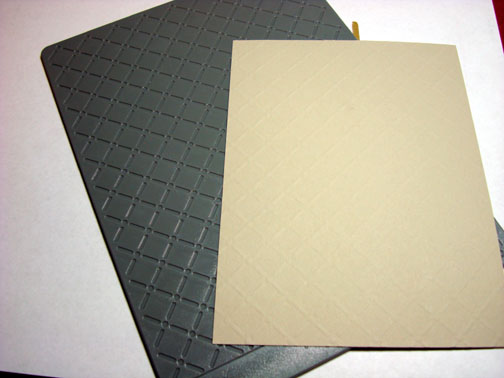
Brayered Sahara Sand ink over the texturized panel to bring out the texture better.
Used the Sharpie Metallic Gold Marker on the edge of both the Sahara Sand and Black panels.
Used the Tulipe Big Shot Die and ran it through twice with Black card stock.
Only used part of the design on the finished card.
Added the Die cuts and 4 Gold Brads, using my piercing tool to start my brads.
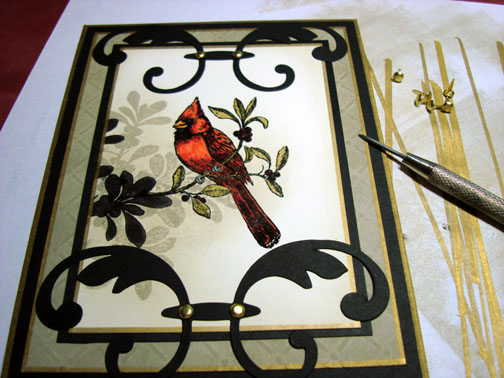
Here is the finished design measuring 5″ x 6.5″.
I hope this tutorial has inspired you to look at your holiday stamps in a different light. I just might get more use out of them.
May your day be filled with love and happiness.
Until my next post. . . . . . .
Huge Hugs,
Michelle
 Get ready for Brayer Workshops! I am coming to:
Dayton, Ohio
Columbia, Missouri
Lynchburg, Virginia
Greenwood, Indiana
Castro Valley, California
Yardley, Pennsylvania (near Philadelphia)
Knox, Maine
Akron, Ohio
Broomfield, Colorado
Moore, Oklahoma
Nashville, Indiana
Portland, Michigan
2010
Phoenix, Arizona
Monroe, Louisiana
Jacksonville, Florida
Mechanicsville, Virginia
Raleigh, North Carolina
Colleyville, Texas
Colorado Springs, Colorado
Salem, Oregon
Wheaton, Illinois
Rockville, Maryland
North Chili, New York (near Rochester)
New Johnsonville, Tennessee
Here is a link to my workshop calendar where you can see all of my travel schedule and to get info on beginner and advanced Brayer workshops: https://zindorf.splitcoaststampers.com/workshop-calendar
Link to my Stampin’ Up website were you can order all of your must have Stampin’ Up products from me 24-7: https://michellezindorf.stampinup.net
Frequently asked questions answers: https://zindorf.splitcoaststampers.com/frequently-asked-questions/
Pingback: My Blog Picks and Posts from Here and There Around the Web « Rogue Thoughts…Jean's Stamping Studio in the Rogue Valley