
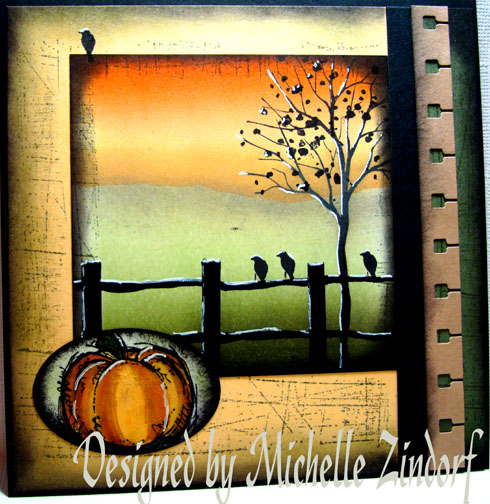
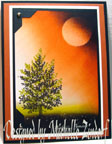
Here is a little Autumn scene for you today. Every since I purchased this Stampin’ Up stamp set “Branch Out”, Item #113200, I just knew I wanted to see those little birds lined up on a fence. Today’s lesson teaches how to put a fence in your scene using a ruler and a marker. Rustic fences are the easiest to create because you don’t have to worry about straight lines. They look better if they are a bit crooked and gnarly looking. 🙂
Announcement: I will be teaching Brayer workshops in Kenova, West Virginia on July 17, 2010, Auburn, Washington on September 25-26, 2010 and Elk Grove Village, Illinois on October 1-2, 2010, please contact me for workshop information/registation at [email protected]. 🙂
Now let’s get started on the tutorial . . . .
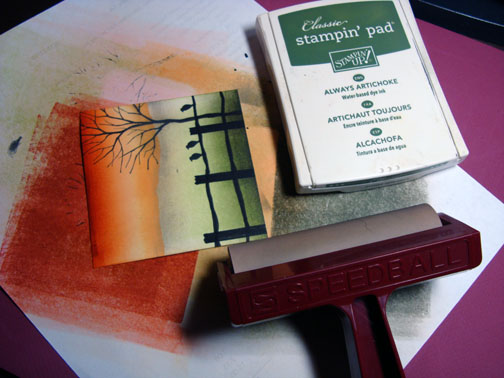
Supplies:
| Stamps: Stampin’ Up Branch Out, Autumn Harvest & Sanded Background |
| Paper: Stampin’ Up Whisper White, Apricot Appeal, Basic Black, Creamy Caramel & Always Artichoke |
| Ink: Stampin’ Up Apricot Appeal, Basic Black, Always Artichoke, Certainly Celery, Going Gray & Really Rust |
| Accessories: Stampin’ Up markers, White Gel Pen, Brayer, Sponges, Ruler, Oval & Spiral Punches & post it notes |
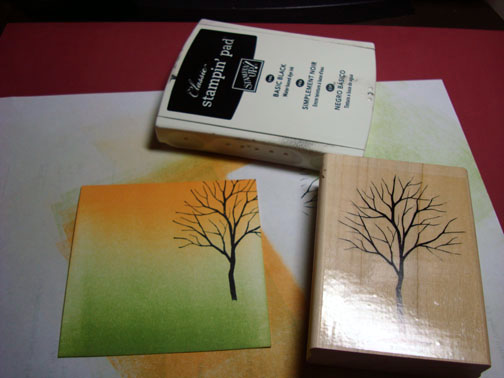
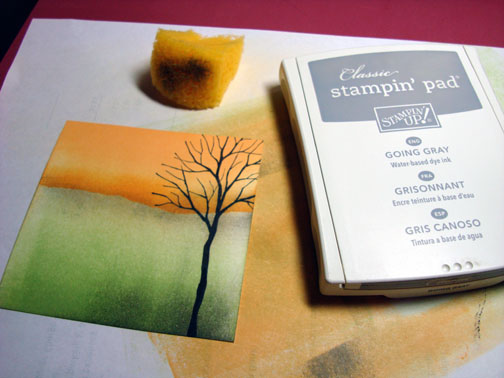
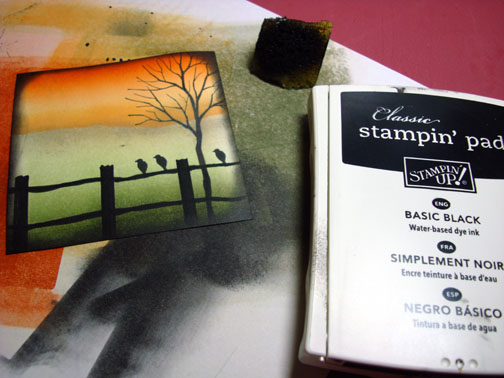
Want a free 39 page, Stampin’ Up Mini catalog? If you are a resident of the United States, just e-mail your mailing address to me and I will get one in the mail to you. Are you inspired by this Blog? One way you can help support this blog is by ordering your Stampin’ Up products through me. You can order from me 24-7 from this link: https://michellezindorf.stampinup.net or e-mail me at [email protected] If you are within the United States. Want a copy of the brand new 2009-2010 Stampin’ Up Catalog for $9.95 with free shipping, just e-mail me at [email protected] and I will get one in the mail to you. Want to become a Stampin’ Up Demonstrator and earn instant income? Consider being part of my Stampin’ Up Team. Also check out the Stampin’ Up specials, click this link to check it out: https://www.stampinup.net/esuite/home/michellezindorf/promotions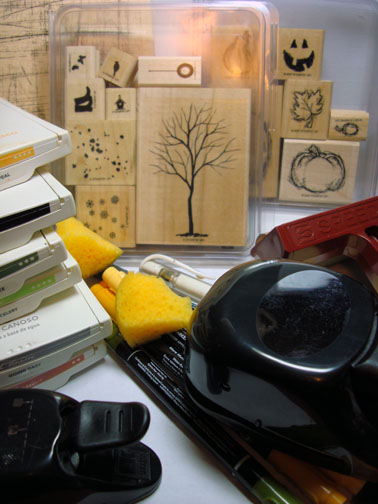 On a 3.5″ square piece of Whisper White card stock, brayered Apricot Appeal ink at the top of the card stock.
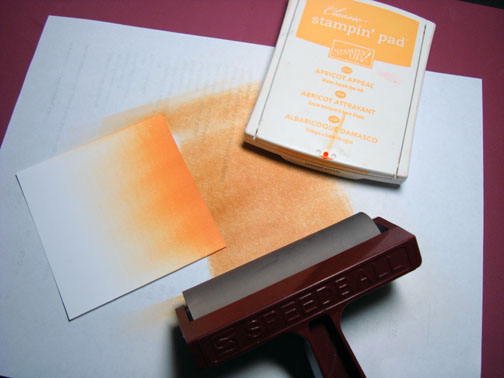 Brayered Certainly Celery at the bottom of the card stock.
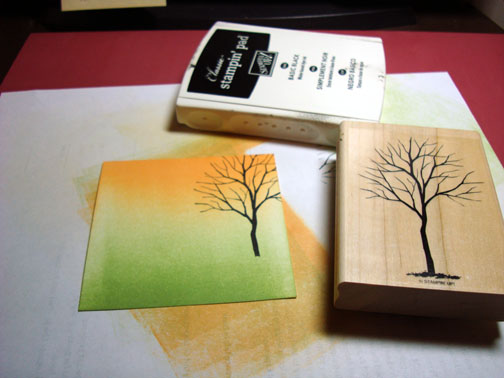
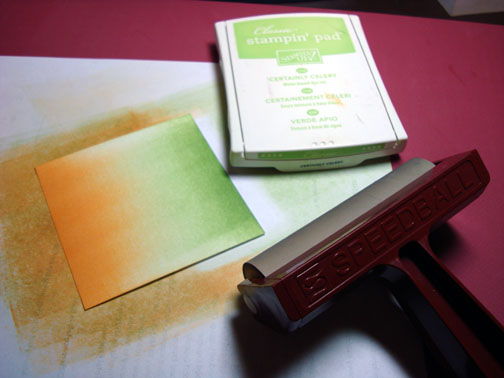 Stamped the Branch Out tree with Basic Black ink. Note: I did not ink up the grassy portion of the image. I did this so I could extend the trunk of the tree with a Basic Black marker after it was stamped. 🙂
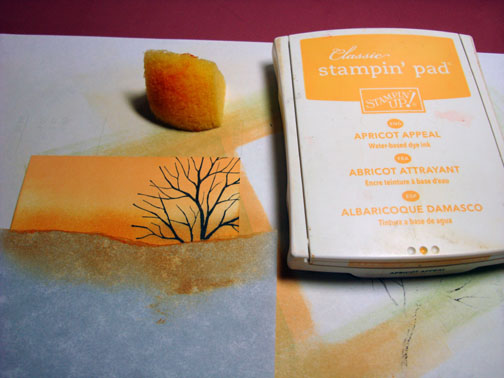
Ripped the edge of a Post It Note off to make it jagged and used it as a mask for the ground area.
Sponged Apricot Appeal at the edge of the Post it Note to darken the horizon line.

Removed the post it note and sponged Going Gray ink a the bottom of the card stock and below the horizon line.
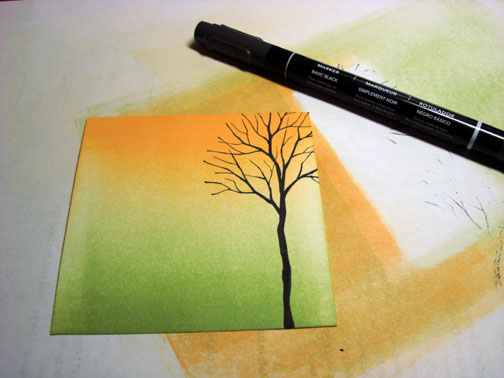
Used a Basic Black marker to make the cross bars of my fence.
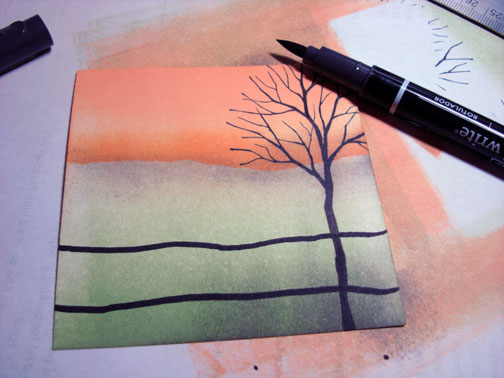
Used a Ruler to draw two straight lines about 1/4 inch apart for each fence post and colored them in with the same marker.

Stamped the little Birds on the fence using Basic Black ink.
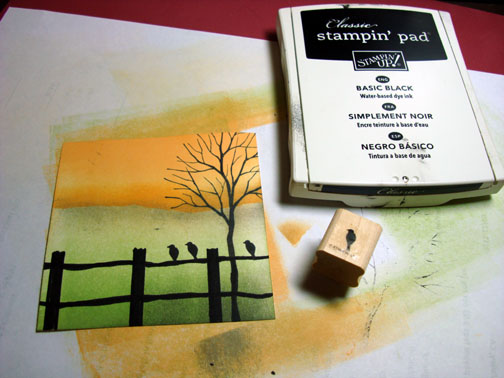
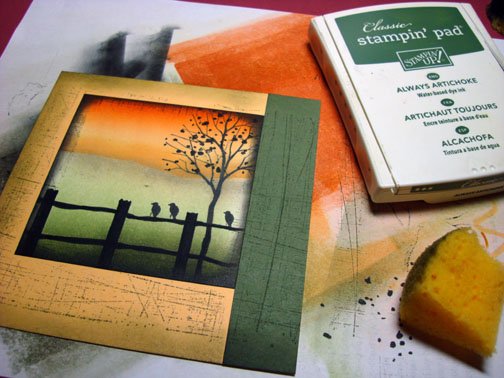
Added a bit of Really Rust ink with a brayer at the top of the card stock.
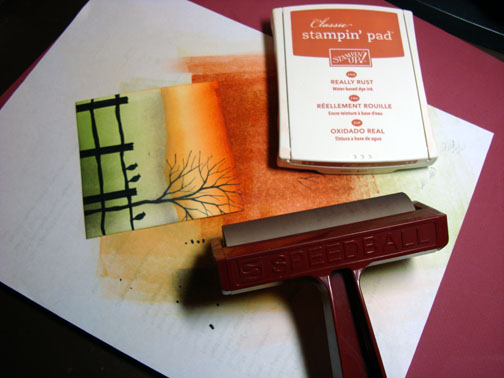
Brayered Always Artichoke ink at the bottom of the card stock.
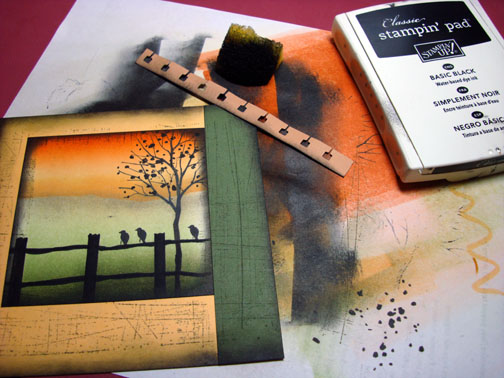
Sponged Basic Black ink around the outside edge of the main image panel.
Stamped some leaves on the tree with Basic Black ink.
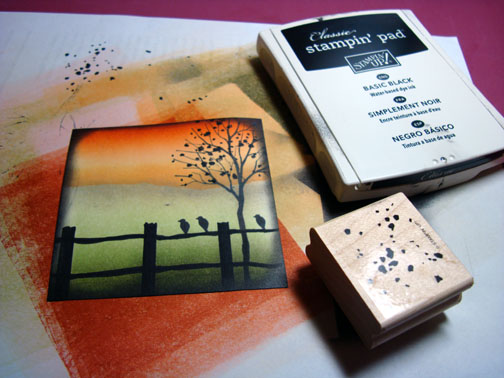
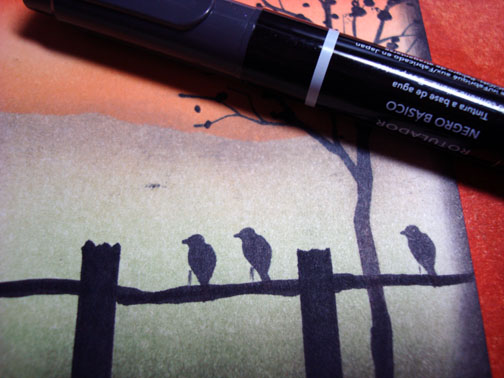
Added feet to the birds with a Basic Black marker.
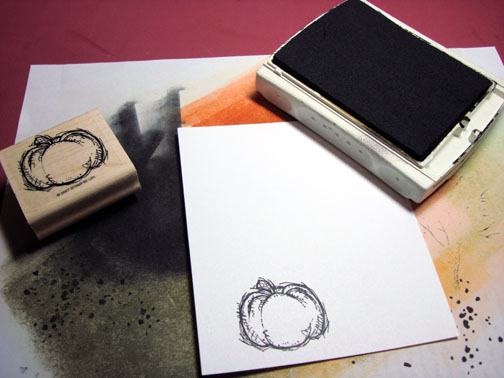
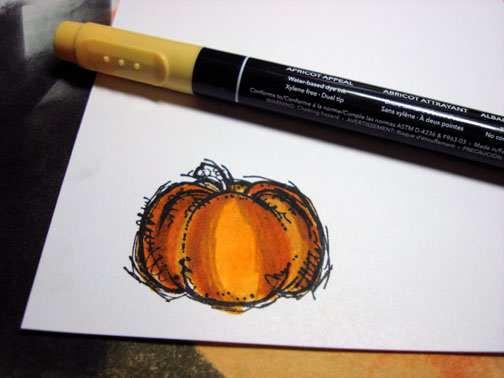
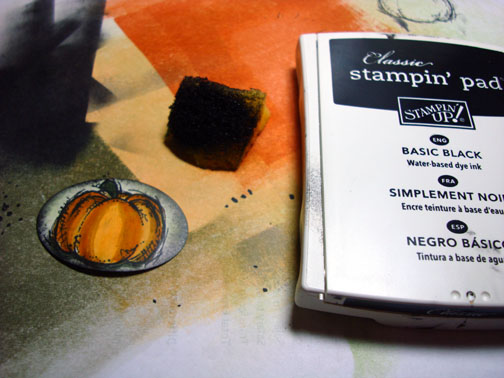
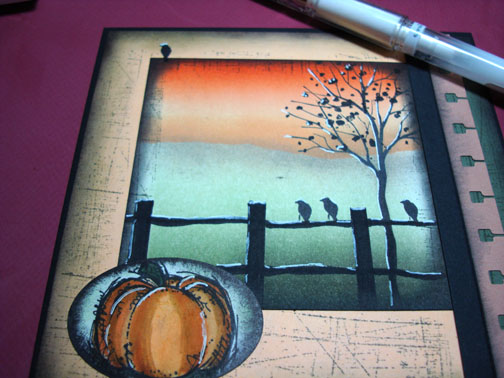
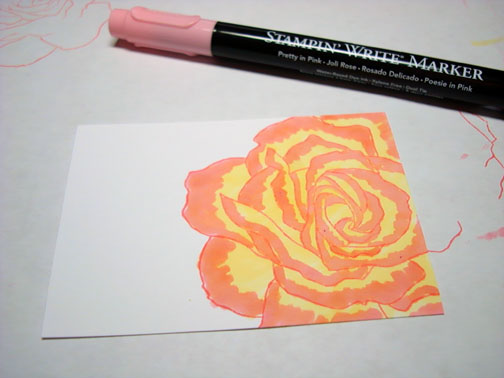
Stamped the small Pumpkin stamp from the Stampin’ Up set Autumn Harvest using Basic Black ink on a separate piece of Whisper White card stock.
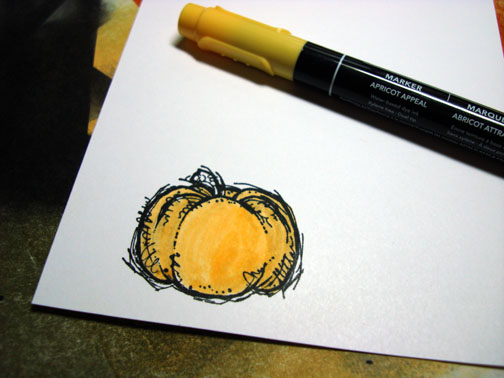
Colored the Pumpkin in with an Apricot Appeal marker.
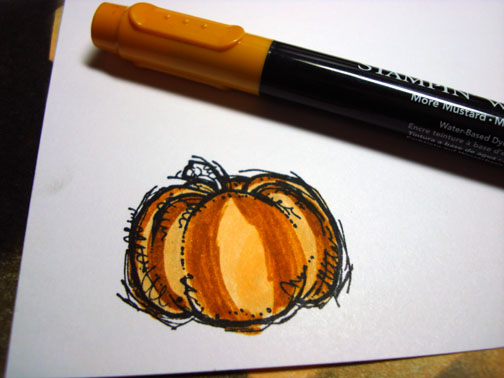
Added More Mustard marker to the pumpkin.
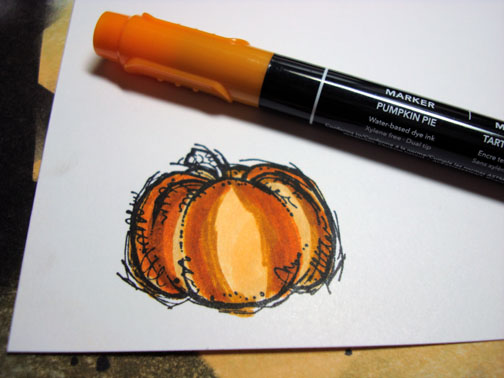
Added a bit of Pumpkin Pie ink to the pumpkin.
Colored over the entire pumpkin with the Apricot Appeal Marker to blend the colors together a bit.
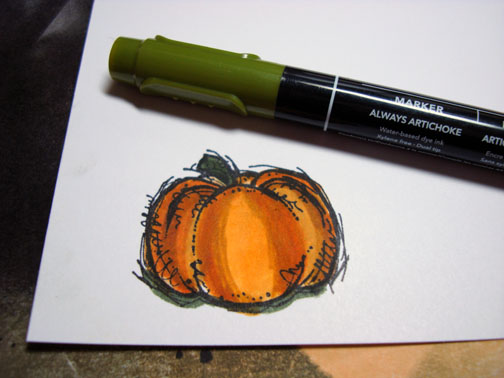
Colored the Stem with an Always Artichoke marker.
Punched the Pumpkin out with a large Oval Punch.
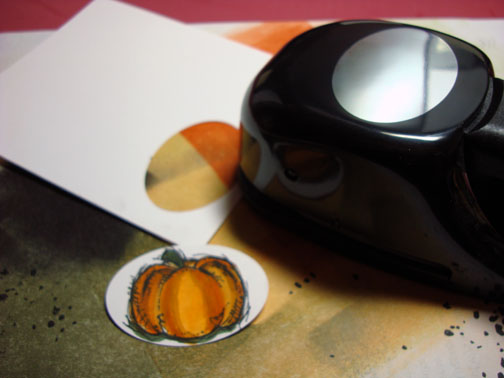
Sponge Certainly Celery ink around the edge of the Oval.
Sponged Basic Black ink around the edge of the Oval.
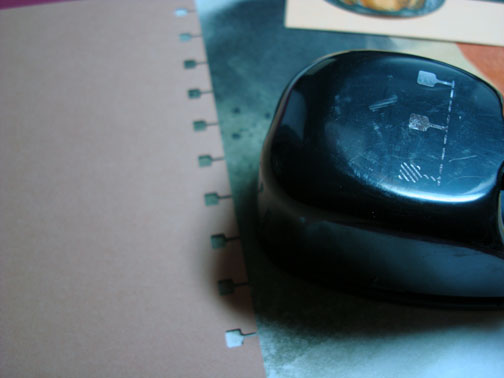
Punched Spiral punch down the side of a piece of Creamy Caramel card stock. Then used a paper cutter to cut the spiral punched card stock into a strip.
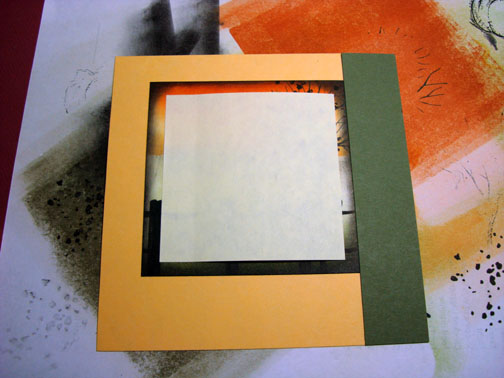
Glued the main image panel on a Apricot Appeal panel and added a strip of Always Artichoke cardstock. Put a square Post It Note on the Main image panel to mask the center of it. This allows me to stamp the Sanded Background stamp over everything and still get a bit of the background image around the edge of main image panel.
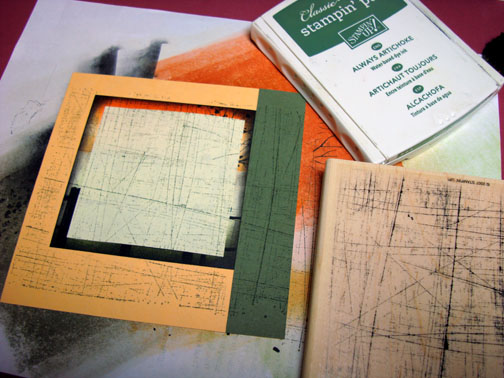
Sponged Always Artichoke and Basic Black ink around the edge of the card stock. Also sponged a bit of Basic Black ink on the Spiral punche strip.
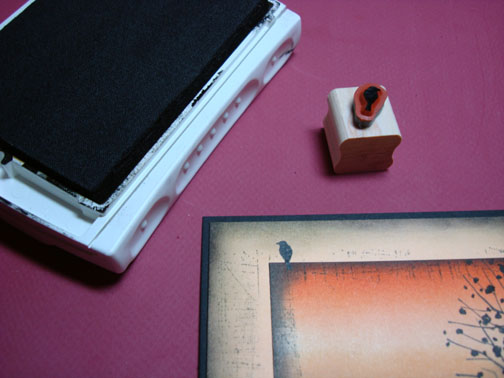
Added a Black bird at the top left corner of the card with Basic Black ink.
Time for some White Gel highlights on the Tree, fence, pumpkin and birds.
Here is the finished card measuring 5 3/8 square.
May you have a moment to feel the sun on your face today.
Until my next post. . . . .
Huge Hugs,
Michelle
 Get ready for Brayer Workshops! I am coming to:
Yardley, Pennsylvania (near Philadelphia)
Knox, Maine
Akron, Ohio
Broomfield, Colorado
Moore, Oklahoma
Nashville, Indiana
Portland, Michigan
2010
Dayton, Ohio at Marco Paper
Phoenix, Arizona
Monroe, Louisiana
Jacksonville, Florida
St. Louis, Missouri
Mechanicsville, Virginia
Raleigh, North Carolina
Colleyville, Texas
Colorado Springs, Colorado
Boise area of Meridian, Idaho
Riverside, California (Southern California)
Salem, Oregon
Wheaton, Illinois
St. Cloud, Minnesota
Rockville, Maryland
North Chili, New York (near Rochester)
New Johnsonville, Tennessee
Kenova, West Virginia
Helena, Montana
Middleburg Heights, Ohio
Venice, Florida
Ginnell, Iowa
Piedmont, Alabama
Auburn, Washington
Elk Grove Village, Illinois
Here is a link to my workshop calendar where you can see all of my travel schedule and to get info on beginner and advanced Brayer workshops:
https://zindorf.splitcoaststampers.com/workshop-calendar
Link to my Stampin’ Up website were you can order all of your must have Stampin’ Up products from me 24-7:
https://michellezindorf.stampinup.net
Frequently asked questions answers:
https://zindorf.splitcoaststampers.com/frequently-asked-questions/
31 responses to “Black Birds on a Fence – Tutorial #261”