Sep 26 2009
Direct to paper Mountain Scene - Tutorial #264
I am currently in New Jersey enjoying myself at a Stampin’ Up Team Function. I created this project before I left last Thursday so you would have something to mess around with this weekend in my absence. Enjoy! I will be back on Monday.
Supplies:
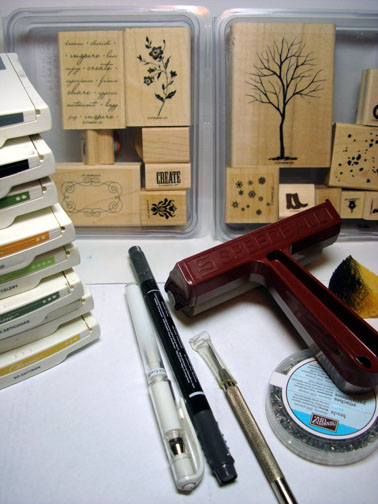
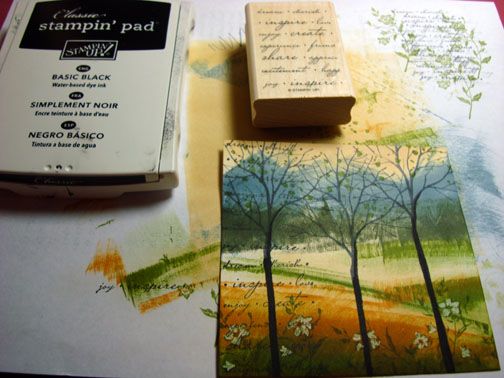
| Stamps: Stampin’ Up Branch Out and Charming |
| Paper: Stampin’ UP Whisper White, Bordering Blue and Basic Black |
| Ink: Stampin’ Up Basic Black, Bordering Blue Basic Gray, Old Olive, More Mustard, Certainly Celery, Always Artichoke & So Saffron |
| Accessories: Stampin’ Up Piercing Tool, Stampin’ Up Basic Black Marker, Sponge, Brayer, White Gel Pen, Silver Brads, Sponge |
Want a free 39 page, Stampin’ Up Mini catalog? If you are a resident of the United States, just e-mail your mailing address to me and I will get one in the mail to you. Are you inspired by this Blog? One way you can help support this blog is by ordering your Stampin’ Up products through me. You can order from me 24-7 from this link: http://michellezindorf.stampinup.net or e-mail me at mzindorf@aim.com If you are within the United States. Want a copy of the brand new 2009-2010 Stampin’ Up Catalog for $9.95 with free shipping, just e-mail me at mzindorf@aim.com and I will get one in the mail to you. Want to become a Stampin’ Up Demonstrator and earn instant income? Consider being part of my Stampin’ Up Team. Also check out the Stampin’ Up specials, click this link to check it out: http://www.stampinup.net/esuite/home/michellezindorf/promotions
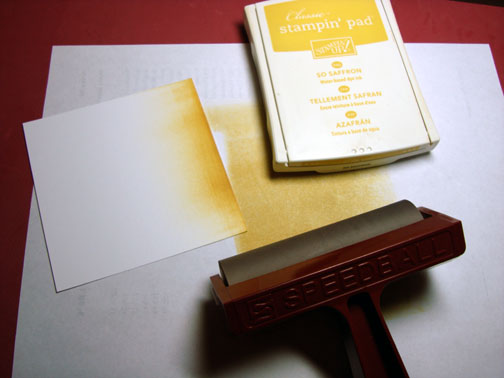
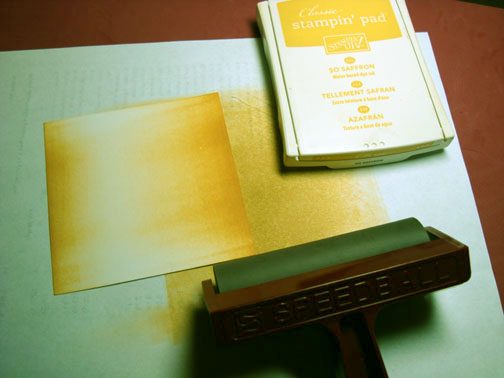
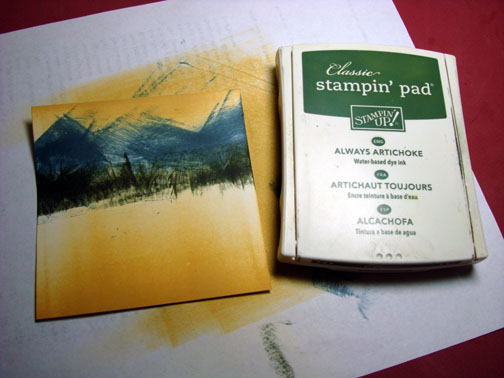
Brayered So Saffron ink at the top and bottom of a 4″ square piece of Whisper White card stock.
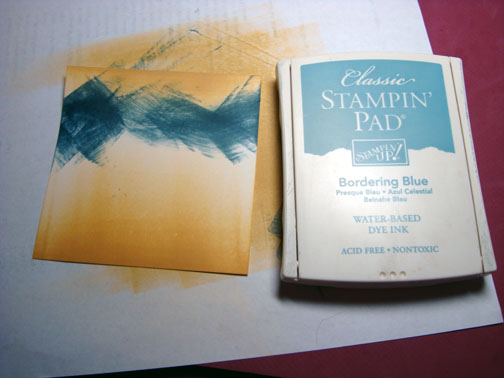
Used the direct to paper method and smeared Bordering Blue ink on the card stock to create some mountains using the corner of the ink pad.
Note: All you need to do is make the suggestion of the elements.
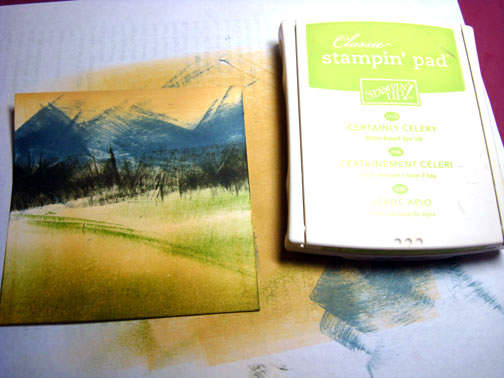
Smeared Always Artichoke ink below the mountains using one edge of the ink pad.
Smeared Certainly Celery ink at the bottom of the card stock.
Smeared Old Olive ink on.
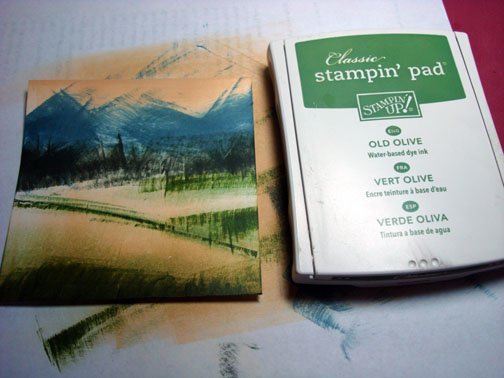
I wanted to add a bit of warmth to the scene so I added the warm color More Mustard using the edge of the ink pad.
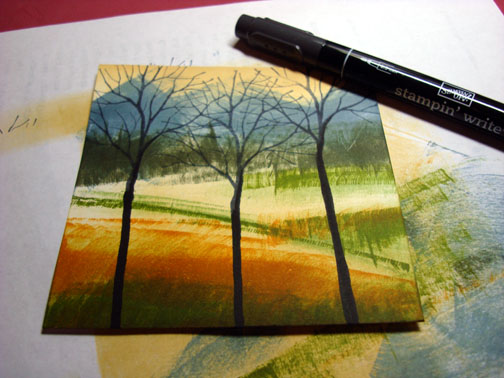
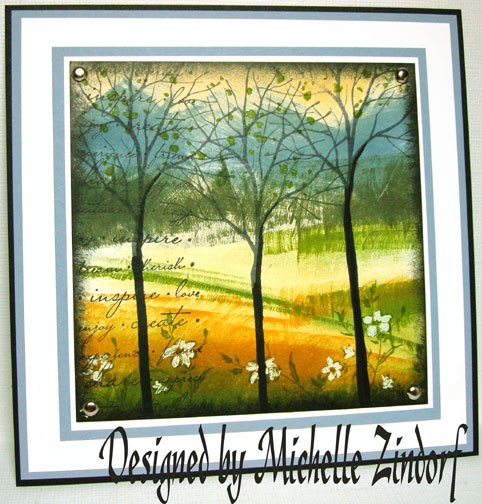
Stamped the Branch Out tree 3 times using Basic Gray ink.
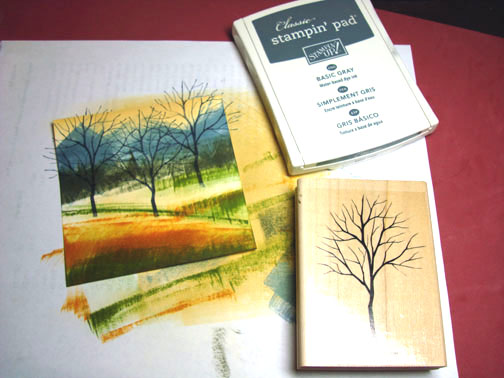
Extended the trunks of the trees with a Basic Black marker.
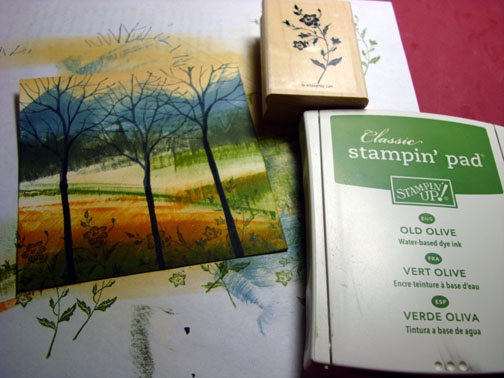
Stamped the Flowers from the Charming Set using Old Olive ink.
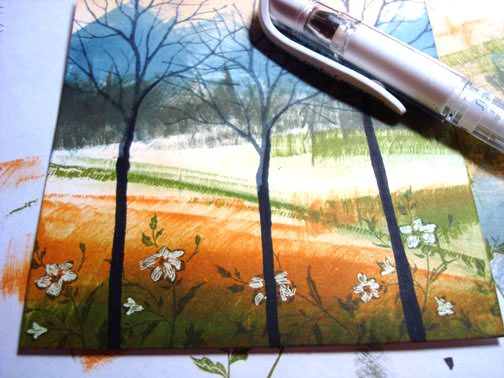
Colored the flowers in with a White Gel pen.
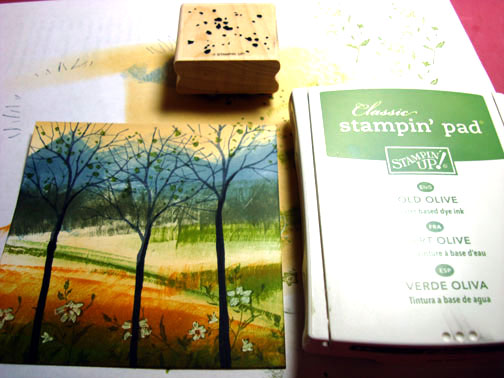
Stamped a few leaves in the trees with Old Olive ink.
Stamped the words stamp from the Charming set down the left side of the card stock using Basic Black ink.
Added 2 Bordering Blue, 2 Whisper White and one Basic Black background panels and 4 silver Brads.
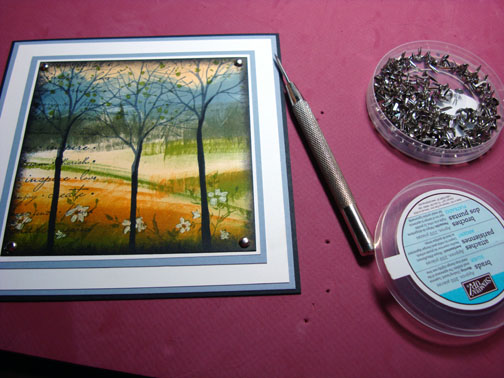
Here is the finished card measuring 5 3/8″ square.
May you have the time to really enjoy your weekend.
Until my next post. . . . .
Huge Hugs,
Michelle
Get ready for Brayer Workshops! I am coming to:
Knox, Maine
Akron, Ohio
Broomfield, Colorado
Moore, Oklahoma
Nashville, Indiana
Portland, Michigan
2010
Dayton, Ohio at Marco Paper
Phoenix, Arizona
Monroe, Louisiana
Jacksonville, Florida
St. Louis, Missouri
Mechanicsville, Virginia
Raleigh, North Carolina
Colleyville, Texas
Colorado Springs, Colorado
Boise area of Meridian, Idaho
Riverside, California (Southern California)
Salem, Oregon
Wheaton, Illinois
St. Cloud, Minnesota
Rockville, Maryland
North Chili, New York (near Rochester)
New Johnsonville, Tennessee
Kenova, West Virginia
Helena, Montana
Middleburg Heights, Ohio
Venice, Florida
Ginnell, Iowa
Piedmont, Alabama
Auburn, Washington
Elk Grove Village, Illinois
Here is a link to my workshop calendar where you can see all of my travel schedule and to get info on beginner and advanced Brayer workshops:
http://zindorf.blogs.splitcoaststampers.com/workshop-calendar
Link to my Stampin’ Up website where you can order all of your must have Stampin’ Up products from me 24-7:
http://michellezindorf.stampinup.net
Frequently asked questions answers:
http://zindorf.blogs.splitcoaststampers.com/frequently-asked-questions/
This card is amazing !!! I really thought you had stamped over a photograph when I first saw it.
You’re killin’ me. I love this. Where in Jersey are you? I’ll keep a look out for you.
How gorgeous is this?! Smear…huh? I think you have gifted hands and ink pads, Girl Ü
Your cards are “art”. They are amazing and absolutely frameable. I wish mine would come out looking even a quarter as beautiful as yours. Mine can be found in someone’s (meaning my mother) drawer. Yours can be found in a museum. Looking at them is a pleasure! Thank you.
You showed us, but I’m still saying, HOW DID SHE DO THAT???” What talent! I’m amazed and loving what you share!
WOW this is absolutely gorgeous. A work of art Michelle.
OMG only you could do this. its gorgeous.
Oh wow, what an awesome scene, that is so cool!
Your work is always wonderful but this goes way beyond anything I’ve ever seen. This is magnificent! It would look so fabulous up on my wall!
I don’t know how you do it??? Another amazing piece of art that has left me in awe.
This is incredible.
Wendy
Love the card! I’m always (I know I shouldn’t be) surprised at the great creative cards you come up with and how you make it look so easy. Thanks for the inspiration!!!
Lisa
Absolutely STUNNING!!!!!!!!!!!!!!!
Holy crap, Michelle! This is absolutely amazing as well stunning!
Ok, this one is my absolute favorite! I love all your work, but this one stands out to me!
OMG….this is gorgeous. What a “painterly” looking card!!! This is more like “stand alone” art!!! It would make a fantastic canvas piece to be hung on a wall and admired daily!! You ROCK!!! Hopefully, time will allow me to play today to see what I can do with this tute!! Hope to catch a class from you in the near future. Hisses, Rockin Robin Caldwell
truly beautiful!
Gorgeous! I am in awe of your talent once again. How do you do it, with the same ink and paper I have, you can come up with something so stunning?
OMWord Michelle, my jaw dropped when I saw this beauty. I keep all of your tutorials, I must have about 50 by now.
This one I think will make me take the plunge and try it out.
I love this, it looks like a beautiful painting. Thanks for all of the beautiful tutorials that you take time to make and even though I’ve not tried one yet, I get so much enjoyment out of seeing how you create your gorgeous work.
Thanks, Nicole
quelle artiste !
Another great card, love the direct to paper method. I need practic. (Since what I made looed clumpy!) The Branced out set i8s getting plenty of use. Happy Weekend, hugs…
Wow so beautiful . Iam going to try it. Susan
Your creations are always wonderful BUT there is just something about this one that I really love. I think that the words on the side REALLY made this one for me.
so beautiful, i love !
This scene is beautiful! I totally love this scene. Great work, Michelle. I think is my all time favorite!
Oh my gosh, I love what you do with this set! Keep creating with it because of all the beautiful things you make with it. I’m off to give this a try…hope mine comes out half as nice!
Oh, I do like this. It’s gorgeous. I am always impressed with how you create such wonderful backgrounds with just a few swipes of an inkpad. And how it takes just a few simple stamps to bring them to life. Brilliant.
Beautiful!!!!!!!!!!!!!
I have been in such a creative slump for months now, but this work of art has really inspired me. Thanks for sharing your talent and techniques!
WOW!! This is georgous. I love everything about it–the colors, the design, and the techniques. I’m so looking forward to taking your classes. I hope it gives me more confidence to try some of your tutorials. You come up with such lovely designs. Thanks for posting all these great tutorials.
Oh my goodness! You never cease to amaze! This looks just like a painting. I can’t get over those mountains and tree line!
This is absolutely gorgeous! If you decide to sell this one, would you please let me know? I’d love to buy this and display it. Your cards are truly works of art.
You’re a genius, that’s all there is to it! Love your work!
This is SO stunning. I will “try” to do this and I say I will just “try”. I cannot thank you enough for sharing your art/work with all of us, for all the world to see. I have noticed that some websites and now having one pay for the tutorials they do. And, you are so far and away more talented then any of these women. Every time you post a tutorial to share with all of us, I want you to know howgrateful I am and I am sure many others are that you share with us. JudyOR
Wow, I’m always in awe of your tutorials, but this one has to be my favorite. Or at least my favorite since last week. Well, and then there was that other one… Each week you outdo yourself.
I thought I knew some creative people, but you take the cake.
Wow !! Your card is amazing.
Thank you for sharing your tutorials.
I have done a card with your tutorial rustic rooster.
Wowza, wowza, wowza! This is awesome!
This card is just AMAZING!
You’ve done it again!!!! WOW!!! You have amazed me again with what you can create with a blank piece of paper and some ink and stamps. This is absolutely gorgeous!!!! Did I say “WOW? How do you keep coming up with all this great stuff? Amazing!!!!
even if i think this is more a spring-card and we are having autum in sweden right now:
I LOVE THIS ONE!!!
hope your trip was nice.
johanna
Are you freaking KIDDING me??!! WOW! Simply gorgeous, Michelle…
Wow! This is soooo fabulous!!! tfs
Mess around with-this card is just unbelieving. Yes-very much ART and can not wait to play. Thank you for your talent.
Gorgeous!!
This is absolutely INKredible! LOL I am constantly amazed and in awe of what you can do with an inkpad Michelle!
Michelle, this is fantastic! Awesome scene you have created.
Totally love this card, can’t wait to try it. Thanks for another beautiful creation Michelle.
Wow, amazing! You´re truly an artist!!!
Holy Moly! That is an incredibly beautiful scene. Your artwork is amazing. Love your blog and your techniques and instructions. I wish I could make smearing ink pads work like you do. You are super talented. Thanks for sharing. :^)
Michelle, this is absolutely gorgeous!I sure do love what you can do with an inkpad. I have uploaded a couple of cards to my SCS gallery that I made in the evening after your class in Yardley. YOU ARE A WONDERFUL TEACHER. tHANKS SOOO MUCH http://www.splitcoaststampers.com/gallery/photo/1493387 AND http://www.splitcoaststampers.com/gallery/photo/1493386?
Good grief!!! Do you realize how tramatized I’m going to be trying to recreate this. I can’t even ask you how many times you did something because its all random…. and you know that I don’t do random well. I’m going to try and do this but I’m going to have to get up my courage before I try. Wish me luck.
Amazing. I cannot stop looking at this one. The depth you have created in this scene mesmerizes me! Thanks so much for sharing the tutorial.
Gorgeous card Michelle!! I took a Stampscapes class last weekend and thought of you….thought of how I could use my brayer (MZ style) on those scenes. :o)
Take care and STAY POSITIVE!
I’ve been a member of SCS for 2 or 3 years now, and I’m pretty quiet and stay in the background. But Michelle, just like the movie about the gal that made all of Julia Child’s recipes, I think it’s time for me to try to make all of Michelle Zindorf’s art! You are a fantastic artist! So beautiful!
Your techniques are amazing. This is the most beautiful card I have ever seen. I will definately be adding you to my favorites tonight. TFS.
[…] Branch Out http://zindorf.blogs.splitcoaststampers.com/2009/09/26/direct-to-paper-mountain-scene-tutorial-264/ - Branch Out and Charming w/ direct to paper ink […]
Thanks for the inspiration, Michelle……here is my rendition. I quickly reread your tut and then went to the stamp room without notes so it would look a little like my own creation! I didn’t have the right blue for the mountains though! http://createdbyann.blogspot.com/
I loved this card so much that I have tried your tutorial and made one for my mum’s birthday! I didn’t have the same colours or stamps but just used your overall design and it has turned out fine. I can’t show it on my blog right now but will put it up on Sunday. Thank you for sharing this.