
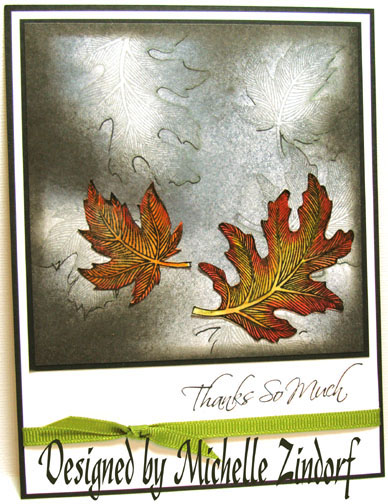
Just when you think you have me pegged, I go and make something a little off the wall, lol. This is my attempt at a fossil rock with fall leaves on it. My leaves are stamped, colored, cut out, heat embossed and glued on. I know, gasp! I actually cut them out and glued them on, lol.
Anyway, I had fun creating this and hope you enjoy seeing the process. The leaf images in this project are in the Stampin’ Up! set “Autumn Splendor”, Item number 116503, $20.95. The set is in the current Holiday Mini Catalog and available until January 4, 2010. 🙂
Let’s get started.. . . . . .
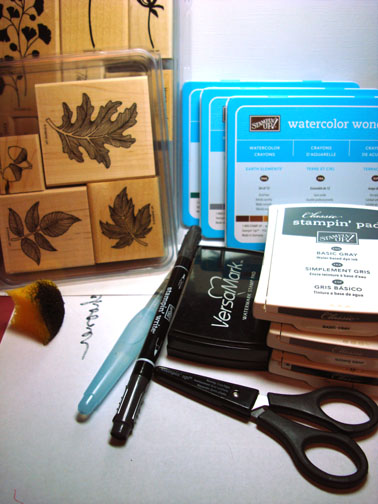
Supplies:
| Stamps: Stampin’ Up Autumn Splendor and Kind & Caring Thoughts |
| Paper: Stampin’ Up Whisper White and Basic Black |
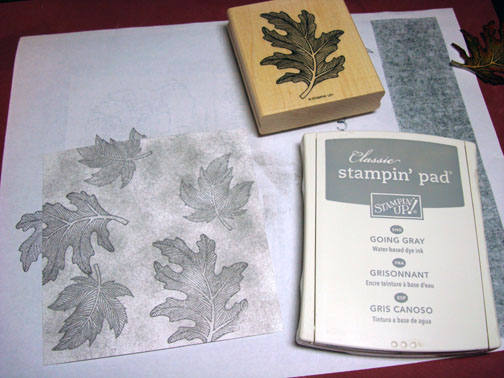
| Ink: Stampin’ Up Basic Gray, Going Gray and Basic Black |
| Accessories: Stampin’ Up Basic Black marker, Aqua Painter, Paper Snips, Watercolor Crayons, Versamark Pad, Clear embossing powder, Heat Gun, Old Olive Ribbon & Sponge |
Want a free 39 page, Stampin’ Up Mini catalog? If you are a resident of the United States, just e-mail your mailing address to me and I will get one in the mail to you. Are you inspired by this Blog? One way you can help support this blog is by ordering your Stampin’ Up products through me. You can order from me 24-7 from this link: https://michellezindorf.stampinup.net or e-mail me at [email protected] If you are within the United States. Want a copy of the brand new 2009-2010 Stampin’ Up Catalog for $9.95 with free shipping, just e-mail me at [email protected] and I will get one in the mail to you. Want to become a Stampin’ Up Demonstrator and earn instant income? Consider being part of my Stampin’ Up Team. Also check out the Stampin’ Up specials, click this link to check it out: https://www.stampinup.net/esuite/home/michellezindorf/promotions
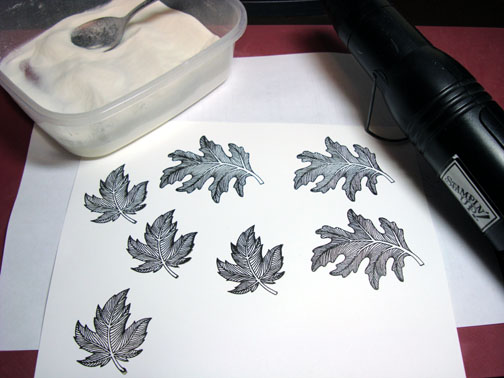
Stamped large and small leaf stamps on Whisper White card stock, loading my stamp first with Versamark and then with Basic Black ink before stamping. Loaded and stamped them multiple times and then heat embossed all of them at the same time using clear embossing powder and a heat gun.
Note: I will be using these leaves in other projects. That is why I stamped so many. 🙂

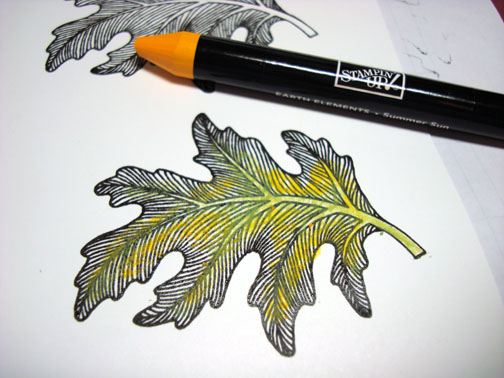
Colored the center of the leaf with an Old Olive Stampin’ Up Watercolor Crayon.
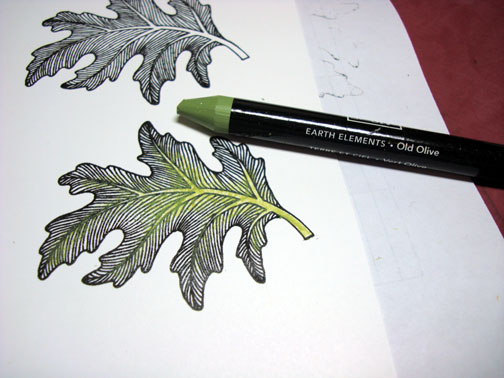
Added More Mustard Watercolor Crayon.
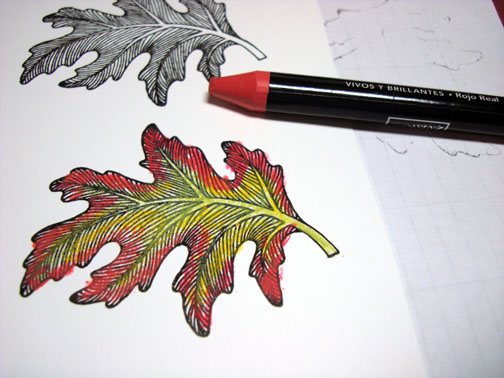
Added Real Red Water Color Crayon around the edges.
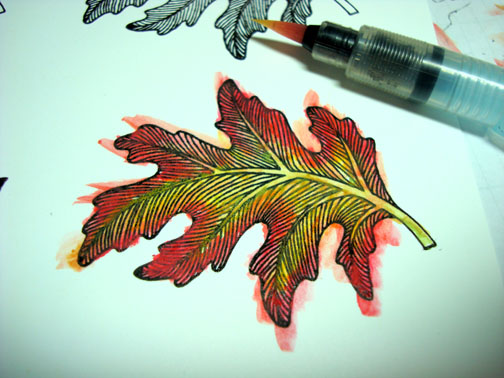
Used a Stampin’ Up Aqua Painter brush filled with water and brushed over the image from the center outward to blend the colors. Note: I cleaned my Aqua Painter brush on my scrap paper frequently so the red did not take over the lighter colors.
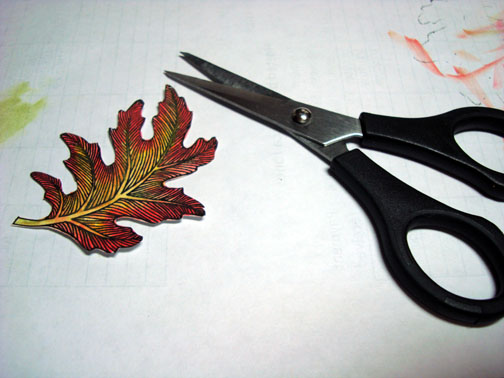
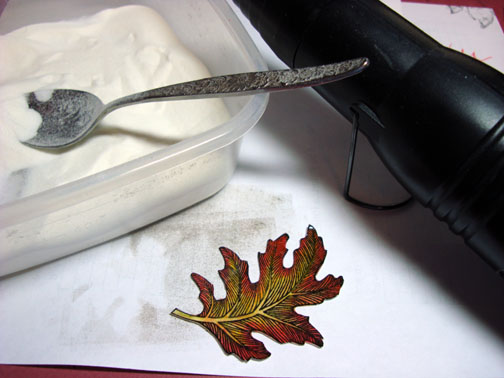
Cut out the leaf using my paper snips. Love these little super sharp, pointy scissors. 🙂
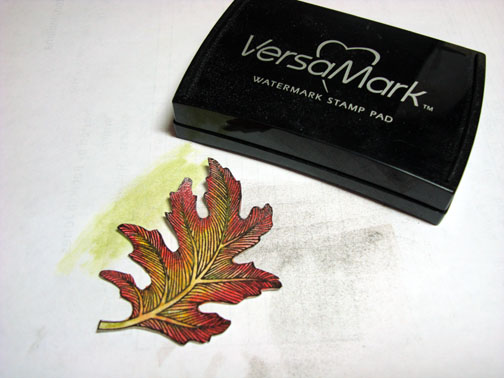
Pressed the Versamark pad all over the cut out leaf and then heat embossed the cut out with clear embossing powder and a heat gun. Repeated this process to create a small leaf cut out also.
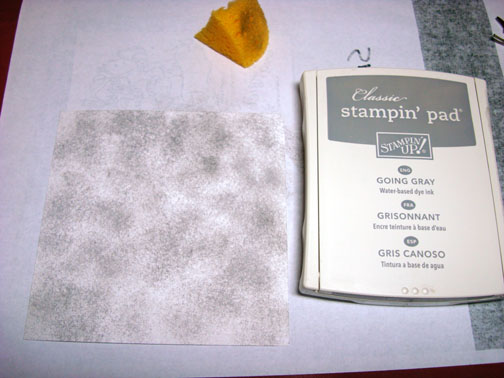
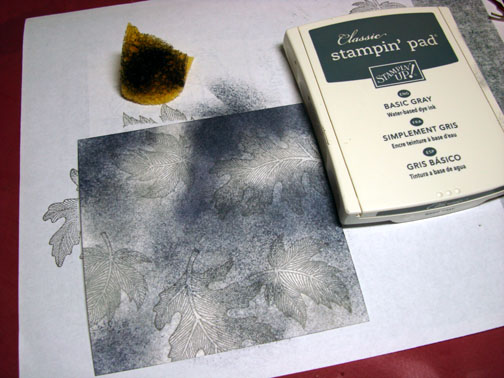
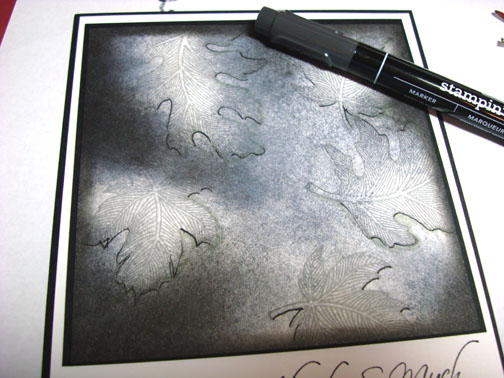
Sponged Going Gray ink, using a pouncing motion, all over a 4.5″ square piece of Whisper White card stock.
Stamped small and large leaves using Going Gray ink all on the card stock.
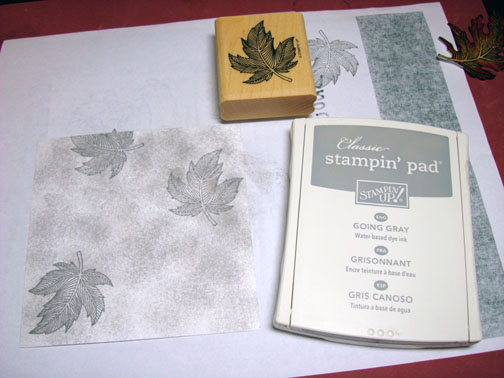
Sponged Basic Gray ink on the card stock, making sure to leave some light areas.
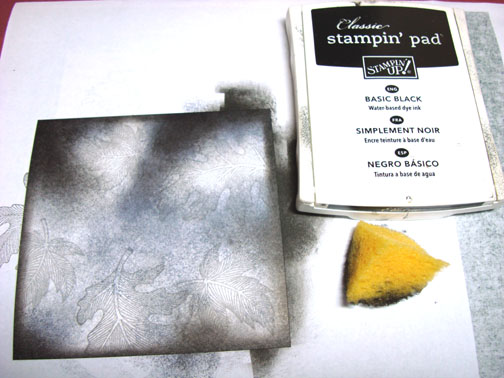
Added a bit of Basic Black ink with the sponge and also sponged Basic Black ink around the edges of the card stock.
Layed out my design and stamped my sentiment before gluing it all together.
Note: I stamp my sentiment before gluing the card together just in case I stamp it crooked. 🙂
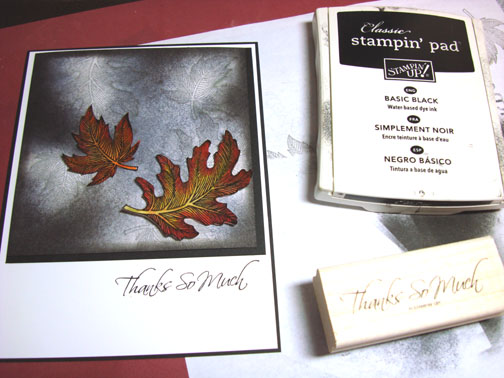
Out lined parts of the Going Gray leaves with the fine end of a Basic Black marker. This helps them stand out a bit more and gives them a bit of depth.
Assembled my card and added an Old Olive Ribbon.
Here it is finished measuring 5″ x 6.5″.
May you put on paper whatever comes to your mind today.
Until my next post. . . . . . . . . .
Huge Hugs,
Michelle
 Get ready for Brayer Workshops! I am coming to:
Broomfield, Colorado
Moore, Oklahoma
Nashville, Indiana
Portland, Michigan
2010
Dayton, Ohio at Marco Paper
Phoenix, Arizona
Monroe, Louisiana
Jacksonville, Florida
St. Louis, Missouri
Mechanicsville, Virginia
Raleigh, North Carolina
Colleyville, Texas
Colorado Springs, Colorado
Boise area of Meridian, Idaho
Riverside, California (Southern California)
Salem, Oregon Wheaton, Illinois
St. Cloud, Minnesota
Rockville, Maryland
North Chili, New York (near Rochester)
New Johnsonville, Tennessee
Kenova, West Virginia
Helena, Montana
Middleburg Heights, Ohio
Venice, Florida
Ginnell, Iowa
Piedmont, Alabama
Auburn, Washington (near Seattle)
Elk Grove Village, Illinois
Here is a link to my workshop calendar where you can see all of my travel schedule and to get info on beginner and advanced Brayer workshops: https://zindorf.splitcoaststampers.com/workshop-calendar
Link to my Stampin’ Up website where you can order all of your must have Stampin’ Up products from me 24-7: https://michellezindorf.stampinup.net
Frequently asked questions answers: https://zindorf.splitcoaststampers.com/frequently-asked-questions/
29 responses to “Leaves on Fossil Rock – Tutorial #272”