
Happy Sunday! I am hiding out in my stamp room this morning while my husband assembles the treadmill that we purchased yesterday. The sales person told us that it is very easy to assemble, but when the box was opened up when we got it home we are finding it has a bunch of parts. Hence I am hiding, lol. This may sound mean but couples can get divorced over putting together projects such as this. 🙂
Anyhow, enough with my ramblings. Today’s tutorial shows how you can color and stamp just one part of a stamp image to omit parts that you do not want in your scene. 🙂
Let’s get started. . . .
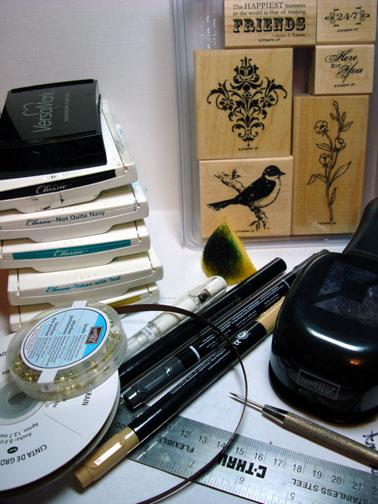
Supplies:
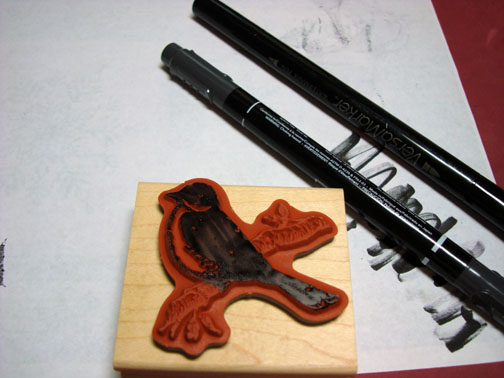
| Stamps: Stampin’ Up Friends 24-7 |
| Paper: Stampin’ Up Designer Series paper “Autumn Meadows”, Basic Black and Whisper White |
| Ink: Stampin’ UP Crushed Curry, Bermuda Bay, Taken with Teal, Not Quite Navy and Basic Black |
| Accessories: Versamark marker & Pad, Chocolate Chip Ribbon, Gold Brads, Photo Corner Punch, Sponge, Ruler, Piercing Tool, Stampin’ Up markers Creamy Caramel & Basic Black, White Gel Pen, Clear embossin powder and heat gun. |
Want a free 39 page, Stampin’ Up Mini catalog? If you are a resident of the United States, just e-mail your mailing address to me and I will get one in the mail to you. Are you inspired by this Blog? One way you can help support this blog is by ordering your Stampin’ Up products through me. You can order from me 24-7 from this link: https://michellezindorf.stampinup.net or e-mail me at [email protected] If you are within the United States. Want a copy of the brand new 2009-2010 Stampin’ Up Catalog for $9.95 with free shipping, just e-mail me at [email protected] and I will get one in the mail to you. Want to become a Stampin’ Up Demonstrator and earn instant income? Consider being part of my Stampin’ Up Team. Also check out the Stampin’ Up specials, click this link to check it out: https://www.stampinup.net/esuite/home/michellezindorf/promotions
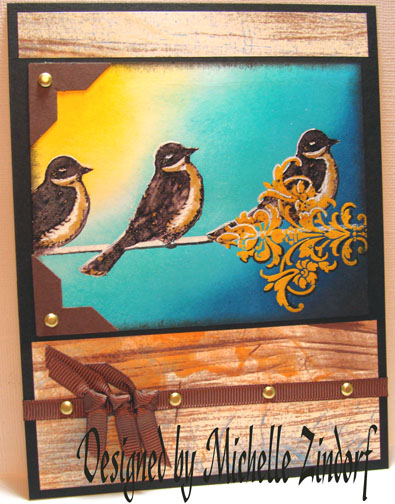
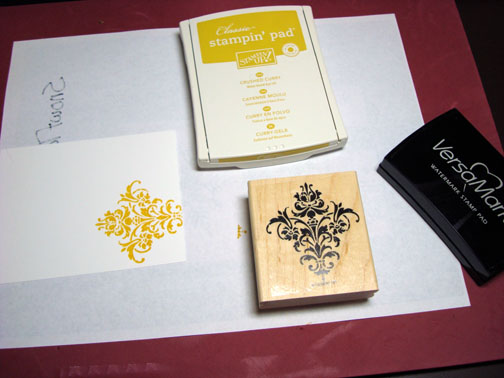
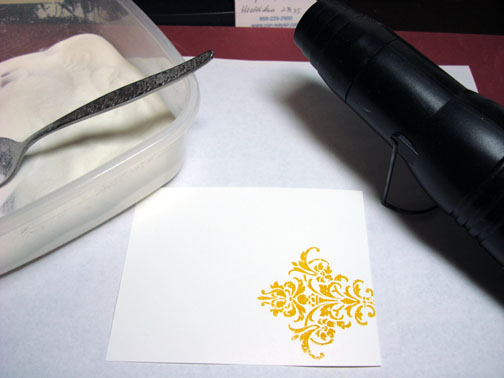
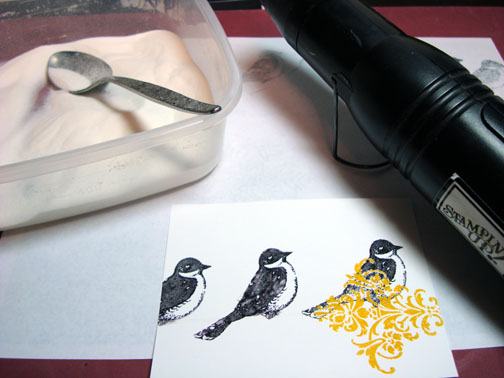
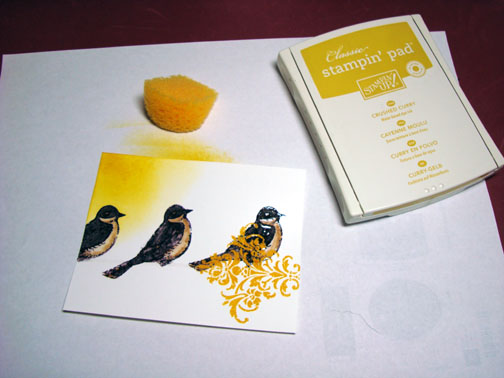
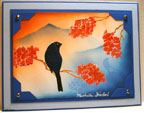
On a 4.5″ x 3.5″ piece of Whisper White card stock, stamped the flourish stamp from the Stampin’ Up set “Friends 24-7” by first loading the stamp with Versamark and then with Crushed Curry ink before stamping it. Heat embossed the image using clear embossing powder and a heat gun.
Colored just the bird on the Bird stamp from the Stampin’ Up set “Friends 24-7” in with a Versamark marker and then with a Basic Black marker. Huffed my breath on the stamp to moisten and then stamped it on the card stock. I then heat embossed the bird using clear embossing powder and a heat gun.
I repeated this process 3 times.
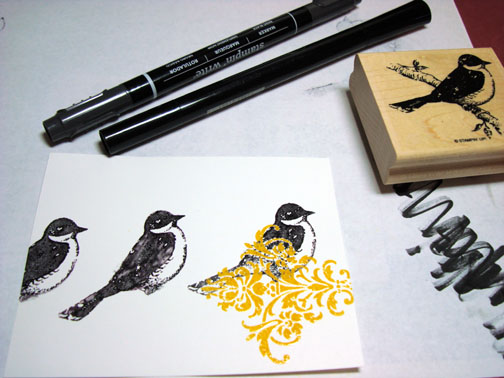
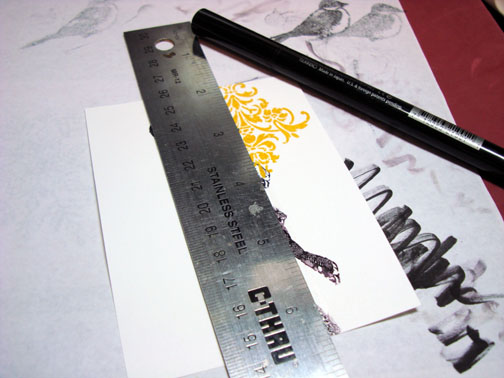
Drew a line for the birds to be sitting on with a ruler and a Versamark marker. Heat embossed the line with clear embossing powder and a heat gun.
Added Creamy Caramel marker to the birds.
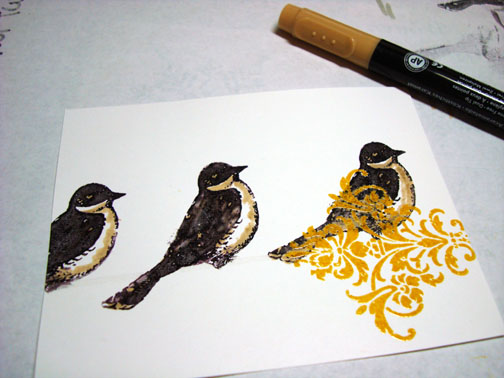
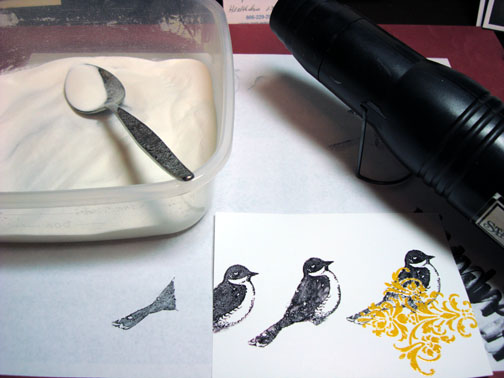
Colored over all three birds with a Versamark marker and heat embossed them with clear embossing powder and a heat gun. All of the images are now heat embossed entirely.
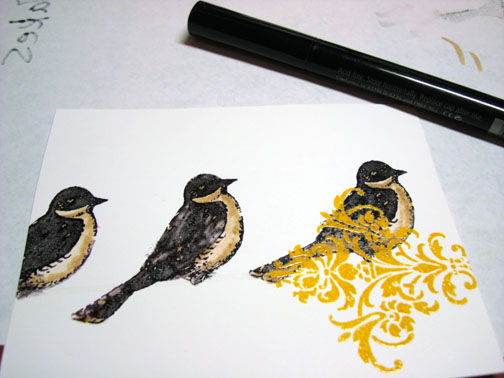
Sponged Crushed Curry in the upper left corner of the card stock.
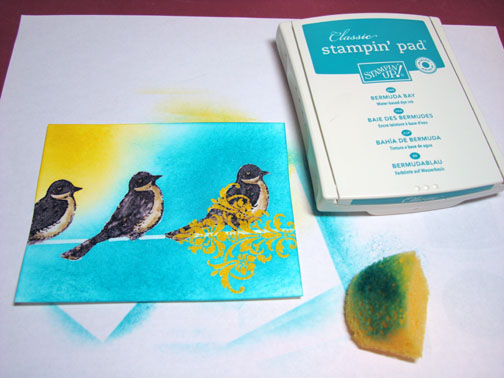
Sponge Bermuda Bay ink on the card stock working from the right side in.
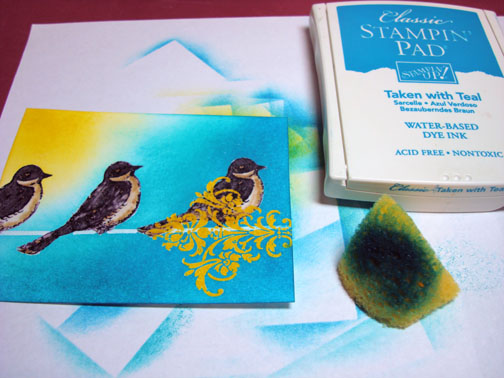
Sponged Taken with Teal ink on the right side of the card stock, not covering the Bermuda Bay ink entirely.
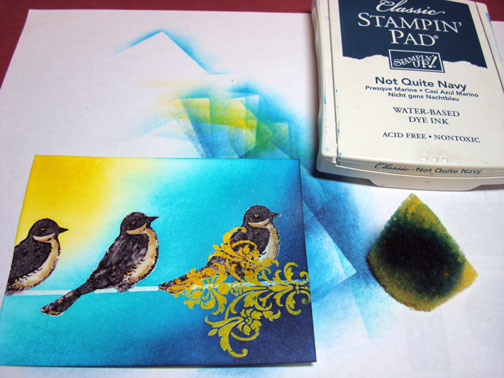
Sponged Not Quite Navy ink on the right side of the card stock, not covering the Taken with Teal ink entirely.
Sponged Basic Black ink on the bottom right corner of the card stock and all around the edges.
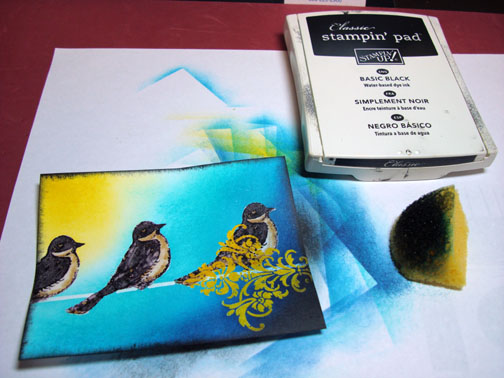
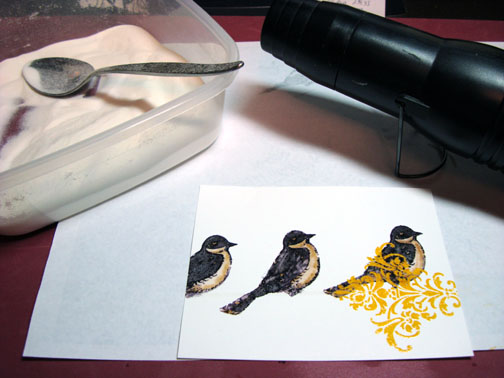
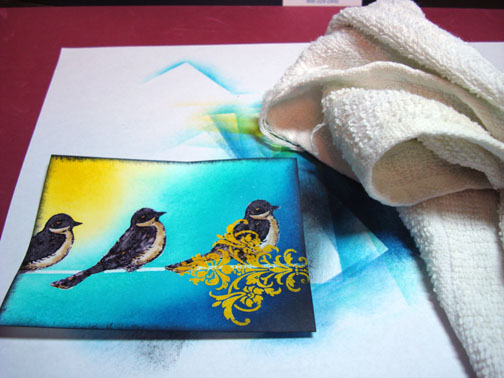
Wiped off my embossed images with a clean cotton towel.
Added a black outline to the right sides of the Crushed Curry flourish and bottom of the wire the birds are sitting on to add a shadow.
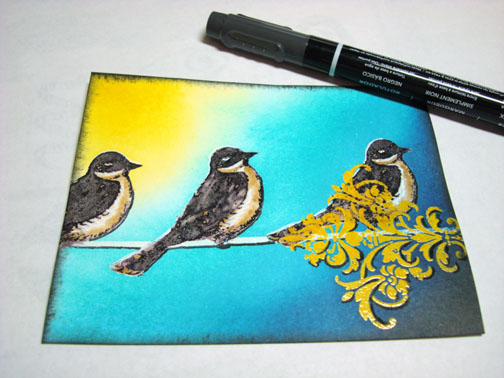
Added White gel pen highlights to the tops of the birds, bellies of the birds and flourish.

Added Chocolate chip small corner punches to the left side of the main image panel. Chocolate Chip ribbon and gold brads. My Design paper panel is from the Stampin’ Up Design Series Paper Pack “Autumn Meadows”.
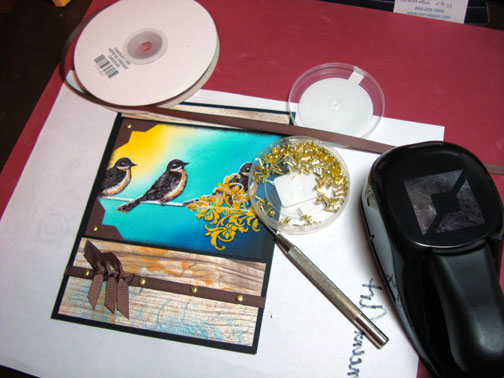
Here is the finished card measuring 5″ x 6.5″.
May you have a day free of assembly. 🙂
Hugs,
Michelle
 Get ready for Brayer Workshops! I am coming to:
Moore, Oklahoma
Nashville, Indiana
Portland, Michigan
2010
Dayton, Ohio at Marco Paper
Phoenix, Arizona
Monroe, Louisiana
Jacksonville, Florida
St. Louis, Missouri
Mechanicsville, Virginia
Raleigh, North Carolina
Colleyville, Texas
Colorado Springs, Colorado
Boise area of Meridian, Idaho
Riverside, California (Southern California)
Salem, Oregon
Wheaton, Illinois
St. Cloud, Minnesota
Rockville, Maryland
North Chili, New York (near Rochester)New Johnsonville, TennesseeKenova, West VirginiaHelena, MontanaMiddleburg Heights, OhioVenice, Florida
Grinnell, Iowa
Piedmont, Alabama
Auburn, Washington (near Seattle)
Elk Grove Village, Illinois
Here is a link to my workshop calendar where you can see all of my travel schedule and to get info on beginner and advanced Brayer workshops: https://zindorf.splitcoaststampers.com/workshop-calendar
Link to my Stampin’ Up website where you can order all of your must have Stampin’ Up products from me 24-7: https://michellezindorf.stampinup.net
Frequently asked questions answers: https://zindorf.splitcoaststampers.com/frequently-asked-questions/
5 responses to “Birds on a Wire – Tutorial #274”