I know I just returned home from Colorado a few days ago, but I’m so very excited! Tomorrow morning (Friday) 3:00 a.m., I am hitting the road again. This time I am heading to Moore, Oklahoma to teach my brayer workshops. It’s a good thing that I like to drive. 🙂 I hope you ladies in Moore, OK are ready to brayer! Because here I come. . . . . .
Today’s tutorial is a chilly one. I used three cool shades of Blue to achieve that chilly look. You could also use cool shades of purple for this project. 🙂 Did you know there are warm shades and cool shades to every color? Take a look at your Blue ink pads that you have. Can you guess which are warm and which are cool? How about your red shades? I bet you can. Now you may not have as many ink pads as I have, because I am a bit sick. But I bet you have a few, or maybe you have more ink than I have. I just never know with you stampers. 🙂 Hmmm, I see some empty spots I need to fill.
Oh yeah, the tutorial, sorry I got a bit off track there.
Let’s get started. . . . . . . .
Supplies:
| Stamps: Stampin’ Up! Branch Out and Many Merry Messages |
| Paper: Stampin’ Up! Whisper White, Bordering Blue and Basic Black |
| Ink: Stampin’ Up! Basic Gray, Night of Navy, Not Quite Navy, Bordering Blue and Basic Black |
| Accessories: Stampin’ Up! Ticket Corner Punch and Word Window Punch, Basic Black Marker, White Gel Pen, Sponge, Brayer, Post it notes, Big Shot Die Cut Machine and Flourish Texturz Plate, Silver Brads |
Want a free 39 page, Stampin’ Up Mini catalog? If you are a resident of the United States, just e-mail your mailing address to me and I will get one in the mail to you. Are you inspired by this Blog? One way you can help support this blog is by ordering your Stampin’ Up products through me. You can order from me 24-7 from this link: https://michellezindorf.stampinup.net or e-mail me at [email protected]. If you are within the United States. Want a copy of the brand new 2009-2010 Stampin’ Up Catalog for $9.95 with free shipping, just e-mail me at [email protected] and I will get one in the mail to you. Want to become a Stampin’ Up Demonstrator and earn instant income? Consider being part of my Stampin’ Up Team. Also check out the Stampin’ Up specials, click this link to check it out: https://www.stampinup.net/esuite/home/michellezindorf/promotions
Starting with a 3.5″ x 5.5″ piece of Whisper White Card stock. I masked the bottom 1/3 of the card stock with a post it note and brayered Bordering Blue ink on the unmasked area.
Brayered Not Quite Navy at the top of the card stock, not covering the Bordering Blue ink entirely.
Brayered Night of Navy ink at the top of the card stock, not covering the Not Quite Navy ink entirely.
Removed the post it note mask and brayered Bordering Blue ink at the bottom of the card stock.
Stamped the tree from the Stampin’ Up! set Branch Out with Basic Grey ink.
Ripped a couple of hills in the edge of a post it note and used it to create some mounds of snow in the scene. This was done by sponging Bordering Blue ink at the post it note edge and then moving it and sponging again for each mound.
Sponged Basic Black ink around the edges of the card stock. Heavier at the top.
Added White Gel pen to the tree and the mounds of snow.
Added a shadow in the tree by outlining the right sides to some of the branches and the trunk.
Ran a 4 7/8″ x 6 3/4″ Bordering Blue Panel through my Big Shot Machine using the Flourish Texture Plate.
Brayered Bordering Blue ink on the panel to bring out the dry embossing further.
Sponge Basic Black ink around the outside edges.
Used the Stampin’ Up! Ticket Corner Punch on a Whisper White Panel and on the main image panel.
Stamped a lone bird in the tree using Basic Black ink.
Punched to word windows out of Basic Black card stock. Cut one end off of each of them. Adhered them with glue and added a silver brads to each one.
Stamped the sentiment from the Stampin’ Up! set Many Merry Messages using Basic Black ink.
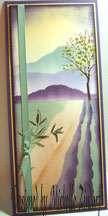
Here is the finished card measuring 5″ x 6.5″.
May your day be filled with peace and harmony. Please wish me safe travels.
Until my next post. . . . . . . . .
Hugs,
Michelle
 Get ready for Brayer Workshops! I am coming to:
Moore, Oklahoma
Nashville, Indiana
Portland, Michigan
2010
Dayton, Ohio at Marco Paper
Phoenix, Arizona
Monroe, Louisiana
Jacksonville, Florida
St. Louis, Missouri
Mechanicsville, Virginia
Raleigh, North Carolina
Colleyville, Texas
Colorado Springs, Colorado
Boise area of Meridian, Idaho
Riverside, California (Southern California)
Salem, Oregon
Wheaton, Illinois
St. Cloud, Minnesota
Rockville, Maryland
North Chili, New York (near Rochester)
New Johnsonville, Tennessee
Kenova, West Virginia
Helena, Montana
Middleburg Heights, Ohio
Venice, Florida
Grinnell, Iowa
Piedmont, Alabama
Auburn, Washington (near Seattle)
Elk Grove Village, Illinois
Here is a link to my workshop calendar where you can see all of my travel schedule and to get info on beginner and advanced Brayer workshops: https://zindorf.splitcoaststampers.com/workshop-calendar
Link to my Stampin’ Up website where you can order all of your must have Stampin’ Up products from me 24-7: https://michellezindorf.stampinup.net
Frequently asked questions answers: https://zindorf.splitcoaststampers.com/frequently-asked-questions/

21 responses to “Chilly Season’s Greetings – Tutorial #277”