
Hey there! I’m back from Nashville, Indiana and I have hit the ground running this morning. I woke at 3:00 a.m. and started creating this tutorial for you first thing while I got hyped up on my coffee.
Let’s get started. . . . . .
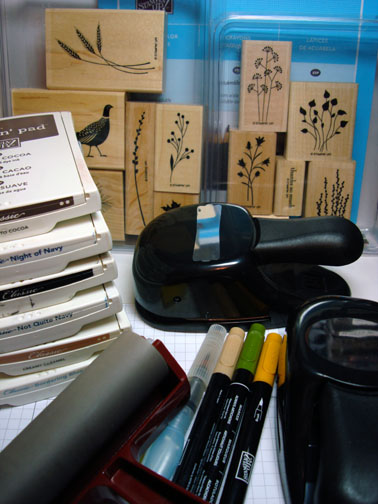
Supplies:
| Stamps: Stampin’ Up Autumn Days and Pocket Silhouettes |
| Paper: Stampin’ Up Designer Paper |
| Ink: Stampin’ Up Close to Cocoa, Night of Navy, Basic Black, Not Quite Navy, Creamy Caramel, Bordering Blue |
| Accessories: Stampin’ Up Punches, Large Oval and Modern Label, Brayer, Stampin’ Up More Mustard Marker, Sponges and Stampin’ Up Watercolor pencils. |
Want a free 39 page, Stampin’ Up Mini catalog? If you are a resident of the United States, just e-mail your mailing address to me and I will get one in the mail to you. Are you inspired by this Blog? One way you can help support this blog is by ordering your Stampin’ Up products through me. You can order from me 24-7 from this link: https://michellezindorf.stampinup.net or e-mail me at [email protected]. If you are within the United States. Want a copy of the brand new 2009-2010 Stampin’ Up Catalog for $9.95 with free shipping, just e-mail me at [email protected] and I will get one in the mail to you. Want to become a Stampin’ Up Demonstrator and earn instant income? Consider being part of my Stampin’ Up Team. Also check out the Stampin’ Up specials, click this link to check it out: https://www.stampinup.net/esuite/home/michellezindorf/promotions
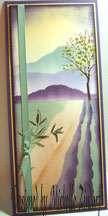
Punched a Large Oval from Very Vanilla card stock.
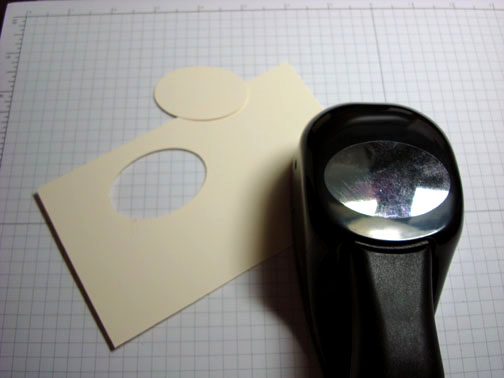
Punched part of an oval from the same card stock. See in the photo the part that was omitted from the first punch oval. 🙂
Now I have my one of my vase shapes.
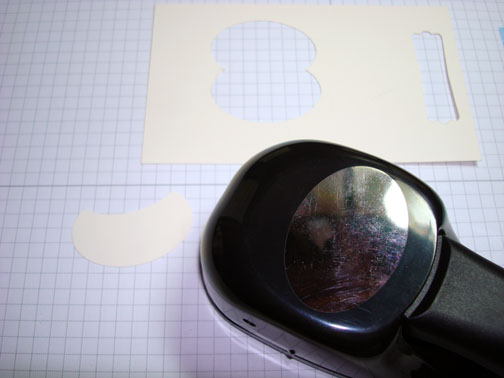
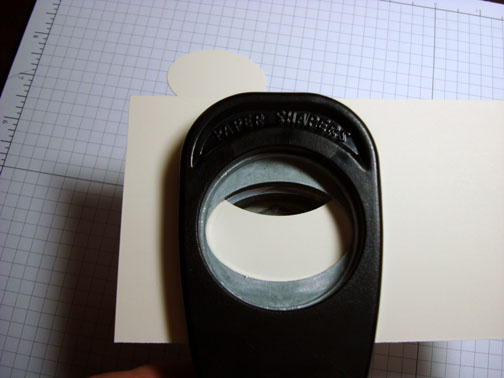
Punched the Modern Label shape from Very Vanilla card stock.
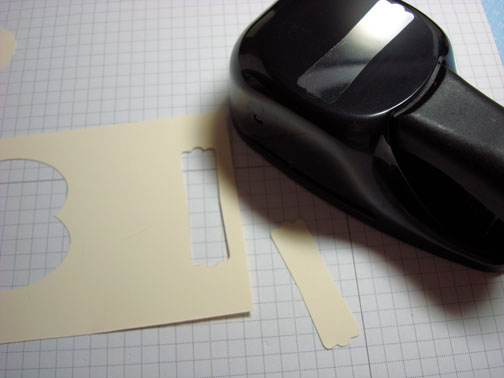
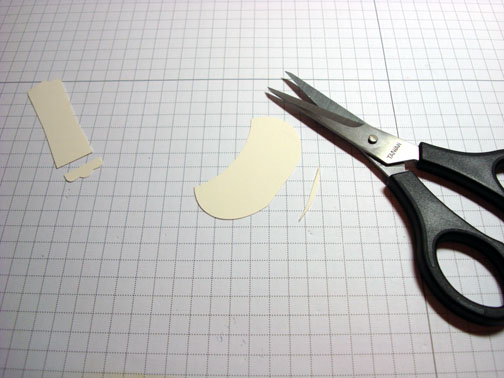
Cut the bottoms off of both shapes.
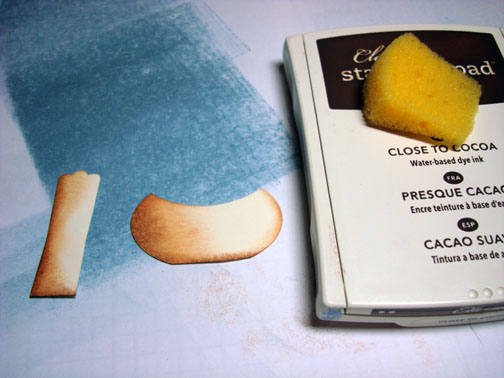
Sponged Creamy Caramel ink a the left side and bottom of each vase shape.
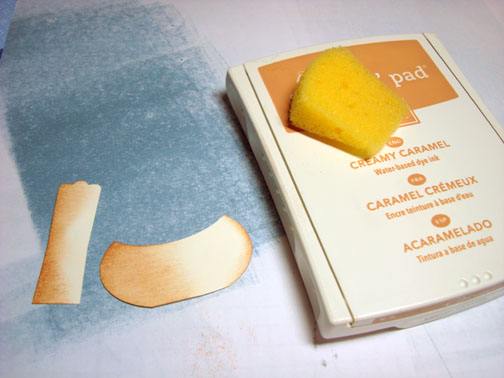
Sponged Close to Cocoa ink at the left side and bottom of each vase shape, not covering the Creamy Caramel ink entirely.
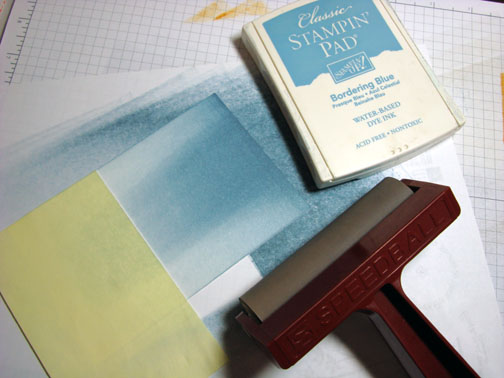
Masked a piece of Stampin’ Up Bashful Blue Designer paper with a post it note and brayered Not Quite Navy at the bottom of the paper.
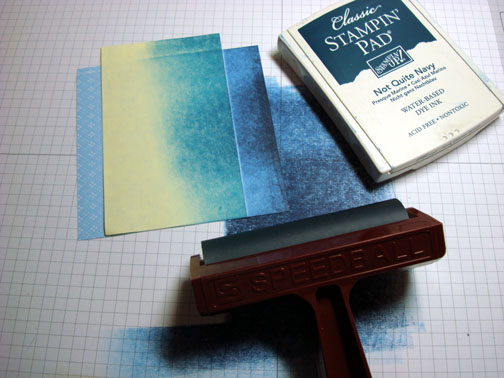
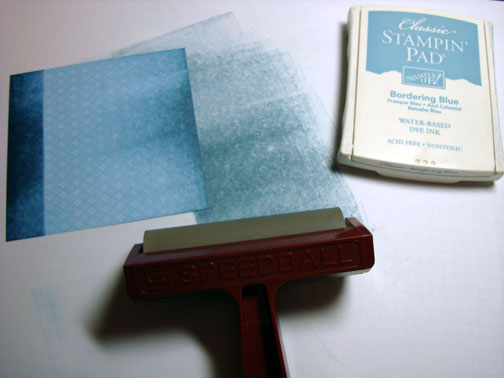
Removed the post it note mask and brayered Bordering Blue ink at the top of the Designer Paper.
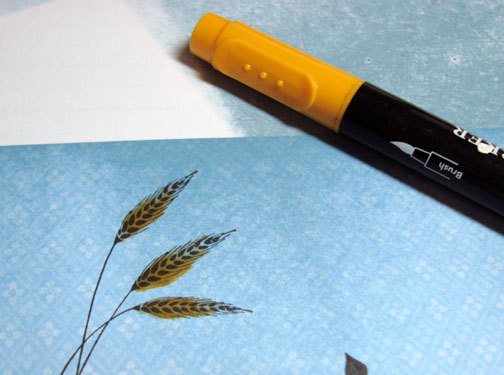
Stamped the Wheat and plant with Basic Black ink. I kept putting the vase shapes on the paper to see just where I needed to stamp the images.
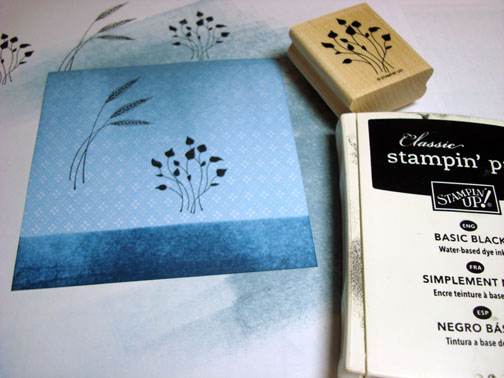
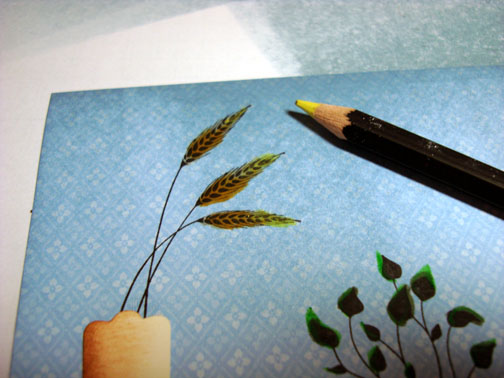
Colored the wheat ends with a More Mustard marker.
Added a bit of Garden Green watercolor pencil to the plant leaves.
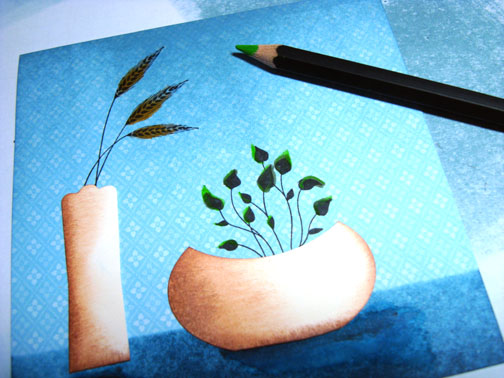
Added a bit of Summer Sun Water Color Pencil to the wheat ends.
Sponged Night of Navy ink at the bottom of the card stock to create shadows for my vases.

Adhered the vases.
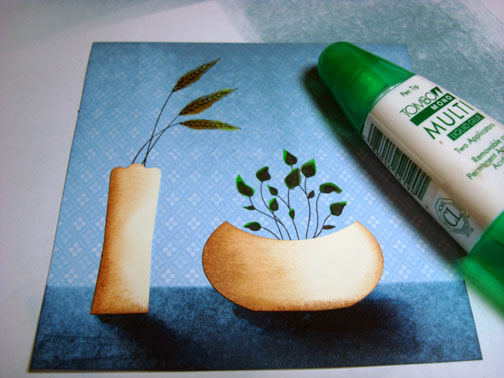
Sponged Close to Cocoa ink around the main image panel and Not Quite Navy panel edges.
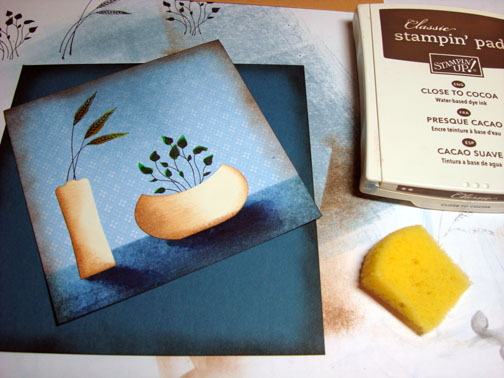
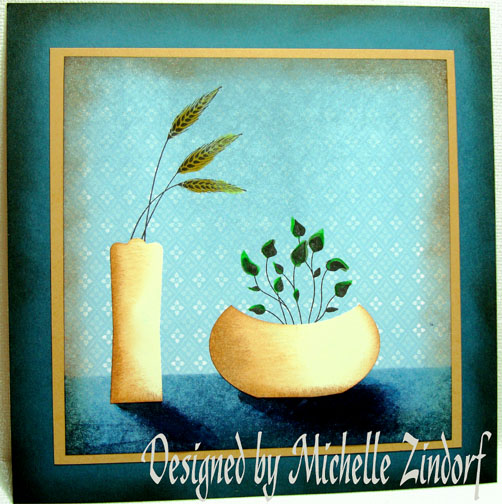
Assembled the card and here it is finished measuring 5.25″ square.
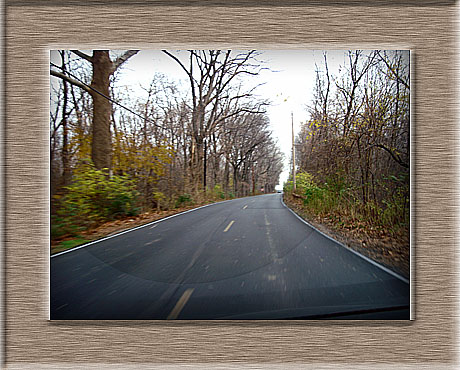
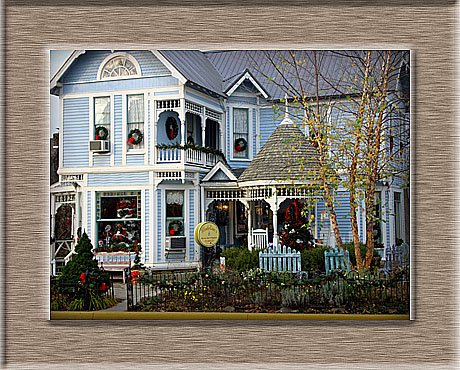
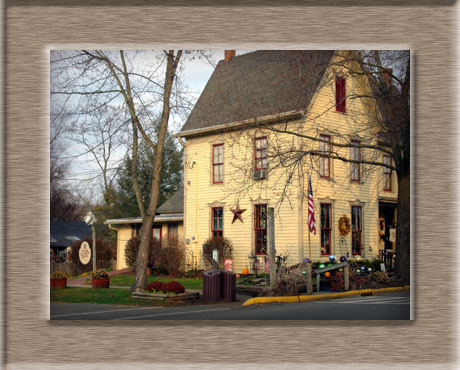
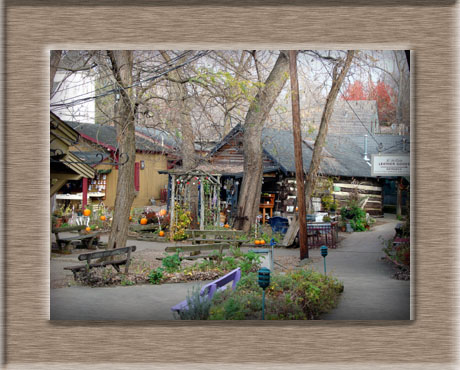
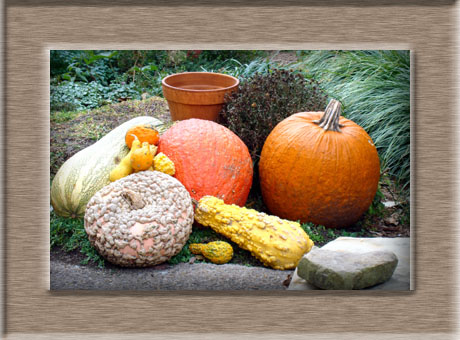
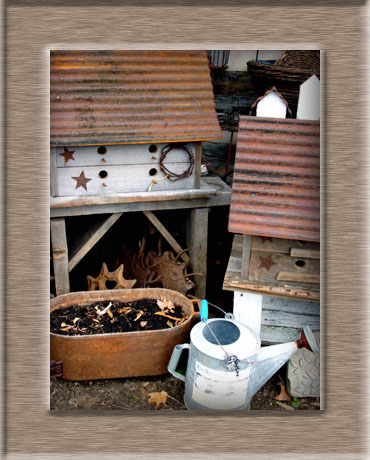
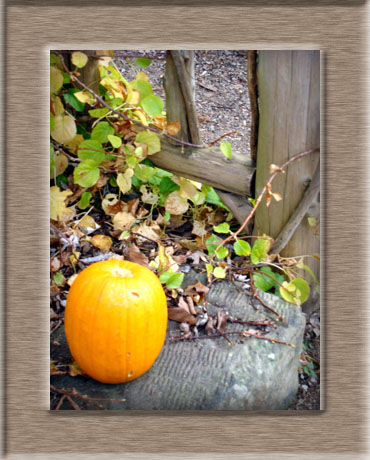
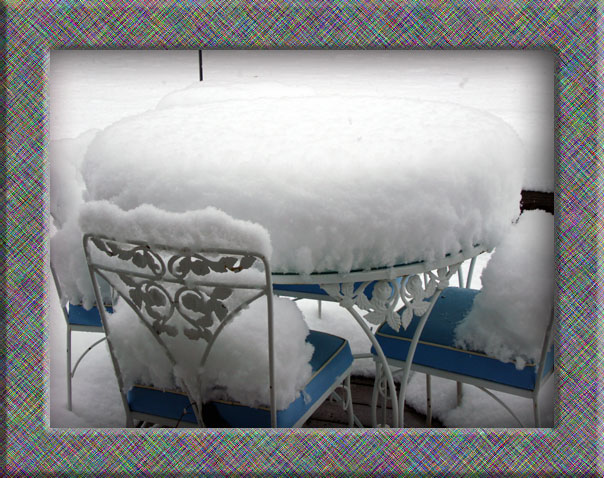
Below are some of the photos taken this past weekend in Nashville, Indiana. You definitely want to visit this lovely town and when you do, take lots of money because there is lots of shopping to be done. The town is filled with cute, cute shop after shop. I made about 6 trips to my car yesterday to drop off bags of my purhcases when my arms got to full. 🙂 Good thing my husband doesn’t read my blog, lol.
May your day be filled with Autumn sites, sounds, sun and cool temperatures.
Until my next post. . . . . . . . . .
Hugs,
Michelle
 Get ready for Brayer Workshops! I am coming to:
Portland, Michigan
2010
Dayton, Ohio at Marco Paper
Phoenix, Arizona
Monroe, Louisiana
Jacksonville, Florida
St. Louis, Missouri
Mechanicsville, Virginia
Raleigh, North Carolina
Colleyville, Texas
Colorado Springs, Colorado
Boise area of Meridian, Idaho
Riverside, California (Southern California)
Salem, Oregon
Wheaton, Illinois
St. Cloud, Minnesota
Rockville, Maryland
North Chili, New York (near Rochester)
New Johnsonville, Tennessee
Kenova, West Virginia
Helena, Montana
Middleburg Heights, Ohio
Venice, Florida
Grinnell, Iowa
Piedmont, Alabama
Auburn, Washington (near Seattle)
Elk Grove Village, Illinois
Atlanta, Georgia
Soledad, California
Here is a link to my workshop calendar where you can see all of my travel schedule and to get info on beginner and advanced Brayer workshops: https://zindorf.splitcoaststampers.com/workshop-calendar
Link to my Stampin’ Up website where you can order all of your must have Stampin’ Up products from me 24-7: https://michellezindorf.stampinup.net
Frequently asked questions answers: https://zindorf.splitcoaststampers.com/frequently-asked-questions/
Pingback: My Blog Picks and Posts from Here and There Around the Web #17 « Rogue Thoughts…Jean's Stamping Studio in the Rogue Valley