
Well, I have been trying to post to my blog for a couple of days now and finally they have it fixed. YEAH! I felt like my left arm was cut off, lol. You are still with me, right? Did you miss me as much as I missed you?
Today’s project is actually last Friday’s project, but here it is anyway. I hope you enjoy this tutorial using the Free Stampin’ Up! Sale-a-bration set, Good Neighbors.
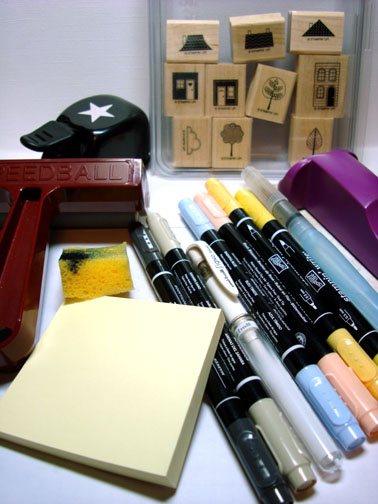
Supplies:
| Stamps: Stampin’ Up! Good Neighbors |
| Paper: Stampin’ Up Whisper White, Basic Black and Blush Blossom |
| Ink: Stampin’ Up! Night of Navy, Going Gray, Not Quite Navy, Bashful Blue, Blush Blossom, Apricot Appeal |
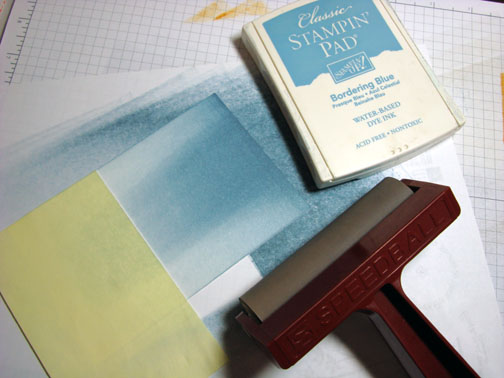
| Accessories: Stampin’ Up! Markers, Apricot Appeal, Sahara Sand, Bashful Blue, Basic Black & Blush Blossom, Aqua painter, White Gel Pen, Stamp-a-ma-jig, Brayer, Star Punch, post it notes, Sponge |
Don’t forget to request your copy of the new Stampin’ Up Occasions mini catalog and Sale-a-bration mini. Just e-mail me your address and I will be glad to send you a set for free. If you are a customer of mine your copy will come to you automatically. 🙂
The new Occasions mini catalog can also be viewed on-line here:
https://204.228.150.61/catalogs/20091231/OccasionsMini10_US.pdf
The New Sale-a-Bration Mini Catalog can also be viewed on-line here:
https://204.228.150.61/catalogs/20091231/SAB_10_US.pdf
Are you getting inspired and enjoying this blog. One way you can help support it is to order your Stampin’ Up products through me. You can order from me 24-7 from this link: https://michellezindorf.stampinup.net or e-mail me at [email protected]. If you are within the United States. Want a copy 2009-2010 Stampin’ Up Catalog for $9.95 with free shipping, just e-mail me at [email protected] and I will get one in the mail to you. Want to become a Stampin’ Up Demonstrator and earn instant income? Consider being part of my Stampin’ Up Team. Also check out the Stampin’ Up specials, click this link to check it out: https://www.stampinup.net/esuite/home/michellezindorf/promotions
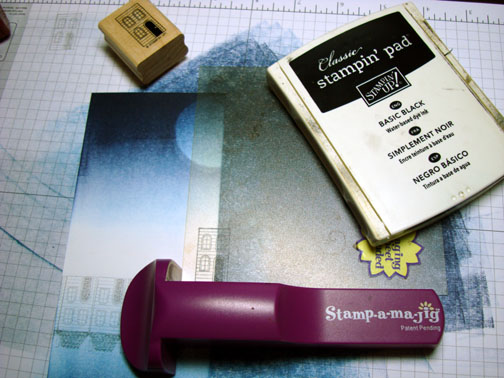
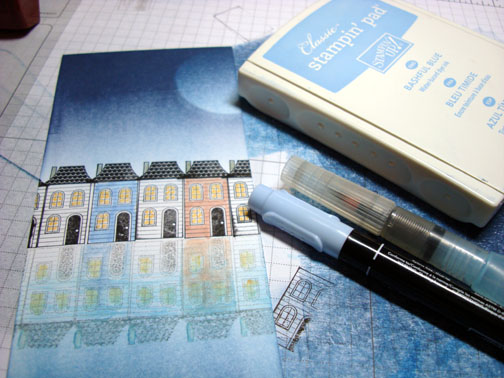
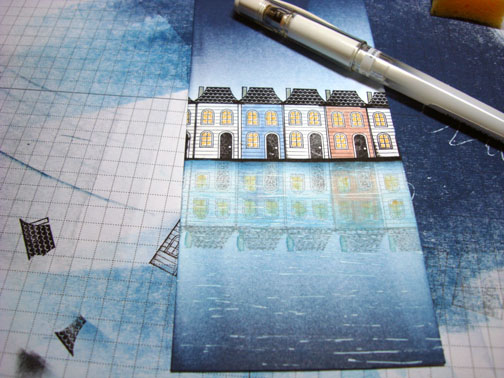
Stamped the house reflections in a line across a 3″ x 7″ piece of Whisper White card stock. To stamp the reflections, stamped the house on my Stamp-a-ma jig plastic using Going Gray ink and then turned the plastic over on my card stock and rubbed the back of the plastic to put the image on the card stock. Repeated this until I had all of the house stamped across the card stock.
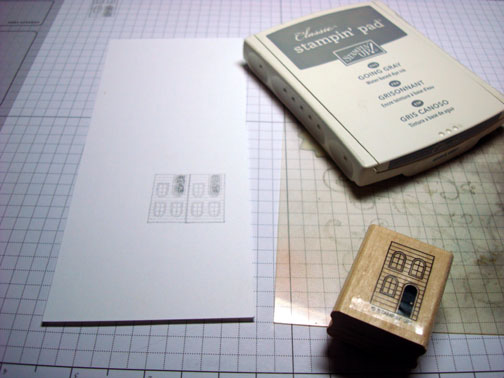
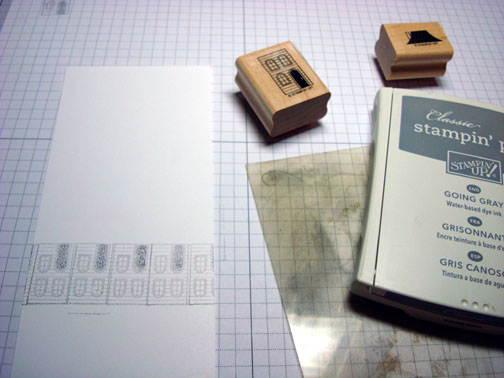
Stamped the house roofs reflection in the same way as the house, using going gray and the stamp-a-ma-jig plastic.

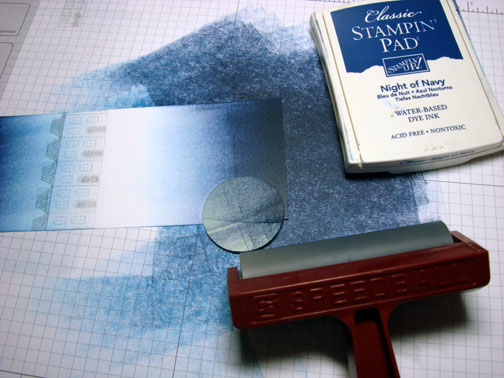
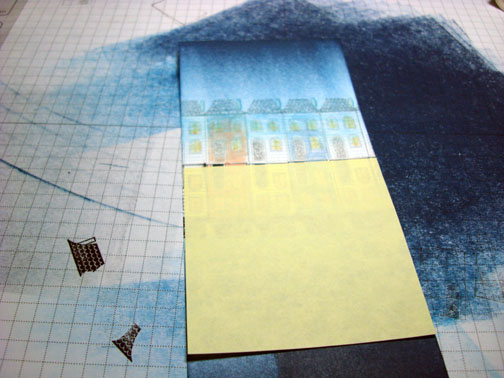
Brayered Not Quite Navy ink at the bottom and top of the card stock.
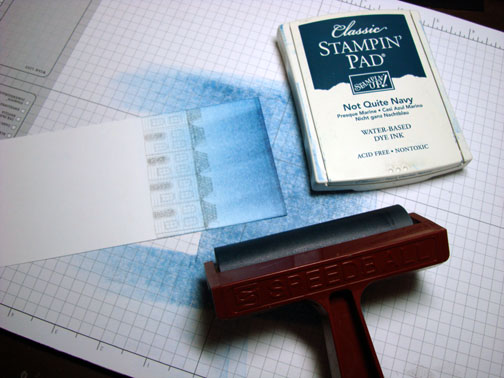
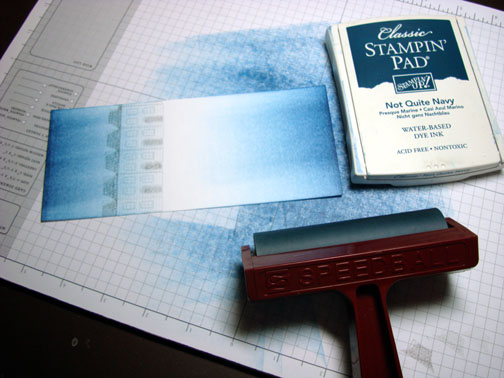
Brayered Night of Navy ink at the top and bottom of the card stock, not covering the Not Quite Navy completely.
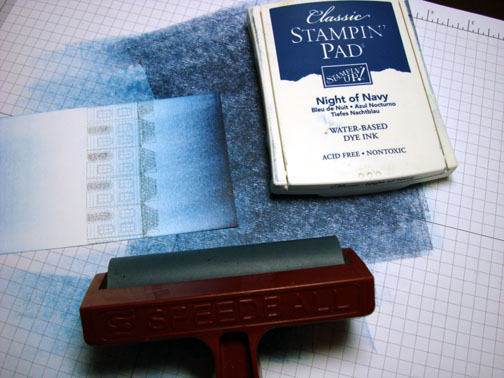
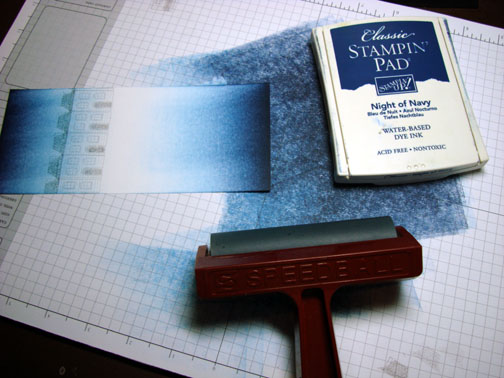
Added a 1 3/4″ mask punched out of the sticky part of a post it note. Brayered Night of Navy again at the top of the card stock to get the moon to show up.
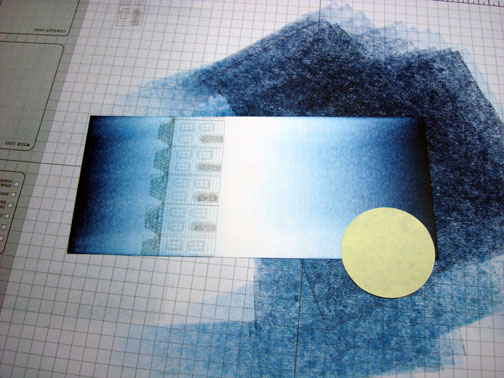
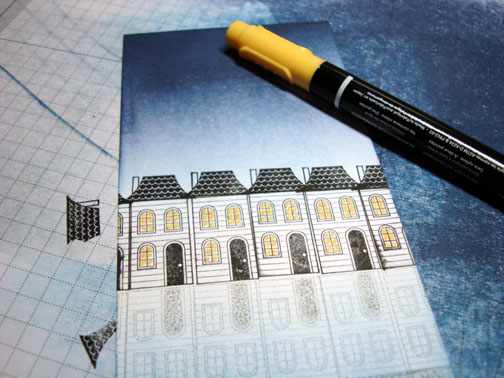
Removed the moon mask and stamp the houses across the card stock using Basic Black ink, matching them up the reflection images using a stamp-a-ma-jig for placement.
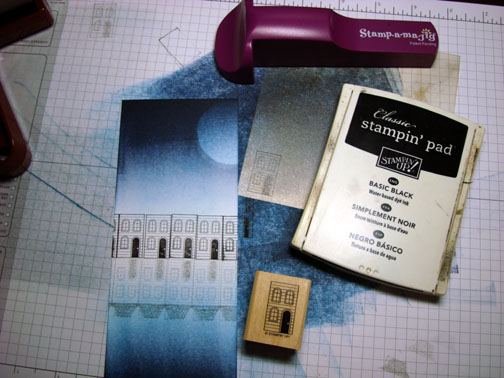
Stamped the roofs in Basic Black ink using a Stamp-a-ma-jig for placement.
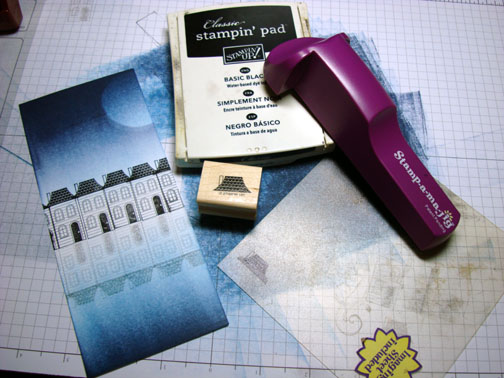
Colored in the windows of the houses with an Apricot Appeal marker.
Added a little bit of watery Apricot Appeal ink with an Aqua Brush to the window in the reflection images.
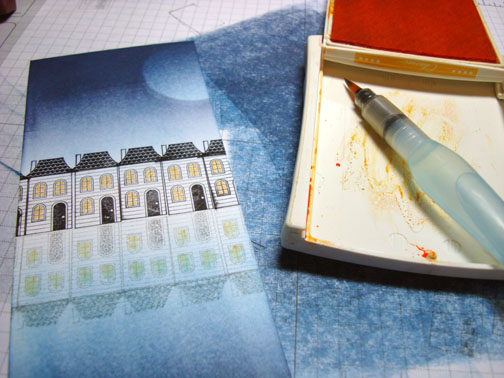
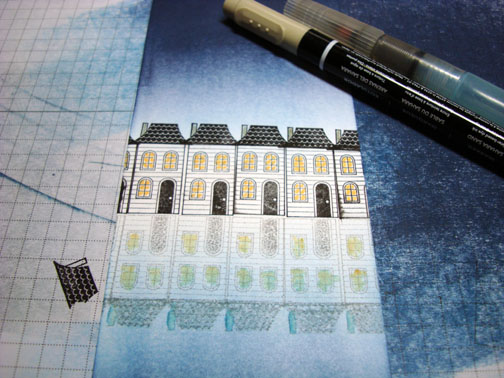
Colored one of the house with a Blush Blossom marker and the reflection for that house with watery Blush Blossom ink using an Aqua Painter.
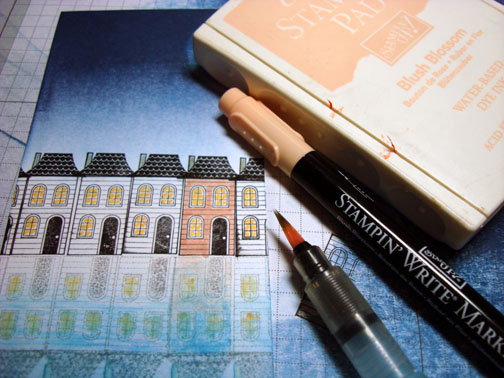
Colored one of the houses with a Bashful Blue Marker and the reflection of the house with watery Bashful Blue ink using an Aqua Painter.
Masked the houses with a post it note and Sponged Not Quite Navy at the post it note edge.
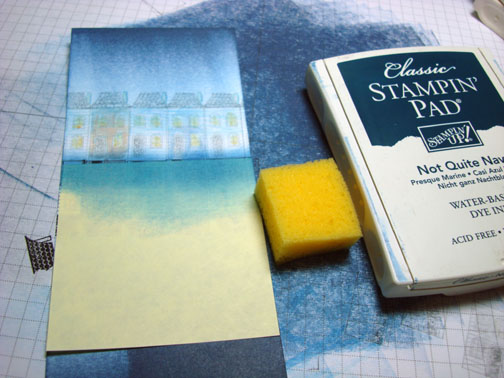
Traced along the edge of the post it note with a Basic Black marker.
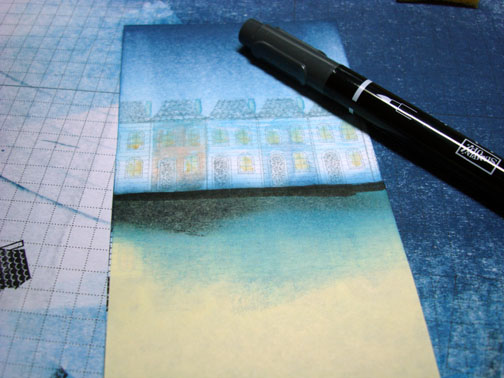
Removed the post it note mask and added dashes in the water with a White Gel Pen.
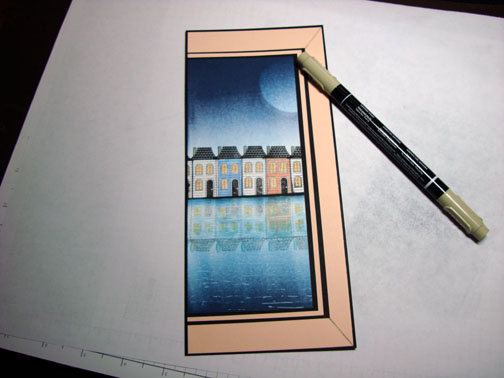
Assembled the card adding Basic Black and Blush Blossom panels. Added a Sahara Sand line in the top and bottom right hand corners of the Large Blush Blossom Panel to make this look like a window frame.
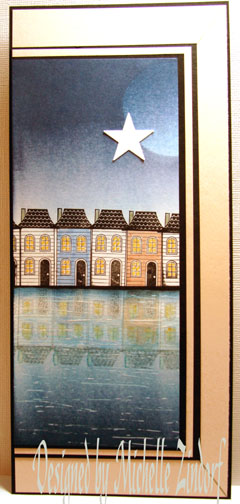
Added a punched Whisper White Star to the sky and here is the finished card measuring 4″ x 9″. This will fit in a #10 size envelope.
May your day be filled with fun and laughter.
Until my next post. . . . . . . . . . . . ..
Hugs,
Michelle
 Get ready for Brayer Workshops! I am coming to:
2010
Phoenix, Arizona
Monroe, Louisiana
Jacksonville, Florida
St. Louis, Missouri
Mechanicsville, Virginia
Raleigh, North Carolina
Colleyville, Texas
Colorado Springs, Colorado
Boise area of Meridian, Idaho
Riverside, California (Southern California)
Salem, Oregon
Wheaton, Illinois
St. Cloud, Minnesota
Rockville, Maryland
North Chili, New York (near Rochester)
New Johnsonville, Tennessee
Kenova (Huntington), West Virginia
Helena, Montana
Middleburg Heights, Ohio
Venice, Florida
Grinnell, Iowa
Piedmont, Alabama (Near GA border close to Cedartown)
Auburn, Washington (near Seattle)
Elk Grove Village, Illinois
Savannah, Georgia
Atlanta, Georgia
North Liberty, Indiana
Saledad, California
Here is a link to my workshop calendar where you can see all of my travel schedule and to get info on beginner and advanced Brayer workshops: https://zindorf.splitcoaststampers.com/workshop-calendar
Link to my Stampin’ Up website where you can order all of your must have Stampin’ Up products from me 24-7: https://michellezindorf.stampinup.net
Frequently asked questions answers: https://zindorf.splitcoaststampers.com/frequently-asked-questions/
Pingback: Frugal Friday: Looks at Sale-a-Bration « Rogue Thoughts…Jean's Stamping Studio in the Rogue Valley