
Hello there, I am back from the fabulous City of St. Louis, Missouri.
Although I love to travel, it means I have to leave my stamping room behind for a while. I think I go into withdrawal, lol. Creating keeps a sense of balance in my life and it is hard to explain to non-crafting people. But I have a feeling that you may just understand what I am talking about.
On my last post I left you guessing where I was by showing you pictures of “Lincoln Log Cabin and Farm” in Greenup, Illinois. It is the last home of Abraham Lincoln’s father and stepmother. I am totally amazed at how many people guessed right, in fact, nobody guessed wrong. I’m glad a lot of you enjoyed seeing the photos. It was my pleasure to share them with you. If you are in Illinois or visiting Illinois I highly recommend stopping there and taking in a bit of the 1800’s way of life. Here is a link if you wish to view a few of the photos I took: https://zindorf.splitcoaststampers.com/2010/02/26/where-on-earth/
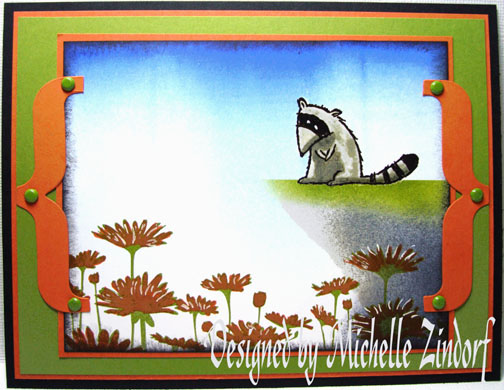
Now that I am home for a few days, I am ready to share a tutorial with you. I don’t normally gravitate to cartoony stamps, but how cute is this little raccoon from the Stampin’ Up set “Under the Stars”. I paired it up with the Upsy Daisy set that is also by Stampin’ Up.
Let’s get started. . . . . .
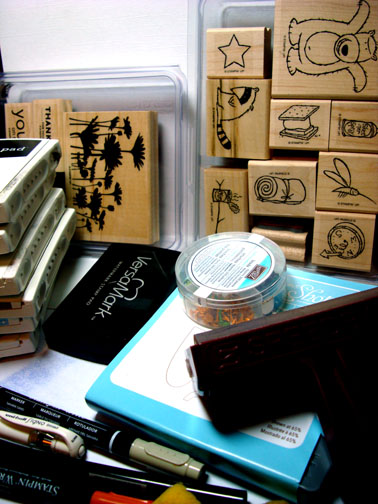
Supplies:
| Stamps: Stampin’ UP! Under the Stars and Upsy Daisy |
| Paper: Stampin’ Up! Basic Black, Really Rust, Old Olive and Whisper White |
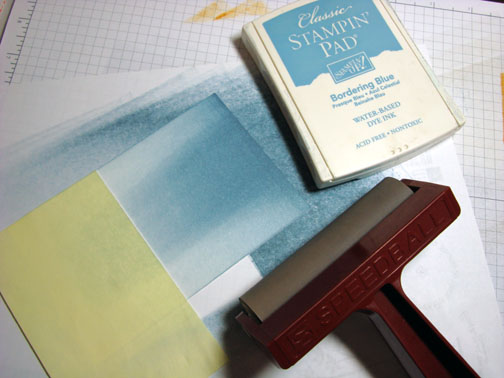
| Ink: Stampin’ Up Basic Black, Old Olive, Basic Gray, Sahara Sand, Bashful Blue and Brilliant Blue |
| Accessories: Stampin’ Up! Sponges, Hearts & Brackets Die, Big Shot Machine, Old Olive Brads, Really Rust and Sahara Sand Markers, Versamark Marker and pad, White Gel Pen, Brayer and Post it notes |
Don’t forget to request your copy of the new Stampin’ Up Occasions mini catalog and Sale-a-bration mini. Just e-mail me your address and I will be glad to send you a set for free. The new Occasions mini catalog can also be viewed on-line here: https://204.228.150.61/catalogs/20091231/OccasionsMini10_US.pdfThe New Sale-a-Bration Mini Catalog can also be viewed on-line here:https://204.228.150.61/catalogs/20091231/SAB_10_US.pdfAre you getting inspired and enjoying this blog. One way you can help support it is to order your Stampin’ Up products through me. You can order from me 24-7 from this link: https://michellezindorf.stampinup.net or e-mail me at [email protected]. Want to become a Stampin’ Up Demonstrator and earn instant income? Consider being part of my Stampin’ Up Team and start your own business
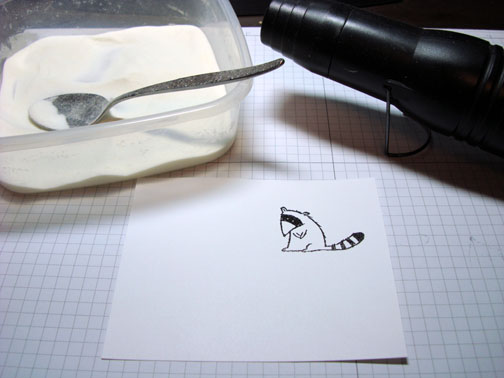
Stamped the raccoon by loading the stamp with Versamark and then Basic Black ink before stamping it on a 4″ x 5″ piece of Whisper White card stock.

Heat embossed the image using clear embossing powder and a heat gun.
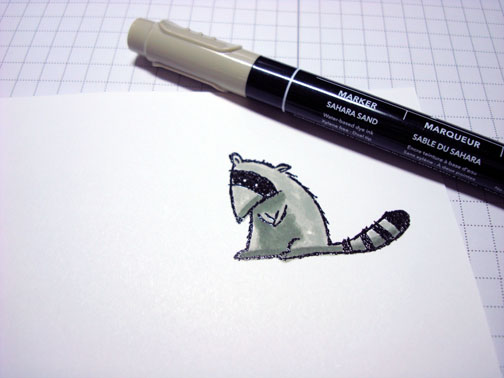
Colored in the raccoon with a Sahara Sand marker.
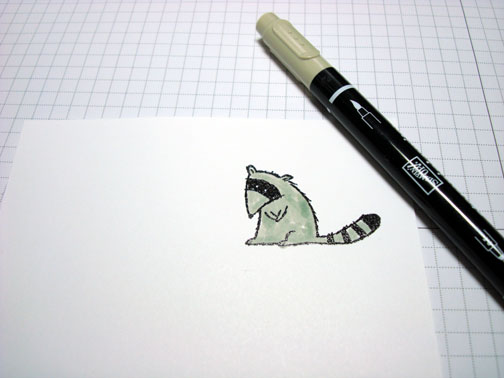
Let the image dry and then shadowed his belly and the bottom of his feet and tail with the same Sahara Sand marker.
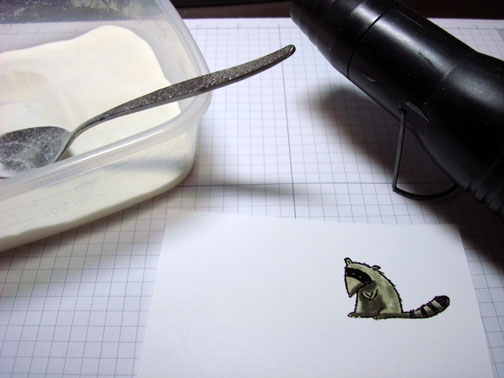
Colored over the image with a Versamark marker and then heat embossed the image with clear embossing powder and a heat gun. Now my image is protected and I can brayer ink over it.
Brayered Bashful Blue ink at the top of the card stock.
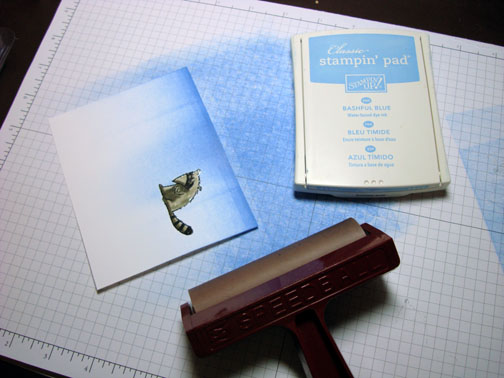
Brayered Brilliant Blue ink at the top of the card stock, not covering the Bashful Blue ink entirely.

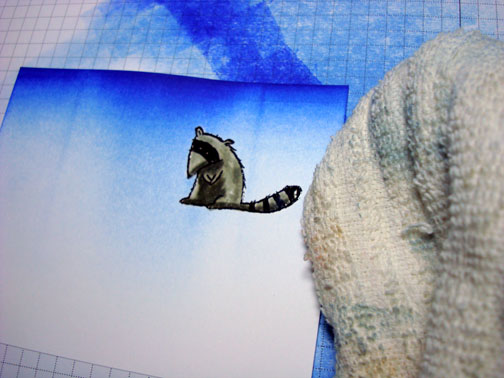
Wiped the ink off of my embossed image using an old cotton towel.
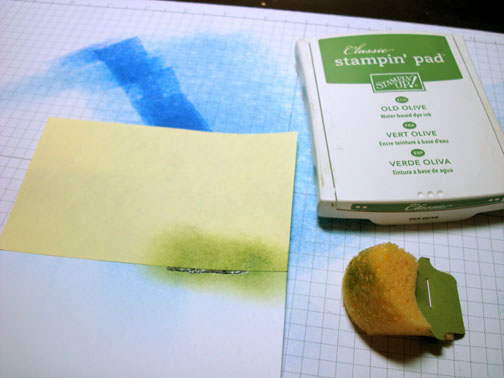
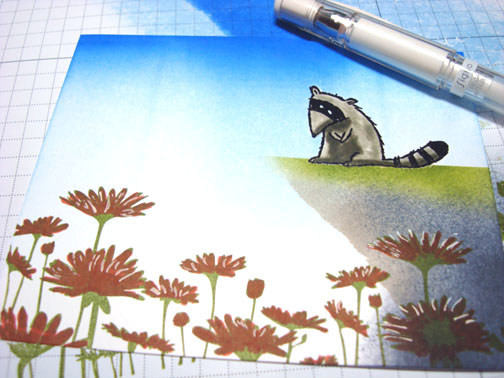
Mask the top of the card stock, leaving a bit of the raccoon showing below the mask and sponged in a bit of Old Olive ink to start the making of the little cliff for the raccoon to sit on.
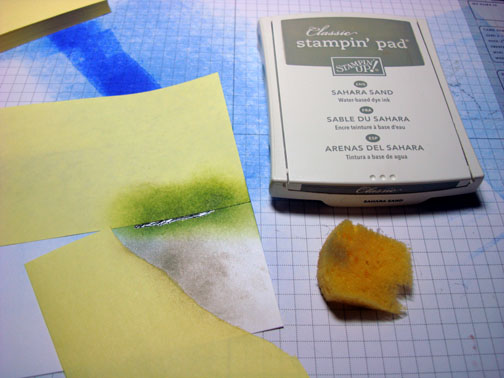
Ripped a post it note to use as a mask to define the side of the cliff. Sponged Sahara Sand ink on.
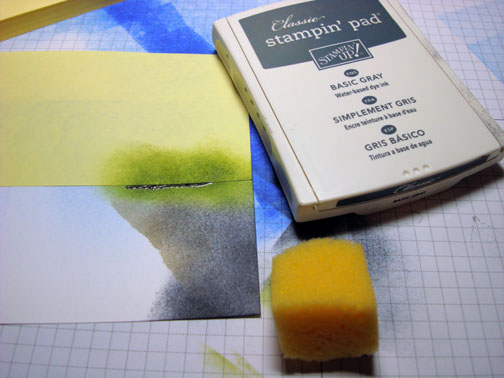
Removed the bottom mask and sponged a bit of Basic Gray ink at the right side and bottom of the cliff.
Stamped the Upsy Daisy stamp using Old Olive ink.
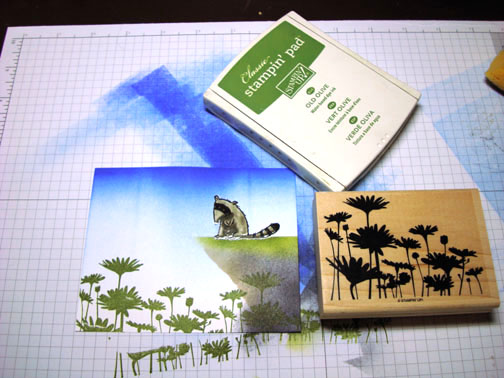
Colored the flower petals with a Really Rust marker.
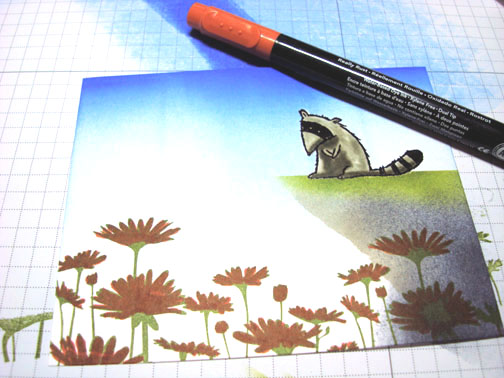
Added white gel pen highlights to the flower petals and the raccoon’s eyes.
Sponged Basic Black ink around the edges of the card stock.

Cut two “}” out of Really Rust card stock using the Hearts & Brackets Die and my Big Shot Machine.
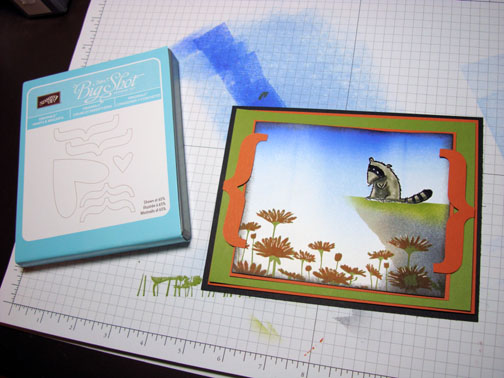
Assembled the card and added a few Old Olive brads. Here is the finished card measuring 5″ x 6.5″.
May your day today be filled with joy!
Until my next post. . . . . . . . . .
Hugs,
Michelle
 Get ready for Brayer Workshops! I am coming to:
Mechanicsville, Virginia (Sold Out)
Raleigh, North Carolina (Sold Out)
Colleyville, Texas (Sold Out)
Colorado Springs, Colorado
Boise area of Meridian, Idaho
Riverside, California (Southern California)
Salem, Oregon
Wheaton, Illinois
St. Cloud, Minnesota
Rockville, Maryland
North Chili, New York (near Rochester)
New Johnsonville, Tennessee
Kenova (Huntington), West Virginia
Helena, Montana
Middleburg Heights, Ohio
Venice, Florida
Grinnell, Iowa
Piedmont, Alabama (Near GA border close to Cedartown)
Auburn, Washington (near Seattle)
Elk Grove Village, Illinois
Savannah, Georgia
Atlanta, Georgia
North Liberty, Indiana
Saledad, California
Here is a link to my workshop calendar where you can see all of my travel schedule and to get info on beginner and advanced Brayer workshops: https://zindorf.splitcoaststampers.com/workshop-calendar
Link to my Stampin’ Up website where you can order all of your must have Stampin’ Up products from me 24-7: https://michellezindorf.stampinup.net
Frequently asked questions answers: https://zindorf.splitcoaststampers.com/frequently-asked-questions/
19 responses to “Dreamy Raccoon – Tutorial #309”