

I am so very much in the garden mode that all I can think about is gardening. So I guess you are just stuck with me creating pieces with flowers and trees for a while. At least until the heat of summer kicks in and I get tired of pulling weeds, watering etc., lol.
I have been spending at least 2 hours a day working in my perennial gardens and hanging out at our local garden store. In the Spring the garden store gets the majority of my income, not really, but it seems like it. Anyhow that is the reason behind my designs lately. Hope you are in the garden mode too and don’t mind my floral pieces.
Let’s get started. . . . . . . . .. . .
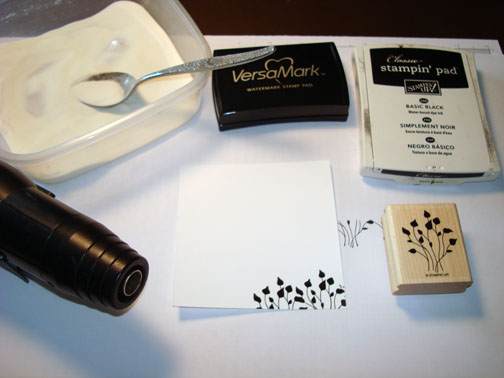
Supplies:
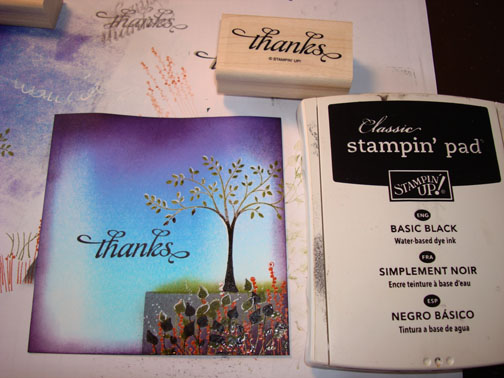
| Stamps: Stampin’ Up! Thoughts & Prayers, Pocket Silhouettes and Thank you Kindly |
| Paper: Stampin’ Up! Whisper White, Old Olive, Lovely Lilac and Elegant Eggplant |
| Ink: Stampin’ Up! Tempting Turquoise, Lovely Lilac, Basic Black, Basic Gray, Really Rust, Old Olive, Elegant Eggplant and Whisper White |
| Accessories: Stampin’ Up! Sponges, Clear Circle Rhinestone Brads, Brayer, Clear embossing Powder, Heat Gun, Versamark pad, Elegant Eggplant Ribbon, White Gel Pen, Basic Black marker, Post it notes |
If you are a Stampin’ Up Customer of mine the new Summer Mini will be hitting your mail box any day now. 🙂 If you would like to be a customer of mine, please e-mail you address to me and I will send you free Stampin’ Up Summer Mini catalog. Are you getting inspiration from this blog? One way you can help support it is to order your Stampin’ Up products through me. Click HERE to place an order. Want to become a Stampin’ Up Demonstrator and earn instant income? Consider being part of my Stampin’ Up Team and start your own business. Click HERE for more information.

On a 4″ square piece of Whisper White card stock stamp the plant from the Stampin’ Up! Pocket Silhouettes set by first loading the stamp with Versamark and then loading it with Basic Black ink before stamping it. Stamped it twice and then heat embossed the images using clear embossing powder and a heat gun.
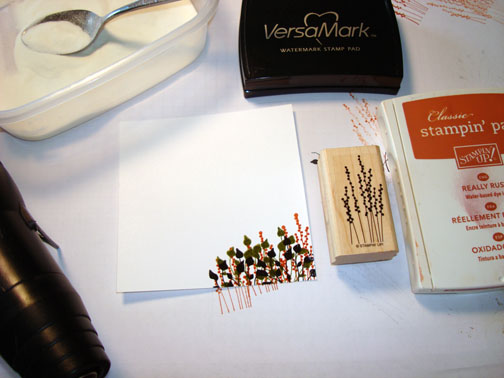
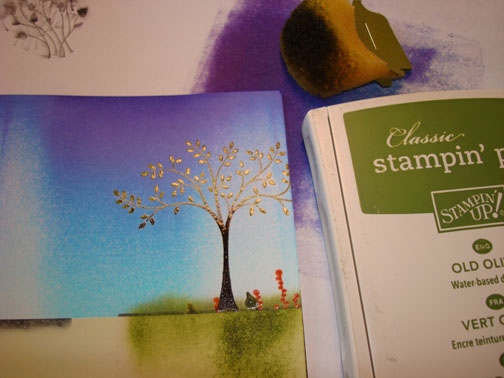
Over stamped the embossed images with the same stamp by loading it with Versamark and then Old Olive ink before stamping it. Heat embossed the Old Olive images with clear embossing powder and a heat gun.

Stamped another stamp from the Stampin’ Up! set Pocket Silhouettes by first loading the stamp with Versamark and then Really Rust ink before stamping it. Heat embossed the Really Rust images using clear embossing powder and a heat gun.
Stamped the Tree from the Stampin’ Up! Thoughts & Prayers by first loading the stamp with Versamark and then Old Olive ink, tapped a bit of Basic Black ink on the Trunk of the tree and then stamped it. Heat embossed the tree image using clear embossing powder and a heat gun.
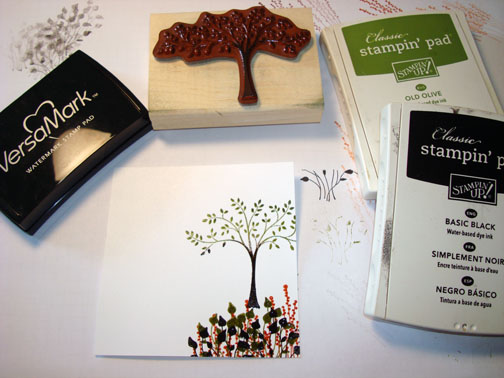
Now that my images are heat embossed the will resist ink so I can now put in my background.
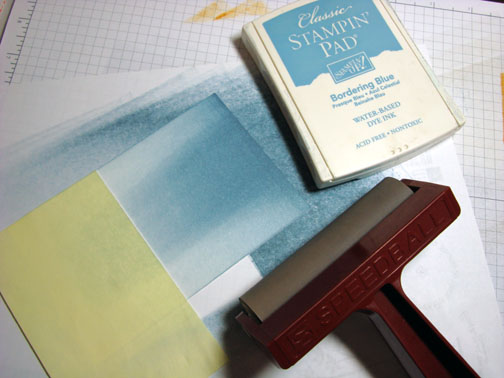
Brayered Tempting Turquoise ink from the at the top of the card stock.

Brayered Lovely Lilack ink at the top of the card stock, not covering the Tempting Turquoise ink entirely.

Used two post it notes and mask the sky and the left side of the card stock in order to put in a wall. Sponged Basic Gray ink in the unmasked area.
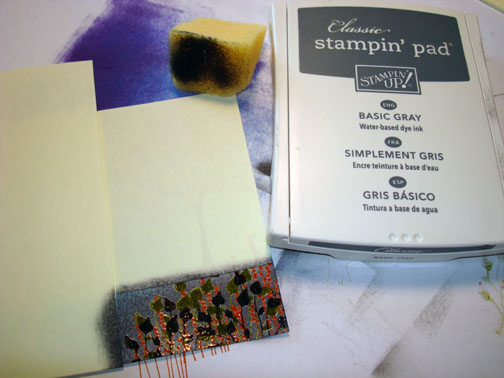
Removed the masks and wiped the ink off of my embossed images.
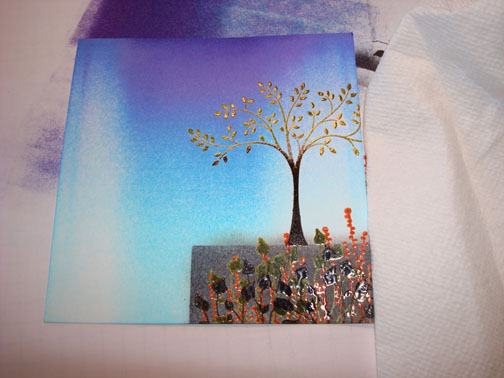
Put a post it note mask at the top of the wall and sponged a little Old Olive ink in for grass.
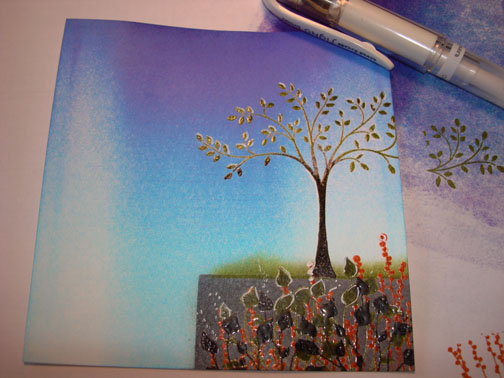
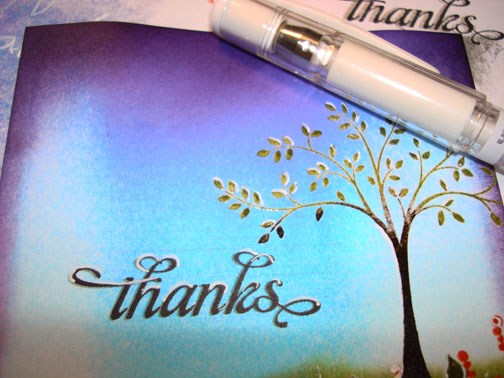
Added White Gel Pen highlights to the leaves of the tree and plants.
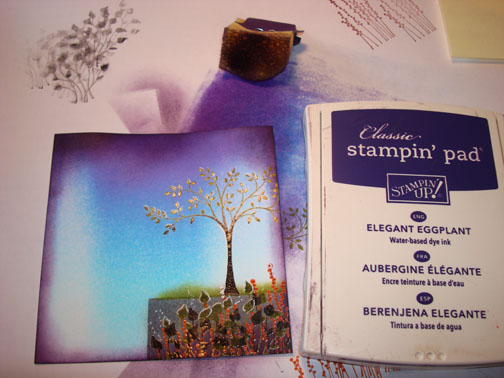
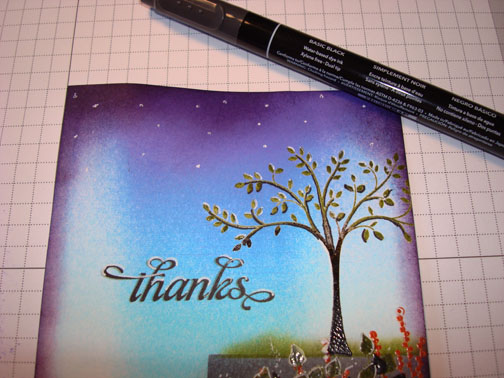
Sponged Elegant Eggplant ink around the edges of the card stock.
Stamped the Stampin’ Up! Thanks image from the set Thank You Kindly using Basic Black ink.
Added White Gel Pen highlights to the sentiment.
Added a few random dots in the sky for stars.
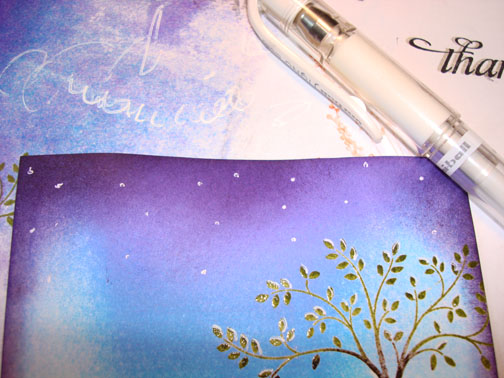
Out lined some of the branches to give the tree a bit more dimension.
Added Old Olive, Lovely Lilac and Elegant Eggplant Panels, Elegant Eggplant Ribbon and a couple of Clear Circle Rhinestone Brads.
Here is the finished card measuring 5.5″ square.
May you get the chance today to enjoy a bit of what nature has to offer.
Until my next post. . . . . . . . . . . . . . .
Hugs,
Michelle
 Get ready for Brayer Workshops! I am coming to:
Boise area of Meridian, Idaho (seats available)
Riverside, California (Southern California)
Salem, Oregon
Wheaton, Illinois
St. Cloud, Minnesota
Rockville, Maryland (Sold Out)
North Chili, New York (near Rochester) (Sold Out)
New Johnsonville, Tennessee
Kenova (Huntington), West Virginia
Helena, Montana
Middleburg Heights, Ohio
Venice, Florida
Grinnell, Iowa
Piedmont, Alabama (Near GA border close to Cedartown)
Auburn, Washington (near Seattle)
Elk Grove Village, Illinois
Savannah, Georgia
Atlanta, Georgia
North Liberty, Indiana
Saledad, California
Here is a link to my workshop calendar where you can see all of my travel schedule and to get info on beginner and advanced Brayer workshops: https://zindorf.splitcoaststampers.com/workshop-calendar
Link to my Stampin’ Up website where you can order all of your must have Stampin’ Up products from me 24-7: https://michellezindorf.stampinup.net
Frequently asked questions answers: https://zindorf.splitcoaststampers.com/frequently-asked-questions/
15 responses to “Twilight Thanks – Tutorial #322”