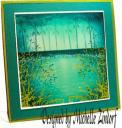
How about smearing a little ink today. This tutorial is all about the technique of “Direct to Paper”. Direct to Paper, aka “DTP” is the art of smearing the ink pad directly onto the card stock. I use the short end of my ink pad throughout this piece and leave a bit of the Whisper White card stock showing through for sparkle.
Before I get into the tutorial though I want to announce the blog candy that I now have to give away. This is a special blog candy, a brand new Stampin’ Up! Level 2 Hostess set, Christmas Punch. Can you get excited about that? I can!
To enter to win this set, please leave a comment on this post telling me to enter you in the drawing. If you are getting this blog update via e-mail, please click HERE and then leave your comment at the bottom of the post. Please no e-mail enties.
I will select the winner using a random number generator on Tuesday, May 4, 2010. Until Tuesday I will be on the road teaching my brayer workshops to the fabulous ladies in Riverside, California.
Now let’s get started on that tutorial. . . . . . . . . . . . . .
Supplies:
| Stamps: Stampin’ Up! Trendy Trees |
| Paper: Stampin’ Up! Whisper White, Basic Black, Perfect Plum and Almost Amethyst |
| Ink: Stampin’ Up! Perfect Plum, Going Gray, Almost Amethyst, Really Rust and Basic Black |
| Accessories: Stampin’ Up! Word Window Punch, White Gel Pen, Basic Black Marker, Sponges, paper Snips and Rhinestone Brads |
Live in the USA and need a copy of the Summer Mini Catalog? E-mail your mailing address to [email protected] and I will get one in the mail to you. ![]() Are you getting inspiration from this blog? One way you can help support it is to order your Stampin’ Up products through me. Click HERE to place an order. Want to become a Stampin’ Up Demonstrator , receive a 20% discount on product and earn instant income on orders? Consider being part of my Stampin’ Up Team and start your own business. Click HERE for more information.
Are you getting inspiration from this blog? One way you can help support it is to order your Stampin’ Up products through me. Click HERE to place an order. Want to become a Stampin’ Up Demonstrator , receive a 20% discount on product and earn instant income on orders? Consider being part of my Stampin’ Up Team and start your own business. Click HERE for more information.
Using the sort end of a Almost Amethyst ink pad, smeared the ink on a 4″ square piece of Whisper white card stock, leaving plenty of white showing.
Added Going Gray ink by using the short end of the ink pad and smearing it.
Stamped the trunks of the trees using Basic Black ink.
Stamped the leaves of the tree by loading the leaves stamp first with Going Gray ink and then tapping a bit of Really Rust on the bottom half of the leaves before stamping it.
Ripped a post it note and masked right at the bottom of the tree trunks. Took a Basic Black marker and traced the jagged edge of the mask, leaving a tiny unmarked area in order to form the crack in the next step.
Removed the mask and drew a crooked line down from the Basic Black line opening to the bottom of the card stock to form the crack.
Sponged a tiny bit of Going Gray in the rock area to tone it down a bit.
Added white gel pen highlights in the leaves of the trees.
Added Basic Black marker under the leaves of the tree to give them a bit more definition.
Decided to put a little more drama in the sky by adding a tiny bit of Perfect Plum ink by smearing it on the right and left sides of the sky area.
Added White Gel pen highlights to the left side of the tree trunks.
Cut a 5.25″ square piece of Almost Amethyst Card stock and sponged Perfect Plum ink on the edges.
Punched a Word Window from Basic Black card stock and cut one end off of the punch. Assembled my card front and added the punch.
Added purple rhinestone brads to the punch.
Here is the finish card measuring 5.5″ square.
May your weekend be over flowing with Joy!
Until my next post. . . . . . . ..
Hugs,
Michelle
 Get ready for Brayer Workshops! I am coming to:
Riverside, California (Southern California) (only a couple of seats available for Saturday, May 1st) Click HERE for info.
Salem, Oregon (Sold Out)
Wheaton, Illinois
St. Cloud, Minnesota (Sold Out)
Rockville, Maryland (Sold Out)
North Chili, New York (near Rochester) (Sold Out)
Kenova (Huntington), West Virginia
Helena, Montana
Middleburg Heights, Ohio
Venice, Florida
Grinnell, Iowa
Piedmont, Alabama (Near GA border close to Cedartown)
Auburn, Washington (near Seattle)
Elk Grove Village, Illinois
Savannah, Georgia
Atlanta, Georgia
North Liberty, Indiana
Soledad, California
Here is a link to my workshop calendar where you can see all of my travel schedule and to get info on beginner and advanced Brayer workshops: https://zindorf.splitcoaststampers.com/workshop-calendar
Link to my Stampin’ Up website where you can order all of your must have Stampin’ Up products from me 24-7: https://michellezindorf.stampinup.net
Frequently asked questions answers: https://zindorf.splitcoaststampers.com/frequently-asked-questions/

390 responses to “Cracked Up – Tutorial #326 and Blog Candy”