
I love making flower pots out of punches for my cards. Here is one made from oval punches.
Let’s get right to tutorial today because the sunshine is calling me outside. 🙂
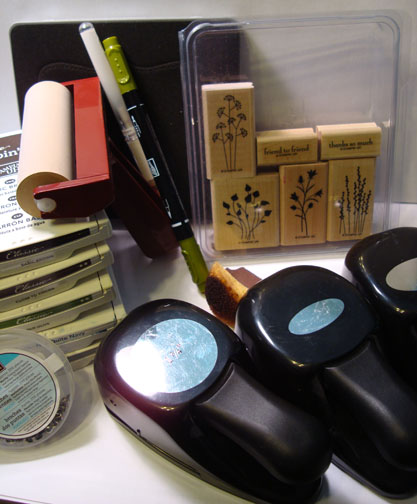
Supplies:
| Stamps: Stampin’ Up! Pocket Silhouettes |
| Paper: Stampin’ Up! Not Quite Navy, Bravo Burgundy, Going Gray and Whisper White, Stampin’ Up Designer paper |
| Ink: Stampin’ Up! Going Gray, Not Quite Navy, Old Olive, Close to Coco and Basic Brown |
| Accessories: Stampin’ Up Punches – 1 3/4″ circle, small oval and large oval, brayer, White Gel Pen, Always Artichoke marker, sponge, post it note, Big Shot machine, Top note die, silver brads |
Live in the USA and need a copy of the Summer Mini Catalog? E-mail your mailing address to [email protected] and I will get one in the mail to you. ![]() Are you getting inspiration from this blog? One way you can help support it is to order your Stampin’ Up products through me. Click HERE to place an order. Want to become a Stampin’ Up Demonstrator , receive a 20% discount on product and earn instant income on orders? Consider being part of my Stampin’ Up Team and start your own business. Click HERE for more information.
Are you getting inspiration from this blog? One way you can help support it is to order your Stampin’ Up products through me. Click HERE to place an order. Want to become a Stampin’ Up Demonstrator , receive a 20% discount on product and earn instant income on orders? Consider being part of my Stampin’ Up Team and start your own business. Click HERE for more information.
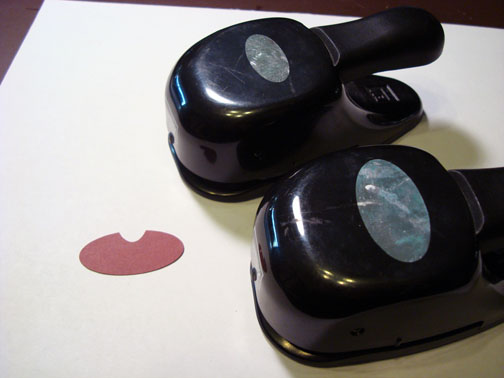
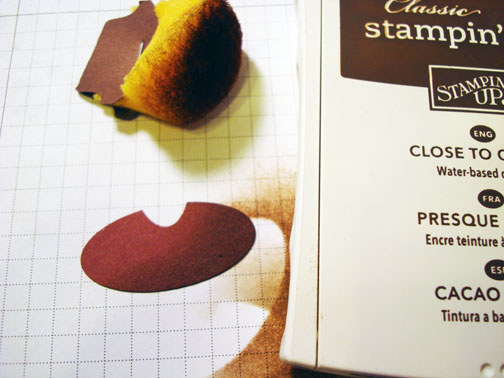
Punched a small oval out of a piece of Bravo Burgundy card stock.
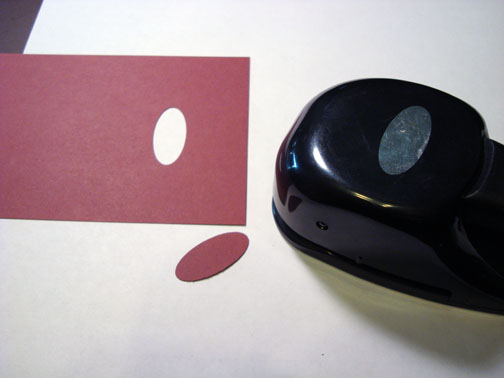
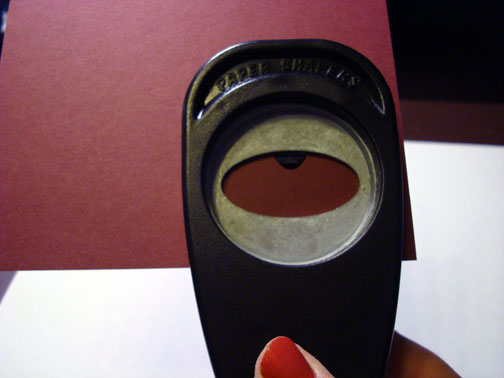
Using the large oval punch, lined up part of the small oval punched hole in the center and punch.
This is what you end up with. 🙂
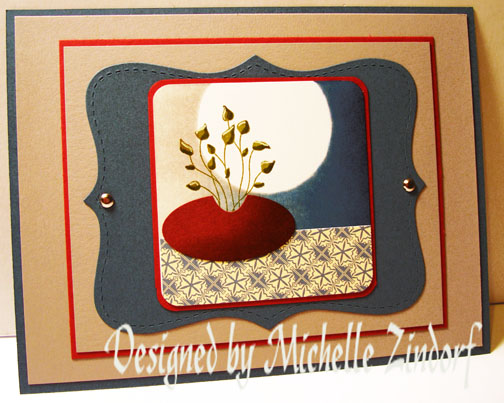
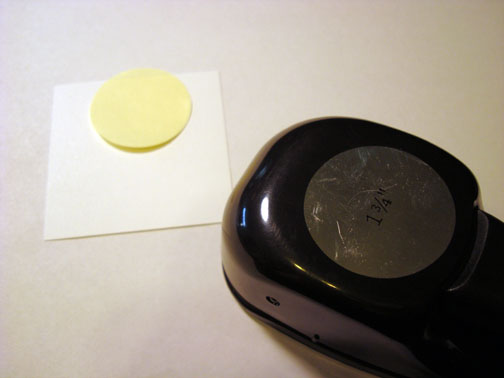
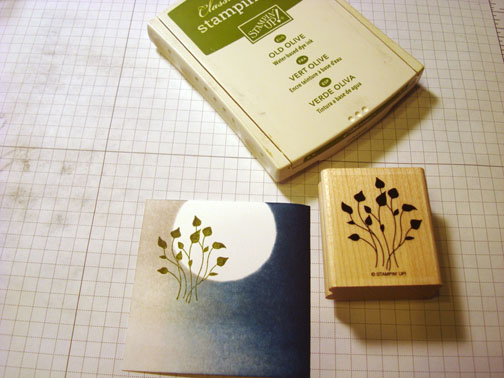
Punched a 1 3/4″ circle out of the sticky part of a post it note and used it as a mask for the moon. Masked the moon on a 2 7/8″ square piece of Whisper White card stock.
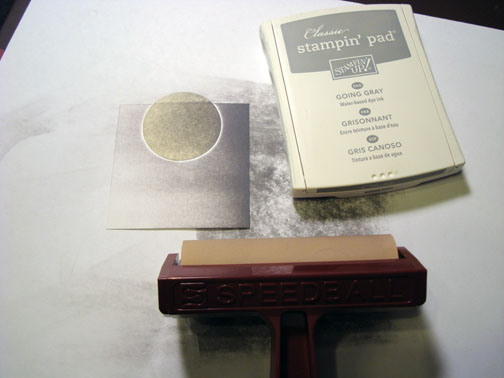
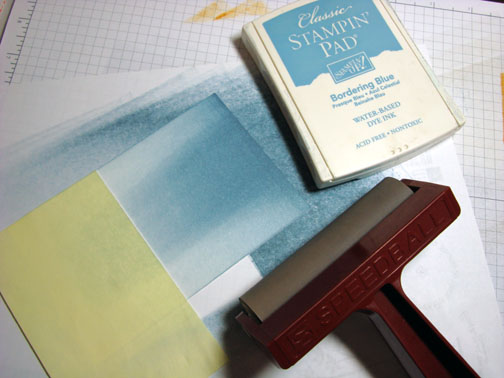
Brayered Going Gray ink from the right side to the left.
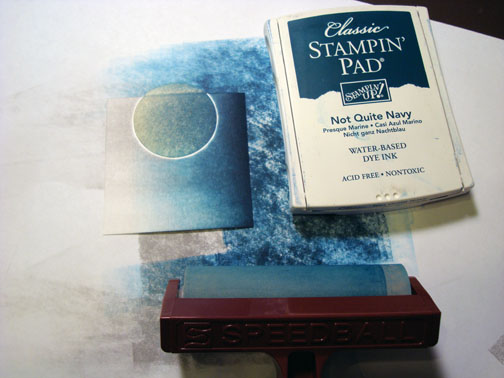
Brayered Not Quite Navy ink from the right side to the left without covering all of the Going Gray ink.
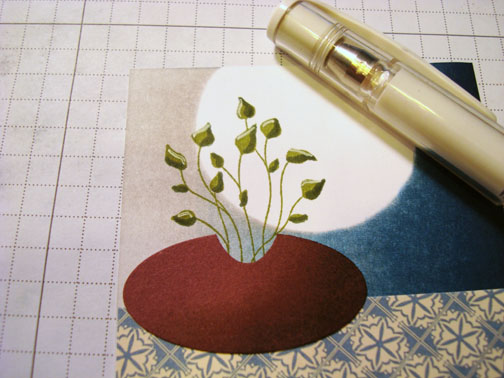
Removed mask and stamped the plant using Old Olive ink.
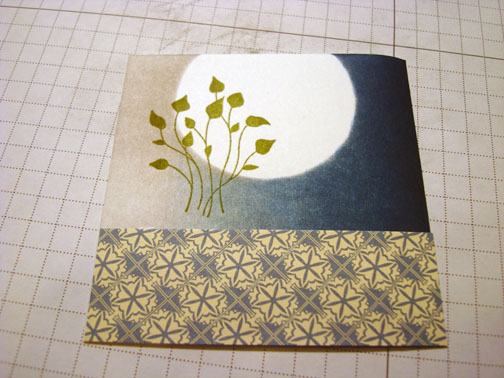
Cut a 1″ x 2 7/8″ piece of designer paper and adhered it to the bottom of the main image panel.
Sponged Close to Coco ink on the right and bottom of the oval punch.
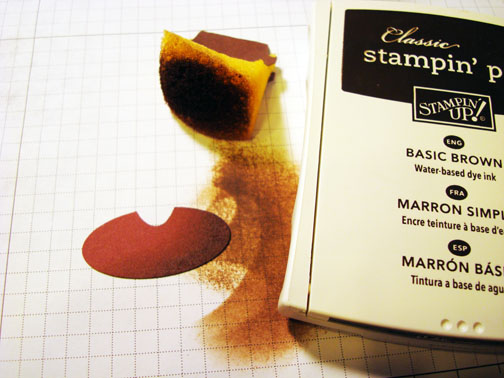
Sponged Basic Brown ink on the right and bottom of the oval not covering the Close to Coco ink entirely.
Added a shadow on the leaves using an Always Artichoke marker.
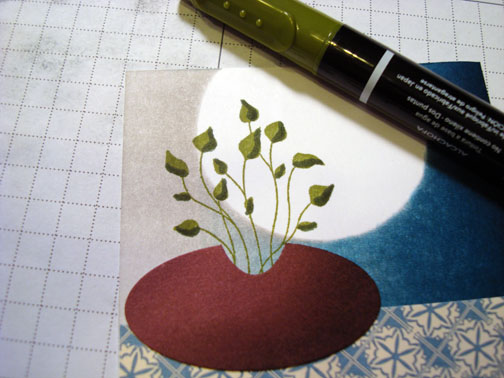
Added a few highlights on the leaves using a White Gel Pen.
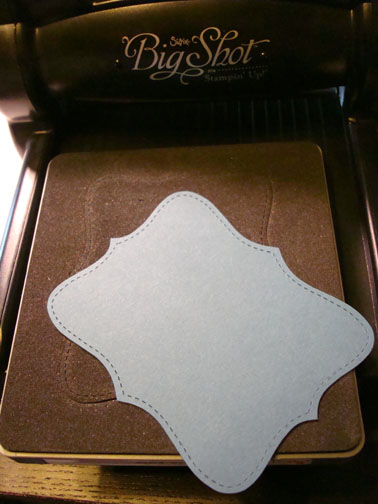
Using my Big Shot machine, cut a Top note Die out of Not Quite Navy card stock.
Cut a 3″ square piece of Bravo Burgundy card stock panel and used the corner round punch on the panel and main image panel.
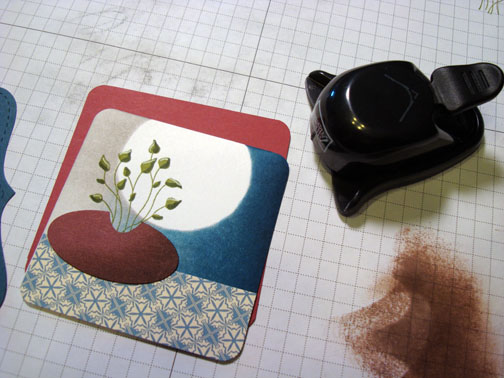
Assembled the card adding Going Gray, Bravo Burgundy and Not Quite Navy panels. Also added two silver brads.
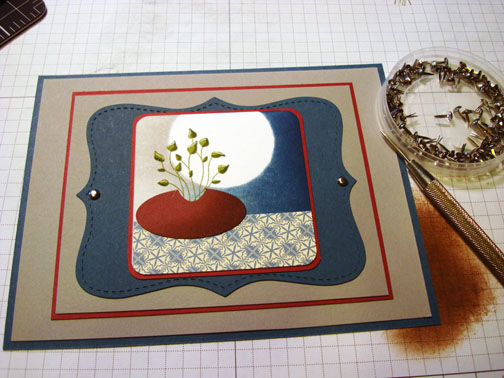
Here is the finished card measuring 5″ x 6.5″
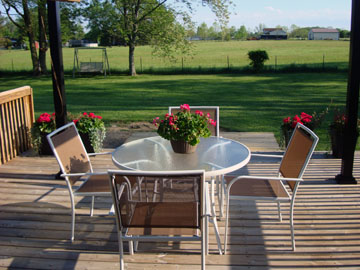
Now I am off to my second office, which is our deck, where I take my laptop to return e-mails. 🙂
I hope you are able to enjoy some sunshine where ever you are today.
Until my next post. . . . . . . . . . . . . . .
Hugs,
Michelle
 Get ready for Brayer Workshops! I am coming to:
Salem, Oregon (Sold Out)
Wheaton, Illinois
St. Cloud, Minnesota (Sold Out)
Rockville, Maryland (Sold Out)
North Chili, New York (near Rochester) (Sold Out)
Kenova (Huntington), West Virginia
Helena, Montana
Middleburg Heights, Ohio
Venice, Florida
Grinnell, Iowa
Piedmont, Alabama (Near GA border close to Cedartown)
Auburn, Washington (near Seattle)
Elk Grove Village, Illinois
Savannah, Georgia
Atlanta, Georgia
North Liberty, Indiana
Soledad, California
Here is a link to my workshop calendar where you can see all of my travel schedule and to get info on beginner and advanced Brayer workshops: https://zindorf.splitcoaststampers.com/workshop-calendar
Link to my Stampin’ Up website where you can order all of your must have Stampin’ Up products from me 24-7: https://michellezindorf.stampinup.net
Frequently asked questions answers: https://zindorf.splitcoaststampers.com/frequently-asked-questions/
15 responses to “Oval Planter – Tutorial #327”