
Woohoooo! I have reached tutorial #350. Sorry, but I just have to celebrate each milestone and give myself a pat on the back. We often are our own worst critics. How about being our own biggest fan instead. 🙂
Today’s tutorial uses the emboss resist technique along with brayering, masking etc. etc. I need to use my clear embossing powder at the very least, once a week or I will go into withdrawal. That could get ugly folks, lol.
Sometimes I find myself extremely layout challenged. Tip, if this happens to you, just open up those Stampin’ Up! Idea Books and catalogs and be very inspired. This layout comes from the Stampin’ Up! Summer Mini on page 19. Now my card looks nothing like the card in the mini, but the layout so inspired me. You get the picture, good.
Be sure to stop back to my blog tomorrow, hint, hint, I will be giving the Inspired by Nature stamp set away as blog candy. You won’t want to miss signing up for that. 🙂
Now on with the tutorial. . . . .
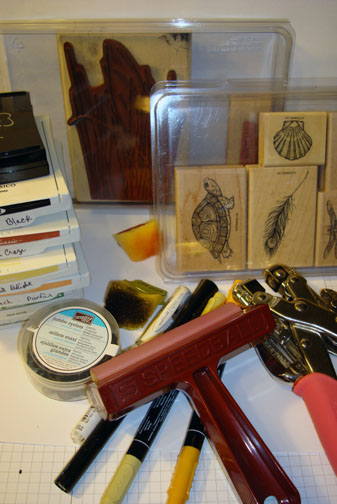
Supplies:
| Stamps: Stampin’ Up! Inspired by Nature and Nature’s Nest |
| Paper: Stampin’ Up! Whisper White, Basic Black, Peach Parfait and Old Olive |
| Ink: Stampin’ Up! Basic Black, Always Artichoke, Old Olive, Cajun Craze, Daffodil Delight and Peach Parfait |
| Accessories: Stampin’ Up! Sponges, Versamark Pad and Marker, Markers River Rock and More Mustard, White Gel Pen, Crop-a-dile, Jumbo Brads, Brayer, Clear embossing Powder, Heat Gun and Twine |
The brand new USA Idea book and Catalog is here. For your copy, please send a check for $9.95 to Michelle Zindorf, P.O. Box 116, West Alexandria, OH 45381 or send it via paypal to [email protected] USA only. Want a copy of the Summer Mini Catalog? E-mail your mailing address to [email protected] and I will get one in the mail to you. ![]() Are you getting inspiration from this blog? One way you can help support it is to order your Stampin’ Up products through me. Click HERE to place an order. Click HERE to check out the Stampin’ Up! catalogs. Want to become a Stampin’ Up Demonstrator , receive a 20% discount on product and earn instant income on orders? Consider being part of my Stampin’ Up Team and start your own business. Click HERE for more information.
Are you getting inspiration from this blog? One way you can help support it is to order your Stampin’ Up products through me. Click HERE to place an order. Click HERE to check out the Stampin’ Up! catalogs. Want to become a Stampin’ Up Demonstrator , receive a 20% discount on product and earn instant income on orders? Consider being part of my Stampin’ Up Team and start your own business. Click HERE for more information.
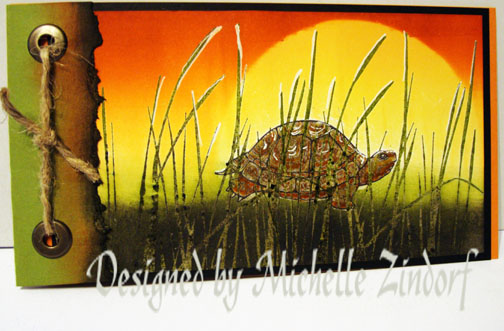
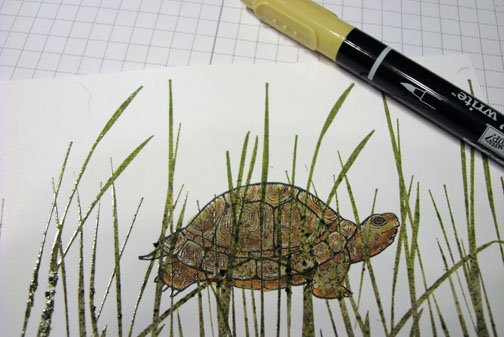
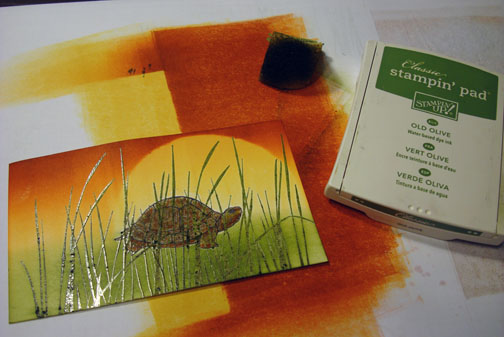
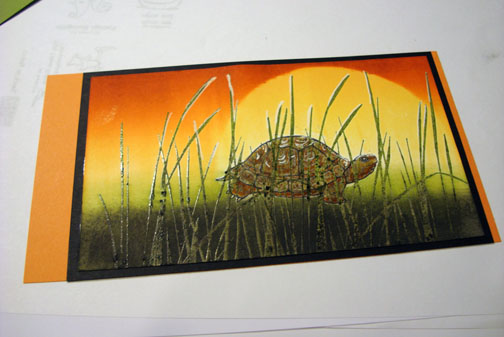
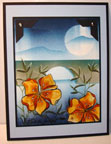
On a 3.5″ x 6″ piece of Whisper White card stock, stamped the grasses from the Stampin’ Up! set “Inspired by Nature” by first loading the stamp with Versamark, then Old Olive ink and then patted some Always Artichoke at the bottom part of the grasses before stamping it. Had to stamp this twice to get the grasses all the way across the card stock.
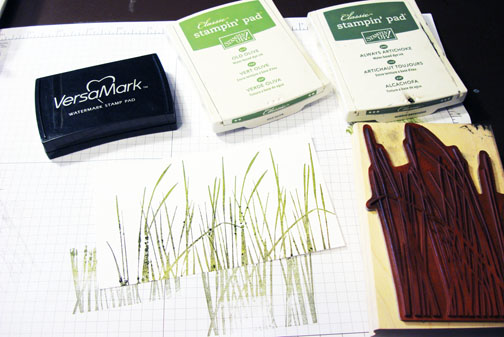
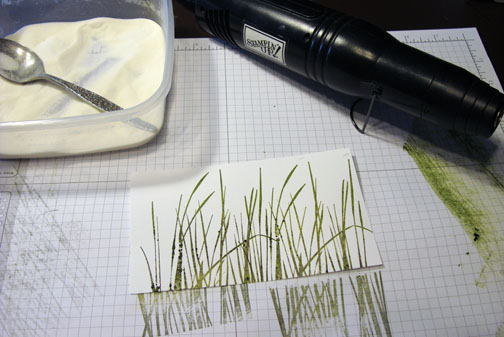
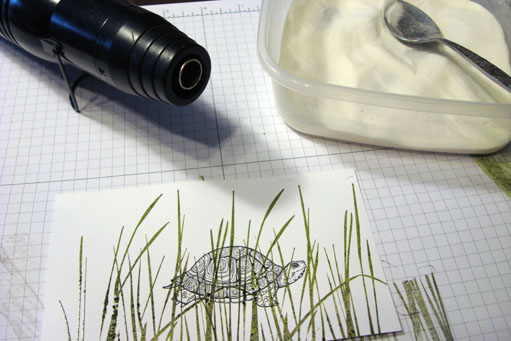
Heat embossed the images using clear embossing powder and a heat gun.
Stamped the Turtle from the Stampin’ Up! set “Nature’s Nest” by first loading my stamp with Versamark and then Basic Black ink before stamping it.
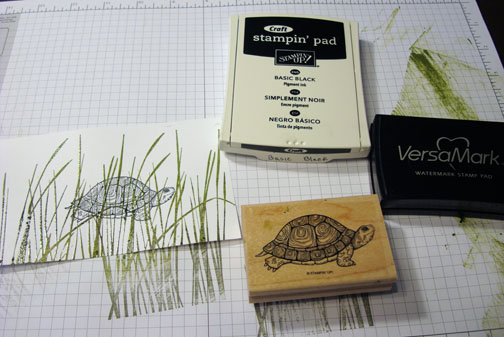
Heat embossed the turtle with clear embossing powder and a heat gun.
Colored the turtle in with a River Rock marker.
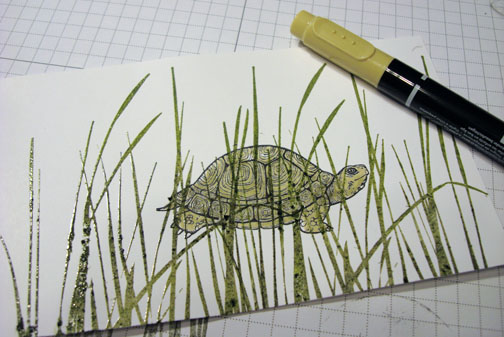
Added a bit of More Mustard marker.
Colored over the turtle again to blend things with the River Rock marker.
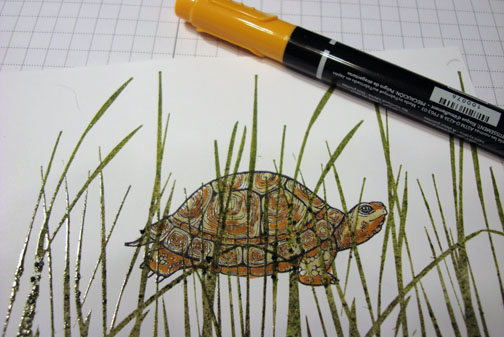
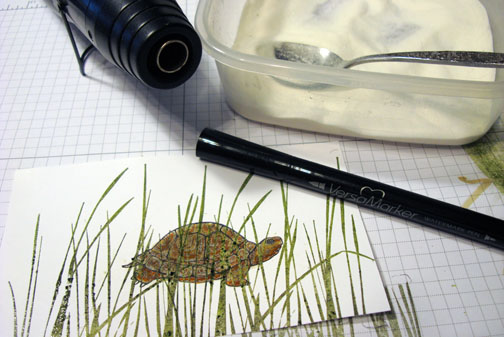
Colored the turtle with a Versamark marker and then heat embossed the image using clear embossing powder and a heat gun. Now my embossed images will resist the brayered ink in the next steps.
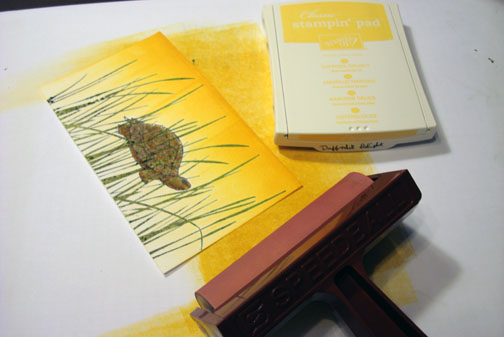
Brayered Daffodil Delight ink at the top of the card stock.
Die cut the 3.5″ circle using my Big Shot and the Circles die. Used the die cut as a mask for the sun. I held the mask in place as I brayered Peach Parfait ink at the top of the card stock.
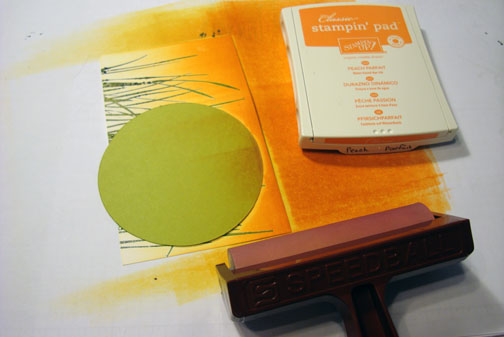
Held the mask in place as I brayered Cajun Craze ink at the very top of the card stock, not covering the Peach Parfait ink entirely.
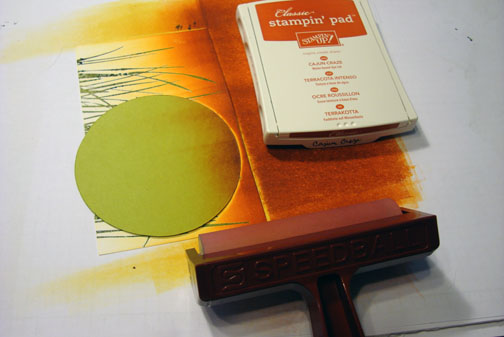
Removed the sun mask and sponged Old Olive ink at the bottom of the card stock.
Sponged Basic Black ink at the bottom of the card stock, not covering the Old Olive sponging entirely.
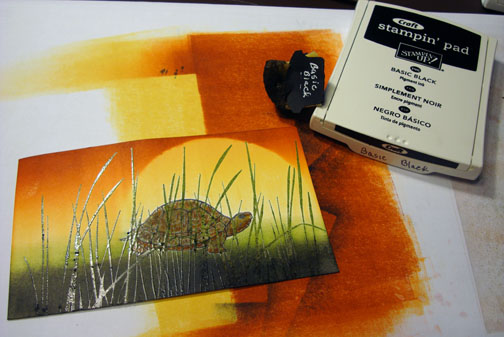
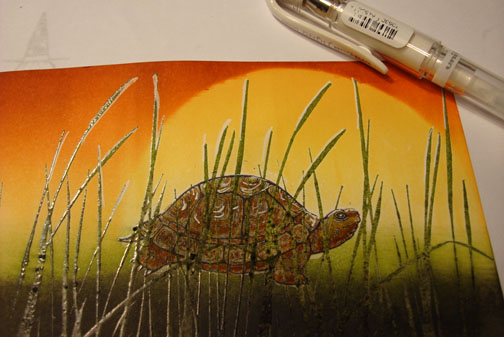
Added White Gel Pen highlights to the grasses and the turtle.
Layered the main image panel with a Basic Black panel and then a 7″ x 4″ Peach Parfait Panel.
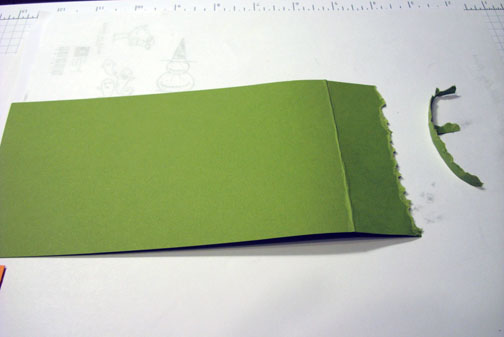
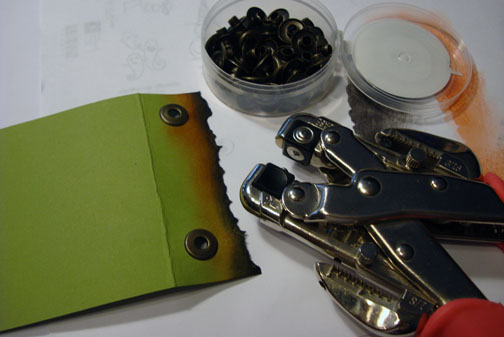
Cut a 4″ x 8″ panel from Old Olive. Folded the end at the 7″ mark. Ripped a tiny bit of the card stock off at one end.
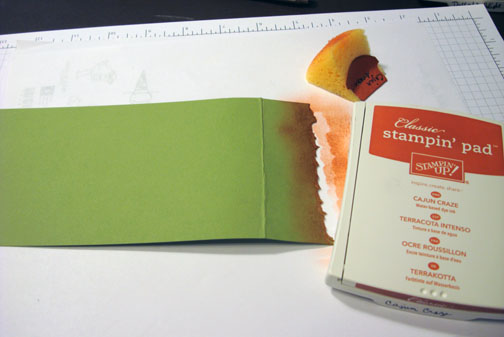
Sponged Cajun Craze ink at the end of the card stock.
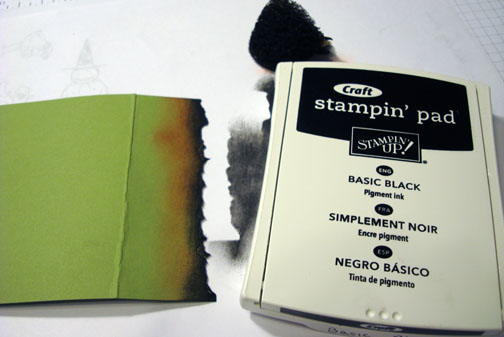
Sponged a bit of Basic Black ink at the very edge of the card stock.
Added Stampin’ Up! Jumbo Brads using a crop-a-dile to create the holes and to set the brads.
Added some twine.
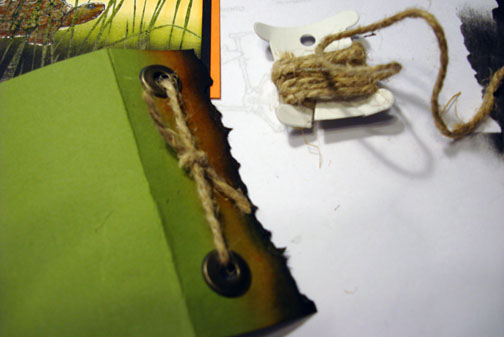
Adhered the card front to the flap of Old Olive to finish off the card.
Here it is finished measuring 4″ x 7″.
I hope this tutorial has inspired you to get your embossing powder fix.
May your day be full of adventure.
Until my next post. .. . . . . . . . .
Hugs,
Michelle
 Get ready for Brayer Workshops! I am coming to the following locations, click the location name for more information.
Piedmont, Alabama (Near GA border close to Cedartown)
Auburn, Washington (near Seattle)
Fayette, Tennessee near Nashville, TN & Huntsville, AL
Syracuse (Bridgeport), New York
Here is a link to my workshop calendar where you can see all of my travel schedule and to get info on beginner and advanced Brayer workshops: https://zindorf.splitcoaststampers.com/workshop-calendar
Link to my Stampin’ Up website where you can order all of your must have Stampin’ Up products from me 24-7: https://michellezindorf.stampinup.net
Frequently asked questions answers: https://zindorf.splitcoaststampers.com/frequently-asked-questions/
29 responses to “Turtle at Sunset – Tutorial #350”