
Happy Monday Everyone! I hope your weekend was relaxing and you were able to regenerate so you could start another week fully charged. I taught in Middleburg Heights, Ohio on Saturday and traveled back home on Saturday evening. It was so nice to sleep in my own bed for a change. I was able to wake up, have breakfast with Russ and then see the new Twilight movie. Love it!
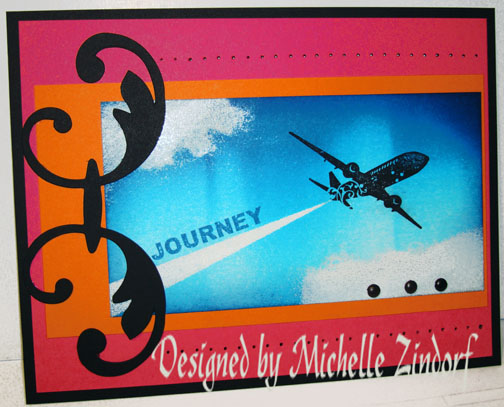
If you haven’t noticed, I travel a great deal. Traveling allot made this Stampin’ Up! set “Sentimental Journey” very appealing to me and I just had to have it. My card today showcases how you can use sponged on Versamark that has been heat embossed with clear embossing powder to protect the white of the paper to create clouds and the plane’s exhaust.
Before we get going on the tutorial though I have two announcements to make.
First, I have added the wonderful town of La Porte, Indiana to my Calendar of Cities I will be teaching my Brayer Workshops in. Hope to see you there. 🙂
Second, I have a Lucky Blog Candy winner to announce.
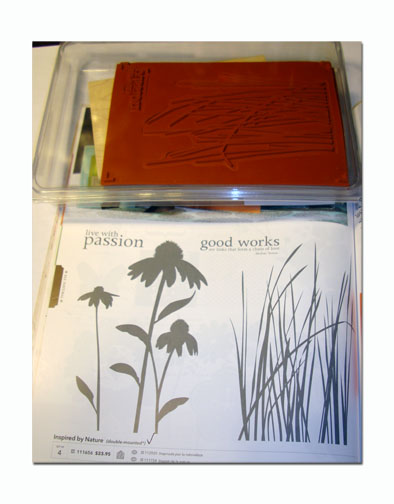 The winner of the Stampin’ Up! set “Inspired by Nature” is. . .. . . . .. . . . . …. . . . . . .
Bobbie in Montana, who wrote “This is my absolute, all time favorite stamp set!!! I would looove to win it! Your cards are spectacular; your talent and creativity amazing. Thanks for the inspiration!”
Bobbie, congratulations! Please e-mail your address to [email protected] within 30 days and I will pop this set into the mail to you.
Thank you to all who played along. I hope you are the winner next week. 🙂
Now on with the tutorial. . . . . .
Supplies:
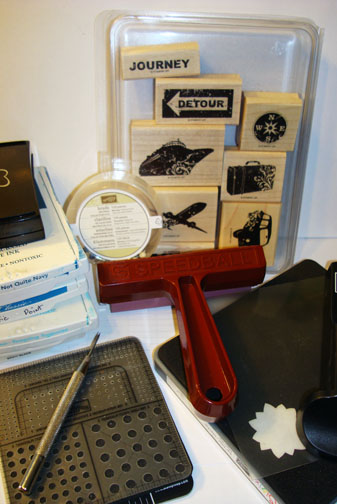
| Stamps: Stampin’ Up! Sentimental Journey |
| Paper: Stampin’ Up! Whisper White, Pumpkin Pie, Melon Mambo and Basic Black |
| Ink: Stampin’ Up! Tempting Turquoise, Pacific Point, Not Quite Navy and Basic Black |
| Accessories: Stampin’ Up! Mat Pack, Piercing Tool, Brayer, Sponge, Clear Embossing powder, Heat gun, Tulipe Die, Big Shot, Black Brads and Stamp-a-ma-jig |
The brand new USA Idea book and Catalog is here. For your copy, please send a check for $9.95 to Michelle Zindorf, P.O. Box 116, West Alexandria, OH 45381 or send it via paypal to [email protected] USA only. Want a copy of the Summer Mini Catalog? E-mail your mailing address to [email protected] and I will get one in the mail to you. ![]() Are you getting inspiration from this blog? One way you can help support it is to order your Stampin’ Up products through me. Click HERE to place an order. Click HERE to check out the Stampin’ Up! catalogs. Want to become a Stampin’ Up Demonstrator , receive a 20% discount on product and earn instant income on orders? Consider being part of my Stampin’ Up Team and start your own business. Click HERE for more information.
Are you getting inspiration from this blog? One way you can help support it is to order your Stampin’ Up products through me. Click HERE to place an order. Click HERE to check out the Stampin’ Up! catalogs. Want to become a Stampin’ Up Demonstrator , receive a 20% discount on product and earn instant income on orders? Consider being part of my Stampin’ Up Team and start your own business. Click HERE for more information.
Now in the first 4 photos you are not going to be able to see what I have actually done on the card stock. You will need to look at photo 5 for placement. 🙂
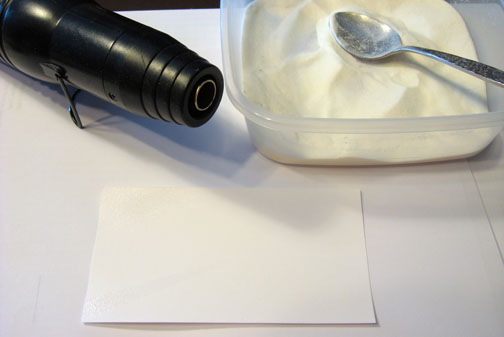
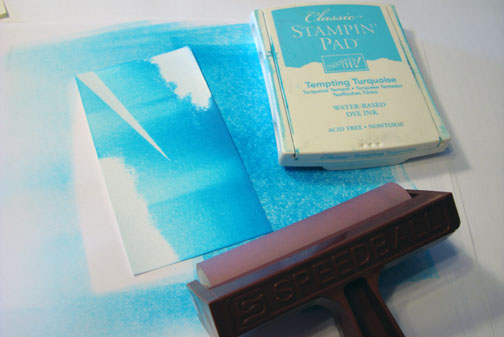
On a 2.5″ x 4.75″ Piece of Whisper White card stock sponged Versamark on the top left and bottom right corners of the card stock. Heat embossed the corners using clear embossing powder and a heat gun.


Added 2 post it notes and sponged Versamark in the unmasked area to create the exhaust and then heat embossed it using clear embossing powder and a heat gun. Note: leave the post it notes on the card stock until you are done heat embossing.

Removed the masks. Brayered Tempting Turquoise ink on the card stock from the top down. Now you can see the places I heat embossed.
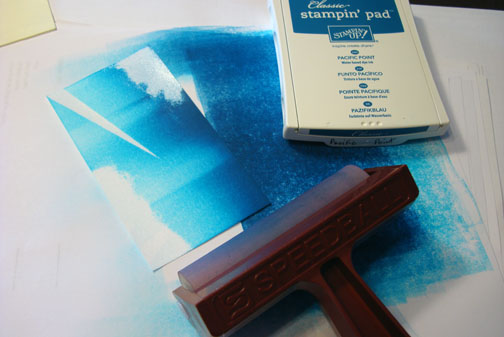
Brayered Pacific Point ink at the top of the card stock, not covering the Tempting Turquoise ink entirely.
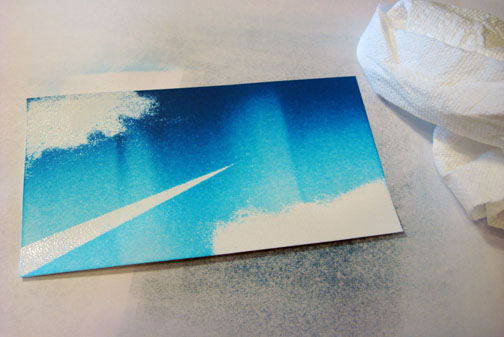
Wiped the excess ink off of the embossed images using a paper towel.
Using a Stamp-a-ma-jig for placement, stamped the plane using Basic Black ink.
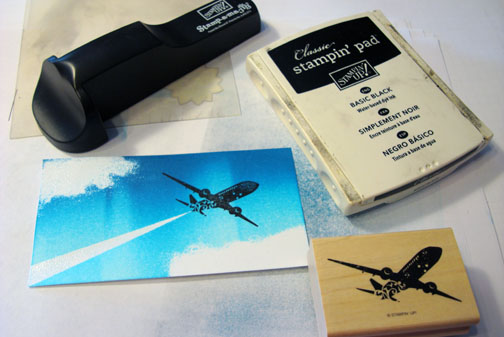
Stamped the sentiment using Pacific Point ink.

Sponged Not Quite Navy ink around the edges of the card stock.

Added Pumpkin Pie, Basic Black and Melon Mambo card stock panels.
Also added part of a Tulipe die, die cut from Basic Black card stock, Basic Black brads and pierced to lines of wholes using a piercing tool and the mat pack for placement.
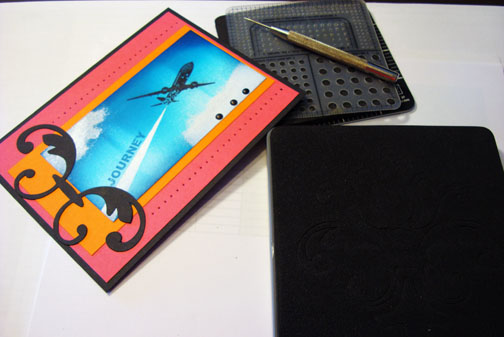
Here is the finished card measuring 5″ x 6.5″.
May your personal journey be life fulfilling.
Until my next post. . . . . .. .
Hugs,
Michelle
 Get ready for Brayer Workshops! I am coming to the following locations, click the location name for more information.
Piedmont, Alabama (Near GA border close to Cedartown)
Auburn, Washington (near Seattle)
Fayette, Tennessee near Nashville, TN & Huntsville, AL
Syracuse (Bridgeport), New York
Here is a link to my workshop calendar where you can see all of my travel schedule and to get info on beginner and advanced Brayer workshops: https://zindorf.splitcoaststampers.com/workshop-calendar
Link to my Stampin’ Up website where you can order all of your must have Stampin’ Up products from me 24-7: https://michellezindorf.stampinup.net
Frequently asked questions answers: https://zindorf.splitcoaststampers.com/frequently-asked-questions/
Pingback: Why is salt supposed to relieve thirst, but when you eat popcorn or tortilla chips, you get really thirsty? | Electric Popcorn Makers
Pingback: Find and book cheap flights to US: The Best Way to Book Cheap Flights